

Slide it in from the top and down onto the marked yellow tube held in position. Apply a ring of glue from the top.

The fins were laser cut but the centering rings were die-cut.
There's a few hold down tics that should be smoothed out.
The ring fit was too tight on the BT-20 engine mount tube. I wrapped some 400 grit around a used engine casing to widen the diameter.

I did some dry fits in the tail cone - Uh, oh!
GOTCHA: The pencil marks show where the instructions said the rings should go. I couldn't fit the engine mount in the tail cone unless I moved both rings about 5/8" to the rear.
Don't glue the rings on yet -
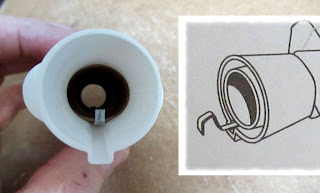
On the left is the mount fit in the tail cone. The mount slides in from the top. It stopped and wouldn't pass through the nozzle hole!
Check the instructions. The drawing shows the rear of the engine mount tube even with the rear of the tail nozzle.Look closely at the hole in the left side picture. It is actually more oblong than round.
This will take some work . . .
No comments:
Post a Comment