Showing posts with label AE Initiator. Show all posts

Friday, July 19, 2024

Enerjet by Aerotech Initiator Build, Part 13A, Launch Lugs

A little backtracking to show the launch lug attachments in the body tube slots.
   
The kit includes (squared) plastic launch lugs and conformal rail guides. The client asked for the squared launch lugs.
Like the fins, there are pre-cut slots for the rectangular tab underneath the base of the lug.

The top of the plastic lug overhangs the top end of the body tube slot. The back end is even with the low ends of the slot.

When cutting out the die-cut slot, try to make the low end clean and square. Don't make vertical cuts below the base end of the launch lug. 

I had painted the tubes and launch lugs before assembly, the launch lugs were molded out of black plastic.

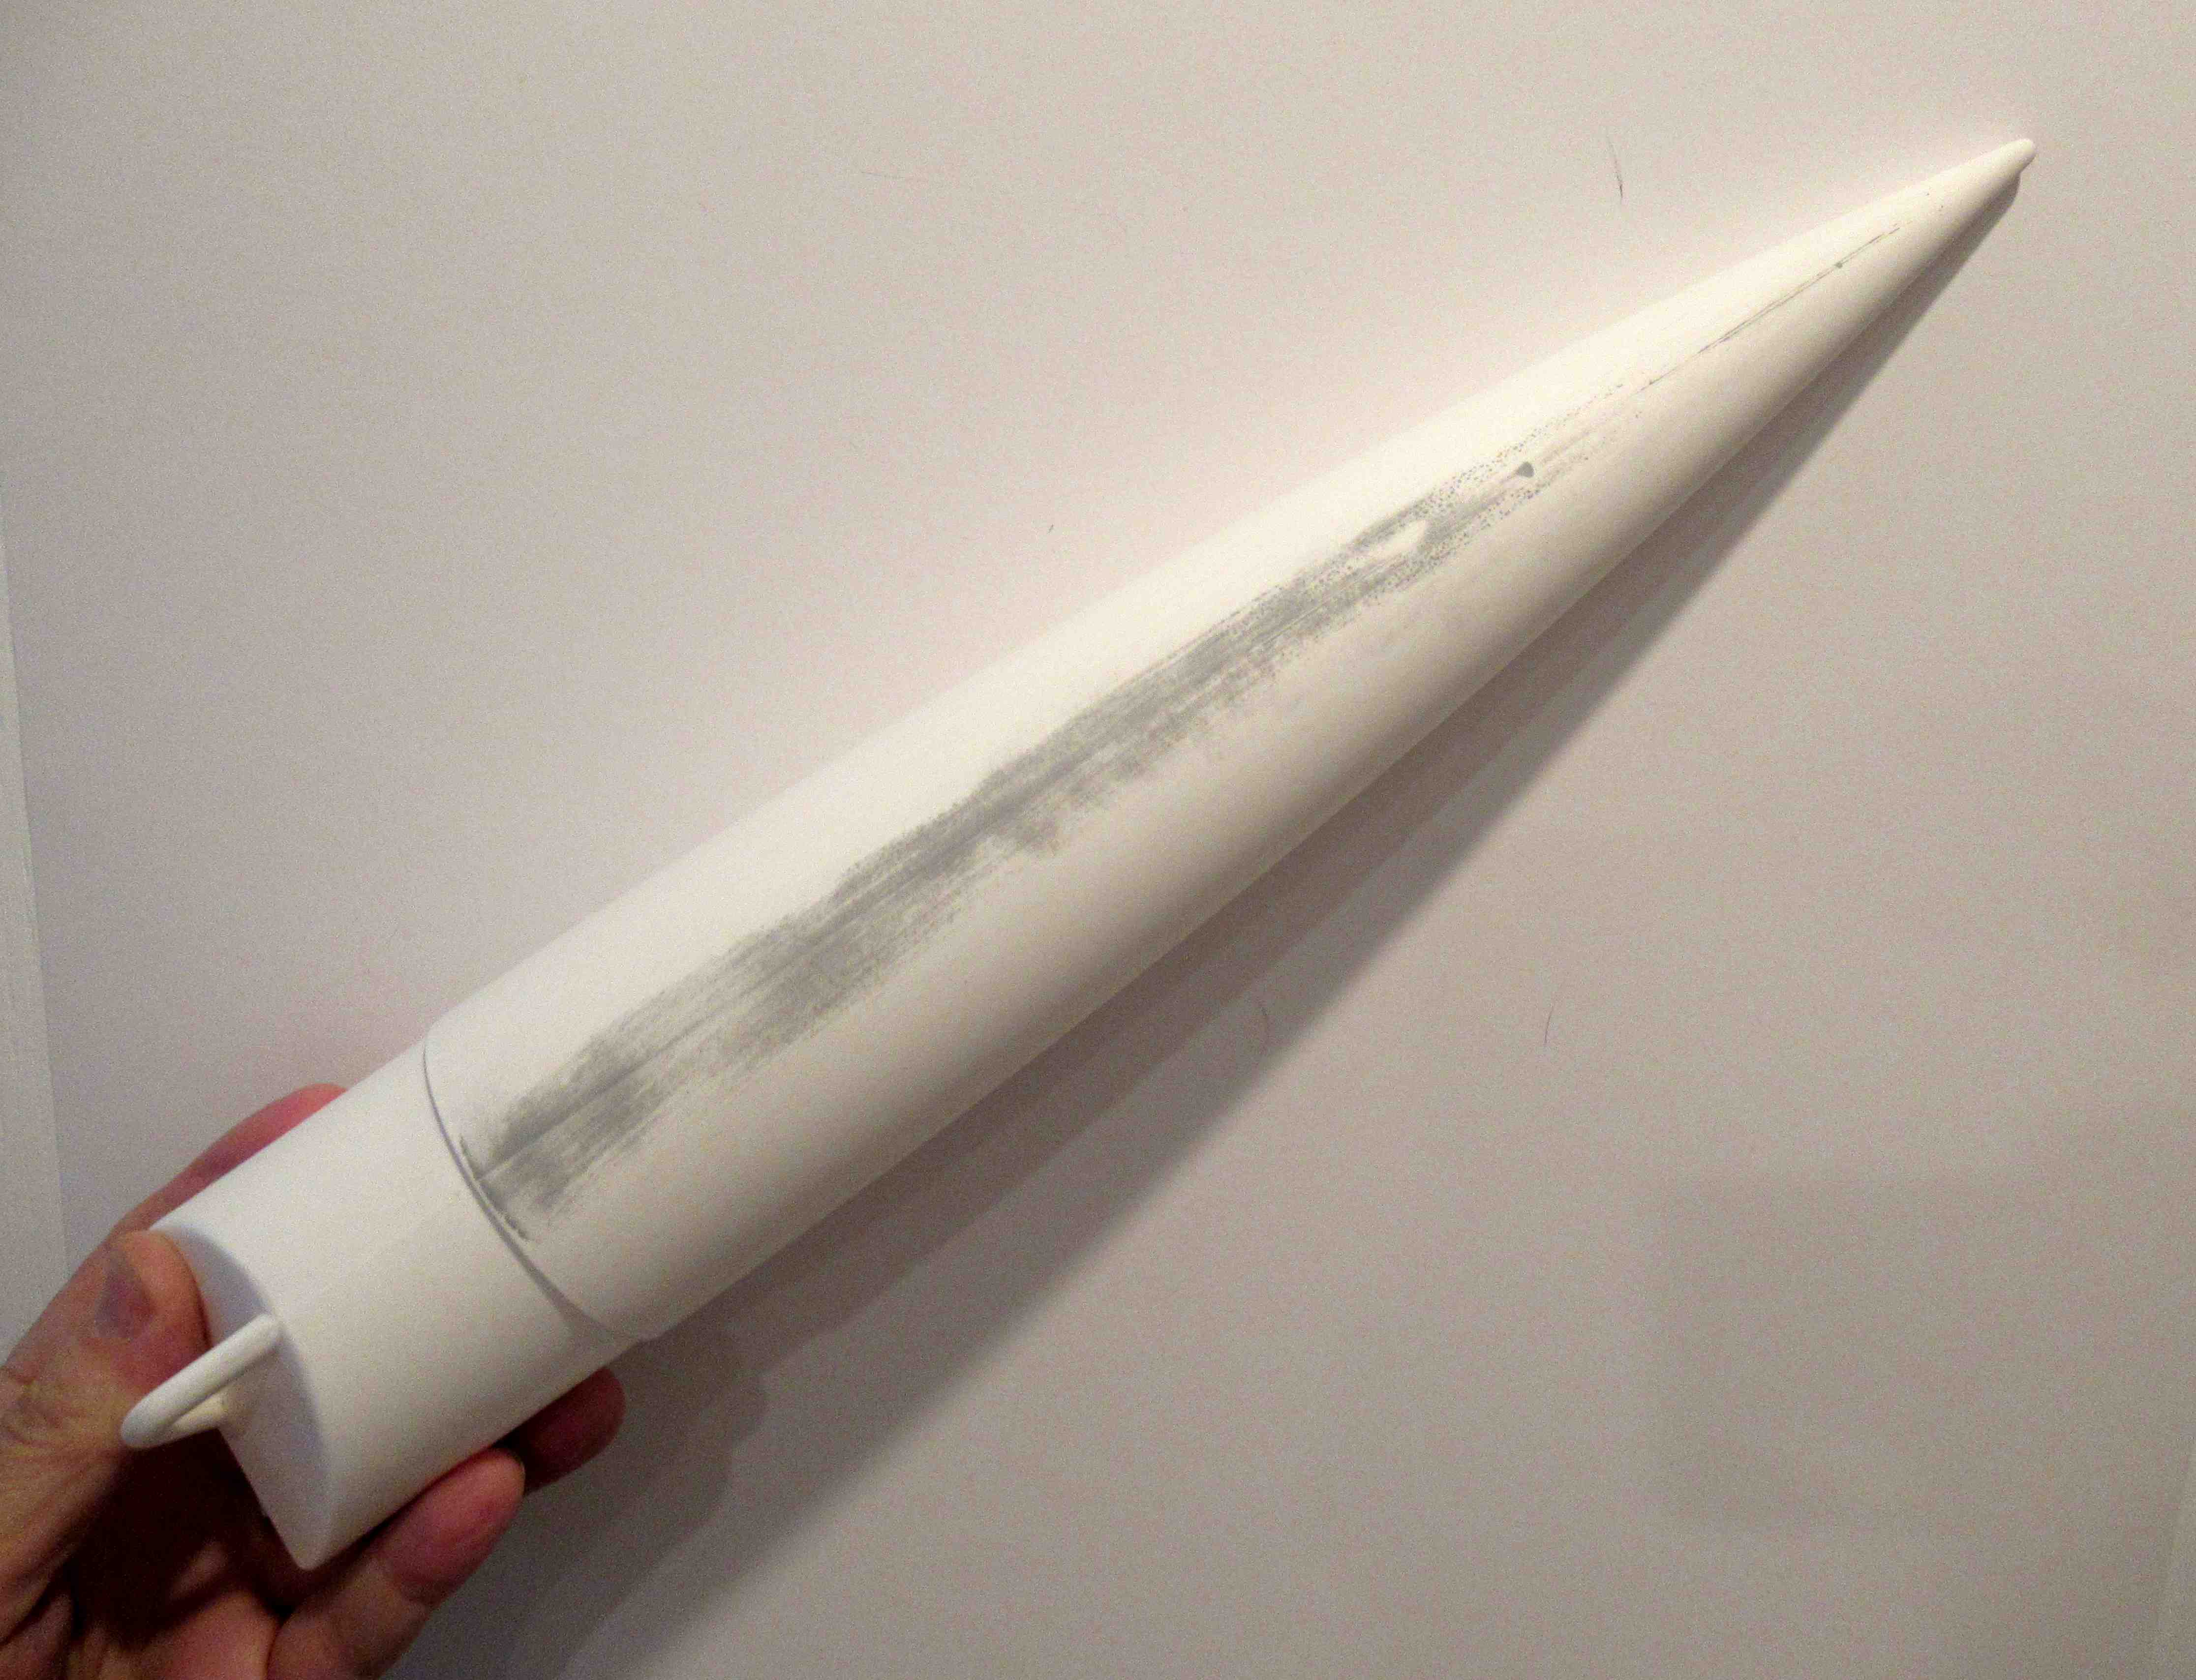
You should cut away the paint for better glue adhesion.
I used lines of masking tape to guide the knife blade line and score into the paint. 
On the right side picture, the tube is flipped over.


The paint was scraped. The paint should chip along the score lines.


Here's one of the two inline lugs glued in place.
The tab molded into the bottom face of the lug fits into the cut slot.

Wednesday, July 10, 2024

Enerjet by Aerotech Initiator Build, Part 14, Finished


The aluminum motor retainer is epoxied onto the rear of the motor mount tube.

The shock cord is tied to the nose cone shoulder loop.
The nylon parachute is tied onto the shock cord, one foot away from the nose cone.


Here's the low end with the bold fin graphics.


The mid section with the somewhat tricky stickers as they are pieced together.
The final look has a good flow.


After this picture was taken, I shot the nose cone again with Ace Banner Red to lighten the tone and better match the red on the sticker below it.

The Initiator is an impressive introduction into mid-power rocketry.

Tuesday, July 9, 2024

Enerjet by Aerotech Initiator Build, Part 13, Fin Decor


After trimming the fin stickers,

Place them dry without the backing removed. Mark the corners with pencil for easier positioning.


Here's how the fin sticker was placed. 

Fourteen more to go!


With the backing peeled off, dip the decal sticky side down in water. Shake off some of the excess. 

The water on the adhesive side allows the sticker to be lifted if placement is a little off.

Any water and air can be worked out with a clean cloth, going from the center to the outside edges.


The shoulder lip got a swipe with a red Sharpie. 
The tube edge also got the Sharpie treatment.

This covers any white that could show up at the nose cone/body tube joint.

Sunday, July 7, 2024

Enerjet by Aerotech Initiator Build, Part 12, Decal Stickers


Plan ahead! You'll get best results if the stickers are set in a certain order -

1.The INITIATOR name is centered and in place. 
2.The orange stripe goes down the tube, running through the open line in the Initiator name.
3. Now the upper body tube wrap can be set down, lining up the down point with the orange line already in place.

 
Start sticking the wrap with the "down point" lined up with the orange stripe - then wrap the sides.

It sometimes easier to have a end wrap sticker edge overlap the tube end. You can always shave off any overhang with a razor blade. 

You could remove the entire backing and wet the decal for re-positioning. Try to keep your fingers off the sticky adhesive. Fingerprints will show under the sticker.


Check out the dry positioning with the sticker backing still in place. 
I wanted to have equal border spacing around the color edges. This will need trimming.


The coverage of the sticker at the root edge was too wide. This will also require some trimming before being stuck on the fins.

Friday, July 5, 2024

Enerjet by Aerotech Initiator Build, Part 11, Sticker Planning

Don't simply jump in and start laying down stickers - 
Plan ahead to see which stickers need to be placed first for everything to be centered and all to be lined up.


The INITIATOR name is centered up the body tube between two fins lines, on the opposite side of the launch lug.

I find the center by pressing a piece of paper between two fins. Press in and crease the paper at the root edge. Match the creases, and fold in half to find the center.

Mark the body tube with a pencil at the centerline.  


The decals aren't stuck down yet, but are held in place with tape on the back.


Notice how the orange trim line cuts through the word INITIATOR and lines up with the orange down peak of the upper body wrap.


I set the INITIATOR name sticker by visually centering it in the white area between the leading edge of the fin and the upper wrap. 

Lightly mark the center with a pencil. 
You'll want to see the center mark after the backing is peeled off.


Also lightly pencil mark the top and bottom at the base and top of the INITIATOR sticker. 


Thursday, July 4, 2024

Enerjet by Aerotech Initiator Build, Part 10, Rear Centering Ring & Nose Cone Color Match

The rear centering ring did need some edge sanding to slide into the rear end of the main airframe tube.

You'll find it easier to fit it into the top end of the tube. If it ends up too tight you can remove it by spinning (turning) the ring to grab and slide it out.
You can't turn and flip the ring if inserted into the motor mount end.


The rear centering ring is slid in place until it contacts the back of the low ring lock ring. 
Apply a wood glue fillet. Here I'm smoothing out the fillet with a Q-Tip. It's too narrow an area for a fingertip.
Here's what I was talking about earlier, matching the nose cone color to the red on the decal sticker.

The sticker still has the backing on it, it's not stuck down yet. 

The nose cone will need some passes of the regular Ace Banner Red to lighten the burgundy color.

Before I just grab a can of paint I already have - I'll take the face card off the instructions (or cut the picture off the box) to the hardware store and try to match colors with the cap on the spray paint can.

At the time, burgundy was the closest color. But, things looked different when the sticker wrap was set next to the nose cone and placed over the white paint.

Plan ahead:
I didn't tie the shock cord to the nose cone because I thought there might be some color matching. With the nose cone untied, I could spray it off the model.

Monday, July 1, 2024

Enerjet by Aerotech Initiator Build, Part 7, Painting Tip

I paint models horizontally which helps prevent drips.

On the left is a 18mm engine casing pushed onto a 1/2" diameter dowel. On a smaller model, the casing is slipped into and locks in the engine mount. You can securely hold onto the dowel and spray paint the model horizontally.

TIP: The Initiator has a 2.7" diameter. I needed something larger to hold onto.
I wrapped the nose cone with a sheet of copy paper. The nose cone was wedged into the body tube.
I placed a plastic bag over my hand. I now had something to hold onto while spray painting.

This works best with a longer tapered nose cone.

Sunday, June 30, 2024

Enerjet by Aerotech Initiator Build, Part 6, Engine Mount


Before gluing the plywood centering rings in place,
Check the fit of the fins in the fin lock rings.

(This picture is from an earlier build and shows the previous fibre centering rings.)


Before gluing the rings in place,
Double check that the fin is running straight down the tube.
The two rings on the far end are just slid on the tube to keep track with five builds going on.


The cooling mesh baffle is stretched out to 6" in length.
The mesh is slid into the top of the motor mount tube. 


The top edge of the tube is slit so the baffle shoulder piece can slide in. 
Four 1/4" slits are made, spaced 90 degrees apart. Notice the pencil line at 1/4" down from the top of the tube.
Using a single edge razor blade, you can cut two 1/4" lines directly opposite to each other. 
Glue the shoulder piece in with medium CA glue.

The screw eye is screwed in the top hole of the shoulder.

Saturday, June 29, 2024

Enerjet by Aerotech Initiator Build, Part 5, Engine Mount

The kit now includes an aluminum engine retainer. There are some revisions to the instructions to fit the retainer.

The measurements on the Revised Location Guide were printed incorrectly. Use a ruler to mark the tube at 1 1/2" and 3 9/16" from the rear. Note the rear 1 1/2" mark is the position of the front edge of the rear fin-lock ring. The 3 9/16" mark is the position of the back edge of the front fin-lock ring.


The fit of the fin-lock rings was too tight on the motor mount tube. 
It took quite a bit of shaving with a hobby knife to widen the inside diameter of the ring. The plastic is very strong.
Here I'm smoothing the inside surface with some 220 grit sandpaper around a 24mm tube.


To mark the tube positions, 
A one of the plywood centering rings was slid down the tube. A pencil traced around the ring. 

The instructions mention "fibre" rings but the kits have upgraded to plywood rings.

There is a pencil line already down the tube. I used it to line up the older engine hook recess. There is no engine hook needed now with the upgrade retainer ring.

Don't glue the rings on yet - 

Friday, June 28, 2024

Enerjet by Aerotech Initiator Build, Part 4, Body Tube Bubbles


Body tubes are not what they once were. 
This is not blaming Aerotech or Quest. 
The supplier - Euclid/Paramount make the tubes for all vendors. When Paramount bought Euclid, the quality dropped. 

There were a few raised air bubbles that will show thru on the finished model. They don't show in the photograph but you can feel the raised area with a fingertip. I marked the raised areas with pencil.
I had mixed results using the technique shown here.
I slit the outer white layer with a sharp knife.

A bead of medium super glue was run over the slit. A few seconds for the CA glue to run into and spread out under the slit.
Before it set up, the excess was wiped off.


As the glue dried, 
A Sharpie barrel was quickly rolled back and forth over the glued slit. 


Here you can see where the glue has seeped under and around the slit.
This closed up the bubble pulling the raised center area down and onto the tube.

Most all of the bubbles and slits will disappear when filler/primer is sprayed then sanded. A few of the bubbles needed a second treatment with the Super Glue.

Thursday, June 27, 2024

Enerjet by Aerotech Initiator Build, Part 3, Parts Prep, Nose Cone & Body Tube


The tip of the nose cone has a small bit o molding flash (left side)

On the right side the tip has been sanded and rolled off. Start with 220 grit and go progressively to 400 grit.


The nose cone molding seam was filled with plastic model  putty.
You can also lay a bead of medium Super Glue down the recesses. Be careful, the glue can run.
Sand down the filler bead of glue again with 220 grit working down to 400 grit.


The main body tube wrap seam was filled with CWF and sanded to surface.
Follow up with a spray of filler/primer and sanding with 400 grit.

There is more on the body tubes in the next post.

Tuesday, June 25, 2024

Enerjet by Aerotech Initiator Build, Part 2, Parts Prep, Fins


The leading edge tips are uneven. 
Here's the before and after.

It's easiest to check the tip shape from the other side.


There is a mold nub where the fin was broken off the molding tree.

This root edge should sit flat against the motor mount tube so sand it off.


Here's the underside of the trailing edge. 
The center mold line should be sanded smooth.

Monday, June 24, 2024

Enerjet by Aerotech Initiator Build, Part 1, Parts


Above is all the parts. Everything seems to be great quality.

The parts of interest:
Heavy walled tube 2.6" diameter.
24mm & 29 mm Aluminum Motor Retainer
Ejection Cooling Mesh
"Launch Lug" Rail Guides
Fin Lock Rings
Molded Plastic Fins (Thru-The-Wall)


The instructions and self adhesive decal sheet are tightly rolled up in the main body tube.

TIP: You may not be able to reach and pull them out. Lightly tap the tube on your open palm and they will work their way down and out.