Showing posts with label Upgrade. Show all posts

Wednesday, January 29, 2020

Quest Future Launch Vehicle #3013 Build, Part 3, Engine Mount

I'm not a big fan of the thin walled yellow engine mount tubes. This one was cut about 3/16" short of the normal 2 3/4" length.
If assembled by the instructions, using the engine hook slot - the engine block ring would extend beyond the top of the short tube!
I'll replace this tube with a Odd'l Rockets Heavy Wall BT-20H.


The fit of the centering rings is too loose in the main air frame tube. While it could be used, it would take too much glue to fill the gap.


The rings also needed a small relief notch for clearance over the engine hook. I used a rotary punch to make a partial crescent cut.
To make up for the loose centering rings, I made some balsa gussets. Cut them wide and sand to fit. These make the entire mount much stronger without adding any real weight.

To better seal the upper loose ring, a bead a glue was set around the edge and allowed to dry before gluing the mount in the body tube.

Thursday, December 20, 2018

Estes Orbital Transport, Kit #K-42, Part 2, Engine Mount


The engine mount is a standard 20/50 style. I'll be doing some minor upgrades.

The upper centering ring is glued above the upper bend of the engine nook so no notch is needed. I did cut a "V" shaped notch for a Kevlar tie.
The lower ring (upper left, the mount is shown upside down) got a notch for engine hook relief. It's not a deep notch, just as deep as the thickness of the flat hook.

150 lb. Kevlar is tied around the BT-20 tube. I usually use a square knot. The first overhand knot can open up so a little bit of wood glue is set on the top to hold it while the second (reversed) overhand knot is tied.

The inset picture on the right shows a glue fillet beneath the ring. The Kevlar line loop is pressed into the glue before it sets up.


Here's the finished engine mount.


I also added an engine block, a 5/20 ring. The original kit didn't have an engine block - Not a smart omission.

Monday, October 22, 2018

Semroc Snake Jumper Build, Part 2, Engine Mount Upgrades

This build will incorporate the new Odd'l Rockets heavy wall BT-20H, an extended length engine hook and replaceable Kevlar.

The BT-20H diameter is a bit wider than a standard BT-20. To make it fit the centering rings sand the inside hole edge with 220 grit sandpaper. Roll the sandpaper around your index finger and rotate around the inside hole. Sand a bit, check the fit and repeat until the tube slides in. It's easier than you think.


To prep the rings for the replaceable Kevlar mount -
Punch a small hole directly opposite the engine hook slot on both rings. A plastic tube from Dollar Store Q-tips will slide through both hole
To use the new eXtended Length Engine Hook (3" long) the BT-20H tube is cut to 3" long.

A notch is cut for the upper bend of the hook. Make the notch 1/4" from the top of the tube.

On the far right is a dry fit of the hook, tube and centering rings. Black electrical tape will wrap around the tube, over the hook and tube, centered between the centering rings.


Slide the engine block in from the bottom, no glue yet.
Use an standard engine casing to push the block forward until it ends up under the top bend of the hook.

A glue fillet is applied around the top of the engine block. You can leave the engine casing in place until the glue dries.

Using the XLEH (eXtended Length Engine Hook) places the engine block under the top bend of the hook preventing movement and tearing of the engine mount tube. The fit of the engine top is also better, not resting at a slight angle in the tube.

Monday, October 8, 2018

Estes Mini Mars Lander Build #0881, Part 3, Engine Mount

I didn't notch the upper centering ring for the engine hook, the fit would have ended up being loose.

When the ring was slid down over the engine hook there was the right amount of friction fit for a good joint. Right at the engine hook a small bit of the ring was pressed up. This was trimmed off with a sharp knife.


Here's the finished mount.

The shock cord hasn't been tied through the upper slit yet.


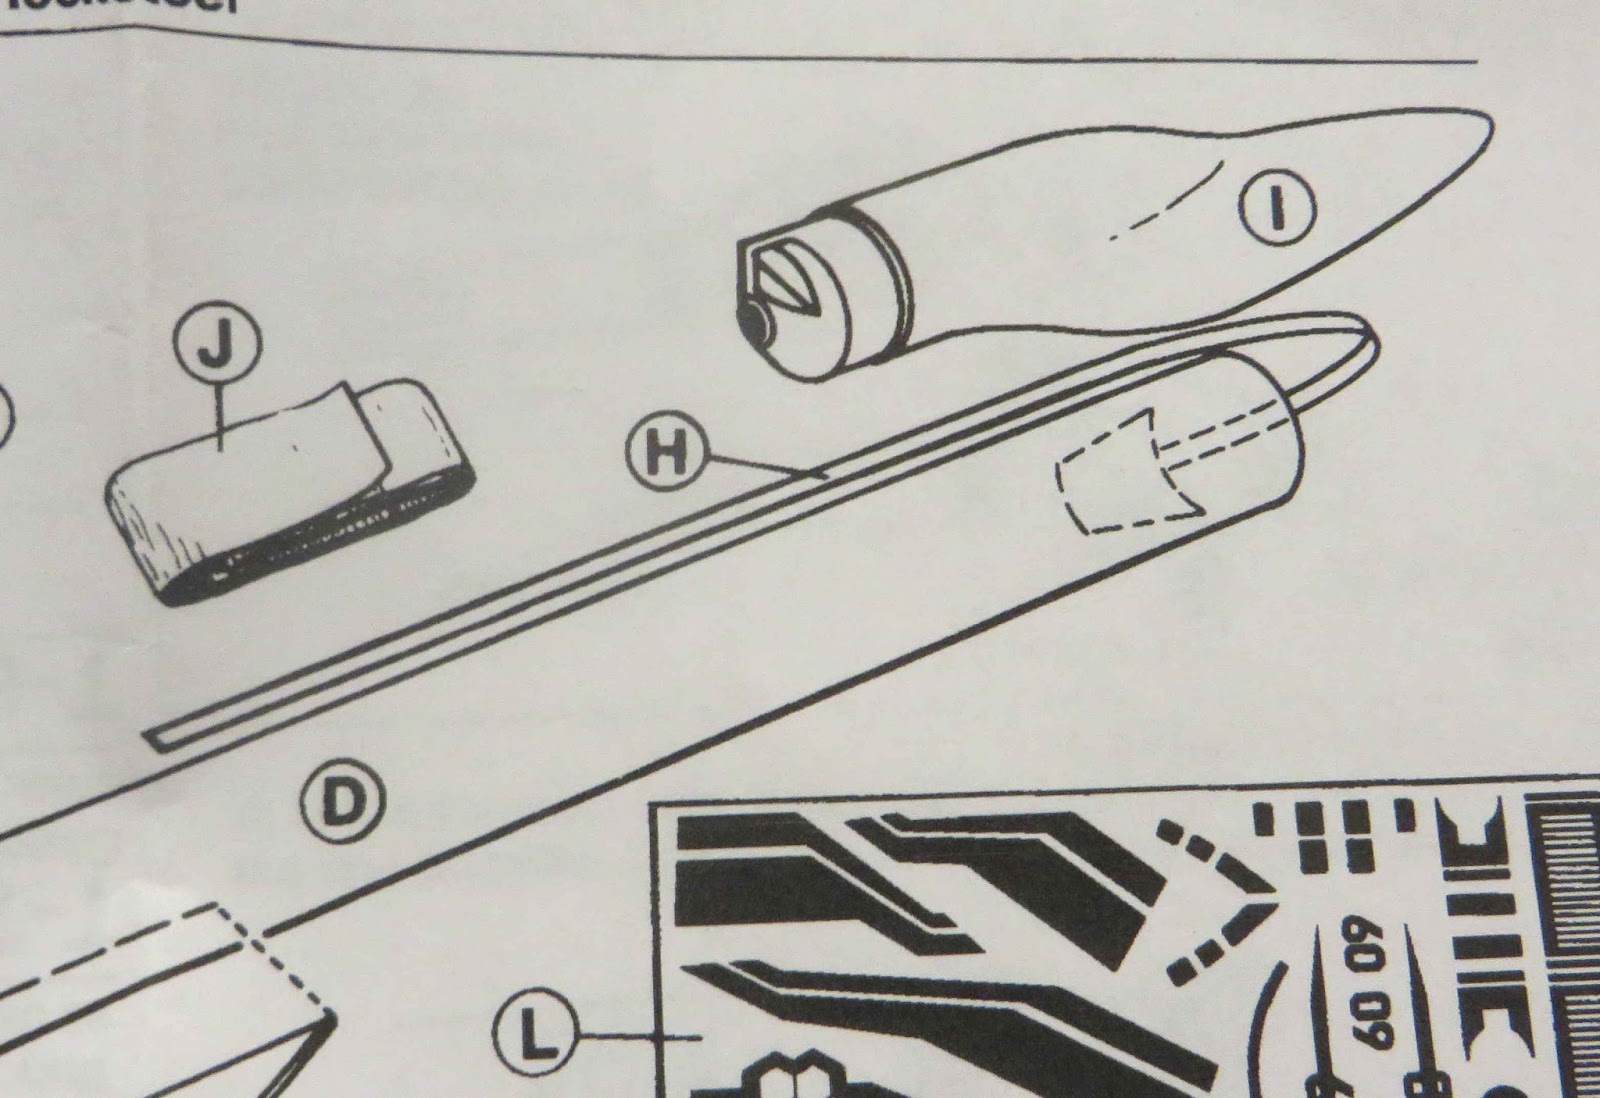
This illustration from the instructions show how the shock cord is tied and the mount glued in.


UPGRADE: I tied an elastic shock cord in place of the rubber one in the kit.
The top ring/ tube joint gets a fillet and was smoothed out with a Q-tip.

Wednesday, September 19, 2018

Quest Striker AGM Build, Part 1, Parts


Parts are iffy in this kit.
The tail cone lip is uneven. One side of the shoulder is wider than the other. This effects the fit of the 35mm body tube and root edge of the fins. It is actually a plastic transition adapter dating back to MPC in the 1970s.

The two piece MPC Nike Smoke nose cone fit is bad. It'll take quite a bit of filler to smooth out the seam.
The balsa sheet is broken up from being sent in the padded envelope.


The yellow engine mount tube had a wide open seam. The engine mount tube wall is too thin. It will be replaced with a new Odd'l Rockets heavy wall BT-20H tube. This rocket could use the new Quest C and D Q-Jets. I want a stronger engine mount.

The upper bend of the engine hook is too short to be effective. The hook is not spring steel and will be replaced with an new Odd'l Rockets 3" long XLEH (Extended Length Engine Hook) spring steel hook.

Tuesday, February 20, 2018

ASP D Region Tomahawk Build, Part 14, Folding and Cutting the Fin Plates


Emboss the fold lines before cutting out the fin plates. It's easier to make the fold lines while the pieces are still on the larger paper.

I'm using the tip of a butter knife, the flat area above any serrations on the cut side of the knife.


Most of the straight lines were cut with a new X-Acto blade and a straightedge. Cut and leave the black edge border lines.

The shortest lines were cut with a single edge razor blade.


Here's the four plates ready to be formed.
Notice the bolt head circles - They alternate three bolts then four bolts.


To wrap around the body tube, form a curve in the plate in the heel of your hand. Use a 1/4" dowel or the rear of an X-Acto handle.

ASP D Region Tomahawk Build, Part 13, New Fin Plates

I looked back at the Estes Tomahawk instructions and Peter Alway's Rockets Of The World for more information on the fin plate shape.
The plates are slightly raised above the body tube so I decided to print them on 60 lb. card stock. This lighter card stock will also allow the plates to be folded and glued into the root edges.


Below: 1" reference lines were added to the kit decals. The decals were scanned and dropped into Corel Draw.

Above: The outside lines were .5 width. The 3 ridge "flats" were drawn with gray lines. This will visually imply the raised sections.

Monday, September 25, 2017

Estes Scout Ship Nova Build #1392, Build, Part 1, Parts


I'll be using many of the parts from the Starship Nova kit, the nose cone is what makes this an easier clone.
In the above picture the fins have been correctly sized, the CWF applied and sanded smooth.


One part of the original kit I don't quite understand - it used streamer recovery.
The upper engine tube hangs over the back end and would hit the ground first.. I would think that would lead to a broken support piece or two.
UPGRADE: I'll be substituting a parachute for the streamer.


I cut the finger tab off the engine hook.
For the first time in an Estes kit I got a bendable engine hook!
This wasn't spring steel and will be replaced with a standard hook from BMS.

Monday, September 18, 2017

Estes Puma #7256 Build, Part 8, Engines Paint


Two balsa pieces were cut to the width of the tab openings on the top of the wing engines. This gave me something to hold onto while spray painting.

The engine mount centering rings were masked and a dowel slid in for a painting handle.

I learned from another forum build by Scigs30 to paint the engines before gluing them onto the wing extensions.

Instead of just black, I used Rusto Metallic Black for a little extra shine.


UPGRADE: To add a little more detail, I cut some small squares of aluminum Monokote trim. These were stuck into the front end of the engines.

Friday, September 15, 2017

Estes Puma #7256 Build, Part 3, Engine Mount and Vanes

The engine construction mount is pretty standard.
Before you glue it together, check the next step.

UPGRADES: I cut the finger tab off the engine hook and added a Kevlar line beneath the upper centering ring.

GOTCHA: The instructions say to glue the lower ring 1/2" from the bottom of the engine tube. The small vanes are only 7/16" long and according to the instructions they should fill the space to the end of the tube.

To properly fit the length of the vanes, glue the lower ring 7/16" from the bottom of the engine tube.

The vane marking guide is cut from the instruction sheet and slid over the low end of the engine mount. Mark the locations with pencil.
On the Lynx build I glued the ring onto the centering ring.
You can see the low end of the tube was hit with primer/filler and sanded.
I'll glue on the vanes later after the grain has been filled with CWF, primer/filler and sanding.

Sunday, September 10, 2017

Apogee Shrockets Skonk Wulf Build, Part 14, Decals and Canopy Sticker


Here's the stick-ons included in the kit. Maybe it's just me, but I hate stick-ons.
That clear border always shows up as a thick edge around the image. This decal could be carefully cut to remove most of the clear border but that wouldn't work with most of the others.


UPGRADE: I redrew the decals, all were printed in black. Here's the decal sheet getting three coats of clear acrylic.


I did use the canopy window decal supplied with the kit. There was no clear border around it and this would be a very difficult mask to pull off.
I was concerned it wouldn't fit around the contour of the nose cone. After burnishing it did lay down well without wrinkling.
But - a problem. I was burnishing it down and some of the blue ink rubbed off! I had to go back and mask the canopy and spray a blue blend in the middle. The blend came out very well.

Saturday, September 2, 2017

Apogee Shrockets Skonk Wulf Build, Part 4, Engine Mount

UPGRADE: I changed out the standard BT-50 engine tube for a heavy wall BT-50H tube. I never thought the BT-50 tubing was very strong, especially when you are using 24mm and composite engines.

This required me to widen the center hole in the centering rings. It's easy to do with a 24mm engine casing and some 220 grit sandpaper.


1/4" of the engine tube is exposed out the back of the engine mount. I filled the body tube seam.


The Kevlar line is tied around the upper end of the engine tube. The end goes through the notch in the upper centering ring.

Friday, September 1, 2017

Apogee Shrockets Skonk Wulf Build, Part 3, Engine Mount


UPGRADE: The engine hook wasn't spring steel. It reminded me of some Quest engine hooks from the past.
It didn't pass the "bend test" and was tossed. I replaced it with a spring steel hook from BMS.


The burnt faces of the centering rings were sanded clean with some 400 grit sandpaper. The back face of the rear ring will be seen on the finished model so it should be smooth.


The engine hook and Kevlar notches were cut but not all the way through. A rectangular diamond file was used to knock it out.

Mentioned earlier, the face of the rear centering ring is flush with the end of the body tube. It will be seen and needs to be smooth for some masking.
The wood grain got a coat of CWF and smooth sanding.

Tuesday, August 29, 2017

Estes Starship Nova #1371 Build, Part 25, Nose Cone Tie


UPGRADE: I showed this earlier, the tie down loop at the nose cone shoulder had a mold bubble in it. The plastic tie loop isn't very strong to begin with. I cut it off and made a stronger attachment.


A hole was drilled using a diamond file.
In the end I made it larger than what is pictured here. I had trouble feeding the shock cord through.


To make it easier to reach the shock cord a bend was put in the elastic.
It was fed through the hole and picked up with some narrow tweezers. It took a few tries to grab it.


A Duncan Uni-Knot was tied in the shock cord.

UPGRADE: A long elastic shock cord was used in place of the short rubber shock cord provided in the kit.

Wednesday, November 23, 2016

Estes Mini Max #2445 Build, Part 8, Decals From Decals, Tips Part B

The Excelsior art is good but I didn't like the layout of the "kills" decal. The spacing and art sizing seemed off. I wanted something closer to the layout on the standard Red Max model.
I played around with the "bugs" and came up with the art on the right side. Some bugs were resized, some flipped.

I also played with some of the fin decal sizes to get them closer to the scale of the larger Red Max model.

More decal information: Why are some decals printed on white back paper and others on blue backed paper? Both colored papers work the same when soaking and transferring onto the model. On a blue backed decal paper you can actually see a white ink decal.

On some recent Estes kit decals, you have to hold the decal up to a bright light to find the white decals on the sheet!
The upper part of the picture is the white backed decal sheet in normal room light.

The inset picture shows the white invisible decals are revealed when held close to a light bulb.
TIP: Before cutting up a white backed decal sheet, always do a light bulb scan. It's too easy to cut and ruin a usable white decal.

Monday, November 2, 2015

Estes QCC Explorer Build Part 20, Color Paint Upgrades

The great thing about duplicating the face card decor, there is no masking!
If you didn't glue on the tail cone, nose cone or upper body tube, spray each part separately and glue together afterwards.


The tail cone was painted separately. The gluing surfaces were masked off.


Instead of the suggested gloss black, I went with the Rusto Metallic Black.
It's a subtle change that might make your model stand out from the crowd of QCC models at the next club launch.


The primer grey I first used on the payload section didn't give any contrast to the light grey color on the kit decal.

I ended up going with the Rusto Aluminum paint. It gives a little shimmer and is still in the grey family.