Showing posts with label E Maxi Brute Honest John. Show all posts

Thursday, January 5, 2023

Estes Maxi-Brute Honest John (Kit #1269), Part 17, Motor Bands? Yikes!

The Motor Band is made up of three layers of cardstock, the third layer has evenly spaced holes in it.
Step 7 of the instructions say simply: "Cut small holes out of third motor band." I prefer to use my rotary punch.

Test on scrap area to get a feel for how the punch will cut. Usually you have to have a second layer of cardstock underneath the punch area for a clean cut.

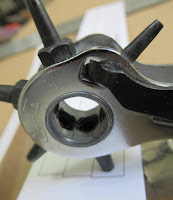
Shown above on the right,
If you can't see the inked edges around the cutter tube, try light pressure to be sure of the punch position. Remove the punch and check.

If you are happy with the position, set the tube on the light recess and finish the punch. This allows you to slightly move the punch tube if you didn't get the position right the first time.
To round out and true up the circle edges - 

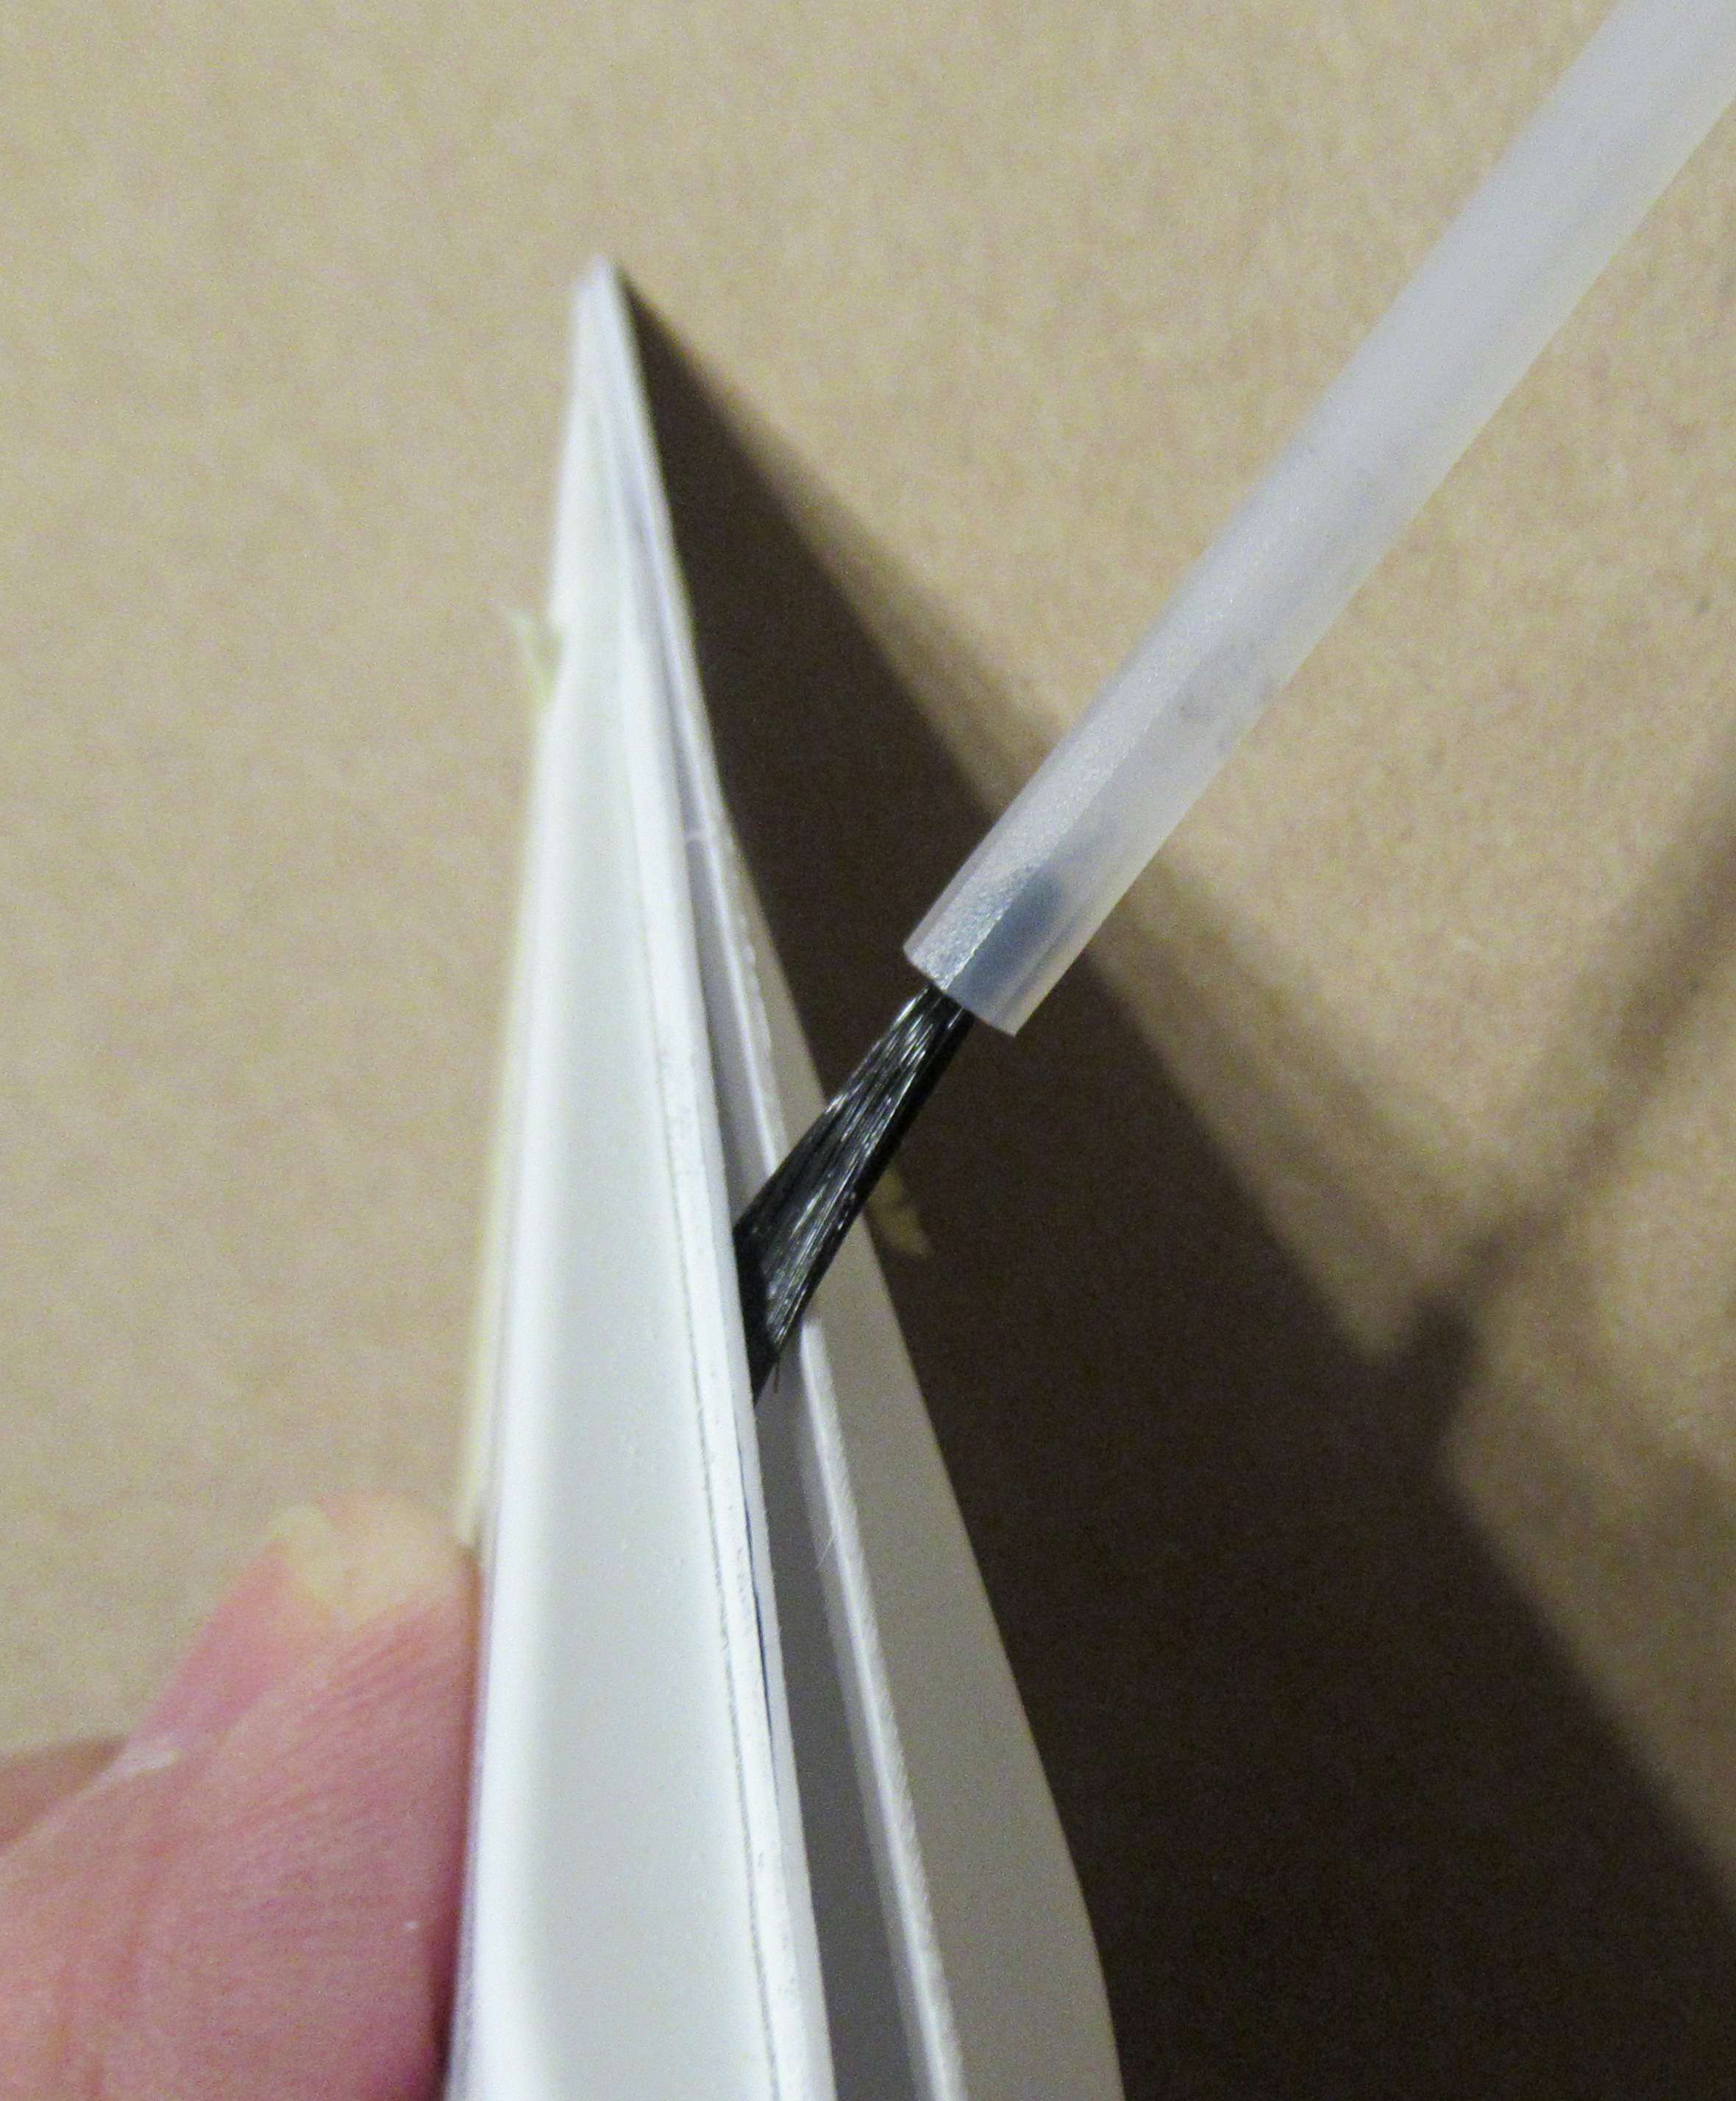
TIP: Use a smooth sharpened dowel. Wet the dowel tip and wipe off the tip leaving the wood just slightly damp.
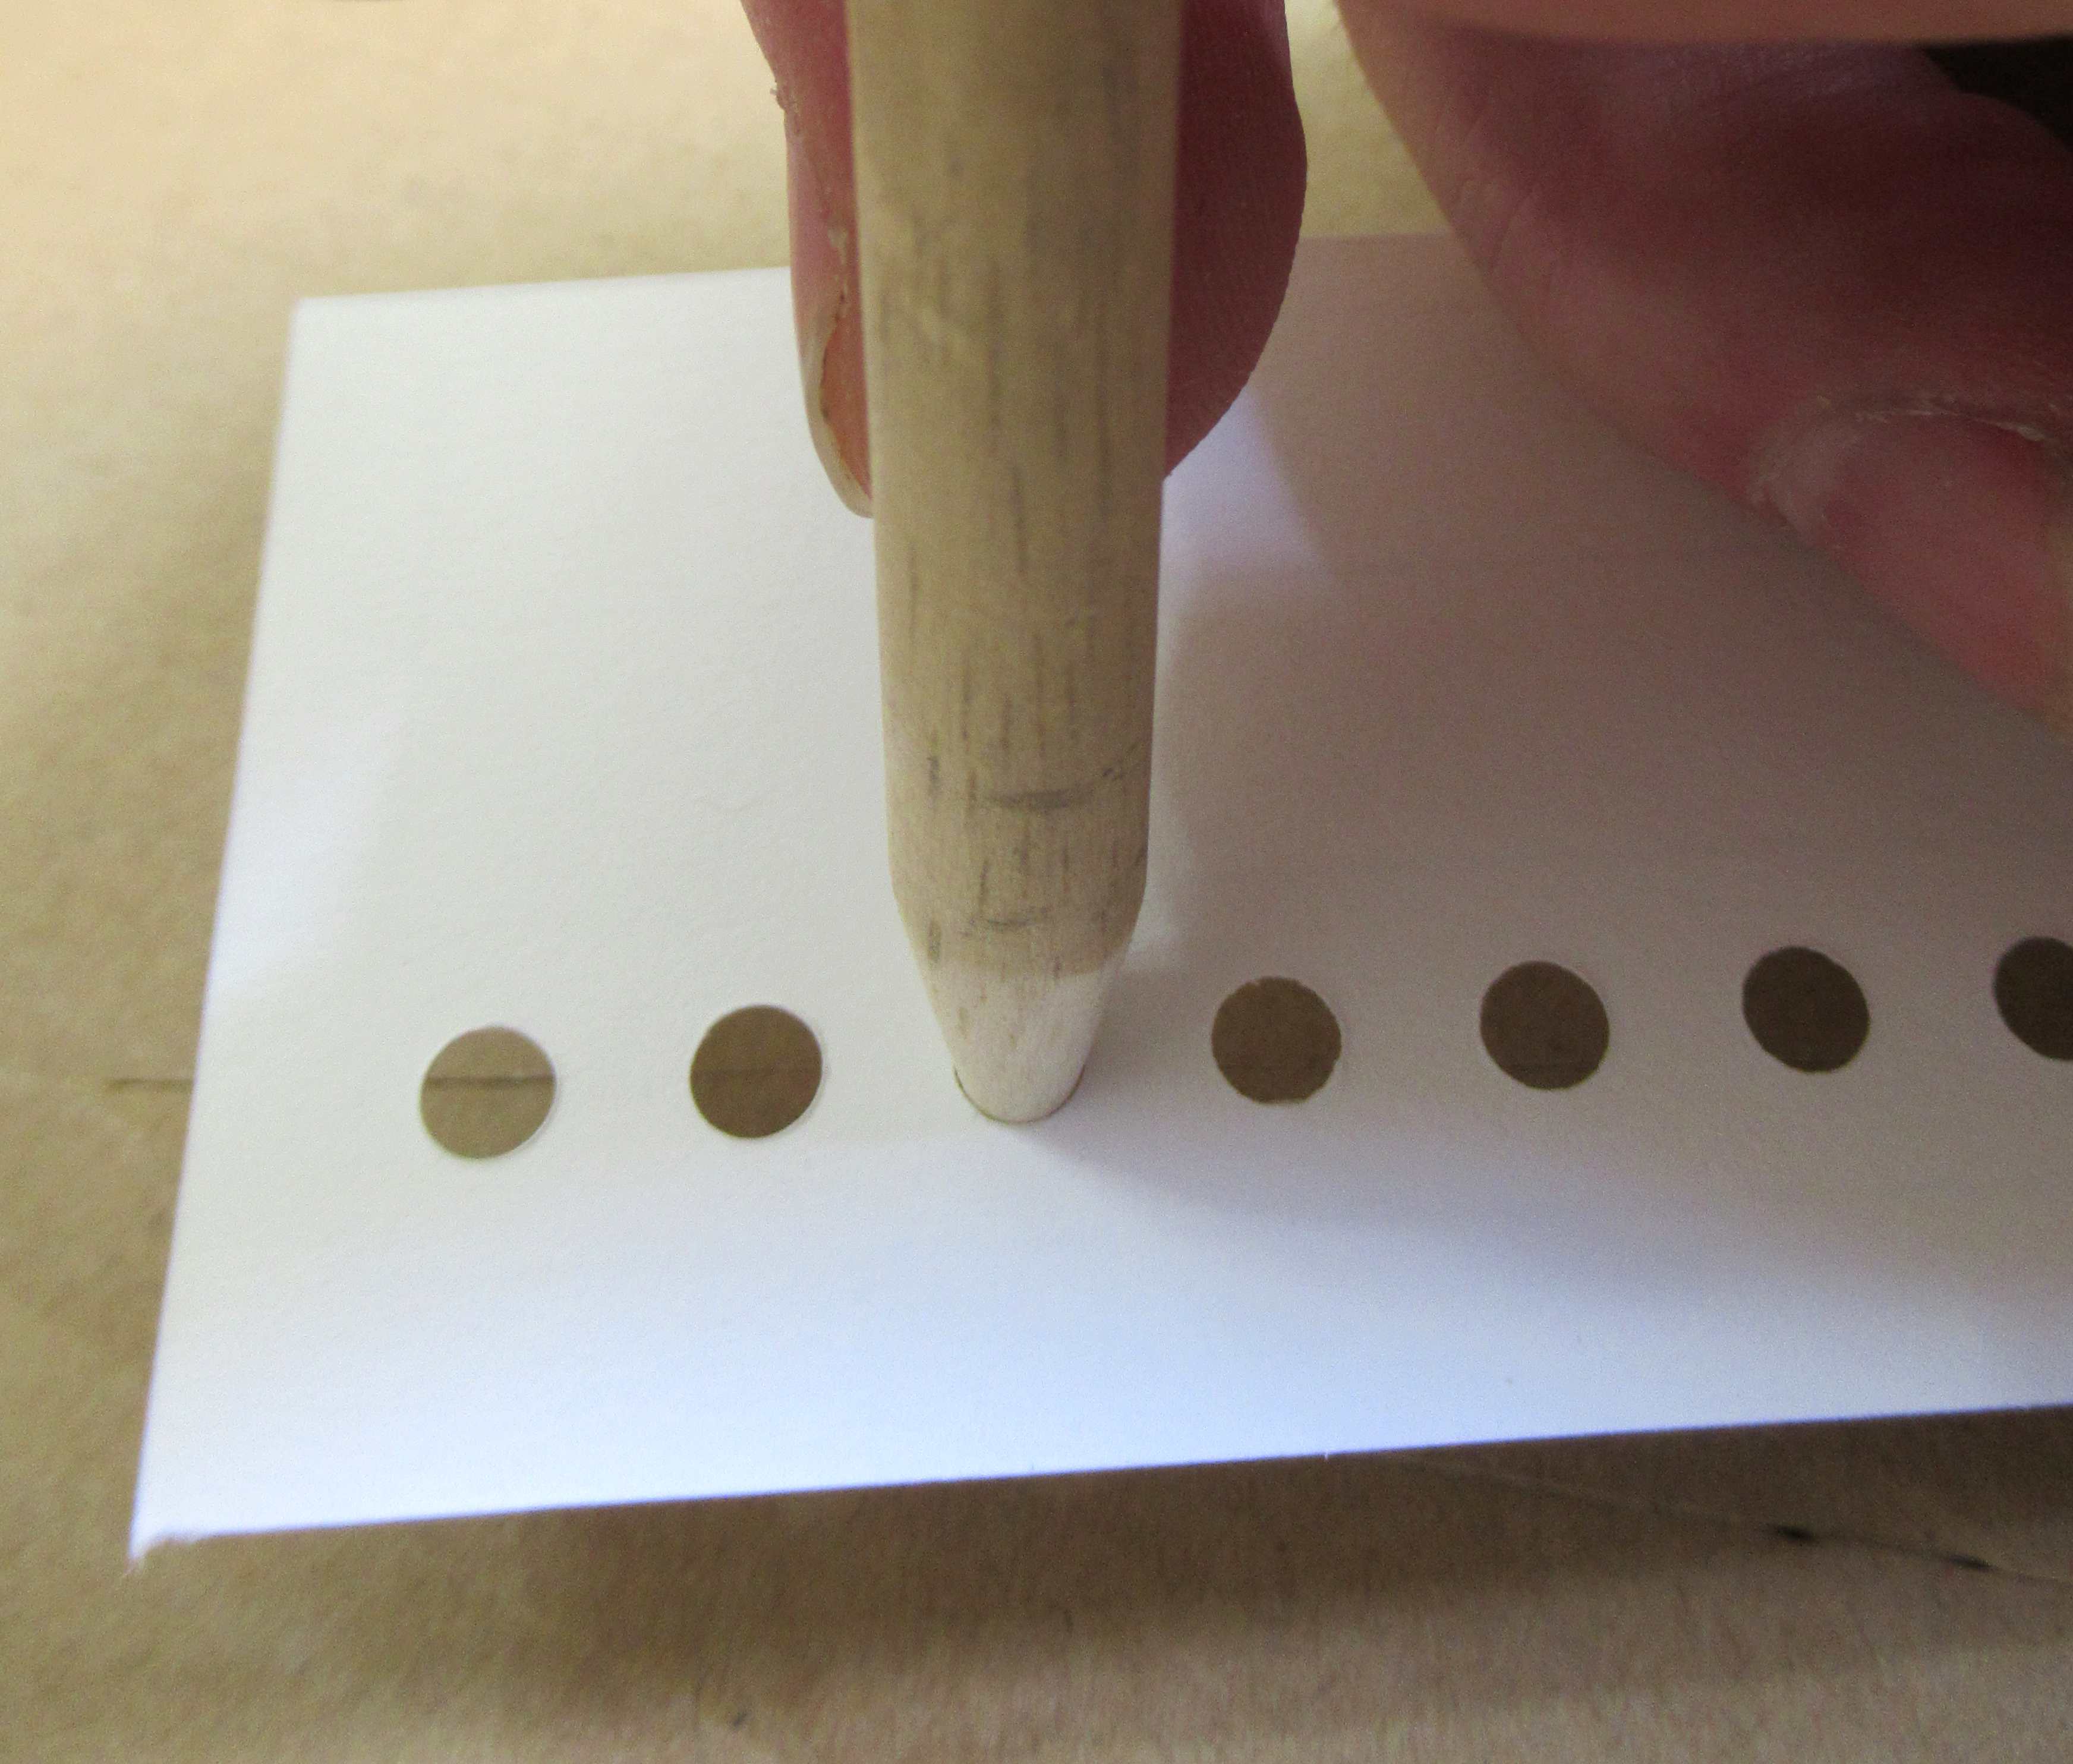
Gently turn the dowel in the hole.

I dowel form the holes on both sides.
The final side of dowel forming is the side that will face out on the finished model. That leaves a clean taper on one side of the strip.

TIP: I make a practice of gluing the printed sides in. Printed words and inked lines can sometimes wick through and be seen after spray painting.

Here's where I threw in the towel.
The motor bands didn't wrap completely around the tube!
The picture on the left shows the first motor band. The ink line is where the wrap should have been cut. I left overlap thinking this could happen.

The second overlay wrap didn't meet up.
That leaves the third wrap with the holes not completing a full turn.

It's not difficult to patch a cardstock gap. But, the third wrap holes will end up unevenly spaced where the ends meet up! This would require a re-draw.

I'm going to take a breather on this build. It's rare when I stop a build, my apologies.
To be honest - I was disappointed with the weak, floppy fins, substituting basswood for the balsa launch shoes pieces, and the motor wrap ends not meeting up. 
I've spent too much time correcting and beefing up the kit supplied parts. I'll return to this build another day.
This Friday - A full build that I did finish! The new Estes B.O.S.S.

Wednesday, January 4, 2023

Estes Maxi-Brute Honest John (Kit #1269), Part 16, Some Fixes

Look at the flex on the fins.
The fin shown at the right is two vacu-formed sides, not glued up yet. The fins are stiffer when the two halves are glued up, but this is still too much flex for me.
Only one fin was glued together so far. I was letting things sit for a few days thinking about a solution. 

In the comments, Paul K wrote: 
"I like that you’re building this stock, it might actually fly on a D12-3! I added 1/16” basswood internal reinforcement, with TTW tabs, but it needs at least an E18 to fly."
 
Paul's suggestion for a interior reinforcement might be a good idea.
I cut a stiffener piece from 1/16" basswood. 
With the basswood in the middle, the (now) three piece fin is much stronger.

I didn't want to go through the wall. That's an iffy proposition when cutting through the thin fin root edge and also slotting the molded tail cone. This stiffener piece by itself is a compromise.


One of the launch shoes didn't turn out well.
The top piece cracked off when sanding and ended up at an angle when it was glued back on.

I cut another Part A from 1/8" basswood and have enough leftover B pieces to make another.

Tuesday, January 3, 2023

Estes Maxi-Brute Honest John (Kit #1269), Part 15, Gluing Up & Sanding The Fin Sides

Before gluing up all the fin halves - 
Wait to read Step 16. I did a fin reinforcement to stiffen the plastic fins. 
This post shows how the fin sides are joined per the instructions.

The leading edge is already glued shut and remains closed in the following steps.
Slightly open up the gap on the root edge side a sneak in the brush to apply a wet line on both sides.
Close and hold until the glue sets up.


Where you can, open the two halves up enough to get the wet brush between the two fin halves.

Where you can't get the seam to open wide enough for the brush,
Brush on some glue over the closed edge. The glue is thin and some should seep into the joint.


After the glue dries, continue sanding using a block with 220 grit sandpaper.

Here I've started to sand down the overhang edge.
A joint has opened up - 
Brush on more glue and hold the gap closed. 

Don't sand all the way down and Don't remove every bit of the overhang lip.
Notice I traced a pencil line around the raised fin sides to better see the height of the overhang lip.

Sand very "close" the the fin side - 
Then sand and round off the remaining lip, shown on the right.

This leaves the fin a little stronger. If you were to sand to far, there is just two thin ends butted up against each other. Stopping a little early leaves a bit more contact of the plastic at the bonded sides.

Monday, January 2, 2023

Estes Maxi-Brute Honest John (Kit #1269), Part 14, Gluing Up The Fin Halves

(My camera focused on the closest edges. Look at the blurred right and left wider sides of the fins.)

On the left - 
Notice one side is higher than the other.

On the right - 
This is what you are looking for. Both sides are in line with each other. You can't count on evening up the overhang edges. Look beyond them and focus on the sides of the fins.

Alignment of the fin sides is VERY important. If one side is high, you could sand through it trying to even up both sides.


After checking the alignment on all four sides - 

Tape together the fin halves with a strip on masking tape, making a hinge. Check the alignment again before using any glue.


Open the two halves.
This allows you to apply liquid cement to the edges on the tape side.

The inset shows the Plastruct Plastic Weld glue I use.


Brush a fairly wet line down one side of the "hinge" edge. Work fast - This glue dries quickly.

Close up the fin and hold until the glue dries.
We'll glue the other three sides in the next post.

Friday, December 30, 2022

Estes Maxi-Brute Honest John (Kit #1269), Part 13, Thinning Down The Fin Sides

You are instructed to thin out the fin edge overhang to 1/2 of the original thickness. This is much like the old two-sided vacu-form fins in the older Centuri style Saturn 1B and Saturn V kits.
   

The big fin plastic halves are flexible.
Don't sand like the picture on the right - 
Sand as shown on the left, flat over two sides.
This prevents any scratching (and possible  thinning) of the inside wall.


After some scratching up the interior of the first fin half,

I taped the inside wall to protect the surface. 


Notice the forward fin half. The side edges have been thinned.

Note the inside corners are sharper, more defined than the unsanded fin in the back. 


I ran a Sharpie marker over the edges to show the thickness.

On the left is a fin half, not yet sanded and thinned out.
On the right is a sanded, thinned fin edge.

Thursday, December 29, 2022

Estes Maxi-Brute Honest John (Kit #1269), Part 12, Launch Shoes Undercoat & Tube Seam Fill

The root edges of the launch shoe assemblies were masked off using 1/8" wide strips of masking tape.
All were stuck down to the sticky side of masking tape on scrap cardboard for a white spray.


The inset picture is after the white spray. There is still some uneven surface and basswood grain grain left. All flat surfaces were sanded smooth using 400 grit on a block.


The body tube and launch lug got a seam fill using Elmer's Carpenter's Wood Filler (CWF).

This was sanded to surface using 400 grit on a block.
These tubes were rolled tight with a narrow seam. I wish tubes were made this well today.

A close scan and I could see where the filler didn't stay in the seam. I mark these with a pencil,

More filler was applied with a knife blade and sanded down. Sometimes a second fill stays in the rut.

Wednesday, December 28, 2022

Estes Maxi-Brute Honest John (Kit #1269), Part 11, Gluing Up The Launch Shoes

The 1/16" thick side strips (Part G) are glued on 1/16" down from the top of the center piece (Part D).

On the left, I used an extra G piece as a spacer so all the strip positions will be even. The extra strip was set on top of the glued piece while the glue was still wet.
I pressed my sanding block until the spacing strip was even with the top of the D piece. The extra spacing strip was removed leaving the glued strip in the correct position.


Here's the view from the top - 
Both G piece strips are glued on, inline and equally spaced.


The overhang on both sides was on purpose.

Trim off the bulk of the overhang with a knife then sand the ends to the front and back faces of the D piece.


Here's the backside showing the strips sanded to surface. 
I tried not to sand into the wood or remove the gray filler/primer.

Tuesday, December 27, 2022

Estes Maxi-Brute Honest John (Kit #1269), Part 10, Spin Nozzles Units, Part 2

Mentioned in the last post - 
The curved top and bottom will be sanded through first.

On the right, the curved edges are trimmed off leaving the straight sides. 

The straight sides are trimmed off with a sharp knife and straight edge. 
Sand and clean up the straight sides with a sanding block.


Do some test fitting on the low nose cone section.

In the top picture, there is still a gap on the straight sides. This tells me I've got more sanding to do on the 220 grit wrapped around the lower nose cone piece.

Here's a better fit, all the way around the piece.


The spin nozzles will be glued on (later) with liquid cement against the molded lines around the nose cone base.

Monday, December 26, 2022

Estes Maxi-Brute Honest John (Kit #1269), Part 9, Spin Nozzles Units, Part 1


Score around the raised spin nozzles leaving about a 1/16" edge. Bend and crack off the sides.
Hang onto the larger scrap pieces. You might need them for patches on the fin edges. Anytime I've worked with vacu-form parts before, I've needed patch plastic.
Looking ahead - 
The instruction illustration shows a spin nozzles being glued in place. The drawing shows a flat edge border around all sides of the spin nozzle piece.

That's not how they end up after sanding in the bottom curve.
I taped some 220 grit sandpaper around the low nose cone piece. 
Go back and forth in a straight line (here going left to right, right to left) over the sandpaper.

The two side curves will be reduced first, the straight top and bottom edges are reached last.

Saturday, December 24, 2022

Estes Maxi-Brute Honest John (Kit #1269), Part 8, Nose Cone Fitting


I did notice a raised area on those sides of the fitted nose cone.
Look inside and find some thicker plastic down the inside seams. 

I wrapped some 220 grit around a small bottle and lowered the bump.


Here's the fitted nose cone - 
IT'S BIG!


The top of the lower NC section is flat. 
Holes need to be made in the bottom to attach the 1/4" wide shock cord.

Notice I marked the hole locations before drilling into the plastic.
TIP: Don't drill the holes on the molding seams. That's a weak point (thin plastic) in the nose cone mold.


The instructions suggest drilling the holes by spinning a knife tip.
Well - 
Use an old knife blades to start the holes. 

Then, I switched over to a half round diamond file. 
You can also use a Dremel tool to make the holes.


The holes are around 1/4" diameter.
The sides should be smooth. A sharp edge could wear through the shock cord.
 

Friday, December 23, 2022

Estes Maxi-Brute Honest John (Kit #1269), Part 7, Nose Cone Cut & Trim


The lower end of the nose cone and the tail cone are molded in one piece.

Cut them in two around the deep indent line with a razor saw.


You are left with a rough ridge on both parts.

I sanded down the lip using 220 grit on a sanding block. Follow with 400 grit to smooth it out.

The low section of the nose cone won't fit into the upper section without trimming the inside molding lip down. 

The instructions recommend sandpaper, but I chose to do some careful shaving with a new #11 blade.


Almost all the molding lip is trimmed and sanded.

Slide on the upper nose cone section and check the outside seam for any raised areas. A raised spot might require some more trimming of the inside lip.

Thursday, December 22, 2022

Estes Maxi-Brute Honest John (Kit #1269), Part 6, Truing Up & Filler/Primer


Here's a Part A after truing up with a sanding block.
Make sure all the sides are square and flat as you can get them.


All the launch shoe pieces (and some extras) were stuck down to a spraying cardboard. One (heavier than normal) spray of filler/primer followed.


These pieces were flipped over and sprayed on both sides. Both sides of these parts could be seen on the finished model.

Basswood is smoother than balsa, but will still show a grain.

On top is the piece sprayed with filler/primer.
Below is a piece after sanded to surface using 400 grit on a block. Note the gray filler/primer left in the shallow grain and smoothing out the surface.

After all parts have the primer sanded to surface, the assemblies will be glued up in a later post in this series.

Wednesday, December 21, 2022

Estes Maxi-Brute Honest John (Kit #1269), Part 5, 1/16" Thick Launch Clip Pieces


Here's all the pieces cut from the 1/16" thick basswood.

I ended up cutting extras and will use the best  parts.


I'd recommend storing all the small pieces in small bags. You can find the bags in Craft Stores as Jewelry bags.


One the top is how I first cut out the long side pieces.

On the bottom is after I sanded down the wide side making the sides even and square.

Tuesday, December 20, 2022

Estes Maxi-Brute Honest John (Kit #1269), Part 4, 1/8" Thick Launch Clip Pieces


If the launch clips were assembled as shown in the instructions, it would be very difficult to fill all the balsa grain pores. I elected to make the pieces out of basswood.

There are two "Part D" pieces cut out of 1/8" basswood.
Note these two pieces are not "square", the top line tapers down.  

There is one disadvantage to using basswood.
It can break in the corners down the grain line if you haven't made a complete cut. 

Four of the Part A pieces are cut out of 1/8" thick stock.
I cut out the rectangles, then cut off the corners using a single edge razor blade. The template was set on the piece to get the correct angle.