Showing posts with label C X-24 Bug. Show all posts

Monday, June 6, 2016

Centuri X-24 Build, Finished


This one brought back a lot of memories.
I was surprised how well the online scan printed up and turned into a pretty good build. The conical Estes nose cone worked well as a substitute for the Centuri original.
I'm looking forward to the first flights and (hopefully) a decent glide.

UPDATE: It has been launched twice and turned in a respectable glide recovery! After the first flight a little more clay was added. Following the second flight a bit of clay was removed. I'm slowly zeroing in on the right amount for the lifting body.

Saturday, June 4, 2016

Centuri X-24 Build, Part 13, Glide Tests

The instructions say to start with half the clay provided in the kit.
Who knows how much clay was included in the kit?

I started out with 1/8 oz. and added clay until I got a "glide" of about 10 to 15 feet.
In the end there was .25 oz. of clay weight in the back.
This is a tough one to test glide, it's hard to know what a good glide should be.


The old Quest HL-20 lifting body model had a small tube, string, card stock and two pennies for weight.
The total for all those parts came to .22 oz, pretty close to the weight I ended up with on my Bug.

Before sticking down the clay, coat the lower back of the inside of the shroud with glue and let dry. This prevents the clay color from "bleeding" into and discoloring the card stock.

After the clay is pressed in place, the clay got an outside coating of white glue.

Friday, June 3, 2016

Centuri X-24 Build, Part 12, Reinforcement


I remember my original X-24 Bug got a little banged up on the rear cone edge and fins.

I cut some Scotch tape and stuck it over the bottom rear of the cone body. This adds no real weight and strengthened the open edge.


The top of the wings and rudder also got an folded overlay of Scotch tape.

Thursday, June 2, 2016

Centuri X-24 Build, Part 11, Canopy and Wing Gluing

TIP: Use white glue for all the outside surface parts! White glue dries clear, Titebond or Carpenter's Glue will show up as yellow on the finished model.

Here's how the nose end turned out. The body tube wasn't flush, close enough for me.

I did a dry fit of the canopy to double check the position before using any glue.
On the nose cone is a pencil center line to place the tip of the canopy.

I did a small bead of glue keeping it inside the edge of the canopy to make an internal fillet.


A Q-tip was used to mold the canopy ends to the cone and pick up any excess glue.

The fins are glued on placing the bent up tabs on the printed placement rectangles.
You'll find it easier to glue one side and let it dry. Then apply glue to the second tab and stick it down. It doesn't take much glue to adhere card stock.
The real launch lug (the one that slides down the launch rod) is glued inside a fin. Apply two lines of glue where it will contact the inside of the fin and shroud wall.

The lug length follows the angle of the shroud. This lug was glued inside the top rudder. That side is flatter and better follows the thrust line. I hope it won't get hung up on the launch rod during boost.

More X-24s!

Email from Frank Claunch,

Built these over the last few days -


Not only did Frank build them, he drew up the new skins!
After these three X-24s were made, Frank made a few corrections to the art.
The new, latest skins are posted on Y.O.R.F., CLICK HERE
and scroll down to post #7.

Wednesday, June 1, 2016

Centuri X-24 Build, Part 10, Former Gluing and Engine Mount


A line of glue was placed around the top of the engine mount tube.
Press the engine tube and former into the shroud until the sides form the cone into a soft triangle shape.
Press in place for a friction fit then add glue fillets.
Don't use a lot of glue, it can soften the card stock shroud and make a ridge on the outside.


The former was just starting to push out against the shroud wall.
I rolled over with my Sharpie barrel, pushing it down while the glue was still malleable.

Tuesday, May 31, 2016

Centuri X-24 Bug Build, Part 9, Canopy and Launch Lug Supports


If you haven't scored the canopy, do so before trying to glue it together.
A slip of paper was slid under the glue tab to keep the glue stick off the printed right side.

Long tweezers were used to hod the tab down while the glue set up.


It's easier to glue on the interior launch lug fin supports with a guideline. Hold a wing or rudder up to a bright light and make some pencil marks at the center of the black line.


Glue a 1 3/4" launch lug on the line centered between the two side edges of the wing.
Fold over the fin and glue the other side to the lug.


Here's the finished wing.
The bottom tabs are folded out to be glued to the body shroud.

Monday, May 30, 2016

Old Saturn V / X-24 Combo Launch

Frank Claunch sent me an email - 

Hi Chris,
A little X-24 tidbit.

Frank

Thanks Frank,
I actually got that one in the mail from Enerjet/Centuri way back when.
I wonder if anybody other than Larry Brown (in the picture) would "sacrifice" a Saturn V just to deploy an X-24 off the top of it? I wouldn't!
Chris Michielssen 

To see the Enerjet News, CLICK HERE

Centuri X-24 Bug Build, Part 8, Former Bulkhead Adjustments


I held the shroud up to a bright light and could the former was being bent and pushed in at an angle.
The corrugated cardboard was a good "soft" bulkhead but was distorting under the pressure against the shroud wall. I wanted it to be straight. It'll need to be stiffened up slightly.


I cut some scrap cereal box cardboard. the printed side was roughed up with some 220 grit sandpaper so the glue would hold better.


After more test fittings this is where the former ended up down the engine tube.
Fillets were applied to both sides.

Sunday, May 29, 2016

Centuri X-24 Bug Build, Part 7, Former Bulkhead Placement

No glue yet!
Fitting the bulkhead former is the hardest part of the build. You are tempted to push the former in so the shroud is touching all sides of the former.
If you push too hard the sharp former sides will push out and distort the outside of the shroud. You'll see the interior bulkhead shape from the outside of the finished model! The glue softens the card stock and makes the raised ridge even worse.


Don't push the former in too hard in the first dry fits!
The first picture shows the rounded sides making contact against the shroud wall. These can be trimmed back for a softer fit.
Round off the corners and try the fit again. Repeat!


In the end, here's the best fit I could get.
Notice at the top and sides that the shroud wall is slightly raised, not touching all the way around the former bulkhead. I didn't want to push too hard and distort the card stock.

Saturday, May 28, 2016

Centuri X-24 Bug Build, Part 6, Body Shroud Gluing


I remember this step seemed wrong back in 1973! Why can't I remember the important things? 

I would think the tape strip has to go on the other side of the shroud, on the glue tab side. If applied as shown here it just gets in the way of gluing in the next step.

After the shroud edges are lined up, the tape is burnished and holds the shroud edges in line for the gluing.

Use a glue stick! White glue is too thin and runny. With a glue stick you can use less and it holds quicker. It also dries clear.

Here I'm burnishing the glue tab from the inside with a Sharpie pen barrel.
Under the shroud is corrugated cardboard, a softer surface so I don't mar or dent the card stock.


The card stock shroud is a simple cone now.
That'll all change when the former bulkhead is pressed in place.

Friday, May 27, 2016

Centuri X-24 Bug Build, Part 5, Body Shroud Forming


The instructions show pre-curling the shroud under a ruler or over a table edge. I've never got good results this way. I'll usually end up with a crease line in the shroud.

I could form this one over the heel of my left hand.
Even a shroud this large could be formed by pressing and rolling a dowel over the cardstock.
You have to trust me on this, try it and you'll never pull a shroud over a table top again.


You know you've done enough when the cone will stand up on it's own without being glued shut.
No creases or dents, just a smooth outside surface.

Thursday, May 26, 2016

Quest HL-20 Former Bulkhead

An email from Frank Claunch -

Hi Chris,
I was going through some of my old kits today.
I came up on a Quest HL-20 Lifting Body.
The former was made out of paper lined foam board 1/8" thick.
You probably knew this. Hobby Lobby has the foam board. It is easy to cut, light,and strong. Can be sanded easy also.
Thought you might want to pass this along in your blog.

Enclose is a picture of the former.
Working on a X-15 type repaint for the Bug.
__________________________________________________________________

Thanks Frank -
I've got some of that foam board and just didn't think to use it.
The foam board would have been better than the corrugated cardboard I used.
I'll put this in the blog, it might help out another builder.
Thanks, and looking forward to seeing the X-15 bug!

Chris Michielssen

Note: This shape Quest HL-20 former probably won't work in the Centuri X-24 bug.
The foam board material could make a better bulkhead/former than what I used in the blog build.
Frank has done some great "re-colors" of the X-24 body and fins.

Centuri X-24 Bug Build, Part 4, Cutting Out The Fins and Canopy


The scored lines (lines to be folded) on the fins and canopy were scored before cutting out the pieces off the sheet. It's just easier to score them ahead of time, a larger page is more stable under a straightedge.

I scored them using the rolled metal edge on the top of a single edge razor blade. A few layers of masking tape over the blade protect your fingers from being cut.


Cut the fin, wings and canopy with a new blade and straightedge.


Here's all the straight cut pieces before folding.


As always, I used the blunt, rounded back end of a Sharpie pen to make a sharp fold on the scored lines.

Wednesday, May 25, 2016

Centuri X-24 Bug Build, Part 3, Nose Cone and Engine Mount

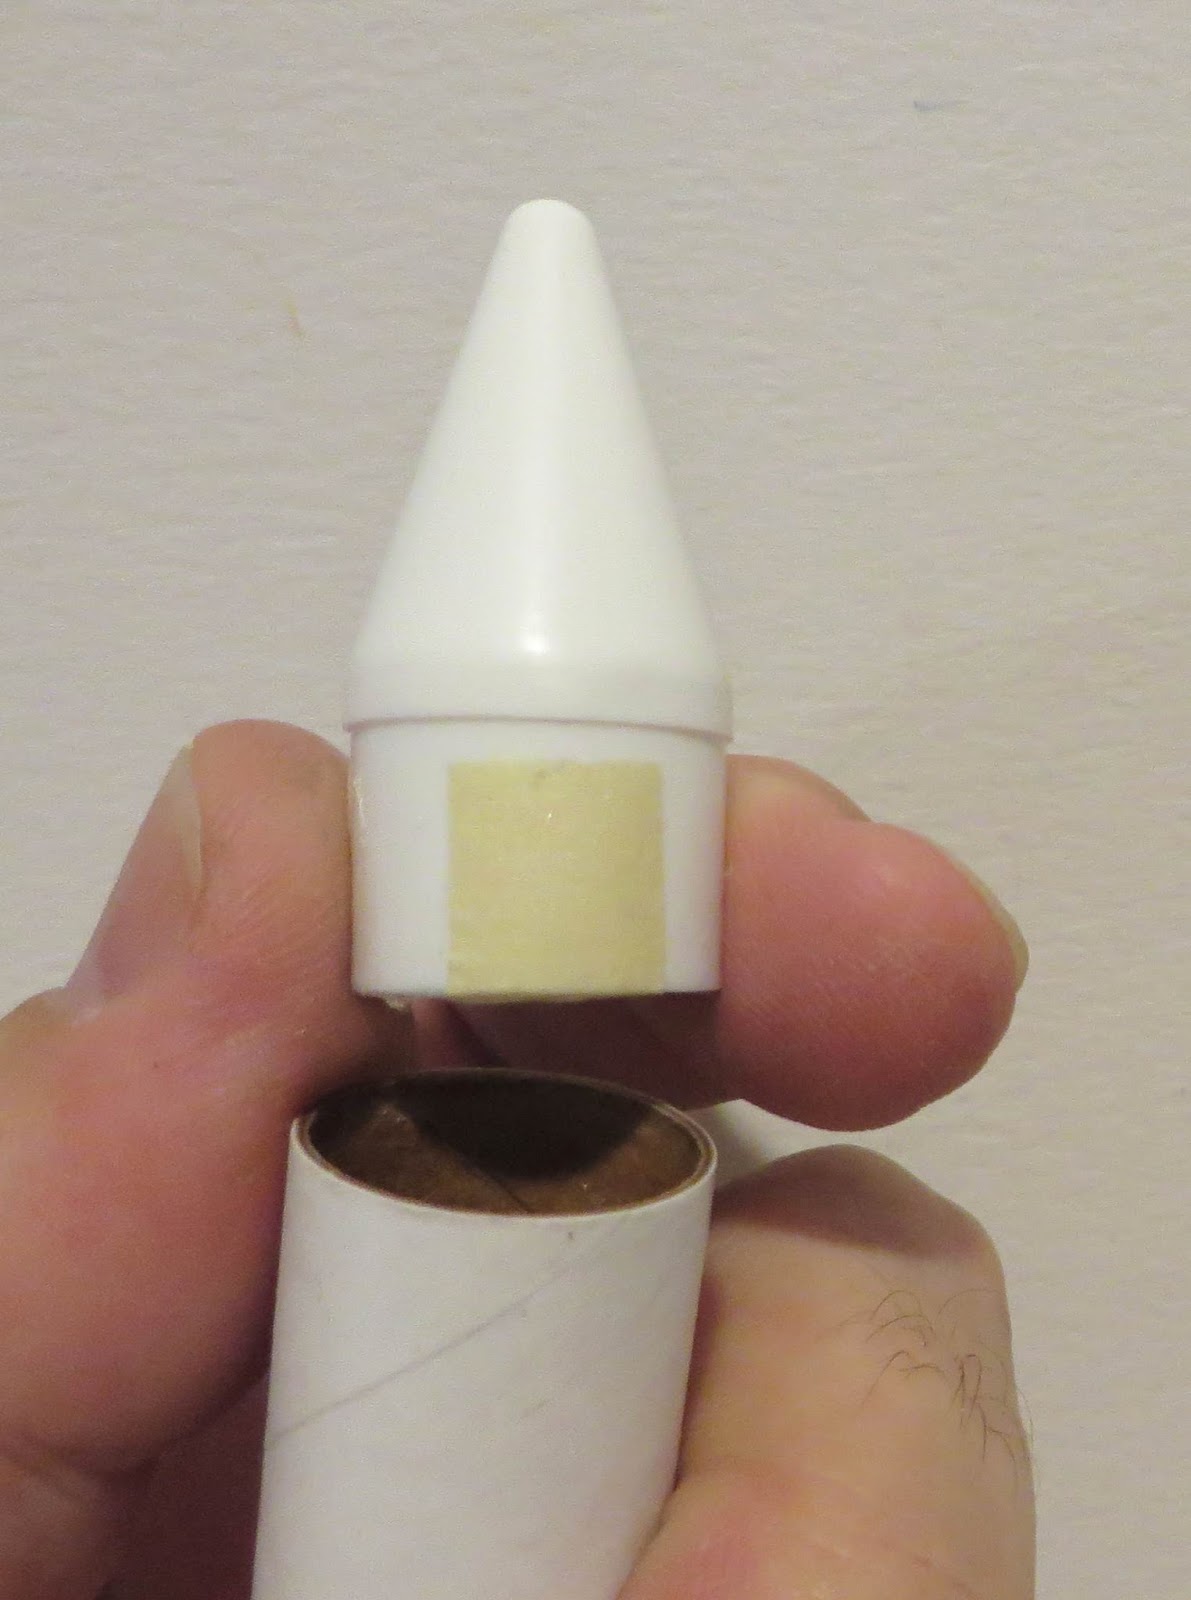
The nose cone shoulder needed a better fit in the wider ST-7 tube. three strips of masking tape were placed on the shoulder. This left some exposed plastic for a better gluing area.

I used the Beacon Fabri-Tac glue to glue the nose cone in place.
The old Centuri plastic cone is no longer available. While the fit may not be perfect, the Estes part is very close in shape and length to the Centuri kit nose cone.
The Estes nose cone is 1 1/16" tall. I can't find the older conical cone listed in the Centuri catalogs.


This is a dry fit of the engine tube into the former.
The final position of the former will be figured out once the body shroud is formed.
So far so good.

Tuesday, May 24, 2016

Centuri X-24 Bug Build, Part 2, Parts Prep

The body skins were printed on 110 lb. stock. I didn't have the original model anymore but I think the parts were printed on heavier stock. I had to beef them up.
Inkjet printed cardstock will have to be sealed. A landing on dewey grass will smear the ink.
I first sprayed the sheets with Krylon clear acrylic, three coats.
I went over that with Future clear applied with a brush.
This glossed up the paper stock and helped harden up the paper.

The former bulkhead template was traced onto 110 lb. cardstock and glued onto some corrugated cardboard with a glue stick.

Anytime I've built a kit with a pressed in bulkhead former, the edges of the former press hard against the interior walls. This sometimes left a raised ridge on the outside of the shroud.
Corrugated cardboard would have a softer edge with less chance of deforming the large cone shroud. Worth a try, right?

The original kit used a ST-7 tube, thicker walled and slightly wider than an Estes BT-20.
I traced around the ST-7 tube on the center of the bulkhead.
(If you are using a BT-20, trace around that.)
The top hole of the formed shroud is printed to fit the Centuri ST-7 engine mount tube. If you are new to the hobby, the ST-7 is thicker walled and a slightly larger diameter than the Estes BT-20.
If you use the BT-20, you can do a few wraps of a card stock strip (about 3/8" wide) to better fit the larger top opening.

The engine tube hole was cut out just inside the pencil line for a friction fit of the ST-7 tube.

Monday, May 23, 2016

Centuri X-24 Bug Build, Part 1, Printed Parts

You can find the scanned cardstock parts at:
http://www.spacemodeling.org/JimZ/centuri/ka-12.pdf
The fins are on Page 6, the body shroud is on Page 7.
Pages 6 and 7 are printed on 110 lb. card stock.

On the first print of the shroud I tried the "fit to page" setting.
It was a a little large with a ST-7 tube slid in.
A second print was made with the "fit to page" setting off. That seems to be correct.
My print was offset to the left and didn't get all the border lines. A little bit was cut off. That's okay, I can live with that.

A X-24 search on YORF brought up many different shroud skins, some you can make up in your choice of colors: CLICK HERE
Check out Posts #9 and #71 by Ironnerd and Rosko Racer


The fins were printed with the "fit to paper" setting turned off.
You'll also need a sized bulkhead, called a "former" in the instructions.
For the former bulkhead cutting template, print off page 8 on 20 lb. paper.


In addition to the printed parts on 110 lb. card stock, here's the parts you'll need  - 
(not shown)
  • The Estes plastic nose cone # 070323, the same small conical cone from the Yankee kit.
  • 3" of ST-7 tubing (or BT-20 tubing, the slightly larger diameter ST-7 tubing will better fit the hole at the top of the shroud print. To fit the larger opening you can build up the tube top diameter with a strip of cardstock )
  • 4 launch lugs, each cut to 1 3/4" long
  • Cardboard for the "former" bulkhead. The original Centuri former looks like it was cut from light Masonite.

Sunday, May 22, 2016

Centuri X-24 Bug Background

Here's one of the weird cardstock shroud model from Centuri, the X-24 BUG. This one was introduced in the 1972 catalog.
From the catalog description:
"Now it's easy to assemble your own model of the manned re-entry vehicle that makes a weird sound and smoke trail as it climbs into the sky. It's unique shape actually makes the X-24 glide back!

I had the Centuri kit back then. I never got a decent "glide" from it.
Check out the 1972 price - $1.00!
To see the catalog page, CLICK HERE

In 1993, Quest brought out their own version, the HL-20.
I bought one on Ebay and tried to fly it a few times. I never got an acceptable glide from it either. The Quest version had a streamer taped to the ejected engine. Two pennies inside some folded cardstock were used as rear trim weight.
Here's the Quest catalog page - CLICK HERE
The Quest HL-20 instructions - CLICK HERE

Here's a more recent kit version from Squirrel Works, the X-RV.
To see the catalog page - CLICK HERE

I'll be making my Bug from the online plans from JimZs.
To print it in the correct size, go with the available PDF CLICK HERE

The Centuri X-24 BUG build starts tomorrow! Printing it at home and using spare parts, it may only cost $1.00.