Showing posts with label Balsa. Show all posts

Friday, May 16, 2025

Quest Intruder Kit Bash, Part 8, Balsa Fin Prep


Here's the parts off the die-cut sheet.

There were doubles of everything except for the lower, small fin! 


I had to cut out another piece. There was enough "free" balsa on the sheet.
Trace, cut out, stack and gang sand.


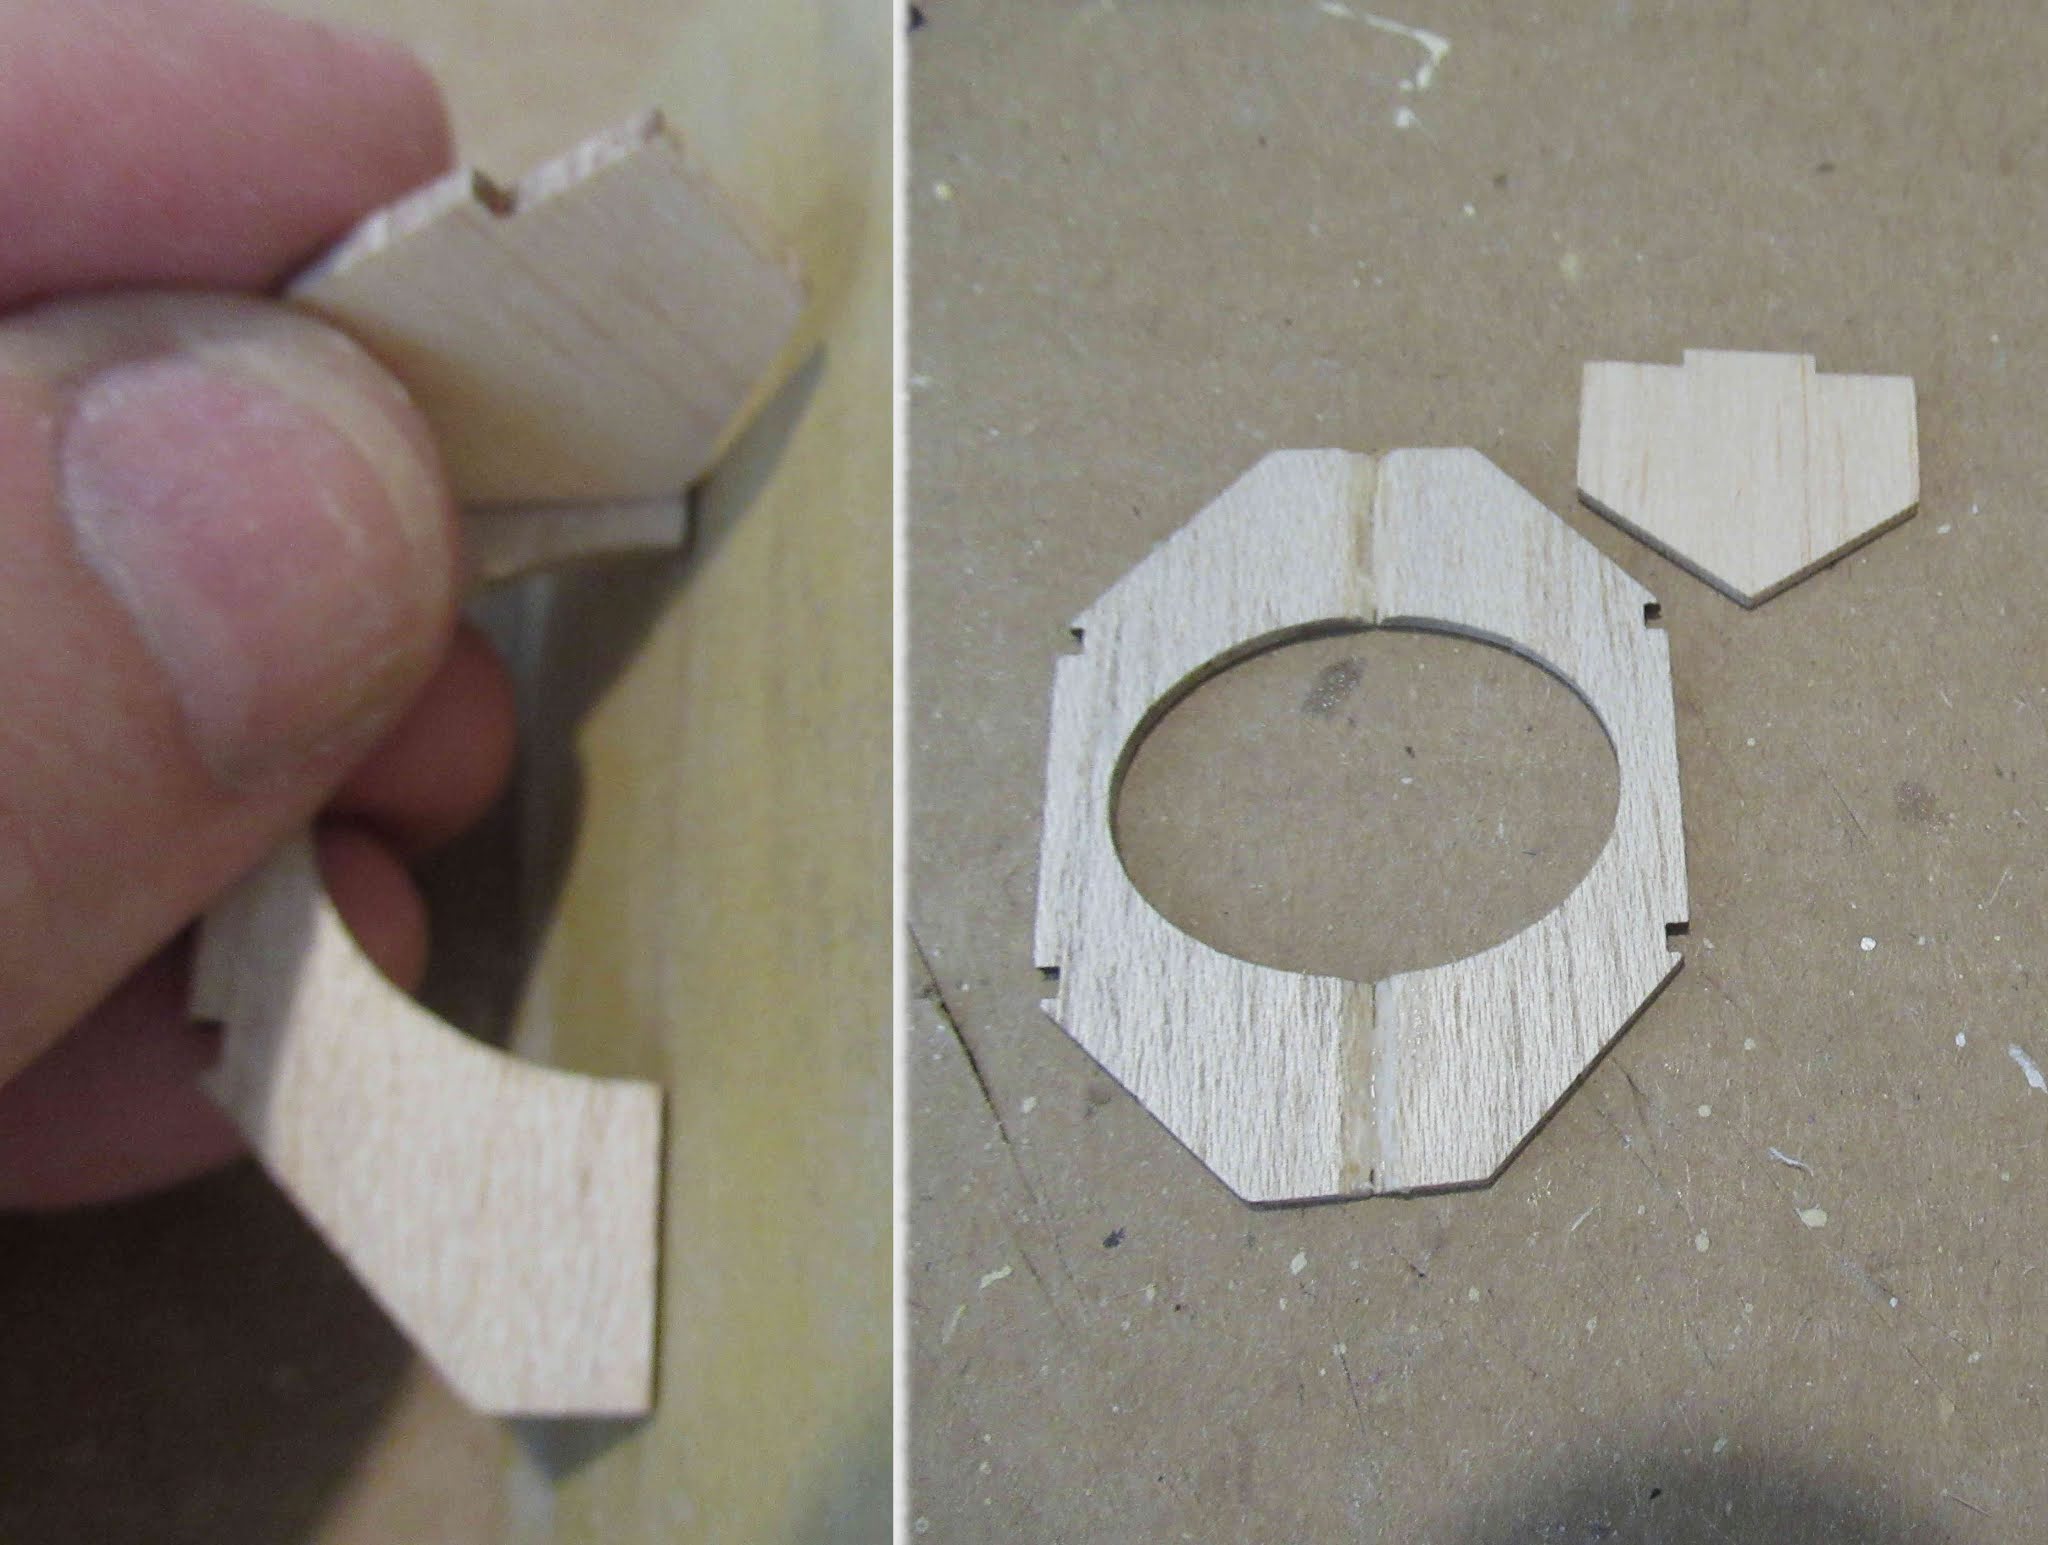
I checked the fit of the two piece wing and upper tail fin pieces. Shown in the left picture, there was a gap.

Some fine sanding with a block gave a better fit.

Thursday, May 15, 2025

Quest Intruder Kit Bash, Part 7, Die-Cut Balsa


The hold down tics on the die cut balsa sheet were pretty wide. You'll definitely need a sharp knife to separate the pieces off the sheet.


Here's the back of the sheet. You can't see the die cuts meaning the blades didn't go all the way through the sheet. It took a lot of work to cut and free the fin pieces.


With old-school die cuts, there will be some variance between the pieces.

You'll have to stack and gang sand them using a sanding block with 220 grit.


After sanding, the forward fin fairing tips ended up uneven.

Line up the backs and trim the front tips even.

Tuesday, April 30, 2024

Estes Condor #0807 Build, Part 4, Balsa Prepping


Here's why I don't like to throw out leftover balsa.

For whatever reason, Estes didn't include the small balsa standoff on the die-cut balsa sheets.
This is a small launch lug standoff.


If you've never seen how die-cutting is done - 
Razor blades are set into wood blocks. There is soft rubber usually surrounding the blades. Here, the blades sit inside and a little under the green rubber strips.

The blocks are pressed onto the balsa. The rubber recedes and exposes the blades. The blades press hard and cut into the balsa.


In 1970 - 1990s die cutting, there can be slight differences between like pieces on the sheet. This depended on how the blades were set into the wood block. 
For fin uniformity, this is why why you should "gang sand" the old style die-cut balsa.

Stack, hold tightly and even up the fin edges.
On the right side picture, I've sanded all the sides except the small top edge. You can see it is off before sanding.


Even the single piece glider fuselage should be trued up.
After freeing the pieces from the sheet, the edges weren't perfectly square.

Monday, April 29, 2024

Estes Condor #0807 Build, Part 3, Freeing The Balsa Pieces


These parts were not die-cut with a new blade. The cuts only made it about half way through the balsa.

To be sure I'll draw my knife through the shallow die-cut lines, I ran a sharp pencil over the cut lines.


Here's how the 3/16" thick sheet looked after tracing over the cuts with the pencil.


Save the extra balsa ends!
You never know if you might need them later on in the build.

Friday, September 16, 2022

Estes Space Shuttle Columbia Build #1385, Part 5, Gluing Up The Wing

The wing is glued up from eight pieces of die-cut balsa.

Here's the back end showing the near fit.
Some block sanding was needed to get a tighter fit of the edges.
I look for areas that are touching and lightly sand that area. That should bring the glue edge gaps closer together.

 
What looks like a little hole in the upper picture is a small die-crush bit. that will be filled when the entire wing is painted with CWF.

The center pieces were the worst of the group.
The centerline was sanded again where the edges touched until I got the best fit.


This is a dry fit of the assembly - no glue yet.

The fit of the joints is much better.


I was more concerned with the inside joint fits.
The outside edges are easily cleaned up and rounded off after the glue on the entire wing assembly has dried.

Wednesday, September 14, 2022

Estes Space Shuttle Columbia Build #1385, Part 3, Balsa Fix & Plastic Nose Cone Prep


I was very careful, used a sharp knife and still broke off the tip of one forward wing piece. Usually I glue the broken piece back on, but I couldn't find it.
I glued on a slightly larger piece of scrap balsa into the broken tip with wood glue. 


I let the glue thoroughly dry.
The tip was shaved down close to the correct shape but left slightly oversize.

The new tip was final shaped with sandpaper.

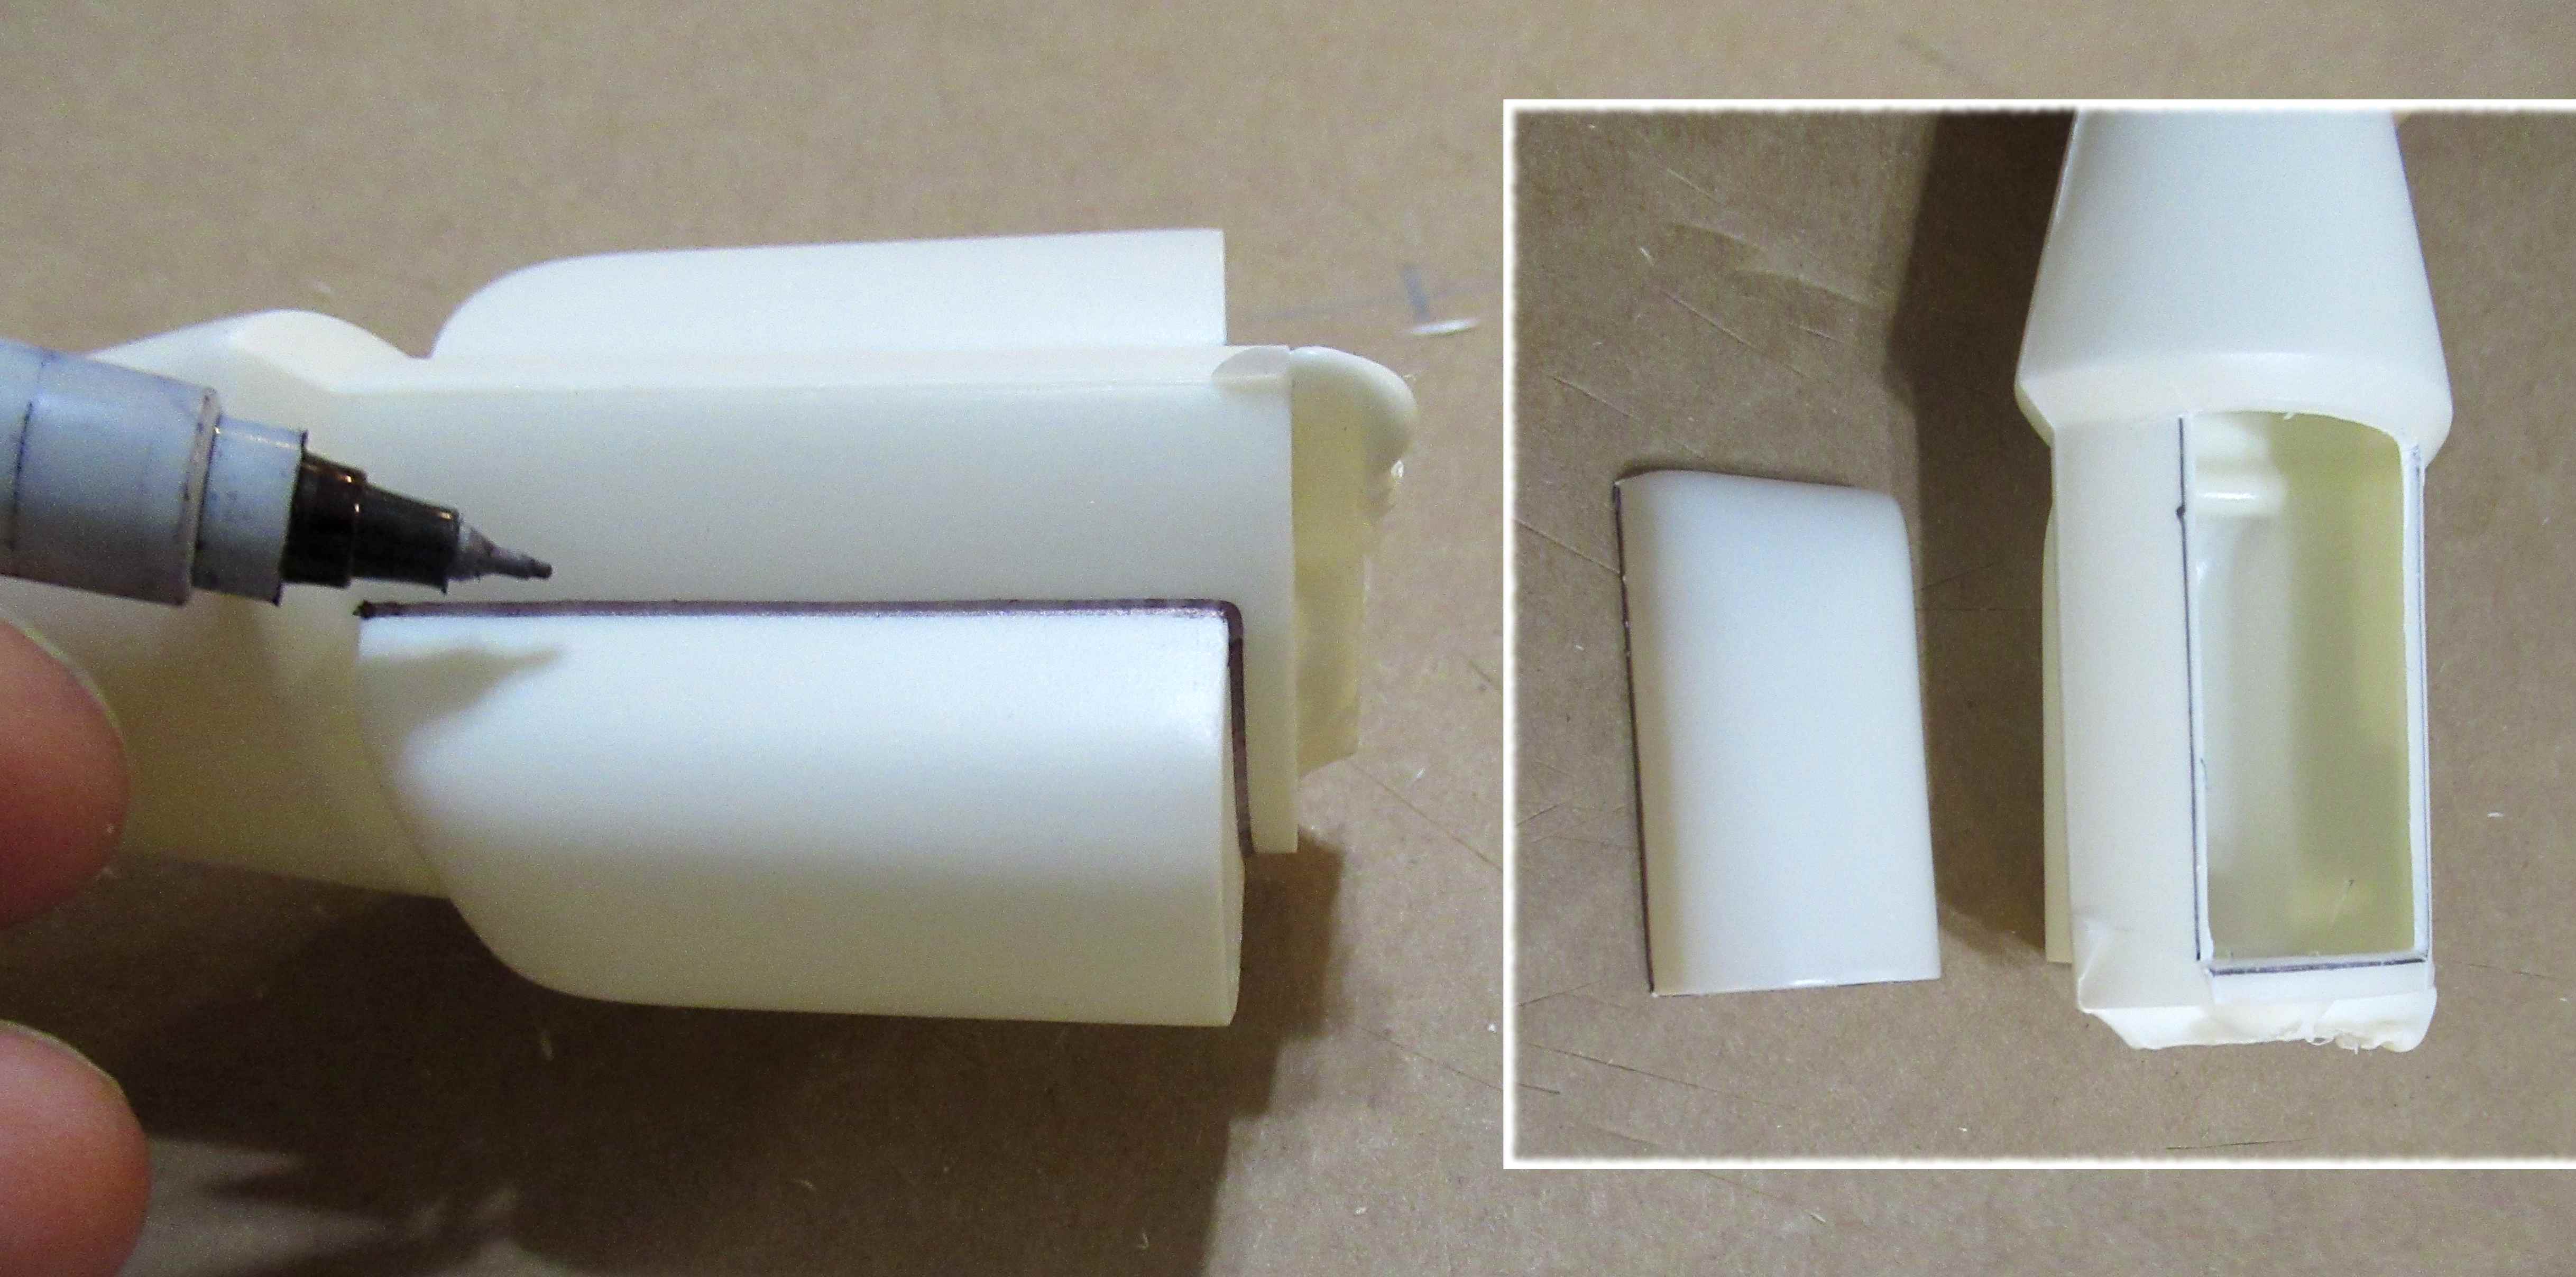
The plastic on the edges of the OMS pods was thick!

I first marked the outlines with a fine point Sharpie. Many passes with a new, sharp blade finally freed the two detail pieces.

The instructions simply say to sand the edges smooth.
You'll get a much better fit by sanding with some 220 grit wrapped around the body tube. Some "back and forth" passes over sandpaper will put a curve onto the edges.


Separating the nose cone from the back OMS piece was much easier. 
The narrow neck was scored and the piece broken in half.

Tuesday, September 13, 2022

Estes Space Shuttle Columbia Build #1385, Part 2, Prepping Balsa

This had to be the worst case of die-cut balsa I've ever seen in a kit!
The balsa is dense, the blades only got through maybe half the 3/32" thick sheet.

On one sheet the rudder was cut most of the way through. Check out the direction of the wood grain. It required quite a bit of cutting - and some guessing!


This was the tough cut - 
Note I started the cut before and outside the corner intersection. Cut down and away from the tip. This can prevent the balsa breaking along the grain in the tight corner.


This is what was removed from one of the two balsa sheets, one side of the main wing.
You end up with two rudders, you only use one in the build.

Friday, July 29, 2022

Estes Super Orbital Transport Build, Kit #7314, Part 3, Engine Mount & Balsa Prep

The lowest engine mount centering ring will be even with the end of the body tube and visible on the finished model.
TIP: I'd recommend sanding the face of the lowest position centering ring flat. Smooth out the wrap ridges and removing any remaining green off the face. You can also do a smooth coat of wood glue and sand that flat. Your finished model will look cleaner.

Note the cut angle of the engine hook notch in the lowest ring. This makes a square notch when the mount is glued up.

TIP: A piece of tape will keep the open notch closed as the glue sets up.

As mentioned many times before - 
Laser cuts are wedge shaped. Sand the root edges flat for a larger, flatter gluing surface against the body tube.

I didn't remove the laser cut slots from the main wing. After many notched "tab and slot" builds, like the QCC Explorer and Low Boom SST, I found the low tabs and notches take a lot of extra work to fill after assembly. 
Especially if the tabs ended up below the surface of the adjoining part face. It's up to you-
I sanded off most of the slot tabs on the engine housing Parts AA, N, O and Z. 

Tab/slot construction is easier to line up the parts. I had to draw up a positioning template. 
Some models require tabs for strength. On this build I figured the engine housings would be strong enough doing surface gluing.

I did leave the tabs on Parts R (wing tip) and Parts H (Wing) where I felt a stronger notched outside joint was needed.

On the outside (Part R) wing tips and the outside notch of the wing (part H), 
Leave the long edge of the tabs as they are - long with no removal of the burnt laser edge.
You'll have less of a seam joint to fill if a (longer) tab is sanded to surface after gluing together.

Built a I did, the engine housings glued under the wing will be a surface mount (no tabs) like the original 1969 kit.

Monday, November 2, 2020

Estes Asteroid Hunter #3224, Build , Part 3, Parts Prep & Front Assembly

TIP: It is helpful to mark the piece names with pencil before removing them from the sheet. Use the parts illustration in the instructions for reference.

The laser cuts are very clean and all the way through the balsa sheet.
The structural pieces are freed up from the balsa sheets with a knife, cutting through the hold down tics.


The interior bulwark pieces have a slight curve on the outside.
Part "N" is shown here
I smoothed the curved sides using some sandpaper wrapped around a used engine casing. The straight sides were cleaned up with a sanding block with 400 grit.


The end pieces have and angle sanded into them to match the to of the "U" support pieces shown on the right side. Part "O" shown here.

TIP: After sanding the angle with a sanding block, you might find it easier to glue the pieces together with a small amount of glue. After the glue dries you can bend the joint like a "hinge" fitting over the U support pieces.


More glue is added to the center joint and is bent down over the top of the "U" piece. I'm not gluing the end piece onto the U piece yet. The tape is holding the hinge angle shape while the glue dries.

Sunday, June 7, 2020

Die Cutting Fins?

Vince Perlman asked on the Facebook Estes Model Rocket page:
Back in the day (until the 80’s, at least) most of your better rocket and plane kits advertised balsa parts that were “die cut”. Sometimes the parts were cleanly cut, oftentimes - not so much. Either way, it was a huge time saver when a lot of parts had to be cut out. I could never picture what balsa-cutting dies looked like or how they were made. I’ve searched YouTube to no avail. Anyone around have any insight on how balsa die cutting was done?

My Answer:

Custom cut and bent razor blades were locked into a wooden block. The black pieces on the outside were soft rubber that would compress when pressure was applied allowing the blades to be exposed. They were good for quite a few clean cuts, then the blades would dull and "die-crush". 
I only have print shop experience when die cutting was done on thick card stock using a Heidelberg printing press. Thin balsa could probably be cut on one of these multi-purpose presses. Thicker balsa might require some sort of clamping press.

Friday, August 23, 2019

Estes Gryphon #7280 Build, Part 2, Cleaning Up The Laser Cut Balsa


I'll be building this model for Estes as a "show" model. You probably shouldn't fill and paint a glider, the extra weight cuts down the flight duration. This one will be filled and painted.

Looking close at the booster engine tube "hook", there is some laser cut wiggles. These should be cleaned up before assembly.

Look close at the lower right of the wing halves. There is a small curved corner. Be careful not to sand this off -


As with most laser cut parts, the cut is a "wedge", wider at the bottom of the flat balsa sheet.
Square these edges up with a sanding block being careful not to change the shape or make the pieces smaller.


The "H" piece is an Alignment Tool. It's handy to have in a kit like this, giving you perfect 90 degree alignment of the glider parts.

Thursday, August 10, 2017

Estes Starship Nova #1371 Build, Part 5, Nose Cone and Balsa


The nose cone tie down loop is pretty thin, about the same as the Bullpup nose cones. There was even an air bubble in the corner making it even weaker.

I'll have to cut this off and drill a hole in a thicker area of the plastic shoulder.


The seams were slight and required little sanding.

I did have to go over the recessed detail lines with a sharply folded piece of 400 grit sandpaper.


The wiggling laser cut lines were pretty evident when they were squared up with a sanding block.

The intake support pieces are very thin after they are cleaned up.

Friday, July 28, 2017

Estes Nemesis #2175 Build, Part 3, Fin Grain and Repair


I'd rather cut out my own fins then deal with bad die-cutting.
You can be as careful as you want but chances are the trailing fin tips will probably break at the grain.

TIP: Note the direction I'm cutting. You have less chance of the tip breaking off if you draw the blade down and away from the brittle tip.

And it happened!

TIP: The corner broke off  one of the wings. I couldn't find it so I glued an oversize balsa piece with yellow wood glue. Don't use CA glue for this. You might find the wood glue sands easier.
Let this dry thoroughly before sanding.
Use a block with 220 grit. The inset shows the repair.

Wednesday, January 11, 2017

No More Balsa Nose Cones?

A YORF post from John Boren of Estes:

"Estes hasn't made a NEW balsa nose cone in over six years now. All the balsa cones in kits today are from stock we are trying to use up. We no longer have a balsa vendor. And NO I'm pretty sure Balsa Machining and Semroc would not be able to supply the TENS of Thousands of balsa cones we would need each year at a competitive price."

John Boren

What? No more balsa nose cones from Estes? 
Over the past few years we've seen short notes in kits talking about a worldwide balsa shortage. If the balsa price has gone too high it's probably cheaper to go with plastic. These days the average builder doesn't take the time (or know how) to fill balsa grain anyway.

Wednesday, January 4, 2017

Estes Solar Warrior (#3225) Build, Part 2, Prepping Balsa


Here's all the balsa removed from the laser cut sheets.
There are four "T" shaped fins and on the upper right, four smaller forward fins that glue to the leading edge of the largest rear fins.


When fins are laser cut fins I don't "gang sand" them. No reason to, being laser cut they should all be exactly the same size.


On the left is before sanding the edges. The inset picture is after sanding off the burnt edge and the hold-down ticks. I don't sand off any more than necessary, just enough to clean and square them up.


Laser cutting doesn't give you a 90 degree straight cut. The top of the sheet cut is wider than the bottom like an open wedge shape.

On the right (inset picture) is the before picture. The "T" piece sets in the slot at an slight angle.
On the left is the same piece after sanding the outside fin edge square with a sanding block.

Saturday, September 3, 2016

Estes Alien Invader #3003 Build, Part 5, Balsa! Lots Of It


I don't always sand the balsa sheet flat. I depends how rough the sheet is. Sometimes if the sheet is smooth I go right to freeing up the parts. This one was rough.


I said there was a lot of pieces.
ALL the leading edges will be rounded.


The curved inside edges of the forward wing pieces were sanded square with some 400 grit wrapped around a 24mm engine casing. This keeps a squared edge on the inside curve without breaking off the tip just to the right of the casing.