Showing posts with label Starter Set. Show all posts

Monday, January 28, 2019

Cox Nike Zeus Starter Outfit On Ebay

Here's a rare, mint item on Ebay -


Complete Cox rocket starter set in their boxes. The plastic wrap is gone -
Nike Zeus rocket (early gap staging), Cox launcher and controller and five three packs of engines!
This launcher has never been used, the blast deflector is clean. Four legs still in the plastic. You rarely find all four legs, one always seems to be broken.
The Nike Zeus packaging says 2000' altitudes. I doubt that, but still it's pretty cool!
Cox also made an Honest John starter set.


Five sealed  three packs of engines with the interesting Cox plug-in igniters. No micro clips!
I've never seen these in the packages before.


To see the listing: CLICK HERE
Am I bidding? NO!
What would I do with it? Take it out and look at it every other year? To some it is too "valuable" to use. I've got plenty of older stuff sitting in storage boxes.
I'll check back tomorrow and see where the winning bid ends up.

Thursday, August 7, 2014

Centuri Powr-Pad Launcher and Controller, Part 5, Power Pad Tilter

I was always curious how the "Tilter" worked.
Well, it doesn't! At least I couldn't get it to tilt. 

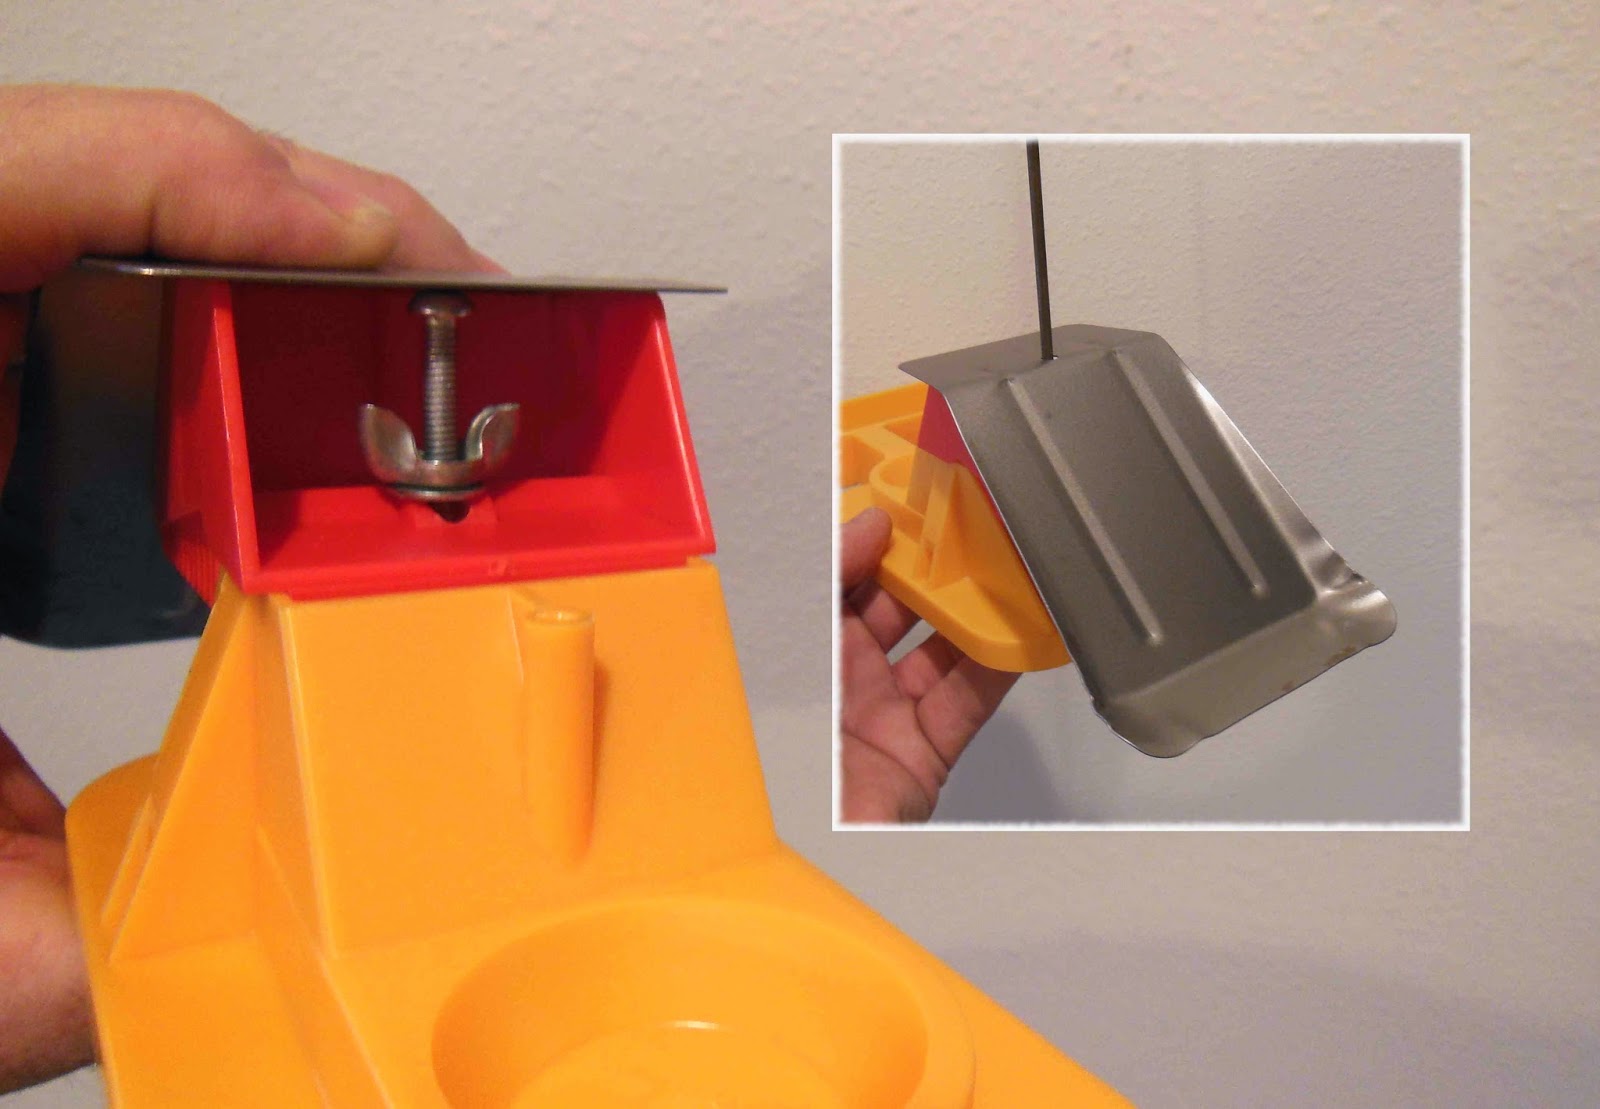
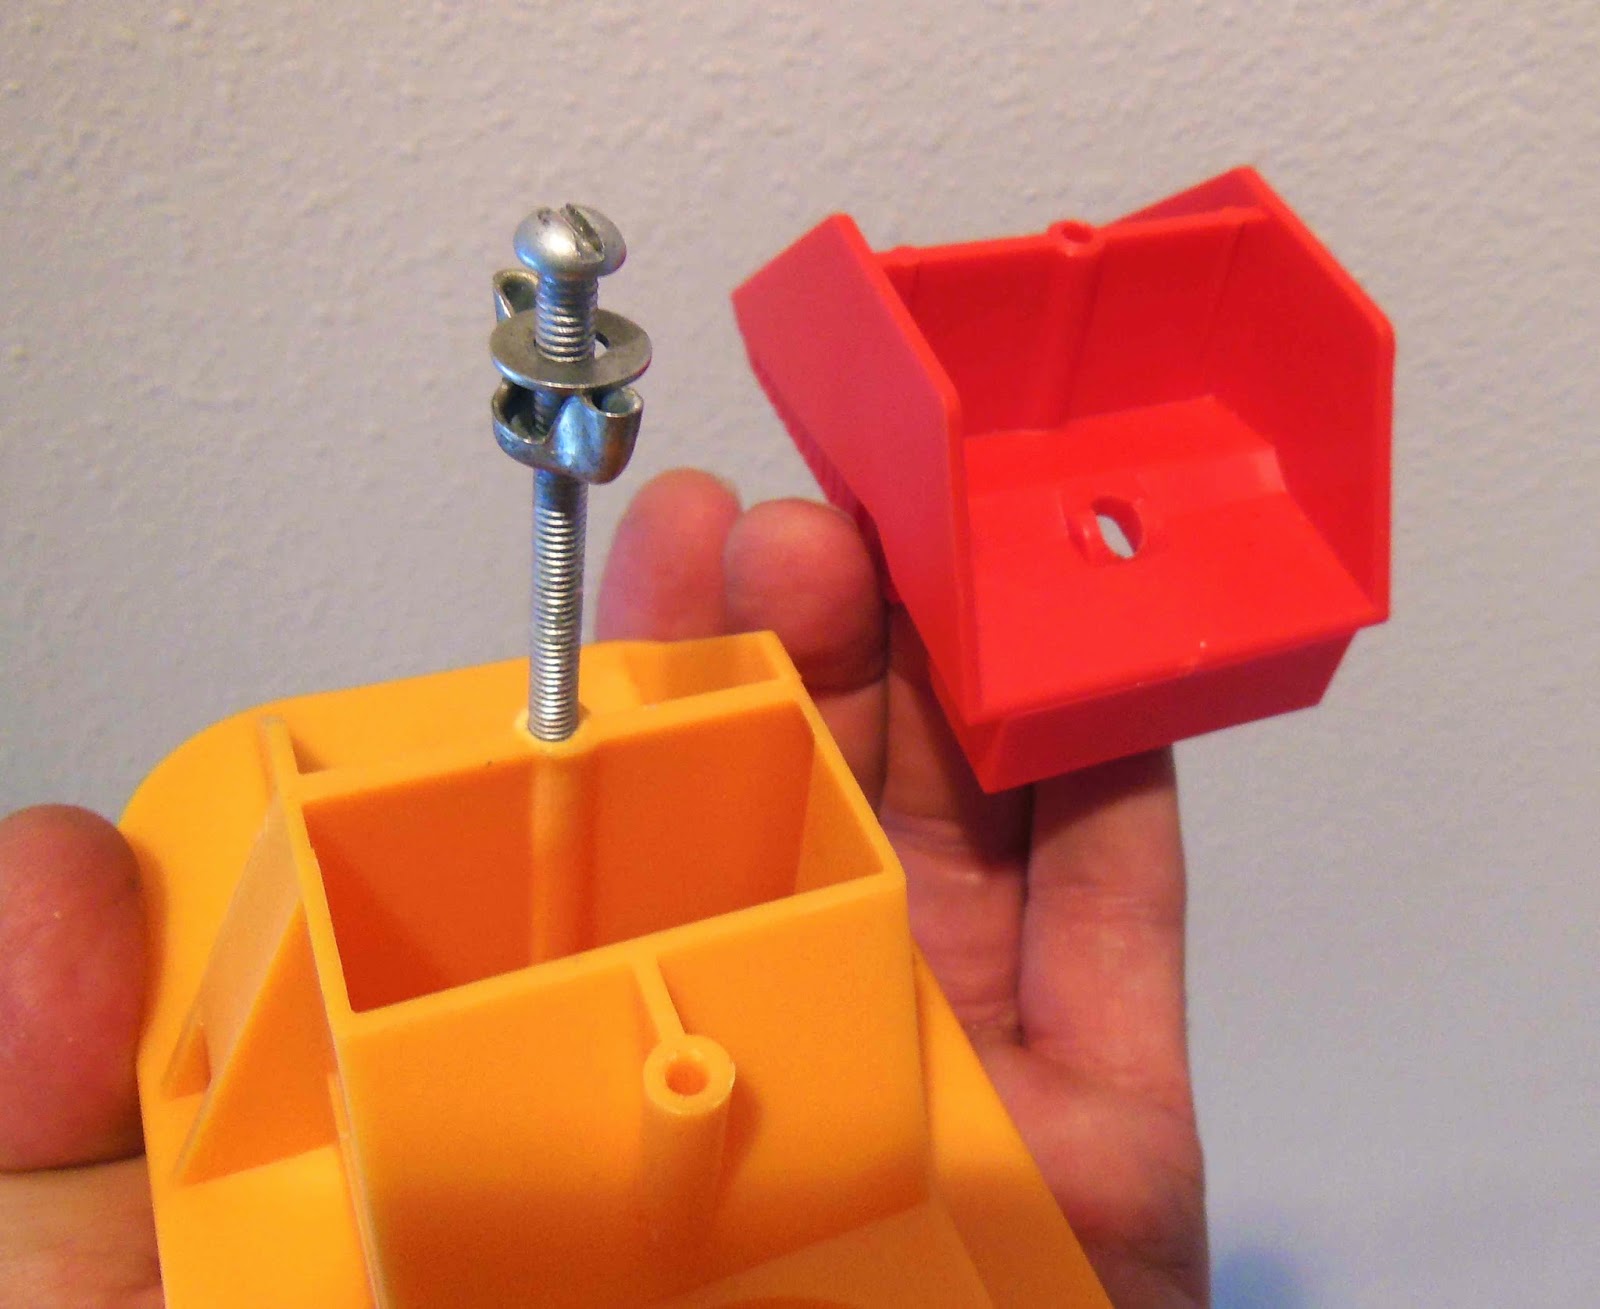
You are told to screw the bolt 1/2" into the yellow top. It screws into what would normally be the launch rod hole.
(I know, the washer should be under the wing nut.)

The bolt is longer than what is illustrated in the instructions.
Even screwing it in to 1/2" depth, the old yellow plastic was starting to swell, I was afraid it might split.
The bolt was removed and the hole diameter widened with a drill bit.

The bolt has to be recessed enough for the blast deflector to fit flat against the top of the red tilter.

Even following the directions I couldn't get the top to tilt much.
The instructions say to:
"Simply loosen the wing nut, squeeze the tilter near it's ridges and position the tilter at the desired angle. Re-tighten the wing nut.

The sides and ridges are too wide to squeeze inside the yellow top.
Oh well, the blast deflector looks cool.

Sunday, October 10, 2010

Estes Customizer Mini Engine Set


My youngest daughter gave me this set for my last birthday.

The box is a little deceiving. It says in big letters "12 ROCKET." The smaller print tells the buyer "Potential Design Combinations."
I didn't think I needed another launcher at the time, but I did like how the pad was designed - Simple dowel legs and a low center of gravity.


The enclosed two piece launch rod was 1/8" X 24". I switched it out for a longer 36" rod. This is the same Lunar Launcher that came with the very inexpensive $10.00 Moon Mutt starter set and the old Screaming Eagle set in the 1989

Right now it's my schoolyard rig, it takes up much less space than my 20 year old yellow Port-A-Pad did.

The 1989 Estes Catalog recommends launching rockets under 16" long on this dowel legged launcher.

I used my old controller until it was beyond repair. My new controller came with this set. It's the new design where you PRESS down the safety key to make the continuity light come on. It takes a little getting used to, the safety "key" is pressed in and held while the launch button is pressed.

Pictured is the one, single rocket made from the set. It looks a little like a Nike Tomahawk with skulls on the fins. There was plenty more stick-on decals, but I didn't think the rocket warranted the flame, checkerboard or dragon decor.

The body tubes are too thin, but the plastic parts look to be sturdy enough. The adapters and nose cone shoulders would need a wrap of tape for a better fit.