Showing posts with label Masking. Show all posts

Monday, August 25, 2025

Centuri Skylab Build, #KB-4, Part 21, Black Trim Paint


Suggested in the instructions: 
The long launch lugs on the outside edge of the solar panel fins are painted red or black. I chose black.

The mask lines don't have to be sharp, the paint edge will be defined by the chrome overlap. 
The exhaust tube (shorter launch lug) is also painted black.
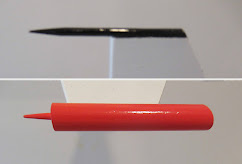
This would be a tough mask so I outlined the tube with a ultra fine point Sharpie.
The rest of the lug was "painted" with a wider point Sharpie. You can't always get a good coverage with the Sharpie. Don't try to cover larger areas with a felt tip pen.

Tuesday, July 22, 2025

Estes Mini Bomarc Clone, Kit #TK-5, Part 15, Silver Paint On The Nacelles


The front end of the nacelles are masked for silver paint
The silver starts at the rear end of the "P" support pieces.

After spraying and pulling the tape,
I got a clean color separation.


There's not much of a gluing area on the root edge of the supports.

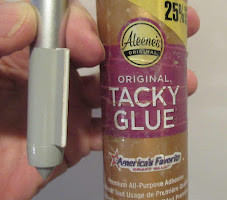
I'm using the thicker Aleene's Tacky Glue to attach the nacelles. The body was masked for a open strip for glue on the body tube.


After that first glue line dried, a fillet of the Aleene's glue was applied.

The Aleene's glue will dry clear and with a semi-gloss. Elmer's white glue dries with a flat finish. Don't use yellow wood glue on a visible glue fillet like this.

Tuesday, June 24, 2025

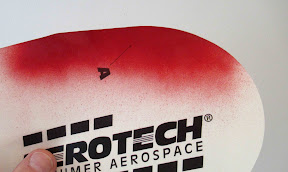
Aerotech Mega Initiator #89541, Part 16, Pulling The Mask - Sucess!


The nose cone was slipped in and the upper end was sprayed with Rusto 2X Apple red. 

I would normally prefer using Ace Hardware Premium Enamel, but their "Banner Red" is darker and I wanted to get close to the red color on the model stickers. In the end, if the top roll sticker and bottom fin red colors are a close match. You can't tell a difference with the visual distance between them.


After about 30 minutes the paint dried quick enough to pull the masks.

The color mask lines were clean and sharp.


I had a small bit of red that got under the tape.

This was easily scraped off the clear area using a knife blade.

Monday, June 23, 2025

Aerotech Mega Initiator #89541, Part 15, Matching The Nose Cone Color

The question has come up on the forums: 
"Which Red spray paint color will match the red sticker on the Initiator? 

Some considerations:
1. The nose cone is molded in black plastic so it would require a good white undercoat. Otherwise, you'll get a darker red on the sprayed nose cone.
2. The Aerotech printed stickers are translucent. The white paint under the sticker makes the red in the sticker almost a brighter red "candy" color. 

I've been to a few hardware stores with my kit stickers in hand, trying to match with any red spray paint available. Sure, they look close side by side, but on the model it's a different story.

Model building is a little like a puzzle. Sometimes I ponder assembly questions awhile until I can come up with a good solution. This one took longer than expected.
I decided to mask and spray the red on the wrap and nose cone at the same time. This will require masking the area at the top of the upper wrap.


Before spraying the model, I tested to see if the paint might bubble up on a scrap piece of leftover sticker material.

No bubbles and a good adhesion.
I marked a thin strip of Scotch tape with a Sharpie. After marking the tape, wipe off any excess ink with a paper towel.

I had to use a thin strip so I could flex the tape around the curve without raised folds.

On the right is the full border mask. The rest of the area underneath must be masked off.
Widen the mask below with a single strip of brown masking tape. Note there are many fold bulges. The upper edge covers about half of the Scotch tape mask.

On the right side is the full mask. The nose cone will be slid in and both will be shot with the same red color.

I know - Why not just use Tamiya tape? 
I'm cheap and I get just as good a result using inexpensive Scotch tape.

Thursday, June 5, 2025

BMS School Rocket, Build, Part 8, Paint & Mask

After a few white undercoats - The body was painted and overall gloss yellow.

A paper towel was rolled and slid into the front of the body tube to keep the paint out.

The four fins will be painted black.

I used my standard Scotch tape masks, the edges marked with an off brand permanent marker. I'd recommend using an actual wide point Sharpie to mark the tape, some of the off brand marker ink rubbed off on the fins and body.


Here's the rounded leading edge mask made up of a few small pieces of Scotch tape mask.


After the tape was pulled,

There was traces of black marker ink on the yellow body paint. This was cleaned off using a Magic Sponge. 
The Magic Sponge can dull the gloss, some polishing compound brought back the shine.

Friday, May 23, 2025

Quest Intruder Kit Bash, Part 14, Finished Masks & Decals


Here's the back end mask. The white paper covers allowed me to mask the red engines while the black toothpick spikes were sprayed.

After the black spikes dried, two more paper covers went over the black spikes and the red motors were sprayed. 


After the masks were removed -

The red mask turned out great, nice and sharp.
The black mask needed some touch up with a brush. The glue fillet was smooth but recessed not allowing a good seal.


Look close. you might see some pencil lines on the trailing lines of the wind flaps.
These were drawn purposely long and were to be trimmed to size.


Canopy decals are usually fitted over curved nose cones.
Experience has taught me to cut them as shown in the picture, This allows the decal to flex.

Note there aren't any sharp cuts on the inside arc. Don't give your decals a chance to tear.

Thursday, May 22, 2025

Quest Intruder Kit Bash, Part 13, Masking The Spikes

I don't mask like others.
I learned about Scotch tape masks from an Apogee Peak Of Flight Newsletter.

For years I masked using brown paper tape and even the more expensive Tamiya tape. Results were iffy at best.
In time I got better at smooth fillets giving cleaner masks.

After the first white undercoats look close at your fillets. Uneven fillets can be sanded using very fine 400 grit sandpaper. Masks come out clean and sharp when the glue fillets are smooth.

Most 3 fin, nose cone masks have a different, second color fin.

I lay clear Scotch tape on a plexiglass cutting board.
Down the center of the tape strip I mark a straight line. Wipe a paper towel down the line removing any excess ink.

This is cut through the ink line using a knife and straightedge. 
This gives you two half strips. The black ink lets you see the edge of the tape down the mask line. 


Here's the back side of the engine mask. The ends roll over and set down the side at an angle.


Here's another view with a mask on both sides.


The rest of the rocket body is covered with a thin plastic grocery bag.
A hole was cut in the bag and the fin tip slid through.
The bag was slid down far enough for brown masking tape to join the bag and Scotch tape. The brown masking tape covers the gap.

Sunday, May 4, 2025

New Way Letter - Go Build, Part 12, Fin Masking


According to the face card picture,
the fins will be white, the lower body tube black.

This was a fairly complicated mask, each fin was different.

First the marked Scotch tape lined the root edges.


Brown masking tape covered the rest of the fins.

Before spraying, reburnish the Scotch tape masking strip edges with a Q-tip.


If your root glue fillets were smooth the Scotch tape masks can give a very clean color separation.

I had a few small over sprays. Those were cleaned off with a damp[ magic sponge.

Saturday, May 3, 2025

New Way Letter - Go Build, Part 11, Tube End Masking


I like to keep paint out of the tube ends. Paint can slow a smooth slide of an engine into the engine mount and a nose cone in the top of the body tube.

I rollup a piece of paper towel.


A painting wand is slid into the engine mount.
The paper towel is pushed into the recess below the centering ring.

Cut off the paper towel overlap and press in the end.


I use tweezers to get the paper towel into all the open areas.


On the open upper end with the nose cone removed - 
Some masking tape is rolled around the end of the tube.


Before pressing the tape in the tube,
Press the sticky side of the tape on your pant leg and pull off. This leaves some lint on the tape making it less sticky.

Sunday, February 2, 2025

Estes Black Star Voyager Build, Part 30, Black Paint


Here's the vanes sections, sprayed with the black metallic paint.


Masking the vanes was a pain. 
It reminds me of a beehive - too many small pieces of tape!


The main body and fins were sprayed with gloss black.

I peeked under the tape to see if there was much difference between the metallic black and gloss black.
In all honesty, it wasn't enough of a contrast to justify all the extra masking! 
It was worth a try though -

Sunday, January 26, 2025

Estes Black Star Voyager Build, Part 25, Painting The Vanes

It is difficult to get smooth fillets inside the tight corners of the vanes. I did sand and reduce the glue boogers and some still were visible when some gloss black was shot. 
I thought about painting the vane areas with flat black, flat colors are a great way to camouflage imperfect areas. Gloss finishes show everything! 
Another idea - why not paint the vane areas with a metallic paint? The model is an overall black, some metallic paint could cover things up and give it contrast.
   
On the left is the before - 
There is some white showing through where I sanded some glue and rough areas. The tubes are masked off.

On the right - 
The same area after spraying with the metallic black. A picture does not show the metallic effect. It shows up best in sunlight.


The paint I used for the vanes,
Rustoleum Black Night Metallic, #7250.

I don't normally like Rusto spray paints, but their metallics are very good.
Be careful though, these are thinner and could run. Spray in light coats. 


Here's the upper basswood vanes, sprayed with a non metallic Ace Gloss Black.
It look like there is white streaks, but that is light reflections.

I've still got some rough areas that need sanding before final paint coats.

Sunday, December 22, 2024

Estes Constellation Build Part 16, Single Black Fin Mask

I wanted the model to match the old catalog pictures. The Semroc face card shows all three fins in white. One fin should be black. For the red and black "1" decal to show up on the black, I'll add a white edge to the decal in the next post. This is not not easy to do, plan your finish after reading the next post.


I used marked Scotch tape for the mask. It takes a lot of straight pieces to round the airfoiled leading edge shape.


The rest of the model is covered with cheap masking tape and grocery bags.


TIP:
 Another use for the Q-tips-
They make a good cushioned burnisher for the taped mask lines.
No scratching, just a well set tape edge.

Saturday, December 21, 2024

Estes Constellation Build Part 15, Masking The Clear Payload Tube

The face card shows the upper and lower ends of the clear payload tube painted black.
The black paint will cover up the balsa shoulders on the nose cone and nose block.
On the left is the line mask using the marker drawn Scotch tape.

The center was covered with masking tape.
It's hard to see the exposed clear tube ends, you can see the reflected light on the upper right.
Small pieces of masking tape are in the top and bottom, sticky side out.
Two rolled up pieces of paper (yes, those are Sudoku puzzles) were stuck in ends.


After the tape was pulled, here's what I was shooting for.


The black paint just covers the exposed balsa shoulders.
The clear payload tube plastic accepts the spray paint very well.


Easy red mask -

Tape the shoulder of the nose cone and paint it gloss red.
Instant, sharp color separation.

Thursday, November 21, 2024

Enerjet by Aerotech Strong Arm Build, Part 17, Adapting A Painting Wand


I use painting wands to hold my rockets horizontally when spray painting.
The wand is a 1/2" dowel shoved into a used 18mm engine casing. 

This is too small a diameter to fit this larger rocket engine mount.
I wrapped some corrugated cardboard around the casing and closed it up with tape. To fit the 29mm diameter mount, the cardboard is just over a full wrap around the casing. This wider diameter gives a good friction fit. 

With the dowel wand slid into the mount,
Some masking tape is placed sticky side out inside the main body tube.

A rolled up paper towel is press into the area around the mount and up against the inside wall of the main tube.


Any open areas are covered with additional pieces of masking tape.

Now the rocket can be spray painted without getting any paint inside the low end.

Sunday, October 27, 2024

Enerjet by Aerotech, Arreauxbee-Hi, Part 17, Upper Body Silver Mask


On the left is the black marked Scotch tape right above the top of the runways.

Masking tape and paper followed, covering the areas that will be painted silver. 


Here's the full mask on the upper tube after the orange was sprayed.


The tape was pulled.
The upper end, above the top of the runways, is sprayed silver. This required another pieced mask of the orange. It took a few pieces of tape to cover the square tops of the runways.

There is some paper towel in the top to keep paint out of the tube.


This shows a good, clean mask line of the orange and silver.