Showing posts with label Corkscrew. Show all posts

Tuesday, March 15, 2011

Corkscrew 2 Build Finished!


I sprayed the nose cone black to give it a better color balance.

What an easy fun build.
This was a true budget model, all spare and leftover parts.


I've already got it loaded and ready for flight!


Followup:
The Corkscrew has flown four times since this build was posted. All stable flights, with a 1/2A3-2t and A3-4t engines.

It was just personal preference, but I ended up cutting off 4" from the bottom of the BT-5 body tube. This involved cutting off the lugs and ring. The old Kevlar was tied to a new engine block and the block glued in place.

I felt the model would look better a little shorter, closer to Bruce Levison's original design.

The picture at the right shows the shorter version.

In the end, I found out the .40 oz. of nose weight wasn't needed. It made the model too stable and caused it to corkscrew less. Without the nose weight it does corkscrew more during boost, you can easily see it in the spiraling smoke trail.

Thanks to Bruce Levison, a great simple design - different is good!

Monday, March 14, 2011

Corkscrew 2 Build Part 12 Launch Lugs


In Mr. Levison's instructions, he glued a launch lug farther up the main body tube.

I decided to glue on two launch lugs, one on either side of the body tube.
This will reinforce the ring / main body tube joint.


Fillets were added to the inside joints using a toothpick.

Sunday, March 13, 2011

Corkscrew 2 Build Part 11 Gluing the Rear Ring

Gluing the ring on took some patience.
I used the "double glue" method.

Glue was applied to the raw tube area of the inside ring and pressed onto place, transferring half the glue line onto the tube.

I let it dry for a minute and reapplied glue to the inside ring line.


The ring end was hung over the edge of my work table to dry.

Saturday, March 12, 2011

Corkscrew 2 Build Part 9 Black Ring Color

Contact paper will be used for most of the black on the rocket.
When applied outside the ring wall it'll strengthen the ring wall.

This is actually black sheeting used for a chalkboard writing surface. I bought some after seeing the results Jason Dembrosky got using it for black trim on his rockets.
Check out the back story HERE.
It's cheap, self adhesive and very smooth when applied.
You can find it at craft stores like Michael's.


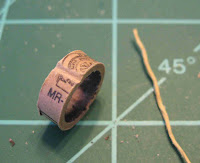
Here the Contact paper has already been applied to the outside of the large ring. The inside of the ring is getting blackened with a permanent marker.

I'm not marking the ring where it'll be glued to the main tube.

On the ring sides you can see where super glue was applied to strengthen the edges.

Friday, March 11, 2011

Corkscrew 2 Build Part 8 Glue Masking


The large ring will be glued on after the main body tube is painted.

This is a dry fit to see where the glue and fillet areas will be.

I drew pencil lines just to the sides of the two launch lugs on the inside of the large ring.
I also marked just around the lug locations on the main body tube.

Masking tape will be applied inside these marks so the glue will adhere better to the bare tube.


Here's the mask on the body tube.

The tube is already on a dowel to hold it while it is sprayed white.

Thursday, March 10, 2011

Corkscrew 2 Build Part 7 Shock Cord Attachment

I've tied the shock cord to the eyelet in the nose cone base.

Normally (on a larger diameter tube) I would cut the cord end about 1/4" to 3/8" from the knot. I'd keep it short so it wouldn't get caught between the nose cone shoulder and top of the body tube. The shock cord can get caught in the nose cone shoulder especially on a small diameter body tube like this BT-5.


If the plastic nose cone has an open base, I'll leave it longer and tuck the end into the shoulder. With this small diameter body tube it won't get in the way when the nose cone is slid in place.

Wednesday, March 9, 2011

Corkscrew 2 Build Part 6 Nose Cone Weight

EDIT: This is how I built the Corkscrew the first time around, with the nose weight. The rocket ended up a little too stable, you could see it spin on the way up, but it didn't really "cone" or spiral during boost and coasting stages. I ended up removing the clay after two flights.

To be safe, I added .40 oz. of clay inside the plastic nose cone.

We've all done this before, roll the clay into a worm and press it into the hollow nose cone.


Use the square end of a dowel and tamp it into place.

Using a dowel you can be sure it's pressed all the way forward.


TIP: When gluing the plug end into the nose cone, apply glue to the inside wall of the nose cone, not on the shoulder plug.
This keeps the glue inside the nose cone.

If glue were applied to the shoulder plug edges, it could end up on the outside when the plug is pressed in place. This is simply a cleaner way to do it and excess dried glue won't interfere with the fit of the nose cone.

Tuesday, March 8, 2011

Corkscrew Build Part 5 Kevlar and Elastic Shock Cord Tying

Tying the elastic end of the shock cord below the top of the tube will prevent zippers.

For any "new-be":
A Zipper is when the Kevlar cuts a jagged line down through the top of the tube. This usually happens when the rocket is traveling too fast at ejection. The Kevlar can snap back cutting a jagged line right through a few inches of the upper tube.

If the Kevlar is beneath the top of the tube you can eliminate any chance of a zipper. The elastic shock cord won't cut through the tube.

Here's how to tie the Kevlar to the elastic BELOW the top:

With the Kevlar fed through the front of the tube, mark it just below the top lip of the tube.

You are going to tie on the elastic below that mark you just made.

Feed the Kevlar back through the back end. Long tweezers or a notched dowel can come in handy here.

Tie the elastic to the Kevlar while it is extended out the back, engine end of the rocket. You won't be able to tie the knot inside the rocket from the top. You'll have to do this from the back end.

You can see the mark I made on the Kevlar on the right side of the picture. The right side of the Kevlar is the loose end side. The rocket body is to the left.

I started the knot away from the mark to insure the knot will be inside the body.


This time a square knot was tied to join the two cords.

Apply a small drop of glue and trim off the excess ends.


Feed the elastic back through to the front end of the tube and you are good to go!

Both the Kevlar and knot are below the top of the tube end.

Corkscrew Build Part 4 Engine Block Placement

Push the engine block in place using the marked engine casing. Press in up to the marked pencil line.
Remove the casing.

The reason I went into such detail is because I disagree with most instruction sheets. They'll have you spread glue 1" from the end of the tube and (hopefully) push the engine block into the correct position.

If you put the glue in too far below the final position of the engine block, you run a bigger chance of the block being stuck in the wrong position.

Take a few extra moments getting everything ready beforehand. Too many rockets have been ruined by a mis-positioned engine block.

Monday, March 7, 2011

Corkscrew 2 Build Part 3 Engine Block Placement

There's a little more preparation before putting glue into the tube.
Feed the tied Kevlar line through the top and out the back of an empty engine casing.


Lay a line of white glue around the top sides of the rounded dowel.

Use enough glue to lay a bead inside the tube, but not enough to drip off the dowel.


Set the glued end inside the tube up to the pencil depth line you marked earlier. Roll the end of the dowel in a circle, laying the bead of glue at the top of the dowel depth.


Try not to get glue on the lower inside walls of the tube, but higher up, where the engine block will sit.

Corkscrew 2 Build Part 2 Engine Block Prep


I had some left over Kevlar, but it was way too thick and strong for a rocket this size.

Out of the three strand Kevlar, I unraveled and used a single strand.


This is another budget build, I used a expended engine casing for an engine block. 1/4" was cut off using a razor saw and a mitre box.

The notch for the Kevlar was made with a diamond file.


Before putting any glue into the body tube, you should mark and have everything ready.

I wanted the engine to stick out of the back of the BT-5 body tube by 1/4".

Setting a used engine next to the body let me see where the engine block would end up in the tube.

I set a rounded dowel next to the tube and marked the dowel where it intersected the end of the body tube.

This dowel will be used to apply a line of glue into the body tube where the engine block will sit.

Sunday, March 6, 2011

Corkscrew 2 Build Part 1 Parts

Mr. Levison's Cork Screw was designed for 18mm engines, built around a BT-20 mainframe with a 3" ring fin on the bottom.

I wanted to fly this one at the local schoolyard soccer field so I'm downsizing it for 13mm engines with a BT-5 main tube and 2 1/2" ring fin.

After building it too LONG with the clay weight in the nose cone, I found the Corkscrew to be overstable! You could see it spin on the way up, but didn't "cone" or spiral as much as I wanted to see.
The build pictures will show the first version, longer with the nose weight. The revised sizes and changes are shown below in italic type.

Parts:
PNC-5 Estes plastic Nose Cone, Elliptical 2 1/8" long
Or, Semroc BNC-5AW is very close to the shape shown here
Or, Use whatever BNC-5 style cone you have handy
I used a plastic cone and in the first build I added nose weight to be sure of stability. Nose weight was removed after I found the rocket to be too stable - not enough "coning"
.40 oz. Clay Nose Weight
(it's in the picture but not used in the revised model)
BT-5 Mainframe 12" long
(The first version body tube was 16" long, 12" is what I ended up using)
BT-70 Ring Fin 1" long
2 Launch Lugs 1/8" X 2" long
(The original had two lugs that were 1/8" x 1 1/4" long, I now feel longer lugs are needed)
TB-5 Engine Block 3/16" long
18" Kevlar
24" Elastic Shock Cord
Crepe Paper Streamer 1 3/4" wide x 18" long

Saturday, March 5, 2011

Corkscrew 2 Build Backstory


Here's a fun, easy to build design by Bruce Levison.

The CORK SCREW won him first place in the FlisKits Design of the Month Contest in October, 2003.

Here's how Bruce described his entry:

October entry #3, the Cork Screw by Bruce Levison of Ohio.

Attached is my submission for the FlisKit's Design of the Month called the Cork Screw 2. It is a simple asymmetric ring finned design that is roll pitch coupled and flies stable! The model's unique coning flight path suggests a "cork screw "shape hence the name my son Ben gave it. The rocket has flown many times over the years, even at national events such as NARAM where Mark Bundick the president of the NAR and the acting sport range LCO indicated that the model lives up to its name. Sorry, I don't have any flight pictures.

Please link the attached Photo and RockSim version 7 file to the design article.

Links to the instructions and RockSim file can be found on this page HERE

Thanks,
Bruce S. Levison, NAR #69055

A unique "coning" flight path? I'm in!