Monday, September 30, 2013

Semroc Cherokee D Build, Part 7, Wet Sanding Tips

BUILD TIME - First White Coat Shot = 5  minutes - dry time not added.
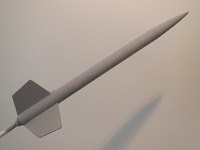
The Cherokee D got an first shot of gloss white.
I can't sand until the white coat dries, at least 24 hours in the Florida humidity.
Now that the color coat has been added wet sanding can follow.

When sanding flat surfaces, stay away from the edges.
It's too easy to sand the paint off a sharp corner.
TIP: Notice how the sandpaper is bent away from the sharp edge of the fin. The sandpaper can't roll over the sharp edge if held like this.
If you sand off the paint and go down through the primer (or balsa!) you might have to spray primer again.
To be safe, stay away from the edge by about 1/16". Those edges will take care of themselves and should be smooth in the end.

Here's how the back end looked after "damp sanding" with 400 grit sandpaper.
Look close at the fin on the upper left. I almost sanded through to the balsa! Sand, stop and check - sand, stop and check!

TIP: Pay close attention to the top of the leading edge where it meets the body tube. It's hard to get a Titebond M&TG fillet to roll smoothly around the top.
Wrap some 400 grit around a Q-tip for a cushioned (small) sanding "finger".
One great thing about the Titebond M&TG is it's sandable!
Well, it doesn't sand like a piece of wood, but it's easier to sand than a white glue fillet.

BUILD TIME - Wet Sand White = 25  minutes

TIP: After you spray the first color coat, hold the model up to a bright light and look close at all the surfaces.
Wet sand (actually more like damp sanding) with 400 grit. Sand over any rough areas.
After the next color coat is applied, all those rough areas should disappear. You should have a good gloss surface when the next coats are sprayed.

TOTAL BUILD TIME so far = 4 hours, 5 minutes

1974 Centuri Powr Control Launch Controller


This was my favorite launch controller in the mid 1970s.
The Centuri Powr-Control.


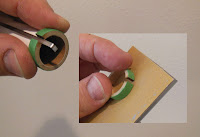
It's standard layout for a controller - safety key, green covered continuity light and red launch button


The 15' of line was wrapped around the controller body.
Easy to store in your launch box and no tangled wires.

Five feet of heavier electrical line ended with the Battery clips.
You could use a lantern battery for single engine launches or car battery for clusters.

This design was far ahead of the older Estes Letra-Line and Launch Control System.

Sunday, September 29, 2013

Semroc Cherokee D Build, Part 6, Primer Coat, Sand And White Color Coat

A few small standard steps won't been covered with pictures this time.
This build was going to concentrate on build time and tips.

BUILD TIME - CA Tube Ends and 24mm Engine Mount Gluing = 5  minutes
BUILD TIME - Mark Tube for Fins, Glue Fins = 15 minutes
BUILD TIME - 2 applications of Titebond M&TG Fin Fillets (not including drying time between fillets) = 12 minutes
BUILD TIME - Launch Lug Mark and Glue = 3 minutes
TOTAL BUILD TIME so far = 3 hour, 5 minutes


TIP: You really don't need four coats of filler/primer and sanding between coats.
I spray one thicker coat and sand with 320 then 400 grit until the tube and surfaces look like the picture at the right. Remove most of the filler with 320 grit. If you sand down to the white tube while using the 320 grit you've probably taken too much primer off. Follow with the 400 grit until you get that "patchy" look.

BUILD TIME - Primer Spray (not including drying time) = 5  minutes
BUILD TIME - Sand Primer, 320 then 400 grit = 20  minutes
BUILD TIME - First White Coat = 5  minutes

I can't sand until the white coat dries, at least 24 hours in the Florida humidity.

TIP: After you spray the first white undercoat, hold the model up to a bright light and look close at all the surfaces.
Sand over any rough spots. Wet sand only after the first color coat. Don't wet sand on bare tube or bare wood. Bare surfaces will soak up any water used in wet sanding and swell up! Only wet sand over sealed surfaces.

Wet sand (actually more like damp sanding) after color coats with 400 grit.
After the next color coat is applied, all those rough areas should disappear. You should have a good gloss surface overall.

As always - these are the methods that work for me. 
Your methods (and finished results) probably work best for you!

TOTAL BUILD TIME so far = 3 hours, 35 minutes

Primer Colors?

On the forums, there is always questions about primers.

From an internet search:

"Primer allows the final color coats to adhere better. Primer is designed to adhere to surfaces and to form a binding layer that is better prepared to receive the paint."


I've had the best results using Duplicolor Filler/Primer shown at the right. 
It's available at auto supply stores.
This Filler/Primer does two things, fills imperfections (after sanding) and primes the surface before a white undercoat.

From the Duplicolor website:
Filler PrimerDupli-Color Filler Primer features a hi-build automotive formulation capable of filling deep scratches and minor surface imperfections. A fast-drying, sandable finish allows for easy feather edging while providing a smooth and rust resistant surface that promotes top coat uniformity.
  • Improves top coat adhesion
  • High build formula
  • Easy sanding properties
  • Dry to touch in 30 minutes
  • Handle in 1 hour
This Filler Primer does a great job of "follow-up" filling of any remaining body tube seams and balsa grain.
After fine sanding the gray primer down, a white undercoat always precedes any color coats.

So, one way to go - After filling the balsa and body tube seams - 
Use GRAY primer/filler first then follow with a white undercoat (or white primer) to make the final color coats brighter. 

Most primers are used for car finishes, where a large area gets a single overall color.
BLACK primers can be used if the overall rocket color is black. If you use a black primer, fewer black final coats will be needed. 
RED primers are heavy fillers, made to fill scratches on car finishes, not normally for hobby use. Many builders use red Bondo Spot Filler on body tube seams with good results.
GREEN primers are used on bare metal to prevent rust.

Saturday, September 28, 2013

Semroc Cherokee D Build, Part 5 Nose Cone Shape and Balsa Fill


The BNC-55AC nose cone is bit different. It's the same nose cone used in the Estes Arcas kit.
You can check it out on the Semroc website or in the Jim Z instructions.

Instead of being a standard ogive shape - 
Right above the shoulder is a slight dip in the diameter. Be careful not to sand this down or sand it off. That slight concave dip is supposed to be there.
The nose cone tip is rounded off.
It's really an elegant, subtle change.


Here's the strangest combination picture I've ever posted.
(One hand has to hold the camera!)
You should lightly sand down the grinding marks before filling the nose cone grain.

TIP:
The left thumb acts as a bumper to prevent you from sanding over and removing some of the raised lip.
My left hand thumb is held right up to the raised shoulder lip.
The right thumb does the up and down sanding and stops at the left thumb.

If you do this correctly, you sand down until the side of your right thumb hits the left thumb stopping the sandpaper before it can reduce the shoulder lip.


After you've sanded the sides of the nose cone, pull it slightly out of the body tube.

TIP:
To clean up the joint a bit more, fold a piece of 400 grit sandpaper in half.
Run the folded sandpaper gently along the down the open joint.
Go lightly, you are just knocking off any uneven edges on the nose cone shoulder.


Here's how a fin should look after the CWF filler dries.
On the right side, You can still see the brush marks.

TIP:
First sand the flat sides of the fins first with 220 or 320 grit, knocking off the high brush mark lines. After that, sand smooth with 400 grit.

BUILD TIME (Nose Cone Sand, Balsa and Tube Seam Fill and Sand, Sand Balsa and Tubes = 1hour, 15  minutes
TOTAL BUILD TIME so far = 2 hours, 30 minutes

Cancun Update 7 - Warning! No rocketry content here -

We have a driver who picks us up at the condo and takes us to the resorts to do a show.
Alex (We call him "Chauffer Loco") drives like a maniac, dodging in and out of traffic and is constantly over the speed limit.

Last night he was pulled over by the police.
It was Alex, Dante (a magician) and myself.
I'd heard of the Mexican Police being corrupt, tonight I saw it first hand.

The Policeman talked to Alex in Spanish, I picked up what little I could understand.
The policeman was threatening to write a $150.00 speeding ticket or he would let it slide if we slipped him 300 pesos ($25.00)
Alex was panicked. He only had a single 10 peso coin. Dante and I both had a 20 peso note.
We gave Alex the 40 pesos. With his 10 pesos we only had 50 pesos for the officer.

The officer asked Alex to get out of the car. They walked to the back of the car and talked.
After a few minutos, Alex came back and we drove off.

Alex told us what the officer said to him privately:
"Is this a joke? You only have 50 pesos between the three of you?
Come on, those Gringos have money. All Americans have money!"
(Well, not banjo playing Gringos, anyway)

Alex told him we didn't have any more money. I don't carry any more cash than I think I might need and was going to the ATM tomorrow anyway. He let us go for 50 pesos.


On the plus side, I went to Chichen Itza yesterday.
I did look at the open grassy area and thought:
"This would be a good D engine field."

Friday, September 27, 2013

Semroc Cherokee D Build Part 4, 18mm Engine Mount


The split 2050 ring is flush with the rear of the 18mm motor mount tube.
TIP:
The cut ends of centering rings are rarely square, usually "wedge" cut at an angle.
For a better look and flush fit, sand the low (exposed) side flat before gluing on the engine mount tube.
The top centering ring goes just over the top of the engine hook.
TIP:
Again, notch the ring for a better fit.
On the left you can see the notch, I filled it in with pencil.
It's just an angled notch, it isn't cut all the way across. Just the end is notched where it lays over the hook bend.

The open ends of the lower open ring are hard to hold down as the glue dries.
TIP:
Set the ring inside the end of the 24mm mount. This will compress the split ring onto the 18mm engine mount tube. (Just be sure there is no glue on the outside of the green ring before sliding it into the larger mount.)

BUILD TIME: 18mm Engine Mount = 20 minutes
TOTAL BUILD TIME so far = 60 minutes

No post about the parachute assembly - it's pretty standard and has been covered before.
BUILD TIME: Parachute Assembly = 15 minutes
TOTAL BUILD TIME so far = 1 hour, 15 minutes

Vern Estes Presentation - from NSL 2013

Here's a YORF thread I missed the first time around from the 2013 National Sport Launch.

Vern Estes gave a talk about his fourth chilld - Mabel, the rocket engine making machine.
You'll find the transcribed PDF HERE
It's recommended reading, lots of pictures and many things I hadn't heard of before.

This picture is from the YORF thread, Photo by Bernard Cauley

Thursday, September 26, 2013

Semroc Cherokee D Build Part 3, 24mm Engine Mount

Look at the left side of the picture. You can see the engine hook compressing the BT-50 motor mount tube.
The instructions don't mention notching the centering ring for a better fit of the engine hook.
TIP:
Anytime a part deforms a tube like this, you should notch the ring. It won't take much to relieve the pressure.

The inset picture on the right shows notched ring and the rounder tube.
Sometimes engine fit can be tight. Imagine how much tighter the engine would be if the motor mount tube was compressed and out of round.

Here's the finished 24mm engine mount.

TIP:
Use black electrical tape to hold down the engine hook.
I recently opened up an older model where a masking tape wrap was in  place. The tape was dried out and flaked off the engine tube!

TIP:
Wait to do your tape wrap until after the centering rings are in place.
With the rings glued in place you can set the tape closer to the actual center.

BUILD TIME: 24mm Engine Mount = 20 minutes
TOTAL BUILD TIME so far = 50 minutes

Decals - Tips

DECALS! 
Whether traditional silk screened (provided in some kits), Ink Jet or Laser printed (provided in some kits) and home printed - All have different soak times.
Play it safe and scan the kit sheet decals just in case you have to print up some extras.

Don't start with the largest decal on the sheet Not that huge wrap-around decal!
Start small to get used to the soak time and how each kit decal transfers unto the model.

Look over the decal position on the model. Should the decal be cut close to the printed image? Will the clear coat overhang a seam or fin edge?
Plan ahead and cut out accordingly.

TIP: Make that first decal a "test" decal. Cut out the kit number or vendor logo decal, one you probably wouldn't put on the model anyway. This way, if it is ruined you still have all the important decals left over.

Soak only one decal at a time!
Start soaking and time how long the decal takes to slide off the backing paper.
Set the first decal in the water and count to 15.
Take out the decal and see if it easily slides off the backing paper.
This is just to play it safe, I've had decals slide off the backing paper after sitting in the soak water after only 15 seconds!
It should still be stuck on the backing paper. Soak a bit more.
Set the decal on a paper towel until needed. This doesn't mean to let the decal sit for an hour. Apply it in the next few minutes.

There has been forum arguments about using a drop of dishwasher detergent in the soak water.
Some say the drop of soap breaks up any beading of the water or makes the decal slide for easier positioning.
Others say the drop of soap removes adhesive from the back of the decal.
I've used a very small drop of soap in the water for years with no real problems.
TIP: For good decal adhesion - Your paint surface should be glossy and smooth.

The picture above shows a decal floating on the surface. You can float a small decal on the surface for soaking.
Try to keep the decal off the bottom of your water glass or dish. It's too hard to retrieve a small decal from the bottom of the glass. Tweezers will help pick up a sinker, though.
I know, I could use less water for the small decals. I was using more water for the larger decal soaking. The larger decals tend to roll up, I needed enough water so the entire (rolled) decal had coverage.

TIP: It's much easier to hold and soak smaller decals held with tweezers.
Soak for 15 seconds (1/2 average soak time) and lift out the decal.
Change the position of the tweezers on the decal and soak again. Moving the tweezers to the other side of the decal allows the entire decal surface to soak.

Wednesday, September 25, 2013

Semroc Cherokee D Build Part 2, Fin Edge Rounding


TIP: 
Don't sand off the brown laser burnt edges yet.
Use the dark burn as a gauge to tell if your rounded edges are even when sanding.

The top fin is before, the bottom fin shows the rounded edge.
This part of the sanding was done with 220 grit on a block.
Here's the fin after rounding the leading and trailing edges.
The remaining burnt brown balsa is sanded off after the initial rounding.
Use a piece of 400 grit over a finger to remove the remaining burnt edge and finalize the rounded sides.

TIP:
Check that your rounded edges are really round by looking down the fin from the root and outside edges.

BUILD TIME: Shaping fins = 20 minutes
TOTAL BUILD TIME so far = 30 minutes

The Big Fix, MMX Jayhawk Kevlar Replacement


The last time I flew the ASP MMX Jayhawk the Kevlar line broke.
This will be an interesting fix.
I have access to the low end, the upper attachment is still good.
This would be better accomplished with an awl but I couldn't find it.
I used my small rat tail file to open up a small hole by lifting up the side of the engine block.
Be careful not to punch through the side of the rocket body. Keep the awl or file parallel to the body tube sides when lifting and "drilling" the hole.
A knot was tied in the new Kevlar.
The line was fed through the rear and through the hole in the lifted engine block side.
Apply some glue under the lifted engine block and press the block back down. Pull the Kevlar through the front until the knot rests against the closed engine block.
The two lines were tied together with a simple overhand knot.
A small streamer was taped to the Kevlar line.
Ready to fly again!

Tuesday, September 24, 2013

Semroc Cherokee D Build Part 1, Parts

This was a favorite, I'd built the Estes original in the early 1970s.
The BT-55 tube is strong. It's a clean design with plenty of decals.
I don't think it was ever launched with a D engine though. Mainly B6 and C6 engines.

This build will be a little different.
It's standard construction - I'll be concentrating on posting build TIPS
I'll also be keeping track of how much time it takes for each step.


Here's the parts:
Great Semroc Quality
Three 1/8" thick fins
12" parachute. The original kit had an 18" chute)
It seems like Estes was always including a larger parachute than what was really needed.
Most other parts are standard


The parts of interest:
Great profile shape of the BNC-55AC nose cone
BIG decal sheet, lots of pieces crowded on a half page
The 5055 centering rings are cut from thick white stock.
On the lower right is the 20/50 engine mount for 18mm engines.
One ring is already cleanly split for the engine hook movement.

BUILD TIME: Opening bag, taking pictures = 10 minutes

Cancun Update 6 - Warning! No rocketry content here -

Just like the pyramids in Chitzen Itza, Mexico seems to crumble around me!
I tried to adjust the light in my bathroom here at the condo. It fell off the ceiling! Whoever installed it didn't use any drywall anchors. I'm not repairing it, I've already done my share of repairs.

Last night I had a heckler. I hit back with a few lines but he was too drunk to get it. He kept up so I hit him with the final word . . .
"They say that everybody has one.
I've been entertaining for thirty years and have come to the conclusion that - Every audience has one.
Congrats Sir . . .  tonight, you're it!"
The rest of the audience got the gist of the put-downs so that's all that mattered.

Only one more week to go! Disney World called with a fill in date in October. Then off to Hong Kong on October 23. Things are looking up.
I visit the real Chitzen Itza this Friday. It's been on my list for years.


Monday, September 23, 2013

Semroc SPEV Finished


Lots of memories building this one. I built an Estes SPEV in 1972.
Looking at it now it's easy to see the Thor Agena B and Little Joe parts being utilized. It's not a cheap kit, there is plenty off balsa used. There is also some Saturn V influence.
This is a good model for a B6-4 in a small field maxing out at 250'.
A C6-5 will get it up to 600' according to Semroc.

Semroc SPEV Build Part 10, Mask and Fix

Whoops! This one should have gone in much earlier! So I screwed up. 
Remember, the blog is free - it isn't perfect. 

The vertical wide black roll patterns are divided into quarters.
I used Scotch tape for the masks.

TIP: You can use your aluminum angle to check how straight your mask lines are.

The black vertical bars run halfway down the BT-60 section of the model. The large adapter also has black areas divided in fourths.

I haven't glued the model segments together yet. Sometimes it's easier to leave things apart for painting them glue it together afterwards.

I flipped the BT-60 section upside down and slid it into the adapter.
The masked quartered segments are continued down the adapter.

After painting the tube is removed, turned over and glued into the adapter.
When the tube is glued on those black segments don't line up but get 1/4 turn so they are opposite of each other.


After the tape was removed all the lines were sharp except for the corners where the tape overlapped. Some corners had a small bleed.

Use the side of your knife and push the black back onto itself.
The lower inset picture shows the correction after the small paint bleed was pushed back.

Semroc SPEV Build Part 13, Lower Body Mask and Decals


Here's the full mask on the lower section.
Again this is divided into quarters, two black and two white quarters.

The mask lines split around the extended "small fins". This required three small pieces of tape per small fin.
I tried to match the face card illustration.
Decals were started on the upper section.
The "UNITED STATES" decals are in two pieces. Plan your spacing before setting down the first half.

The rest of the decals went on without problems. All the wording should be centered between the black and white areas.

Sunday, September 22, 2013

The Big Fix, MMX Red Max to 13mm Engine Conversion

I have two BT-5 models that don't perform that well with MicroMaxx engines. They just don't get an altitude to justify using an engine.
These were carded models built a few years back. This Red Max has a body skin print wrapped around a BT-5 tube.

I thought I'd try to remove the MMX mounts to use some 13mm engines I found on sale.

The inside of the hand rolled MMT tube was scored with a hobby knife to raise an edge I could grab.

Long pliers were used to hold the raised cardstock tab.
The pliers were turned and the mount removed in a spiral.
It was easy to remove.

The model already had a 13mm engine block in place.
One side of the block was lifted with an awl.
A new Kevlar line was knotted and slipped through the hole.
There is no room for even a streamer. Nose-blow recovery should be  fine for recovery.
This one should fly better with a 1/2A3-4t engine.

Semroc SPEV Build Part 12, Nose Cone Mask

The tip of the nose cone is painted silver.
I tend to use Aluminum in place of silver. It dries faster, won't show fingerprints and looks about the same.

This tip would be hard to mask. I cut a narrow strip of Scotch tape in an arc. Look close at the picture and you can see the upward curve of the tape cut.
Again, this will take a few tries to get the spacing and end match right.
Look close and you can see a bit of the Scotch tape right above the masking tape.
The rest of the nose cone was covered in tape.

Like the rest of the kit, all the segments haven't been glued together yet.
Everything will be glued after the parts are painted.

TIP: Before assembling a kit, look ahead to how it'll be painted. You can save yourself a lot of time by avoiding unnecessary masking. When you can spray in segments sometimes your masking lines can be sharper.
This model is over two feet tall. I'll rarely tie the model together by the shock cord until after it's painted.
It's easier to handle and spray it in two parts.


Here's the model so far.
That little silver tip on the nose cone adds a lot.

Next up - Masking and spraying the BT-70 and fins.

The Big Fix, MMX Sentinel to 13mm Engine Conversion

Here's a great carded Sentinel model downsized by Bob Harrington.
You can find the free PDF HERE - scroll down to Bob's models.

I made this one for MMX engines. But again, this one didn't get any altitude with a MMX engine. It deserves more power.


Like the previous Red Max, the inside of the motor mount tube was scored with a hobby knife. This raised an edge I could grab with narrow pliers.
While tightly holding the raised tab, the pliers were turned pulling the paper layers out in a spiral.


After a few turns the entire mount came out! I must not have used much glue on this one.
The inside of the hand rolled tube was still pretty clean.

A new engine block was cut from a used 13mm casing.
Kevlar was tied on and the block slid into place.

A crepe streamer was taped to the line and the end attached to the nose cone.
It's finished and already loaded for launch with a 1/2A3-4t engine.
Yes, the engine does slide in farther -

Saturday, September 21, 2013

Semroc SPEV Build Part 11, Trim Lines

I used my favorite trim material for the thin lines at the segment joints.
This is the Contact Paper Blackboard Covering Material available at Michael's Crafts.

At the bottom of the picture is the kit instructions face card. Blow up the picture and you'll see the thin black lines.


1/16" wide strips were cut and placed using the tube edges for a guide.


The hardest line to place is at the middle of the long adapter.
It'll take a few tries to get it to line up when you get all the way around.