Showing posts with label OR Stealth. Show all posts

Friday, February 22, 2019

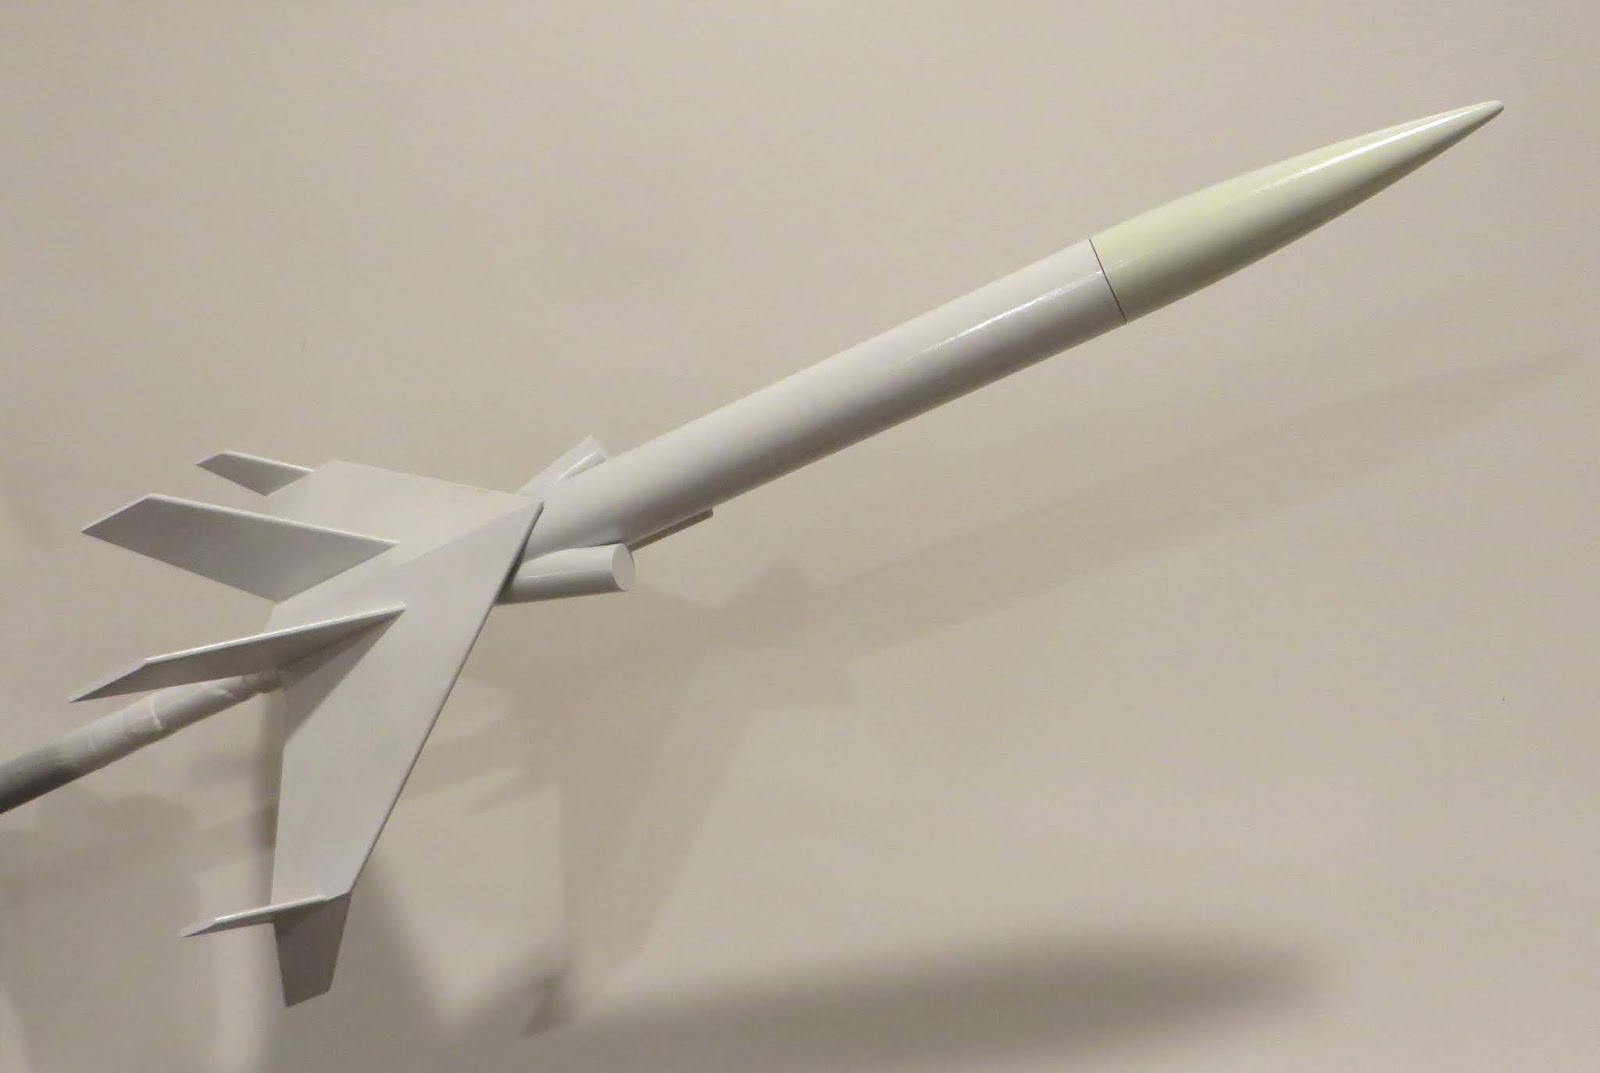
Odd'l Rockets Stealth Build, Finished


That little band of chrome around the engine tube adds a lot.

The wing was glued on 1/8" forward of the main body tube. I thought it gave the model more dimensional interest.

I think this one captures the spirit of the Estes design.
The wings might be a little large, it should be plenty stable!

I don't think I mentioned, the gray paint is Rustoleum 2X Stone Gray. This gray is a pretty good match to the catalog picture, maybe a bit darker.

Before anybody asks, I don't know if this one will become a kit or not.

Wednesday, February 20, 2019

Odd'l Rockets Stealth Build, Part 11, Decal Placement & Canopy Gluing


The darker elevon decals worked well set on the trailing edge of the wings.

The USFF decals were set at an angle like the original Estes kit.


The rear of the cockpit decal is set about 1/8" from the nose cone shoulder lip. Use a damp Q-tip to conform it to the curvature of the nose cone. Let it thoroughly dry before gluing on the clear cockpit.


The black circles are centered on the ends of the intakes.
Against the gray paint the home print black decals show as a dark black.
Use a medium CA glue to adhere the canopy. Medium CA (not thin CA) will help with any gap filling around the edges.

Squeeze a small "pool" drop of CA on some scrap cardboard. Dip a toothpick tip in the glue, remove the toothpick and let the glue dry.
The dried CA will prevent the next application of glue from soaking into the toothpick.

Squeeze out another small drop of glue. Hold the canopy down on the nose cone centered over the decal. Set the toothpick into the CA picking up a drop of glue. Run the bead of glue completely around the edge of the canopy.

Odd'l Rockets Stealth Build, Part 10, Decals and Trim

Here's the decals from the Estes kit and oldrocketplans.com.

There were also two Air Force stars and bars decals using white ink for the wings.


While the Estes kit had you paint the molded in canopy black, I decided to use the cockpit decal from the Odd'l Rockets Fighter Fleet models. The blue colors were changed to gray. The intake decals are round to fit the end of the BT-5s. The gray "boxed" elevon decals are a darker shade for a better contrast over the lighter gray overall paint. On this home print sheet the stars and bars won't have any white.

You can't use the AIR FORCE name without paying a licensing fee these days. I doubt they would ever find out but I won't take the chance. You'd think as a taxpayer you've already paid for the name rights.

Tuesday, February 19, 2019

Odd'l Rockets Stealth Build, Part 9, Canopy Fitting


Around the edge of the clear canopy there is a slight "trench". So you can better see the cut line, run a pen around the trench. I prefer to use a fine point Sharpie. 
With a new knife blade, trace around the canopy along the pen line. You don't have to cut all the way through.
TIP: The plastic will be stretched thinner at the highest or widest areas. The center area of the long sides will be thinner - Go light!

To make the edge removal easier,
Make some side cuts from the scored line to the outside of the canopy.

Bend the edges back and forth until the sides crack away from the center canopy. You might have to go back and score the line again.


Here's what the rough canopy cut will look like.

Wrap some 220 grit around the main tube and sand back and forth in a straight line.

The upper picture shows the edges coming off. You should sand until the pen lines are gone and the sides are smooth.

Check the fit on the nose cone.
On this canopy I had to make a deeper radius at the front. Notice the sandpaper is wrapped over the front end of the nose cone. The rear of the canopy is raised up when sanding.

Monday, February 18, 2019

Odd'l Rockets Stealth Build, Part 8, Lugs and Up Until Now


In the original kit, there were two launch lugs glued on the bottom. Because there are two, I assume these were meant to simulate some sort of guns or missiles.


From above, the wing assembly does look "Stealthy".

There is quite a lot of fin area on this model. This probably isn't a good windy day rocket, it could turn into the wind.


Here's the build after the first white undercoat. It's really a good looking model.

In the next post we'll cut out and fit the canopy.

Sunday, February 17, 2019

Odd'l Rockets Stealth Build, Part 7, Wing Tip Fin Fitting


In the original kit, you would sand an angle in the outside edge of the wing. The larger wing tip is glued into the angle.

I took pictures of this but they aren't on the flash card in the camera! My small build camera is having some trouble.
Look close at the REAR VIEW drawing at the lower left corner of the template. Sanding the wing edge makes a weak area with the balsa being thinned.

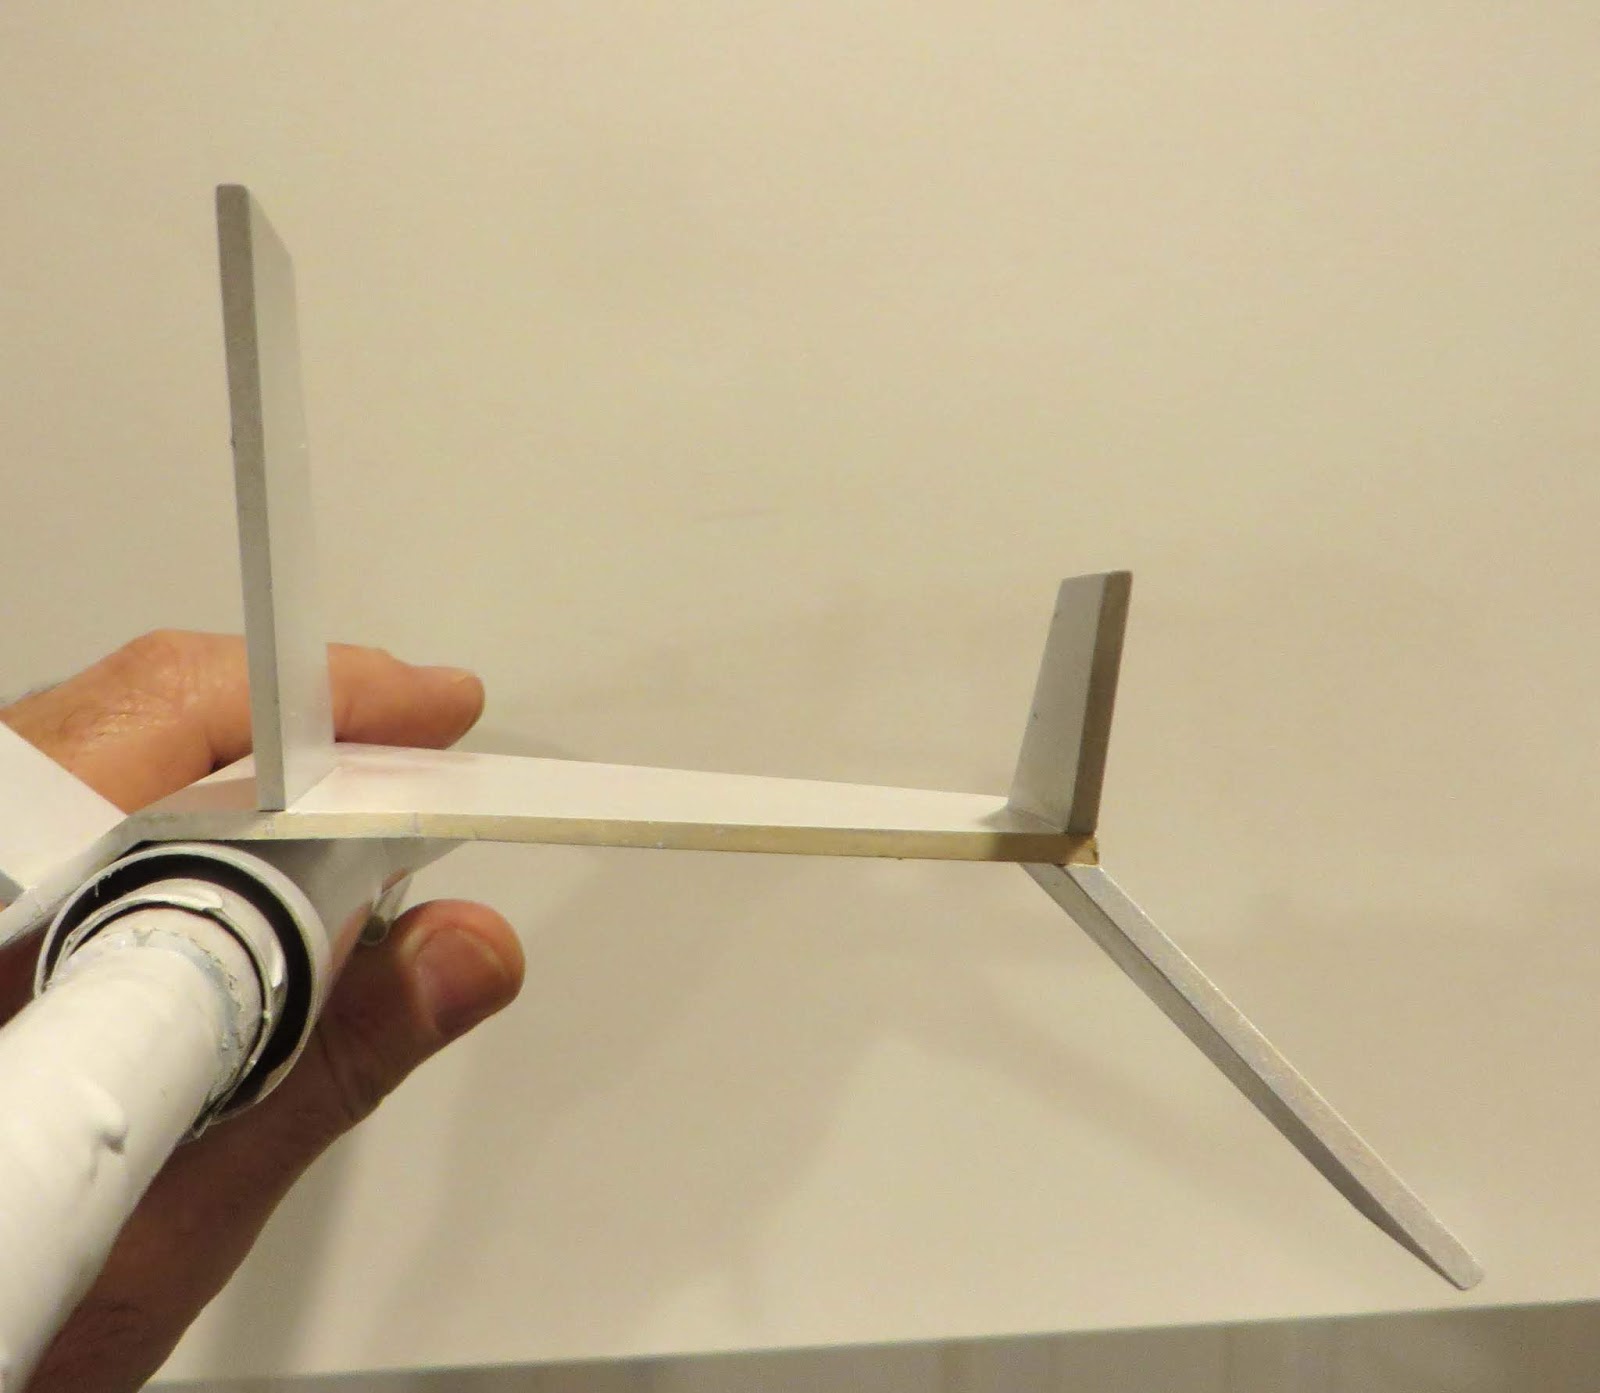
Also note in the REAR VIEW that this drawing is upside down. The two fins pointing down are glued 90 degrees to the wing surface.


Here's the wing assembly, glued onto the top center of the body tube.
The larger fin is glued 1/2" from the center of the wing joint. Both upper fins are glued straight on the flat wing surface.

On the lower right is the lower fin that had its root edge angle sanded.

Saturday, February 16, 2019

Odd'l Rockets Stealth Build, Part 6, Wing Dihedral Sanding

The root edges of the large wing pieces will meet over the top center line of the body tube.

The picture to the left shows the root edge as is, right off the balsa sheet. The outside wing tip is resting on the work table. The height of the body tube will set the dihedral angle.


On the above right my sanding block is set vertically against the wing root edge. This is the angle the edge will be sanded.

The wing is lifted and the sanding block kept vertical. Maintain this angle and sand the root edge.


Here's a pretty good fit of the wing root edges after sanding.

You could glue the wing on without sanding the root edge angles but the bond wouldn't be as strong.

Friday, February 15, 2019

Odd'l Rockets Stealth Build, Part 5, Adjusting The Fin Patterns

The top is a print of the fin patterns from the Stealth instructions posted on oldrocketplans.com
These patterns were made to fit the very different blow molded body in the Estes kit.

The large wing pieces were glued into recess  slots in the molded body. The root edges were offset to the sides of the center line.

In the lower tracing the wing root edges were extended so the root edges could meet over the top of the body tube. This extension is shown as a dashed line.


The root edges of the wing will be glued over the body tube much like the Shrox Quest Aerospace One. This makes a very interesting reverse dihedral. It's an easy glue joint, the height of the body tube sets the angle of the wing sides. This will be shown in an upcoming blog post.

3/32" thick balsa is used for all the wing and fin pieces.

Here's how I set the pieces out to save balsa.

Thursday, February 14, 2019

Odd'l Rockets Stealth Build, Part 4, Gluing On The Intakes

I have some 1/16" plywood "stop disks" from the Odd'l Birdie kits. These will make easy covers for the intakes.

Run a small bead of glue inside the tube edge and press the disk in halfway. I used my sanding block to press the flat disk even with the end of the tube.

You could easily make these covers from heavy card stock. They could be cut slightly oversize. Glue over the end and sand the edges even with the outside diameter of the tube.


The intakes were glued onto the BT-50 main airframe tube. The back of the intake is 2 5/8" from the rear of the BT-50.

I used a rubber band to hold them in place while the glue dried. Don't wind the rubber band too tight, you might deform them if there is too much pressure.
These intakes were glued on before the wing fins. It would be difficult to fill and smooth the glue joints on the intake sides if glued on later.

Primer/filler was shot and sanded over the intakes.
Here I'm doing a "soft" sanding with some 400 grit wrapped around the end of a Q-tip. This will sand off any fillet ridges without digging in with a corner of the sandpaper.

Wednesday, February 13, 2019

Odd'l Rockets Stealth Build, Part 3, Making The Intake Template


To make the cut pattern template,

Simply cut the shaped tube segment at the end of the tube - cut straight.


Iron and flatten out the tube segment. Don't use any steam, it could de-laminate the tube.


Here's the "bell" pattern flattened out.

Draw a 1" long reference line to you can size it when it goes into your graphics program.


The flattened tube is traced. I actually only traced the top side, copied that and flipped it over to the bottom.

Add a center line for positioning on the body tube.


Print a few of the templates, wrap around a tube and tape closed. Trace with a pencil and carefully cut out. Sand the segment against the main air frame tube as shown in the previous post.

Tuesday, February 12, 2019

Odd'l Rockets Stealth Build, Part 2, Making The Intakes

The intakes are a big design feature on the blow molded body in the original kit.
This is one of those things you just have to fumble with to produce a template. There are some complex formulas you could use to draw the cutting curve but I take the easy way out.
You probably won't be able to use your first attempt.


I set a BT-5 tube along the side of the BT-50H main air frame. When I decided on a good angle, a pencil line was drawn on the side of the BT-5.


A rough cut was made with a single edge razor blade. Try to get it close, matching up both side cuts on the tube.
On the left is one of the first intakes I cut, showing the rough cut edge. It was too short and a bit weak. Leaving the front end closed and round made a stronger intake.

On the right is the second attempt.
Wrap some 220 grit sandpaper around the BT-50H tube and sand up and down, parallel with the length of the BT-50H.


Here's a good fit against the main body tube.

In the next post we'll make a template from this intake.


Here's the underside.
When you sand against the body tube, check the inside edge often. Try to get both sides even like a mirror image.

Monday, February 11, 2019

Odd'l Rockets Stealth Build, Part 1, Parts


Here's almost all the parts I'll need for the build.
I didn't know how I was going to make the intakes. I should have included a short length of BT-5 tubing. Making the intakes fit will be the difficult part of the build.
The model will use 12" diameter from the Odd'l Rockets multi-size parachute.
The vacu-formed canopy is the same used in the Odd'l Fighter Fleet kits. This fantasy model will be around the same size as the other two jets, the F-16 and F-104.


This simple drawing is all I really need to proceed. Much of the work is already done using the Estes instructions. There might be a single additional fin at the bottom.


The wing root edges will meet over the top of the body tube. In the Estes Stealth kit, the root edges of the wings glue into a recess "slot" in the blow molded body.