Showing posts with label E Crossbow SST. Show all posts

Thursday, July 2, 2015

Estes Crossbow SST #7207, Finished


I bought this one back in 2009 when WalMart was selling them as boxed kits. It was cheap, probably only $6.00 or $7.00 dollars. With Estes bringing back the kit, I pulled it from the build pile.

The design is downscale based on the discontinued Satellite Interceptor. On the Crossbow SST, the smaller tubes are missing on the outside edges of the wings.
It's a great looking BT-20 based model. This older version has two lower fins (with the F-00339 decal) making it a five fin position model.
The larger Satellite Interceptor had red and black decals instead of the purple and black.
In the third picture, that tube wrapped canopy decal was a major design element.
You'll never see me lose this one on a C6-5!

Wednesday, July 1, 2015

Estes Crossbow SST #7207, Build Part 7, Decals

Light coats of white followed, sanding between coats.
Then the final heavier coat.

This is an easy one to paint, it's just gloss white overall.
There are a LOT of decals on this one. The decal placement picture in the instructions is vague. There is no wide purple band decal to go under the wing.
TIP: The two Caution decals go on either side of the front.
Set the first one down and wrap a strip of paper around the tube to help line up the opposite decal.

The long purple line with the "2" is tricky. It breaks at the nose cone seam.
TIP: Push the nose cone all the way into the tube. Set the entire length of the decal down, the break in the purple line goes on the seam.
Cut the break in the decal after it dries.


I mentioned earlier there is no second set of wide purple bands on the decal sheet. The instructions show the wide band on the upper and lower wing surfaces.

There are plenty of extras with no placement shown for them.
I used some of the thinner purple stripes to give some interest to the underside of the rocket.
I didn't use all the decals. It might have ended up looking too busy.

Estes Crossbow SST #7207, Build Part 6, Space Probes & Launch Lug

They're just dowels, but the instructions call them "Space Probes".

TIP: When cutting them to size, roll your knife over the dowel for only 1/2 turn. First roll forward for 1/2 turn of the dowel. Then roll back for 1/2 turn.
If you just roll straight and long you have a good chance of the knife traveling and cutting a spiral down the dowel.
Cut about half way through and break the dowel at the cut line. Sand the cut ends flat with a block.


The dowels are glued on, centered on the outside edge of the fins.
I marked the center of the fin outside edge and the center of the dowel.
This makes it easier to find the center of both when gluing.


The instructions show the lug set back from the trailing edge of the wing.
To better hide the lug, I glued it even with the trailing edge.

Tuesday, June 30, 2015

Estes Crossbow SST #7207, Build Part 5, More Fins!


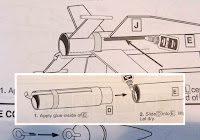
The instructions just say to glue on the Main Wings (Part J)
It doesn't say how far from the rear.
All the other measurements are in inches. After looking at the illustrations, I can assume the rear edge of the Main Wing is 2" from the rear end of the tube.


The Main Wings are glued on at an angle, the outside edges are lower than the root edge line.

For a better fit and gluing edge, an angle was sanded with a sanding block.


Here's the fin layout viewed from the rear.
You can see how the Main Wings are angled.

Estes Crossbow SST #7207, Build Part 4, Fins!


The fins were filled with CWF and sanded smooth off the model.
After that, a shot of primer filler and sanding.

Above is a stabilizer fin (Part G) sprayed with primer filler.
Below is the other stabilizer after the primer filler was sanded down.


Here we go again! 
Another kit fin marking guide that didn't quite match up.
I made up my own guide. The Stab fins and Vertical fin are at 9, 12 and 3 o'clock.

The two sub fins spacing will be visual.


I could still see the notch fill pieces at the root edge.
That gave me a good reference to glue the notch on the vertical fin 1" from the back end of the tube.
The rear of the dorsal fin (Part K) is glued 2" from the rear of the tube.

Monday, June 29, 2015

Estes Crossbow SST #7207, Build Part 3, Body Tubes & Coupler


The tube cuts weren't perfect.
Joined by the coupler inside you can see some gaps.

The ends were sanded flat. The inset picture shows the better fit  after truing up the tube ends.


The coupler was dry fitted to see where the engine hook would sit. That's a pencil mark on the lower white tube showing where the notch would go. The coupler would slide in halfway and butts up against the top bend of the hook.

I punched the top side of the coupler for a Kevlar line.
(In the inset picture the coupler is flipped over, the top is at the bottom)


A shallow slot was cut from the punched hole to the top of the coupler for the Kevlar tie.
The slot has to be deep enough so the Kevlar won't bulge out the upper tube. Don't cut the notch too deep or weaken the coupler.


The tube joint got a coat of CWF and was sanded flat.
There was a little sand through and some fuzz.

CA was wiped on over the joint and the hardened fuzz sanded smooth.

Sunday, June 28, 2015

Estes Crossbow SST #7207, Build Part 2, Changes & Fin Prep


The engine hook is outside the minimum diameter BT-20 main air frame. I never cared for this look. I'll leave off the hook and retaining ring for a friction fit of the engine.

The picture at the left shows how the notched fins fit over the retaining ring.


On these three fins you can see the notches on the root edges.
Without the retaining ring on the tube the notches aren't needed.
The square corners of the leftover balsa sheet were super glued into the notches.
On the two sub fins (Part I) I didn't cut out a filler piece, it was glued onto the corner of the sheet.
After the glue dried the filler corner was cut oversize and sanded to the sides of the fin.


The three fins with the filler pieces sanded.
The center fill piece on the Vertical Fin (Part H) had a piece cut to size before gluing.

Thursday, June 25, 2015

Estes Crossbow SST #7207, Build Part 1, Parts


Estes is reissuing the Crossbow SST kit. This is a downscale (sort-of) of the Satellite Interceptor without the short tubes on the main fins.

I'm building a boxed kit version I picked up at WalMart in 2008. While this one is kit #7207, the new kit will be number 7234.

I was surprised by how much extra space there was in the box!


Here's all the parts. All are high quality.
The BT-20 tube is two parts, the yellow coupler also acts as the engine block.

The white parachute is from the lead ink period. No printing!


The specs are on the side panel of the box.
The new kit is 15" long. This version is 14.6" tall.
I don't think I'd ever fly this one with a C6-5.


The box picture of the fin sheet have the parts named. There is no printing on the supplied laser cut fins.