Showing posts with label Mpc X2 Invader. Show all posts

Tuesday, May 2, 2017

MPC X2 Invader Build, Finished


Here's another strange one from MPC, Round 2 models.
A quick build, taking a bit longer than the "Build and Fly in One Hour!" claim on the box.
The questionable recommended engines and altitude predictions make you wonder who was doing the flight testing.
Still a great value at $5.00 why they still last. I doubt MPC will be producing any model rockets again in the near future.
I've seen two X-2 Invaders go unstable at club launches. I might add some nose weight to be safe.
If you've had experience launching this model, please comment below.

Monday, May 1, 2017

MPC X2 Invader Build, Part 5, Stickers! I Hate Stickers

These kits were designed for a young builder so stick-on decor is supplied. I never understood why kit vendors assume kids can't apply water-slide decals. I was building plastic models when I was five and using water slides. They may not have been set down straight but they weren't impossible to use at that age.

The stick-on decals were easily removed from the backing sheet. Enough are supplied for each side of the four fins. I only applied them to the right side of the fins.

The upper section of the plastic nose cone gets a wrap around. It took a few attempts to get the ends to line up before burnishing.

The narrow section of the plastic nose gets the "Marvin Martian" name on each side. The sharp pre-cut tips of the "Ms" didn't stick that well on the curved
body.


The shoulder fit was loose and required a 3/4 wrap of masking tape for a better fit.

The supplied 18" parachute is WAY too big for this model. I did like the Marvin Martian art but switched it out for a 12' Odd'l parachute.


The box says the finished model should weigh 2.2 ozs. My finished model weighed 2.47 oz! Another reason not to launch it with the recommended Quest A6-4 engine.

Sunday, April 30, 2017

MPC X2 Invader Build, Part 4, Ends and Edges


The blow molded nose cone did have some seams. I did my best to smooth them out but didn't do any seam filling. Heck, it's only a five dollar rocket. I'm not going that crazy with this one.
I don't know why this picture came out orange.


The attachment hole needed to be cleared for tying on the shock cord.
I used the Duncan Uni-Knot.


The small black nozzles are glued into small holes in the back of the fin can.
The holes were too small and were enlarged with a small diamond file. A small amount of glue was set into the holes and the nozzles pressed and turned into place.

The 18" parachute is too big for the model. I would think packing this big chute in a BT-55 sized tube would be tight, not leaving any room for wadding and the shock cord.
I'll be substituting a 12" chute in its place.
The chute colors aren't a great match for a red and yellow rocket.

Saturday, April 29, 2017

MPC X2 Invader Build, Part 3, Fin Can

An elastic shock cord was tied to the Kevlar. The entire shock cord was rolled up and stuffed into the engine mount tube.

Before gluing the fin can into the tube, line up the pre-printed tube graphics so the Marvin art and rocket name are positioned between two fin slots. In the right side picture I made pencil marks on the fin can for alignment on the back tube seam.


A bead of the Fabri-Tac glue was set down inside the tube and the fin can slid into place.
The pencil mark on the fin can was aligned with the overlap seam on the body tube.


The fins were slid into the fin can slots.
Thin Ca glue was dropped onto the top and bottom joint and allowed to run inside the joint.

One side of the launch lug was roughed up with 400 grit. I was surprised how well the lug adhered with just wood glue.

The two small lugs were aligned with the aluminum angle.


Friday, April 28, 2017

MPC X2 Invader Build, Part 2, Engine Mount


I replaced the engine hook with one of my own.
The kit didn't include an engine block. I added a 5/20 centering ring for an engine block.

The engine hook end was slipped through a slot cut into the tube end.
Just enough Scotch tape was pressed over the hook to hold it into place. Too much tape (or a full wrap) won't allow the tube to slip into the plastic fin can.


A small slot is cut into the engine block and a length of 150 lb. Kevlar tied around the ring.


The instructions show the engine mount tube being even with the flat end of the fin can. I glued my mount with a very slight bit extending out the back. This allows for a fillet to be applied. Fillets were added on the top and the bottom.

I used the Beacon Fabri-Tac glue for all plastic to plastic and tubing to plastic joints.

MPC X2 Invader Build, Part 1, Parts


The parts were actually pretty good.

The tube one the left is flipped upside down, Marvin Martian should be at the bottom.

I was glad to see the NAR Membership Application included.

Those tiny black nozzles would be easy to misplace.

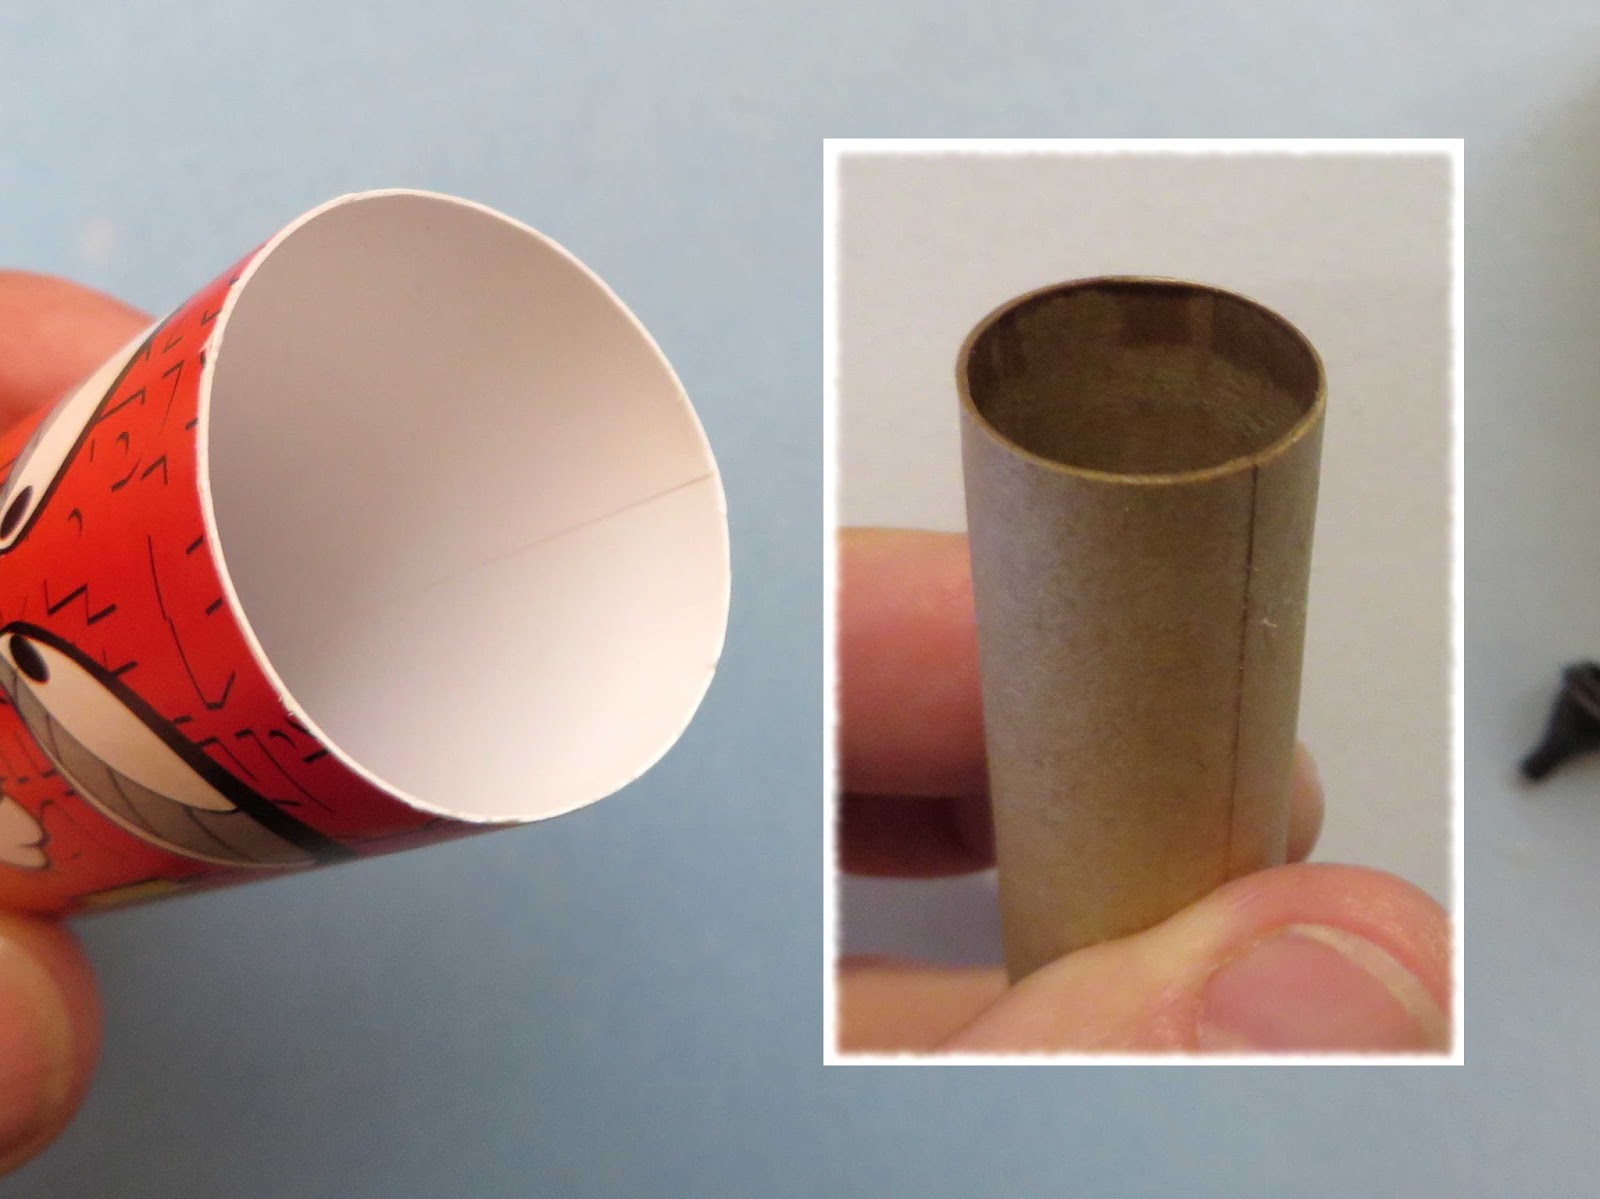
The main body tube feels like its made of convolute wound (not spiral wound) plastic. Enlarge the picture and you can see the interior seam running down the tube length.

The engine mount tube is rough. I had already gave the tube end a wipe of medium CA glue when the picture was taken.


These parts will be replaced, well except for the engine mount tube. I decided to use it.

The engine hook was easily bent, it wasn't spring steel.
The thin paper tri-fold mount won't be used.

Thursday, April 27, 2017

MPC X2 Invader Build, Background


Why another MPC branded model?
I needed some ST-7 tubing and ERockets.biz are the only vendor left that carries it. The MPC kits are on clearance at $5.00.

The box still proclaims: "Flys up to 260 feet!" Every different model design in the MPC lineup says the same thing. My MPC Red Giant (another Sky rocket re-brand) did get to 427' with an Estes C6-5.


Besides that, Warner Brothers characters are a favorite of mine, even thought this model looks nothing like the Duck Dodgers cartoon rocket seen at the right. Sometimes it's a nice change to put together an easy one.


I find these kits interesting to see how things are done in China.
I don't think I'd launch this one with the Quest A6-4. At 2.2 ozs it might be on the ground when the parachute deploys.


This rocket is the same kit at the Sky Long March 3, a semi-scale model of the Chinese launch vehicle, with a very different decor.

This picture is from the Apogee Components website.