Showing posts with label E HiFlier XL. Show all posts

Friday, October 28, 2016

Finished Hi-Flier XL on Ebay


I have a finished Estes HI-FLIER XL on Ebay.

This is a clean build with a Centuri style baffle installed.
To see the specs or make a bid: CLICK HERE

Thursday, April 21, 2016

Estes Hi-Flier XL, #3226 Build, Finished


A large, clean, no-frills 3FNC rocket.
I do like the looks of the bigger version of the HiFlier. The small BT-20 HiFlier reminds me of old school 18mm minimum diameter models like the OOP Sky Hook.

The Rustoleum Metallic Red is a subtle upgrade but really shows up in the sunlight. The metallic specks are very fine and don't end up as a flat finish like other coarser "glitter" paints.

The white triangles on the fins decals are also carried into the rocket name decal and font - a smart design touch.

Wednesday, April 20, 2016

Estes Hi-Flier XL, #3226 Build, Part 21, Paint Ends and Edges

Here's a final touch for any finishing obsessed builders.

The ends of the body tubes usually end up unpainted, with white edges.
This body tube was painted with Rusto Red Metallic. The paint is a little transparent, not much pigment. I was afraid the metallic paint wouldn't give very good coverage on the edge. I used a regular 2X Apple Red paint for the edges.
A small amount of paint was sprayed into a disposable mixing cup.
A Q-tip was dipped in the paint and the excess rolled off.
The Q-tip "brush" was rolled over the edge being careful not to get paint on the body tube sides.

In the picture there is no paint applied yet on the close side.


Here's the finished low end.
The nose cone end of the tube got the same treatment. This is a moot point to many but you'll see a sharper color separation when the black nose cone is seated in the body tube.

On the left you can see the CA glued edges inside the main tube and motor tube.

Tuesday, April 19, 2016

Estes Hi-Flier XL, #3226 Build, Part 20, Decals Part B - TIPS

After the surface is wetted, slide about 1/4" of the decal off the backing paper.
On this model, the rear edge placement is the most critical. Leaving the decal on the backing paper, the rear edge was visually spaced on the trailing edge cut.
When I was happy with the position, the backing paper was pulled and slid out from under the decal leaving it in place.


A wet paper towel was used to remove bubbles and wrinkles.
Gently smooth from the center out to the edges.


Hold the decal area under a bright light to see if there are any small bubbles under the surface.
Roll out the bubbles with a Q-tip. Don't brush the bubbles to the edge, roll the Q-tip pushing the bubbles out.


TIP: Be aware when applying decals on the opposite side of the fins. While the decals placed on the back side might seem set and stuck, sometimes fingerpressure can move the decal underneath the new one you are applying. Play it safe and let the "first side" decal dry a bit before applying the second one on the other side.

Monday, April 18, 2016

Estes Hi-Flier XL, #3226 Build, Part 19, Decals Part A - TIPS

I read forum posts about problems applying water-slide decals. Vendors use different suppliers for their decal printing. Some can be hard to transfer.
I've been using water slides since I was 6 years old, putting together my first plastic model. Experience does help - I'll try to offer a few tips.


The shape of these decals are a little misleading. The white area is hard to see against the white backing paper. Cut them close to the edge, be careful not to cut into the white areas.

Before soaking, set the decal on the fin to get an idea of the centering and spacing from the trailing edge.
My decal bottom was a little wider than the angle cut of the trailing edge.

Don't be impatient! Allow enough time for a decal to soak and release from the back paper.
I first soak the decal in water for about 30 seconds. Remember, every decal soak time can be different. a 30 second soak is a good starting point.
The picture shows the decal sitting on a paper towel. Letting the decal sit for a minute allows it to further relax and release from the backing paper.

Try to "rub" the decal and see if it slides from the backing paper. If it doesn't move, soak for another 15 seconds and let it sit on the paper towel again.
Test to see if the decal slides. If so, you are good to transfer onto the model. Don't remove it from the backing paper yet.


Rub some water on the surface. The water will be a surface lube allowing you to easily slide the decal to it's final position.
Set a decal on a dry surface and it might stick in the wrong position.
Continued next post . . 

Sunday, April 17, 2016

Estes Hi-Flier XL, #3226 Build, Part 18, Second Build Mask - OOPS!

The first HiFlier XL paint mask went well. The tape pulled off clean and left a sharp mask line at the root edges.

My last can of Rusto 2X Gloss Black was running low and I was due to replace the spray cap button. I pulled the old cap, it was starting to spray unevenly.
A new nozzle was set on the can, I knew I had enough left to spray the fins on the second model.

After a few air-shots to be sure the new nozzle was okay, I aimed for the fins.
The nozzle cap got stuck in the down position! While I was trying to react I held the spray in one spot a little too long. That area developed an uneven surface and a drip!


After the paint was fully dry it was taken down with some old 220 grit.
400 grit followed until I couldn't see or feel the raised drip.

I'll have to re-mask, hit it with primer/filler and sand smooth.
Then a final shot with a new can of gloss black.

Estes Hi-Flier XL, #3226 Build, Part 17, Mask and Black Fins


Here's the mask for all fins to be painted gloss black.

Scotch tape strips went down first at the root edges, masking tape filled in the areas between the fins.

A plastic grocery bag is slipped over the top and taped to the body above the fins.


Here's the first HiFlier after the tape was pulled.
Everything looks good, on to the second HiFlier mask and paint.
Fingers crossed!

Friday, April 15, 2016

Estes Hi-Flier XL, #3226 Build, Part 16, Red Paint


The rocket is to be spray painted red and black, the decals add the third color trim.

I could have sprayed the model (and fins) an overall red but simply sprayed the tube and over the fillet areas. The black should easily cover the white and red paint after masking off the red.

Always spray light colors first, darkest last.


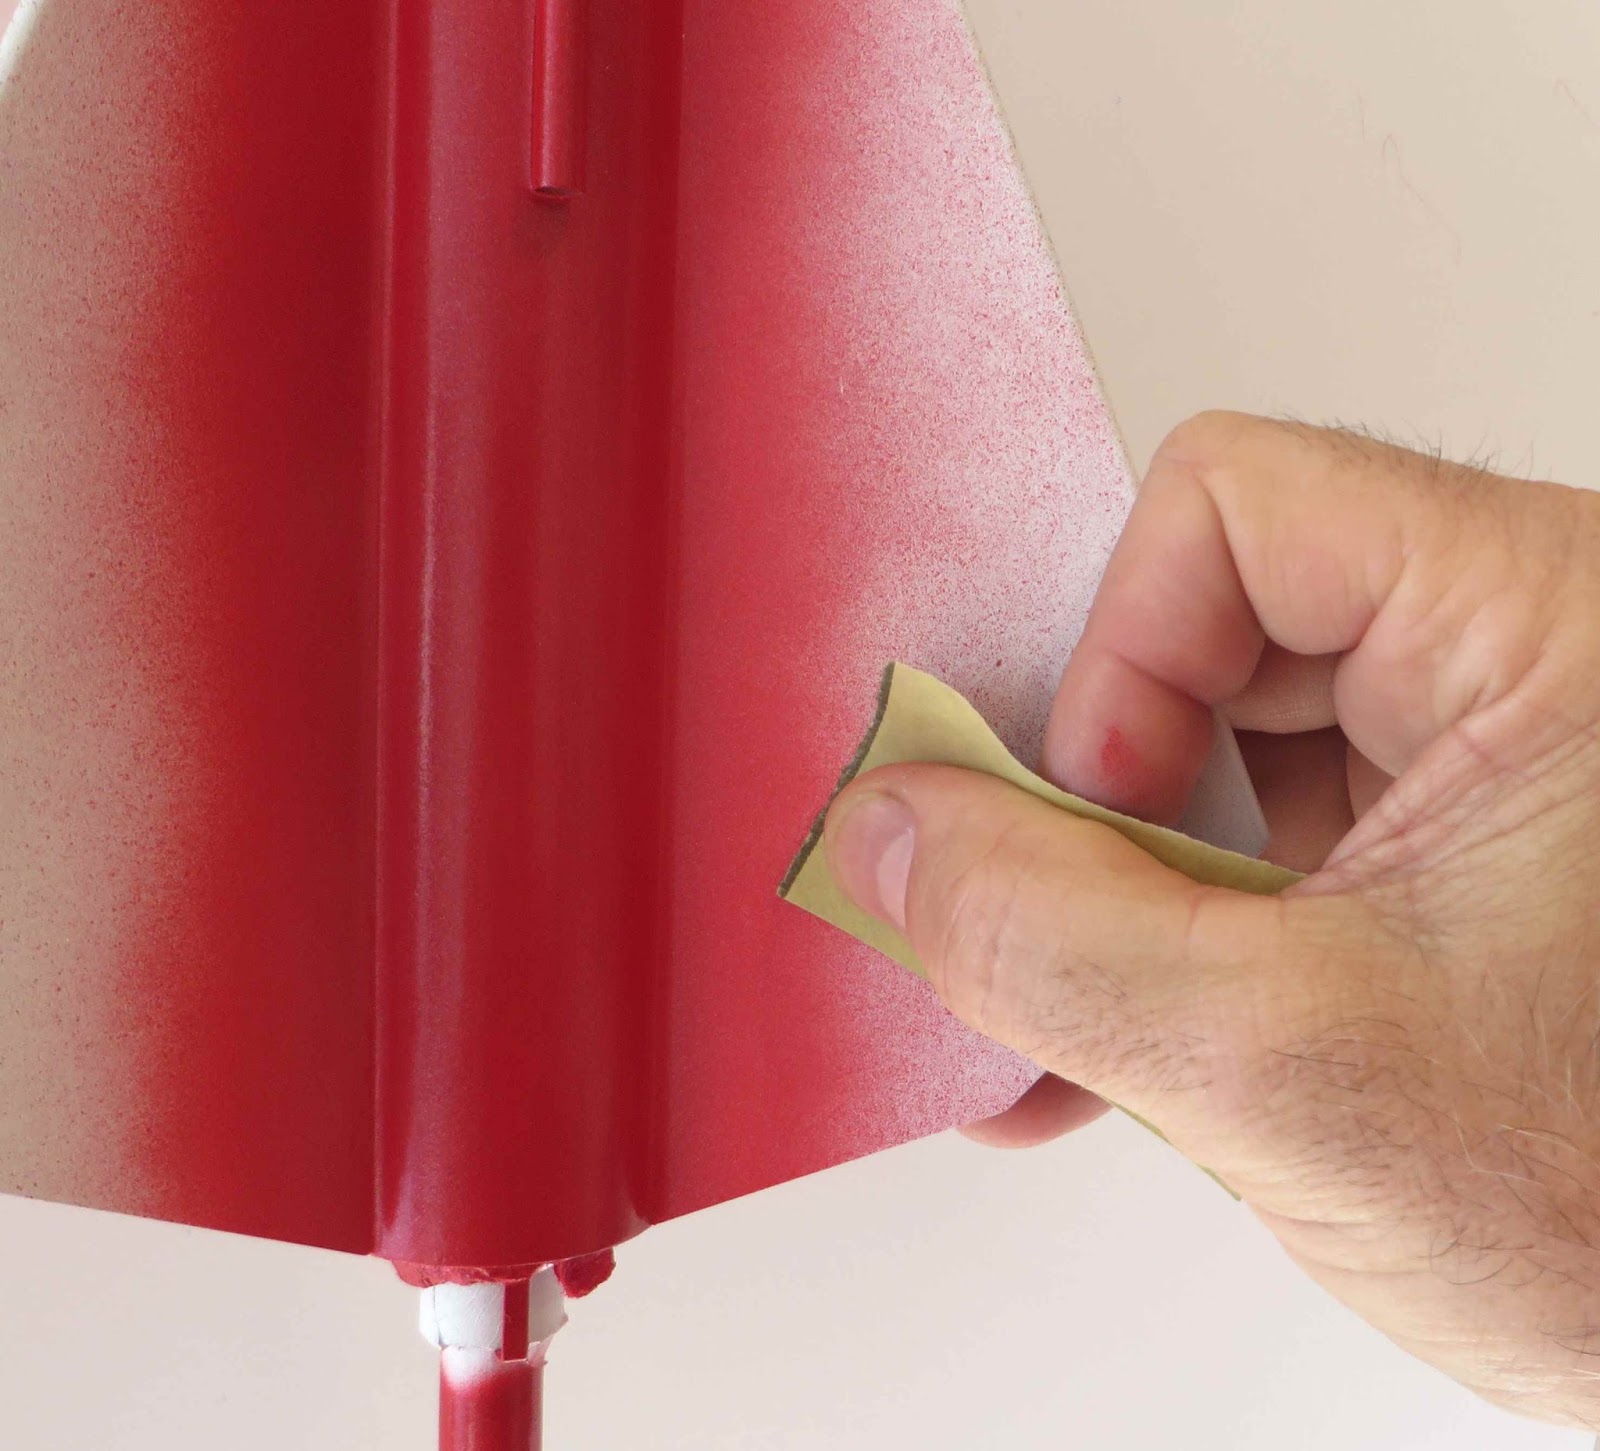
When a "blend' is done like this, the over spray can feel rough.

Wet sand (damp sand) the rough areas so the black will go on smoothly.

Thursday, April 14, 2016

Estes Hi-Flier XL, #3226 Build, Part 15, Sanding and Touchups


After the single coat of Duplicolor primer/filler I noticed a glue smear.
This was easily sanded smooth. The primer/filler filled in the raised sides of the glue area.

Right above the glue area is a tube seam. You can see how the primer is left in the rut, the last bit the CWF didn't quite fill.


The first coats of white showed a slight crack where the tubes were joined together. More medium CA was applied and sanded flat to the tube surface.
When sanding down some rough areas of the white undercoats, I sanded a little too far!
Instead of shooting the entire rocket body with another coat of white, I shot some paint into a cup and used a Q-tip as a brush.
The paint was dipped and rolled over the sanded through area.
The white is just an undercoat. I wouldn't be able to do this touch-up if white was the final color.

Estes Hi-Flier XL, #3226 Build, Part 14, Fin Gluing and Paint Prep


Even after filling the nose cone seams with medium CA, there were still some high areas.
In the inset picture: With the nose in the tube, run your fingers over the shoulder lip and you can feel the high spots. The high areas were marked with a pencil and sanded down to be closer to the outside diameter of the tube.


The launch lug was glued directly above the engine hook.
The first fin was glued on directly opposite the engine hook.

TIP: With both the hook and lug in line the igniter wires can be bent and directed away from the launch rod and between two fins.


This time I didn't spray the body tube with primer/filler before gluing the fins on. Because this is a simple 3FNC model, it won't be too difficult to spray on the gray primer/filler then sand between the fin areas.

On a more complex model, I would usually spray and sand the body tube separately before gluing on fins and detail pieces.

Estes Hi-Flier XL, #3226 Build, Part 13, Fin Primer Fill and Sand


The fins were stuck to a cardboard scrap for primer/filler spraying.
There are six fins here, I'm building two Hi Flier XL kits.

Spray one side, let dry.
Flip the fins over and spray the other side. Don't miss spraying the leading, outside and trailing edges.

Enlarge the picture and you can see the grain pores left after the CWF fill and sand. The primer/filler will fill the remaining grain after it is sanded.
Wet sanding could be a little iffy. I tend to remove most all of the gray primer/filler and the CWF filler underneath is still water soluble.


The bulk of the primer/filler is removed using some old Norton Premium 220 grit sandpaper. Newer 220 might make some deep scratches.
After 220 grit, 400 git follows removing most of the remaining filler/primer.


TIP: Here's that older piece of the Norton Premium 220 grit. On the left the sandpaper is loaded with grey primer/filler dust.
Here's more about the Norton Premium Sandpaper: CLICK HERE

Run the sandpaper under water and scrub out the dust with a soft brass wire brush.
On the right is the same piece of sandpaper, ready to go again.

After one side of one fin is sanded the paper is pretty well loaded up. Use the brush to clean it off and sand off the other side of the fin.
That one small piece of 220 grit was used on both sides of all six fins.

Tuesday, April 12, 2016

Estes Hi-Flier XL, #3226 Build, Part 12, Tube Butt Joint Fill


The tube joint is hit with a brushing of CWF.


After it dries the seam joint is sanded with 220 grit on a block.

Look close at the joint and you can see some of the body tube is sanded and rough.


The rough, raised body tube edges will have to be hardened and sanded again.
Medium CA glue is set on the joint. While it is still wet the raised joint is pressed down and rolled over with the back end of a Sharpie pen. This compresses the loose card fibers.


After the CA dries sand it smooth with 400 grit.

Primer /Filler will be sprayed over this and any remaining joint seam should be gone.

Monday, April 11, 2016

Estes Hi-Flier XL, #3226 Build, Part 11, Baffle Gluing

Before gluing in the coupler, roll over the lip of the body tube. The small turned over edge can slow down the coupler slide.

When the top and bottom of the baffle ends were sanded even with the sides of the red coupler, the outside diameter was taken down a bit. Sometimes kit provided couplers are tight and can freeze up before they are all the way into the tube.
Do some dry fits before using glue and make sure the coupler slides in easily.

I tied on a long 1/4" elastic shock cord to the Kevlar line.
The elastic was fed through the upper tube before gluing the upper half of the coupler.

The trick is to use enough glue so the coupler won't sieze up, but not so much that the glue dries and shrinks up the tube making a recessed ring.


Again, turn the upper tube to even out the glue ring making a smooth fillet inside.

A Q-tip was taped to a dowel to remove any excess glue.

Saturday, April 9, 2016

Estes Hi-Flier XL, #3226 Build, Part 10, Engine Mount Glue Position

First up - an apology to "Anonymous". He posted a comment about papering fins.
On my comments page, the buttons are close together and I inadvertently hit the delete button. His comment is gone! 
Anonymous, please add your comment back and I will post and respond to it. Thanks!

And back to the build, a general comment -  Most of the HiFlier XL posts are geared toward newer builders. Some of the more experienced might pick up an idea or two. My techniques might not agree with yours. That's fine, these posts are just food for thought.

I used a marked dowel to apply a line of glue inside the rear of the body tube.
I concentrate on the front centering ring location. The dowel is marked a little short, below the final resting point of the ring. That pencil mark is the depth gauge for the glue ring location.
A ring of glue is then applied inside the tube. Place a drop on the end of the rounded dowel, set the dowel in the body tube up to the marked line. Roll the glue around the inside of the tube.
After you have a visible ring of glue in the tube, slide the mount into place. Don't wait - the glue is already setting up!


When the engine mount is almost all the way in, the mount is turned so the interior glue line is evened out into a smooth fillet.

With the engine mount in the final position, the two tube ends are even.
The last "press" in is done with the flat side of my sanding block, making sure both tube ends are even.

Right now the only glue is above the upper centering ring.

A glue fillet was applied inside and below the lower ring with a Q-tip. A single drop is set into the joint and smoothed out with the swab.
It usually takes four or five drop applications to get the glue all the way around the ring/tube joint.

Friday, April 8, 2016

Estes Hi-Flier XL, #3226 Build, Part 9, Fin Grain Filling


Brush on thinned CWF with the grain, then against the grain.

Brushing with the grain first gets the filler into the grain pores.
Then brushing against the grain forces the filler in and removes the excess.

There will be brush strokes when the filler goes on and after it dries.

Here I'm sanding down the dried filler with older 220 grit on a block.
TIP: Use the brush marks as a sanding depth gauge. By the time you have sanded down the brush marks smooth, you should "almost" be at the surface.
You should be leaving a very thin coat of CWF on the fins. The fin surface will be the beige color of the CWF.


Hold the fin surface up to a strong light and you might find some leftover brush marks.
You can remove these with some 400 grit.

NOTE: The CWF does not seal wood fins. Water can still be absorbed into the filler and wood underneath.

Thursday, April 7, 2016

Estes Hi-Flier XL, #3226 Build, Part 8, Tube Seam Filling


More first timer tips:
On the forums I see some seam filling with a lot of filler being used. Too much filler and you'll spend too much time trying to remove it.

Sometimes the seams are narrow and hard to see. Use a fine point pencil and run it down the seams for a high contrast guideline.


Dip an old, dull X-Acto knife in your thinned CWF.
You only need to dip 1/4" to 3/8" of the blade tip.
Wipe off the excess filler from the back side of the blade on the lip of the jar.
Set the blade into the seam trench and drag it back and forth leaving a bead of filler in the seam. You'll be able to cover about 1 1/2" before dipping the blade again.
This doesn't take that long to do once you learn the technique. 22" of BT-60 tube took under ten minutes.
The inset picture shows the dried filler beam in the seam.

Using the knife blade guarantees the filler is worked all the way into the seam trench. It also centers the filler in a small bead so there is less to remove after it dries.

Wednesday, April 6, 2016

Estes Hi-Flier XL, #3226 Build, Part 7, Making A Baffle


You can make an internal fillet by applying a line of glue just inside the edge of the coupler.
Then apply a second bead of glue on the upper edge.


TIP: While the glue is still wet, set the disk on the end of the coupler and turn the disk.
This smooths out the glue bead inside the coupler edge. You should end up with a pretty even interior glue fillet.


After the glue is totally dry, sand off the overhanging edges.

Here I am sanding only with down strokes so I can't pull up and loosen the cap edge.
Use 220 grit and the edge should come off easily.
Here's the finished coupler/baffle.

Before gluing the coupler into the body tube ends,
TEST FIT (no glue) and SAND, 
TEST FIT (no glue) and SAND.

You may have to go over the baffle ends a few times for a sliding, smooth fit in the tubes.
I might use epoxy to insure there is no chance of it seizing up in the wrong position.