Showing posts with label Tube Marking. Show all posts

Friday, January 17, 2025

Estes Black Star Voyager Build, Part 17, Marking The Tubes


From the instructions - 
You are directed to wrap the fin marking guide around the lower tube. This wrap fit very well.

GOTCHA: Not mentioned in the instructions - 
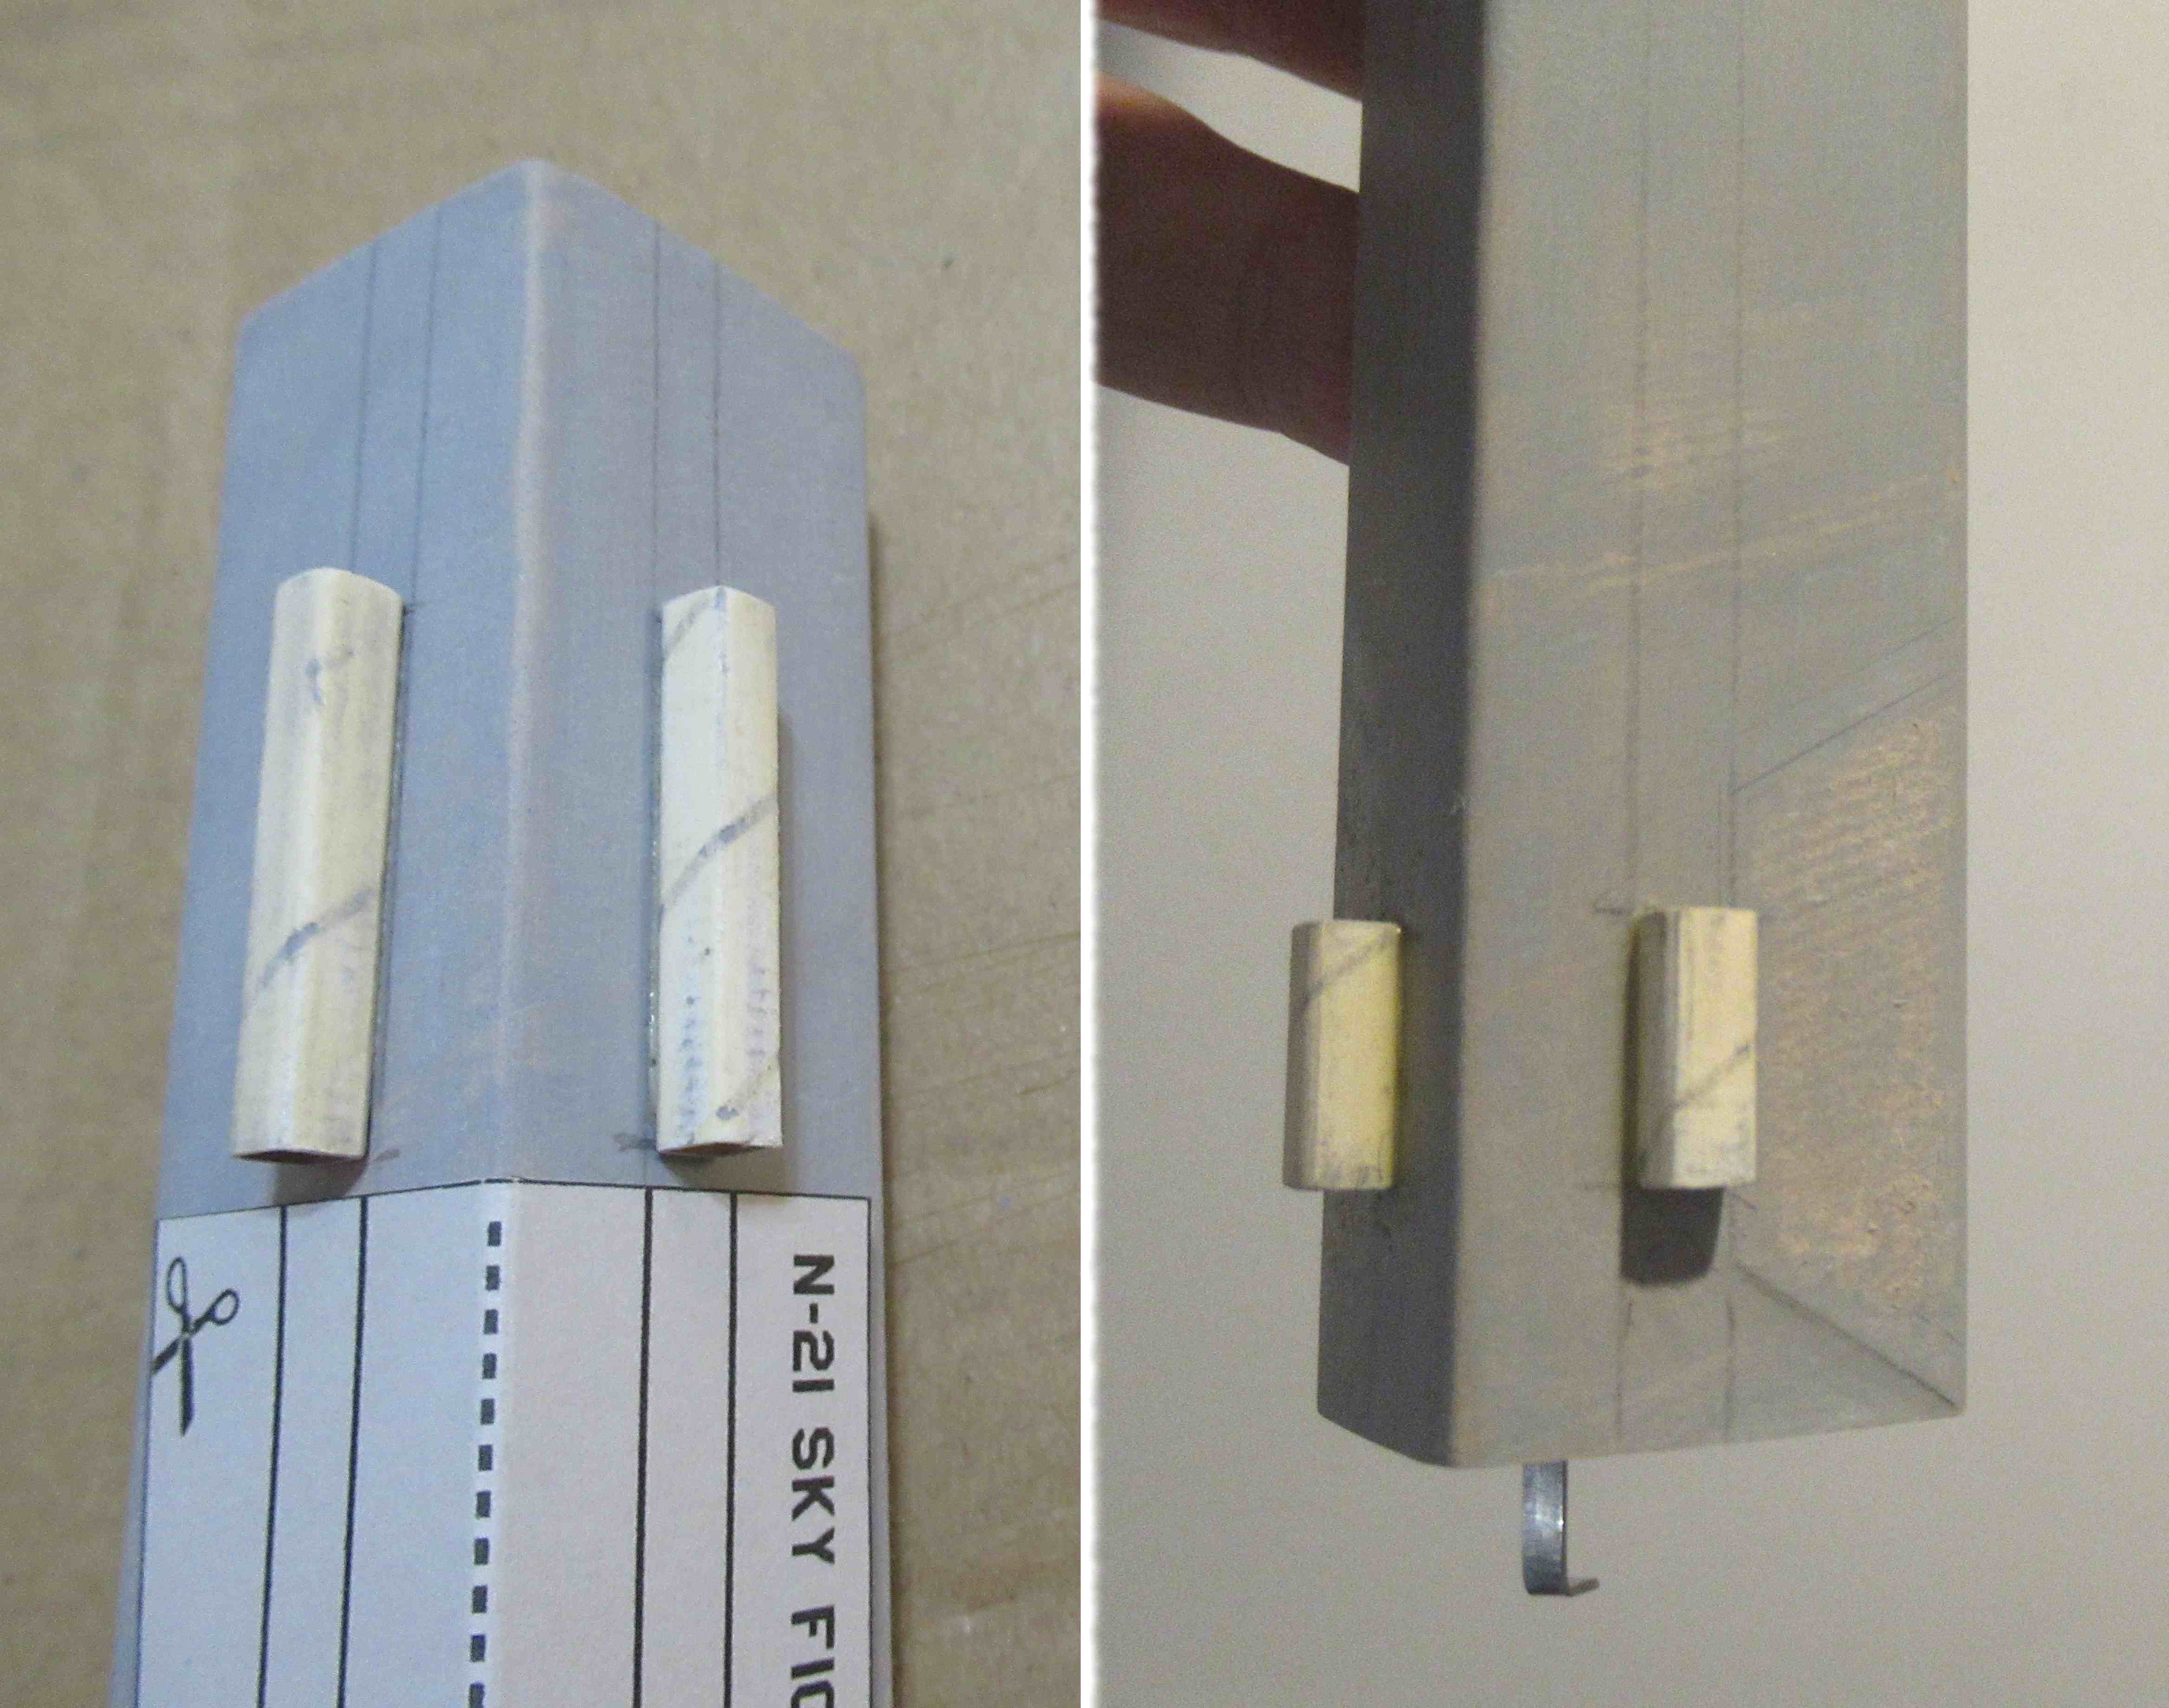
I'd recommend centering the engine hook between two of the "S" lines. You don't want the engine area vanes to hit the engine hook.
To go one step further, center the engine hook between two of the "SF" fin lines.


As in most instructions - 
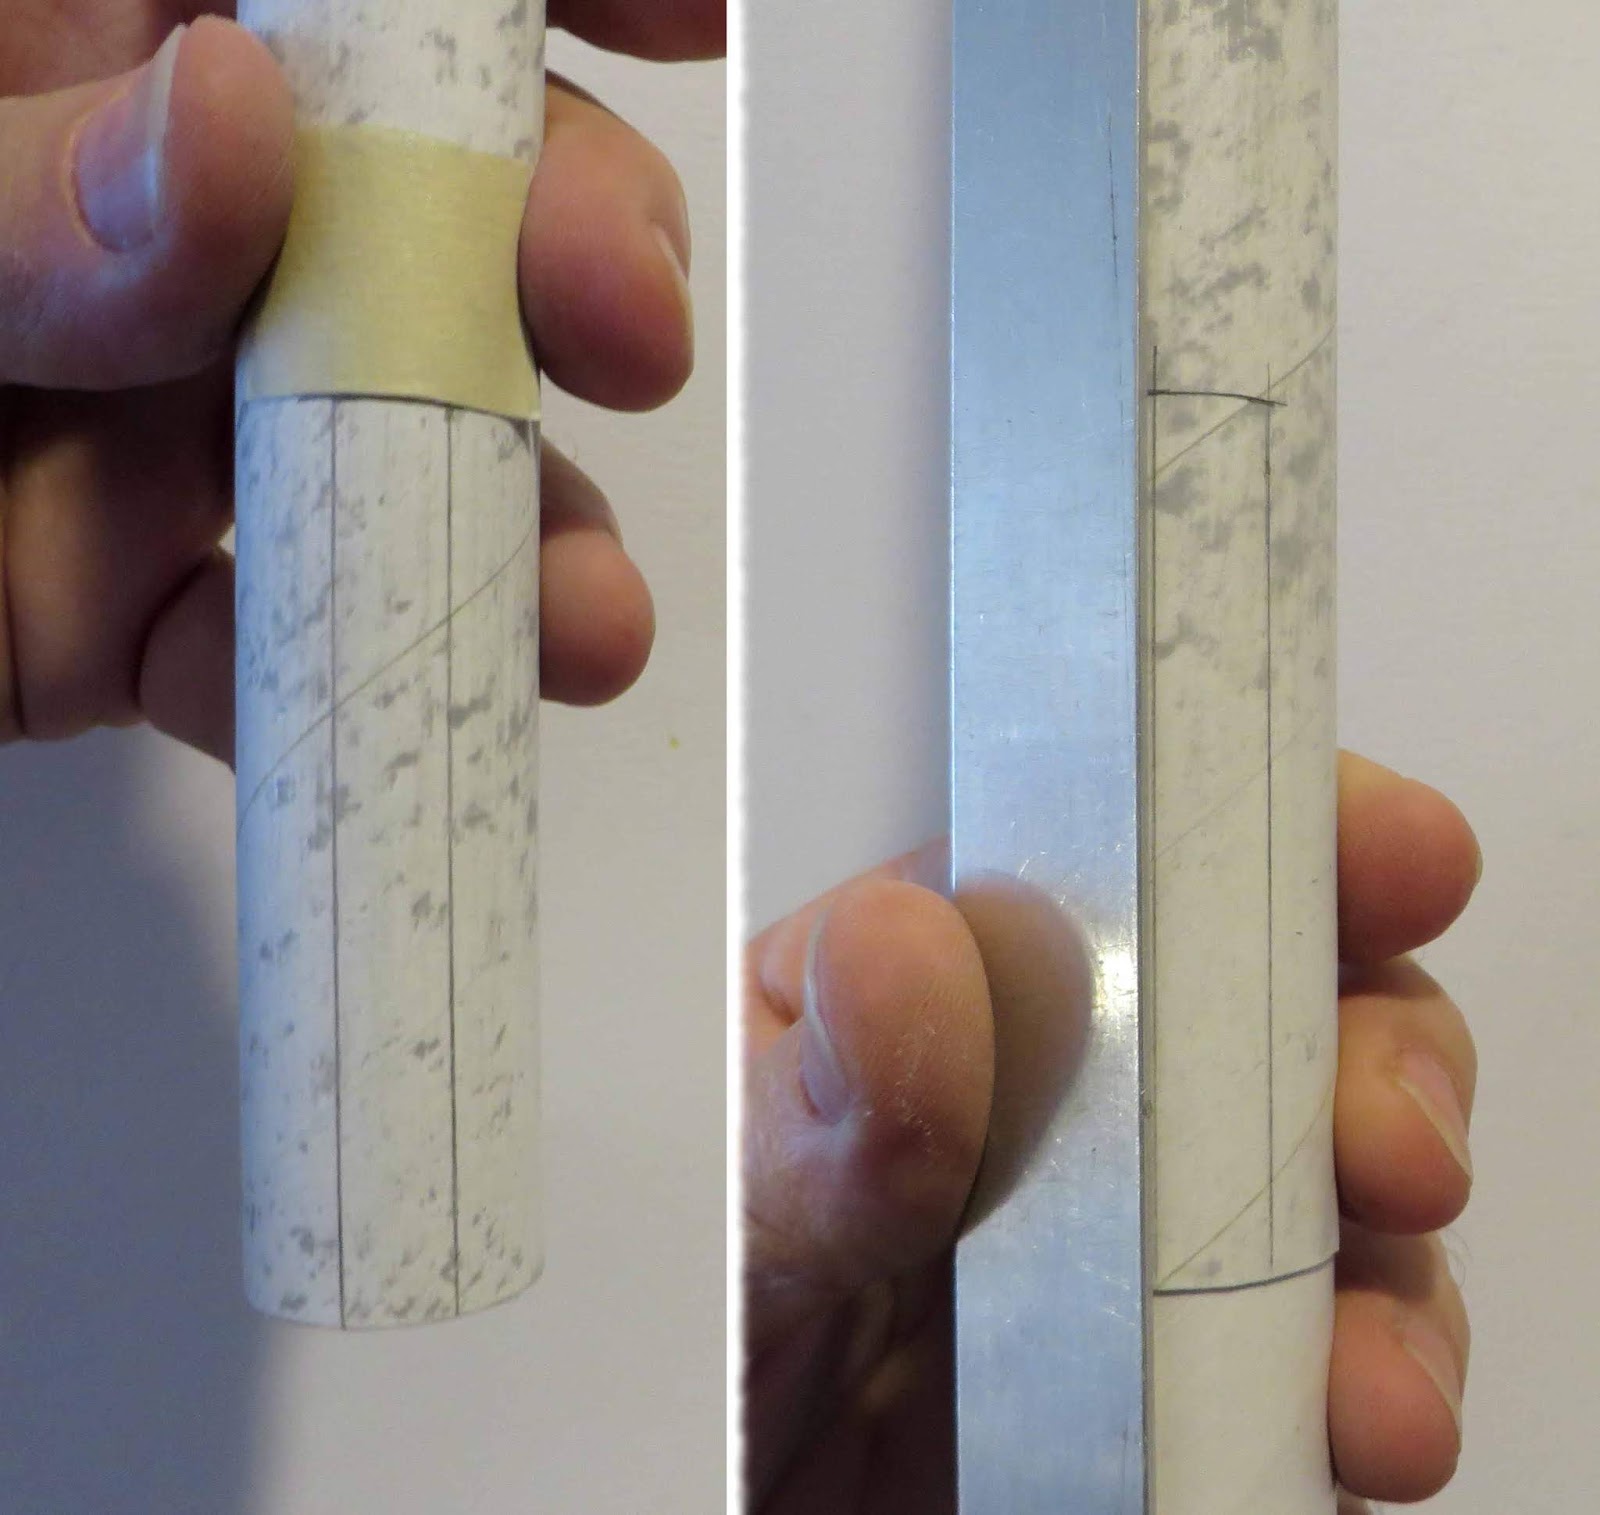
You are told to extend the fin lines using a pencil and door frame.


TIP: I'd highly recommend buying and using an aluminum angle to extend the pencil marks, especially on larger models like this one.

Thursday, April 11, 2024

Estes Mini Bertha Clone, #TK-3, Part 6, Cutting Out The Fins

I had to search to find some 1/16" thick balsa. 1/16" thick balsa is rarely used in rocket kits anymore. You can still see the SIG logo in purple ink on one fin.
Cutting them out by hand makes some small inconsistencies. On the left the four fins are squared up. 
On the right side, the fins have been stacked and the sides sanded even. 
Current laser cut fins are uniform, you don't need to gang sand them. But, you should still sand off the black ash on the fin edges.


Here's another view next to the fin pattern from Jim Z's.


The fins got one coat of CWF and sanding.
Gray filler/primer followed.

On the right side of the picture the fin was sanded with 400 grit. I tend to sand most of the filler/primer off leaving some in any remaining balsa grain.


The printed fin marking guide didn't quite match up after rolling around the tube.

I went to payloadbay.com and printed out one of their fin marking guides: CLICK HERE

Tuesday, February 27, 2024

New Way Nike Ajax Build, Part 11, Lower Fins Gluing


TIP:
I like to line up the engine hook and launch lug positions.
When launching, set the launch lug to the back side of the model for better photos from the front. This also allows you to bend the igniter (starter) wires forward away from the launch rod and engine hook.


Viewed from the rear, 
This is how the fins line up - three on the booster, four fins on the "main stage". (It is a single stage model.)

The instruction explanation is a bit confusing, just keep this view in mind and you can figure it out.
The pressure sensitive (sticky back) ring goes around the BT-55 lower tube at 2 3/8" from the bottom.

Start and finish the wrap at a fin position. Cut off the excess. This joint will be covered by a fin.

Note I used a wrap of tape for an edge guide to insure a straight wrap and the ends would meet up.

With the trailing edge of the fin even with the end of the body tube, mark the notch position. 


Cut a very shallow notch with a sharp knife. You don't have to go very deep with the cut.

The gray primer/filler was scraped away for a better glue bond. After scraping away the primer, you'll have to redraw the pencil lines for the fin alignment.

Friday, March 10, 2023

New Way N-21 Sky Fighter Build, Part 6, Engine Mount Gluing & Lug Gluing

The engine mount is glued in with the engine mount tube and outer tube ends even.
I used my flat sanding block to press the mount in and even it with the outside main airframe tube.

A rear fillet was applied using a Q-tip. 
The marking guide is folded on the dashed line.
Set it on the corner bend in the tube, over the engine hook extension.

The launch lug locations are marked and the lines extended down the length of the tube.

Since I already sprayed and sanded the tube, the filler/primer was scraped off for gluing on the launch lugs.


The long lugs (guns) go in front,
The shorter lugs are at the rear.

The lugs are in line to be slid over a launch rod.

Saturday, November 5, 2022

Estes Odyssey #7235 Build, Part 13, Vanes Marking & Gluing

I only marked the location of the root edge length of the cardstock vanes (Parts O) These upper pencil lines were just longer than the root edge of the vanes.

Only one of the lines was extended down to the rear of the body tube to glue on the BT-80 tube.

The instructions show all the lines the entire length of the body tube. I wouldn't do this - thin pencil lines can make slight indents down the tube and show up when the rocket is painted. 
That's a lot of pencil lines!
TIP: Never use a ink pen to draw position lines. In will show through paint!


Here's a picture from further on in the build -
Look close and you can see the scribed pencil indent line between the two fins. 
When you draw pencil lines, don't press too hard. Use a soft pencil.


The BT-50 tube (Part L) was glued onto the single pencil line that ran all the way down the tube.

The primer/filler was scraped off and the tube roughed up before the glue was applied. 

The rear of the tube is 1/2" up from the end of the BT-55 main airframe tube.


Here's the forward vanes glued in place. 
Some gloss white was sprayed over just this area to spot any glue that needed to be sanded smooth. 

Notice the edges that had the sanded glue bead (seals) on the outside edges. The edges are smooth and shiny.

Wednesday, November 3, 2021

Quest Lil' Grunt Build #Q5014, Part 3, Tube Marking

The fin marking guide from the instruction sheet didn't meet up when wrapped around the tube.
I first made up a marking guide by wrapping a strip of copy paper around the tube and marking the overlap point with a pencil.
This was evenly folded into thirds.

It worked okay, but - folding in thirds isn't usually as accurate as folding into fourths.
I ended up going to payloadbay.com and to "Tools". I printed up a three fin marking guide.
To get to the fin marking guide Tool: CLICK HERE

The box says the tube is 1.97" diameter but the marking guide fit was too tight. 
I printed up a second guide setting the diameter to 1.98". This one fit better and will be used on the other upcoming 50mm Quest/Enerjet builds.

The body tube seams were filled with CWF and sanded. 
Notice the fin height and launch lug position are already marked in pencil. This gives me a reference when the glue areas are scraped (to remove the filler primer) later on. 

The inset picture shows the upper lip of the tube that got a wipe of CA glue applied with a Q-tip.

Sunday, October 17, 2021

Estes Vesta Intruder #7312 Build, Part 6, Filler/Primer, Vane Gluing


Here's all the CWF filled balsa and launch lug. Everything is set down on tape with the sticky side up. All root edges are butted up against each other to keep the filler/primer spray out.

That's a lot of balsa!


The tube marking guide wrap matched up! 

In the picture below left -
I set the long vanes in position with no glue yet. I made a pencil mark below the end of the vane tip. I followed by scraping off the filler/primer down to the width of the vane glue line, just inside that short pencil mark.

I used my aluminum angle to extend the pencil lines all the way down the tube. 

I also extend the line over the top edge of the tube. The fins will cover the pencil lines - I can still see the edge tip of the pencil line.


You can also use the aluminum angle to be sure the long vanes are running straight down the tube.

Monday, February 15, 2021

Estes Airborne Surveillance Missile Build, #0867, Part 4, Tube Filling & Marking Guides


The tube seams were filled with CWF and sanded to surface.
The tube on the left is the lower BT-5, it is flipped over. 
Just the lower end is exposed and needs a shot of filler/primer.

The picture on the right shows the filler/primer after sanding. The upper white side of the BT-5 tube will have the centering rings glued on.


Twelve fins! You wouldn't want to misplace any of them, especially the small ones.
Keep them in a zip-lock bag until you need to glue them on the body tube.


There are two sets of instructions.

TIP: Don't cut up the instructions (that are in English) to get a tube marking guide. Cut up the extra set of instructions and your set of English instructions will stay complete.

Monday, December 10, 2018

Semroc Saturn 1B, Build, OOP #KS-1, Part 40 Notching the H-1 Tubes

Four of the BT-51N tubes have to be notched to fit around the four engine cluster mount. Notch only four!

Mark the tubes for a slot 3/8" wide by 2 7/8" tall.
The long sides were marked in pencil using the aluminum angle.
The top mark was penciled using a wrap of masking tape to be sure it was square.

Use the aluminum angle as a knife guide to make the vertical cuts.


Here's four of the eight fuel tube engines, cut to fit around the four engine mount.

Build time this post: 0 hour, 30 minutes
Total build time so far: 38 hours, 20 minutes

Friday, August 11, 2017

Estes Starship Nova #1371 Build, Part 9, Low Intake Tube Fitting TIP


TIP: There is one great thing about having instructions sheets in different languages. Cut out your tube marking guides off the sheet you won't be using! This saves your English instruction sheets intact.

TIP: Glue the lower intake tube in place AFTER the engine mount is glued in. You won't be fighting the glue (that is quickly setting up) trying to get the engine hook centered with the lower intake position.
Glue the engine mount in first, wrap and mark with the fin guide in line with the hook, then glue on the intake.

GOTCHA: Well, another fin marking guide that didn't quite match up! Maybe this is why Carl at Semroc didn't include them in his kits.

I rotated the grey overlap area directly above the engine hook for a line to place the intake.


Here's a better view to show what I meant.
The center notch on the ring is directly above the engine hook line.