Showing posts with label OR Goony X-15. Show all posts

Sunday, May 21, 2017

Goony X-15, Part 11 Comparisons

Here's a comparison between the Quest X--15 and my Goony version.

I didn't use as many decals on the nose cone.
To be honest, the Quest decal sheet had all those little decals in different areas on the decal sheet. A real pain to place all those tiny details. On a Goony it's not really needed.


Here's all the tiny decals I didn't use on the Goony!


In 1988, Estes had a stumpy NASA X-15 kit #0889.
The side fairings look great but were probably hard to form out of cardstock.

Saturday, May 20, 2017

Goony X-15, Part 10 Decals and Finished

Before applying any decals the model was polished. The metallic finish is a bit rougher than a gloss would be. I wanted to be sure there wouldn't be any silvering of the decals.


This one actually came out pretty well!
Except for the length of the side strakes, all the fins were the same ones used in the old Quest X-15 kit.

Look close at the USAF in this bottom view picture. There's a little silvering of the decal. It looks like the decal didn't adhere around the "A". Oh well!

Friday, May 19, 2017

Goony X-15, Part 9, Nose Weight

This one might be okay without any added nose weight but I'll play it safe and add a 1/2 oz. of clay.
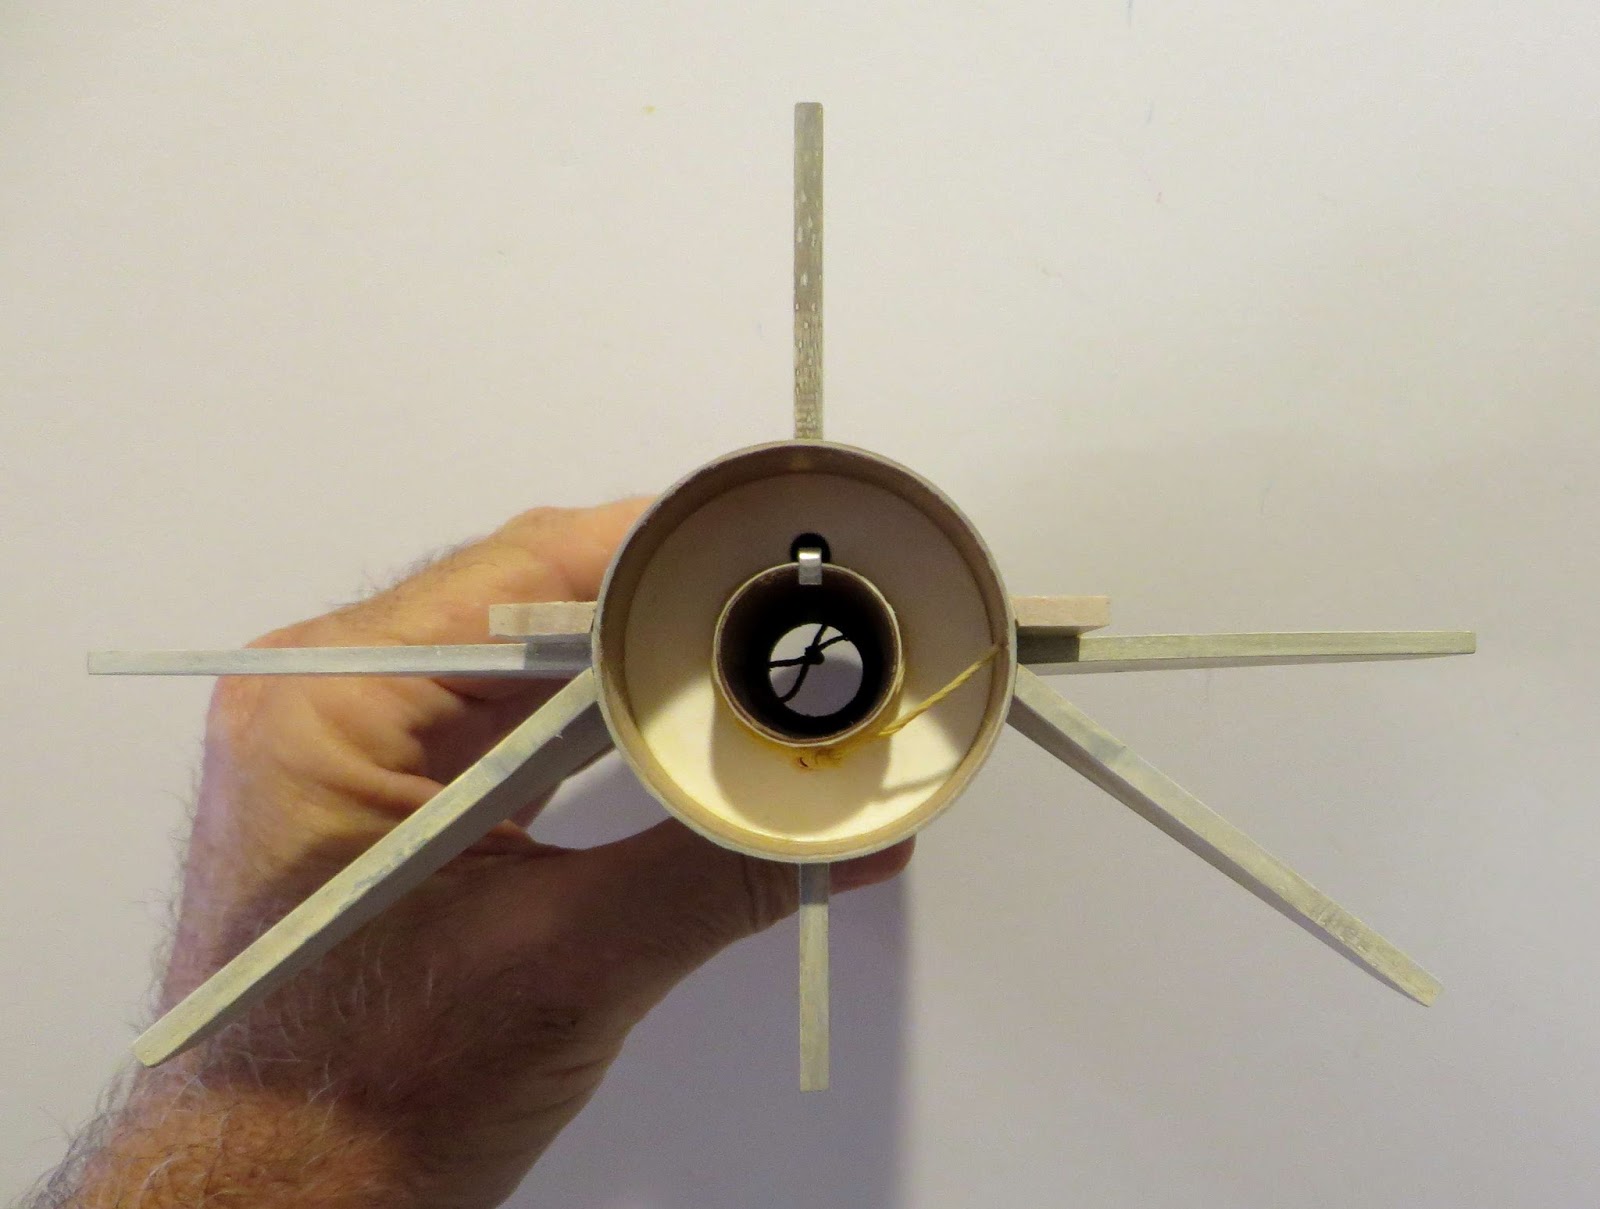
I had already set the screw eye in the nose cone base. I unscrewed it along with some balsa from the shoulder.

I've never drilled out a nose cone for weight before! In the picture you can see the decals were already placed. Decals are shown in the next post.

The screw eye hole acted like a pilot hole. I started with a 1/8" drill and worked up to a 1/2" diameter drill shown at the right. Don't go too deep!

There was some balsa glued on the threads of the screw eye. I could have found a new one, but I'm cheap.
The balsa was filed out of the threads with a small diamond file.

1/2 oz. of clay was pushed into the nose cone hole.
The screw eye was screwed back in towards the outside of the shoulder. Turn the screw eye so it will clear the body tube when the nose cone is inserted in the tube.

Thursday, May 18, 2017

Goony X-15, Part 8, Black Paint Switch

So . . . you paint it black! No masking, just black.

I know, it should be flat black. But, there are water slide decals.
You can't get great results placing decals on flat paint. "Silvering" occurs where the decals can't fully adhere to a rougher flat finish.


I wasn't that excited about the gloss black. So much of the fin lines are lost. I hit the model with one light coat of Rustoleum Metallic Black.
What a difference! I'm getting farther away from scale but it's a Goony! Who cares?

Tuesday, May 16, 2017

Goony X-15, Part 7, White Undercoats And Sanding

Grey primer really shows off all the rough areas a glue blobs. The follow up white undercoat shows off even more.

Check out the rough fillet area under the strake.


Trying to apply a glue fillet in the very tight back fin angle is very hard to do. Sometimes I don't bother with it.
The same goes for launch lug fillets. It depends on how tight the angle is.


I've sanded down the rough fillets with 400 grit. Another white coat will follow.
This one will be easy to paint, it's all black!

Goony X-15, Part 6, Gluing It Together


Here's a view from the back showing the fin position. You can see the angled root edges to fit against the body tube.


Now it's starting to look like an X-15 - well, sort of.
White coats are next.

Monday, May 15, 2017

Goony X-15, Part 5, Canopy Fitting

Originally I thought this Goony X-15 might be a fun addition to the Odd'l Rockets line. It all hinged around the price of the X-15 decal from Quest. They wanted too much for the individual decal sheets and that in turn made the price of the kit too high.
I had carved a X-15 style canopy to make vacu-form canopies. This prototype build will get the only molded canopy I made.


Fitting the canopy to a nose cone took quite a while. It was more complicated than simply sanding around a body tube curve.
Why clear plastic? It's what I had on hand.


Medium CA glue was used to glue the canopy to the filled nose cone.
I kept a Q-tip handy to pick up any excess glue.

Goony X-15, Part 4, Strake and Fin Root Edge Fitting


The wings and upper and lower rudders glue on in a cruciform, 90 degree spacing. The wings are set back farther than the real X-15 for stability.

The strakes glue over the top of the wings. Notice the gap at the root edge of the strake.


For the best fit, sand an angle into the root edge.
The inset picture shows the improved fit at the root edge.


Here's the lower fins before and after the primer/filler was sanded down. There's very little primer left in just the remaining grain pores.


The rear fin root edges are also sanded at an angle to set under the fin and strake.

Sunday, May 14, 2017

Goony X-15, Part 3, Small Stuff


The pointed tip of the nose cone was rounded off with some 220 grit wrapped over my fingers.

Medium CA glue was wiped onto the inside body tube ends with a Q-tip.
TIP: You can get a very even line of glue by using your fingertip against the tube lip as a depth gauge for the Q-tip applicator.
Also run some CA right onto the tube edge.


Smooth the dried CA with some 400 grit sandpaper.


The replaceable Kevlar mount line was set underneath the engine hook to help hold the taut for tying the square knot.

Saturday, May 13, 2017

Goony X-15, Part 2, Fin Prep


One way to make a simple Goony is to glue the original kit fins onto a short 7 1/2" length of BT-60.
The edges of the fins were sanded square. You can see the laser cut "chattering" that needed to be sanded flat.


The Strakes go down the body tube above the wings. These are simply shortened by trimming off the excess at the back.


I was going to make double thickness strakes to better simulate the thickness of the real X-15 fairings. In the end I went with the original single piece "profile" fairings.

Friday, May 12, 2017

Goony X-15, Part 1, Parts


In the past I bought a few of the Quest X-15 Parts packs. In the pack you get everything except the engine mount, main body tube and parachute.

I figured with some BT-60 based parts I could make a good goony version. I raided the spare parts drawers.

I found an Alpha style nose cone and a length of BT-60.


I think the main reason people buy the X-15 parts pack is for the decal sheet. It is a water slide sheet with lots of white decals on it.