Sunday, October 31, 2010

Estes Shock Cord Mounts TIP

I'm not a big fan of the Estes "Tea Bag" shock cord mounts. I never had any pull out at ejection, they just tend to be too bulky in a smaller diameter tube. Years ago, Estes would pre-print the shock cord angle (shown below) on the card stock mount. They dropped this "angled" method and now leave it up to the builder to decide.

With the elastic or rubber band folded twice over itself, it can block a parachute or streamer at ejection.
Here's that old solution to help keep the mount flat against the inside of the body tube.

Glue the elastic at an angle as shown. Look close at the picture and you can see the cardstock mount has already been pre-creased.


Here's the first fold. Note the loose end of the shock cord is laying beside the glued end.


At the second final fold, you can see how the elastic lays beside itself in a "Z" shape.

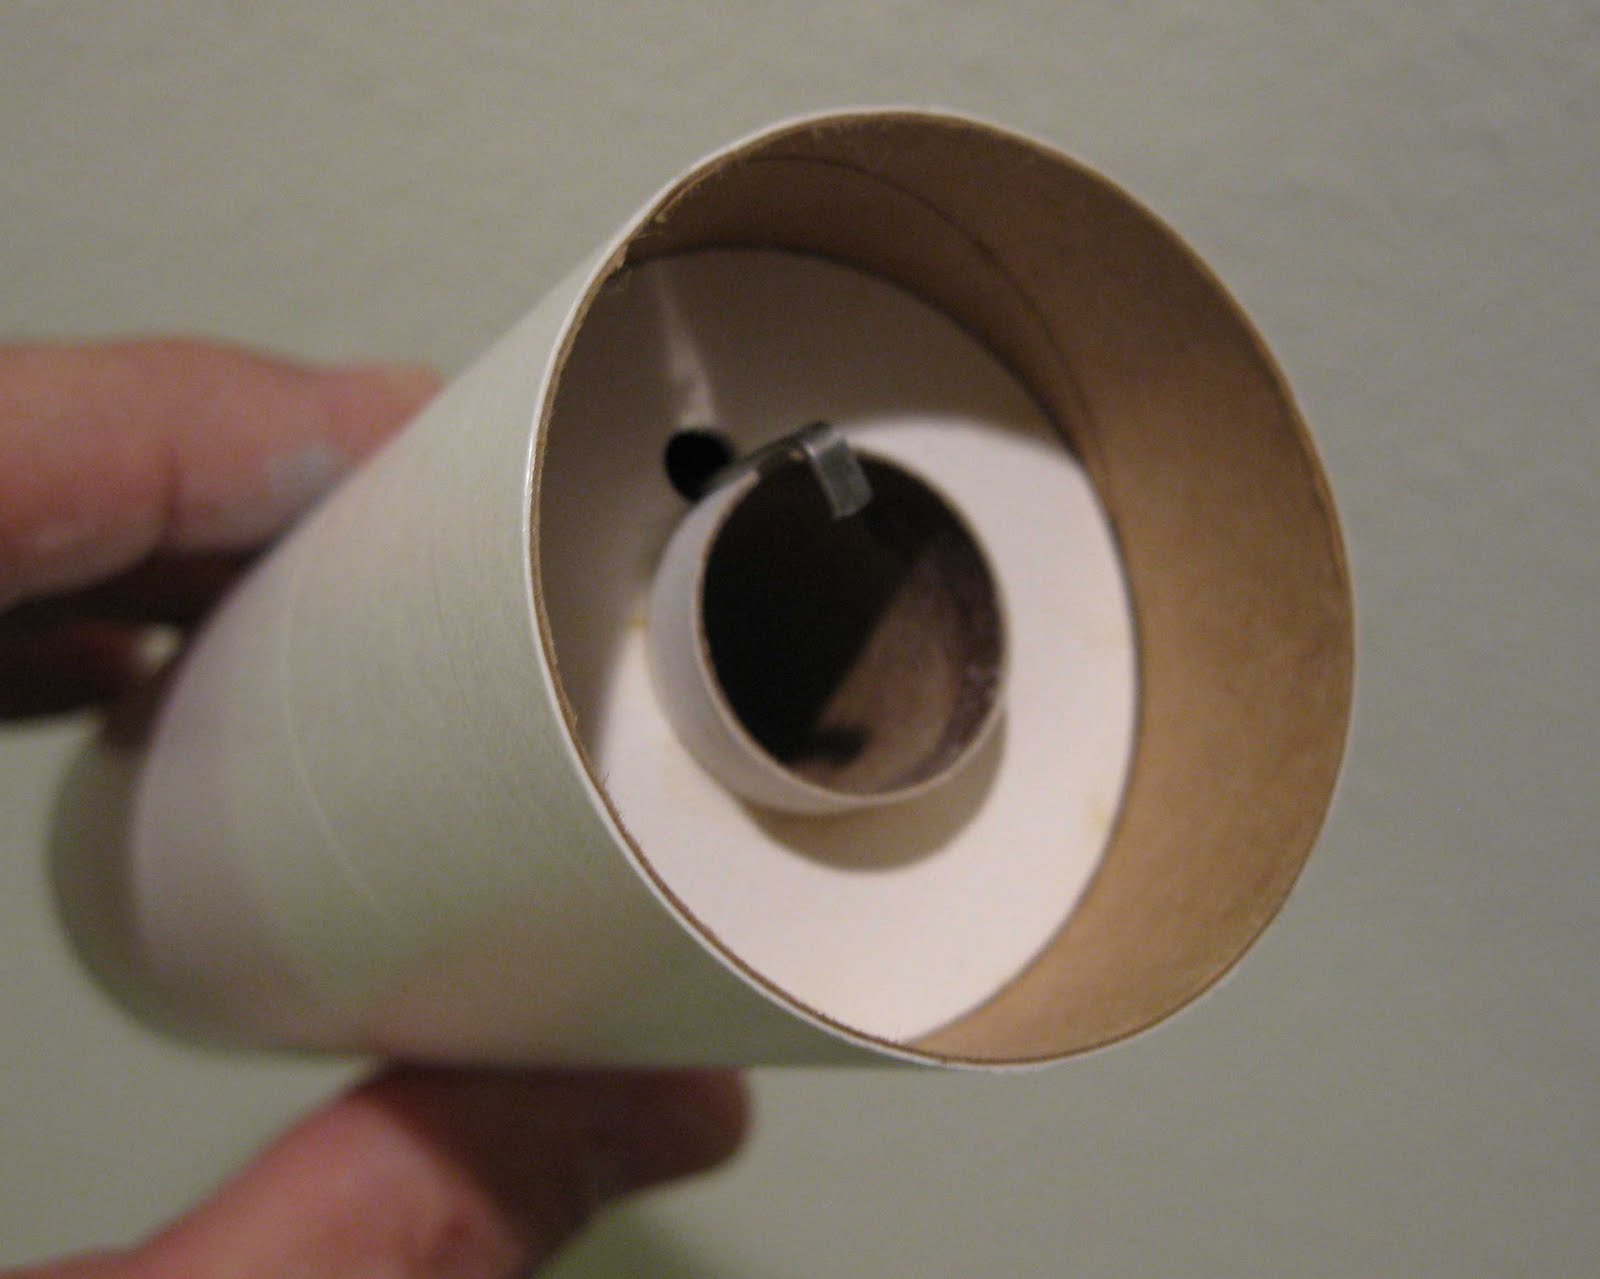
Before gluing into a tube, I'll form it into a crescent shape to better conform to the inside of the body tube.
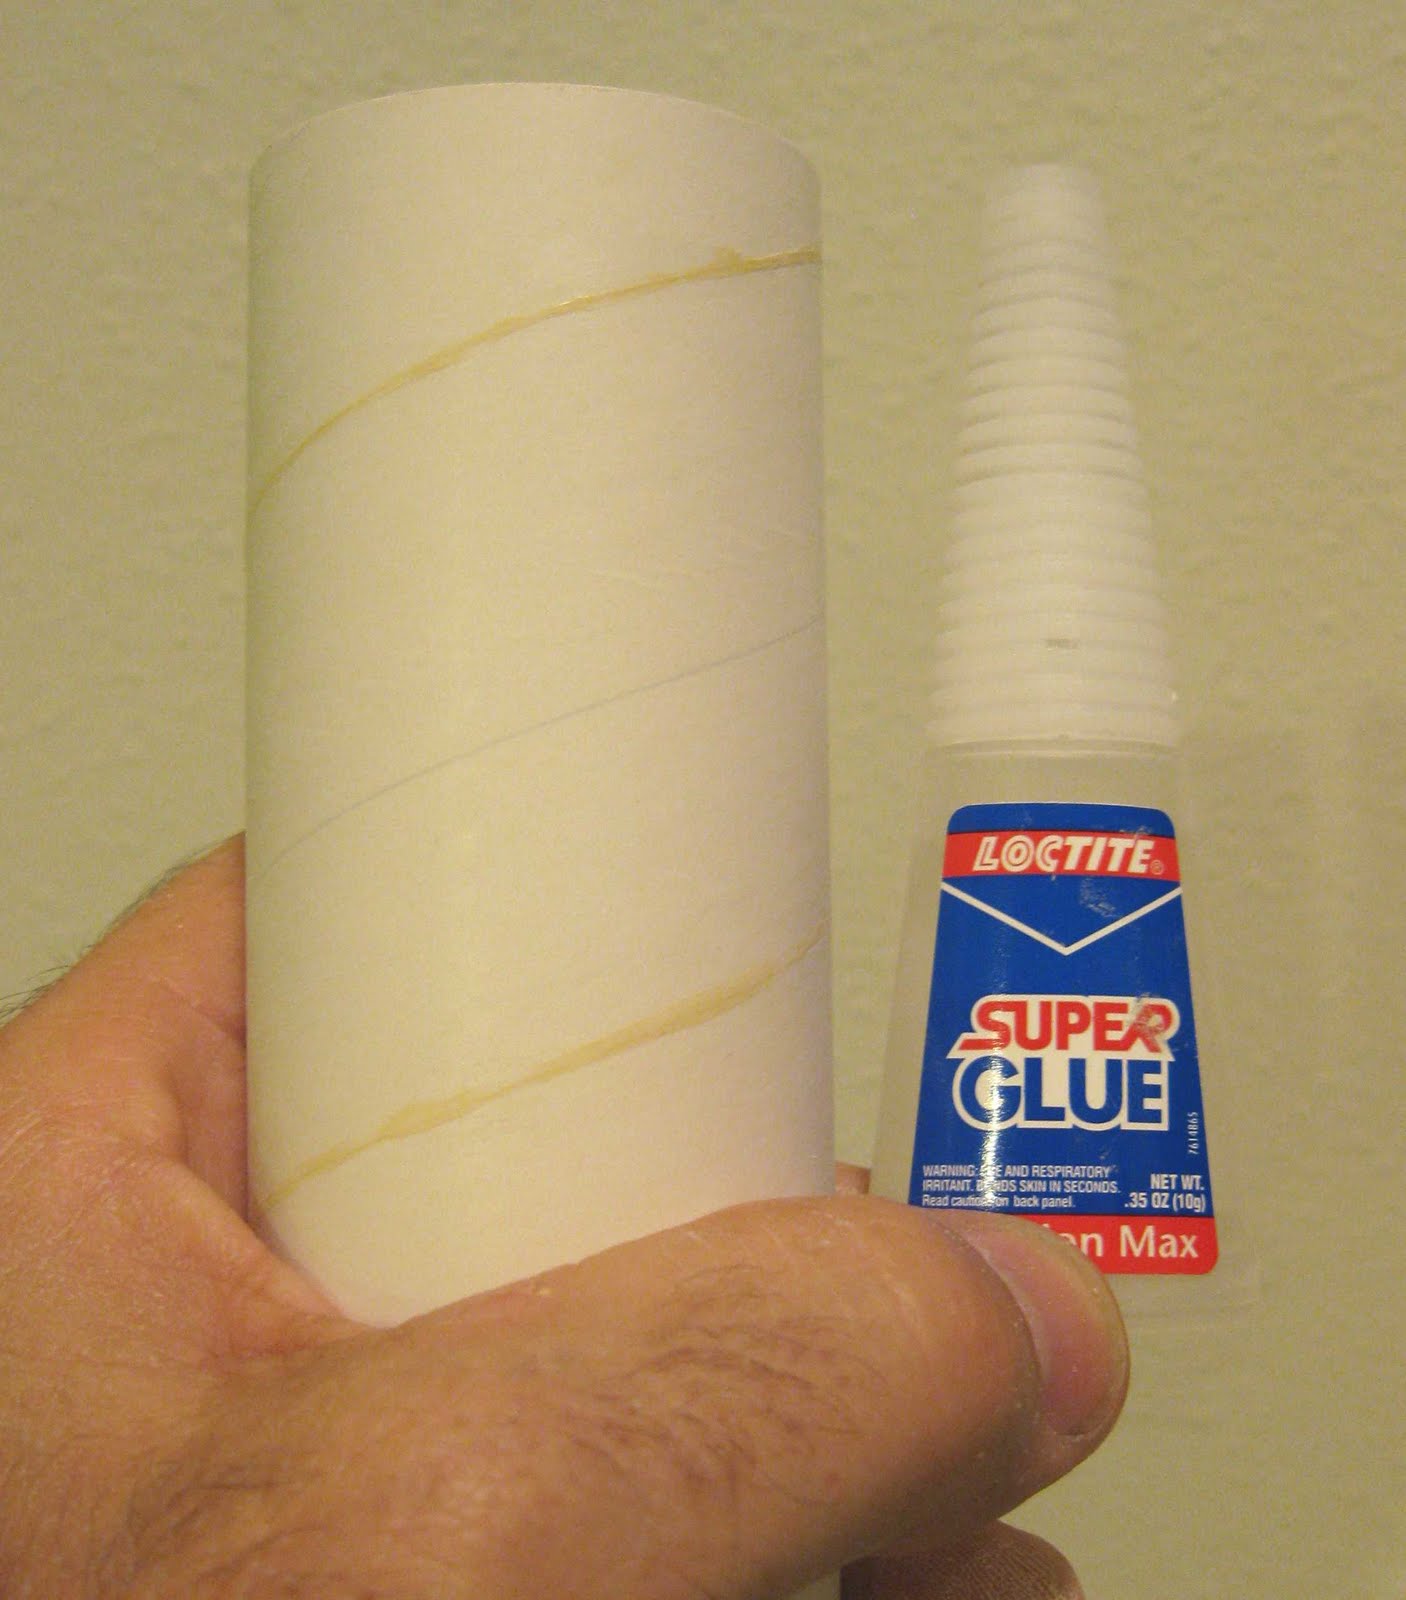
TIP: Many modelers use too much glue when making a tri-fold mount or shroud. More glue only makes a mess and takes too long to dry. Use more glue to glue a tri-fold mount inside the body tube.

LAUNCH! Small Stuff Halloween, 10.31.10

I launched some small things at the soccer field this morning.
Perfect conditions - cool and no breeze at all.

The MMX downscale Missile Toe flew, landing just a few feet from the launcher.
The MMX Sky Writer had it's 12th flight. Perfectly straight boost as always.
My downscale MMX Break-Away would not ignite! I switched igniters and tried too many times. It'll wait for my old controller and another day.

The downscale carded Wolverine flew with an old MPC 1/2A3-5m engine. After the last flight, a little nose weight was added, but it's still coning a little at boost. It might have more to do with the model's size and the asymmetrical fin arrangement. Of course, this delay is too long, but safe deploy and recovery.


Here's a bad judgement on my part. I have way too many MPC 1/2A3-5m engines. All have performed well, I'm not blaming this mistake on the engine.

The carded Mercury Redstone boost was great! The five second delay was too long. I took a chance and the model nosed in. Ejection was very close to the ground and the tower hit the lawn. The tower is crumpled, the rest of the rocket is fine.
I'll print and make another capsule.


Look how close the Redstone landed! You can still see the smoke around the base of the launcher.

This is the first time I used a Quest controller and launcher.
While the launcher was fine, the handheld controller took too long to ignite the MMX engines. Yes, the 9V battery was new. For a while, I'll use the Quest launcher with my other Estes controller.

Mercury Redstone Part 2 Engine Mount

I'm finally home from the cruise with normal, fast computer downloads!

While on the ship, I built two of the small, carded Mercury Redstone models. One non-flying version was a gift to the Cruise Director. I kept the other for flight conversion.

On the model I brought home, the fins weren't glued on yet. I slid an 18mm engine casing in the rear of the main rolled tube and it's a near perfect fit! I decided to make an engine mount for 13mm engines.


1/4" wide segments of the casing were cut to make centering rings for the 13mm mount.

Without power tools, the easiest way to cut them is with a hobby miter box.
TIP: Don't try to saw through the entire casing. Saw a bit, rotate the casing and saw some more. You'll get through the casing much faster this way.


After you've cut off the first 1/4" wide ring, sand the casing end flat. It's easier to sand one side of the ring square before cutting the ring off the casing, there's more to hold onto. Cut off the 1/4" piece and then sand square the other side.


Here's the rings, before and after sanding the cut sides square.

Thursday, October 28, 2010

Ranger Ray's Rocket

This is my last entry while on board the ship. I’ll start again when I’m home on October 31.


Here’s another I printed out last year. This long cruise gave the opportunity to put it together.
This is “Ranger Ray’s Rocket” from :
www.lansbergen.net
There's also a review on EMRR showing a conversion to "T" motors.

It’s a simple build except for the pointed nose cone. You’ll find it easier to get the tip formed by using long tweezers to hold the tip of the flap down inside when gluing. Normally I would steam a nose like this to get the sharp tip to form. Without the steam, I did a lot of kneading and pre-rolling.

This design would make a good conversion for “T” engines. I’ll build a flying version down the road. Three ply fins would be stronger than the two ply design shown here. I can assume nose weight would be required.

This model was a gift to the Event Manager on the ship. The carded Mercury Redstone went to the Cruise Director. They were both surprised and seemed to appreciate the time that went into the construction.

Keeping this blog active while trying to work on a cruise ship has been difficult. Loading daily entries is rarely successful. My apologies to anyone wondering why the content has changed a bit. I wasn’t able to work on the Dr. Zooch Saturn 1 SA-5 kit. I’ll be building it soon when I get back home in two days.

Wednesday, October 27, 2010

Pigasus! Build Part 15 Nose Cone


This is the first time I've ever used pink paint on a rocket.

Now the pig is really starting to look like a pig.


This is where all the design work starts to pay off.

The decals and goggles really finish off the nose end well.
I'll have to go back and do some reworking of the goggle to get a better fit.

Tuesday, October 26, 2010

Pigasus! Build Part 14 Nose Cone


Picture 1:
This is the nose cone of the Pigasus. The nose extension is close to a ½" length of body tube capped with a round piece of heavy card stock.


Picture 2:
The angle of ear pieces were sanded again to give them a more windswept look.


Picture 3:
The head is starting to look more “pig-like” now. I’m looking forward to how the decals look.


Cruise Update:
Don’t ever bother with Acapulco, Mexico!
The taxicab drivers will drive you nuts by constantly pressuring you to take their cab. After you turn down one, ten more follow and didn’t give up until I politely threatened: “Back off or I’ll call the police.”
After being hit by panhandlers, souvenir hawkers and small children begging for money, I did a U-turn and was glad to return to the ship.

Monday, October 25, 2010

Mercury Redstone - A Cruise Diversion


I’d printed this one off about a year and a half ago thinking I’d put it together on a cruise.
This turned out to be the cruise.
Carded rockets are great for travel, I carry a few printouts in a folder.

This free Mercury Redstone printout is available from the Delta Seven Studios at:
http://www.delta7studios.com/dl.htm

While not as detailed as a Dr. Zooch Redstone kit, it would be easy enough to convert it to fly with “T” engines. It’s an easy first-time carded build.

For being a simple rolled shroud, the capsule is stronger than you would think. The tower goes together easy enough, it’s a simple tri-fold. The rolled body tube is right around 3/4" diameter but this model is better suited for a 13mm engine mount.


The directions show the two side fins simply being simply glued. I added an interior of cereal box cardboard to give it a tapered “scale” profile. The lower root edges hook under the body tube. I’ll have to wait until I get home to make the engine mount. After the mount is glued in place, the fins will follow.

While easily converted for flight, you’ll have to add some nose weight. Give it a swing test before flying.

Cruise Update:
Last night’s shows went great! The new travel guitar worked well and I’ve gotten some good comments about the show.
Now, while walking around the ship, my anonymity is shot! Everybody knows who I am. I spend quite a bit of time answering questions about the instruments I played in the show last night.

Sunday, October 24, 2010

Cruise Update Part 3


Tonight is showtime on the Statendam cruise ship! - FINALLY!
That’s one of the down sides of working on a cruise ship. It’s an eleven day cruise and I have one night in the showroom.

The blog postings may have spelling and visual errors in them, but the Internet load times are so slow, I honestly can’t justify the time and cost of continually going back and correcting everything. So, bear with me for now. On a cruise ship, the guests pay $.75 a minute for Internet!
Sometimes it can take two minutes for your mail to load. Imagine uploading two pictures plus copy to the blog.

I had hoped to start on the Dr. Zooch Saturn 1 SA-5 kit but I didn’t pack any balsa filler and I don’t have any way to steam the small wraps for smooth rolling. All I could possibly construct on board is the engine mount! I did pack glue, knives and sanding blocks. This model will have to wait until I get back home.

So for now, I’ll continue with the Pigasus! I had built and photographed far enough ahead for extra blog entries. I’m able to do some graphics on my laptop. What do you think of the new title bar?

Pigasus! Build Part 13 Fins


When the wings were glued into place, the outside tips gravitated in and to the center of the tube in an inverted “V” shape. While this wasn’t the original plan, I went with it thinking it looked good at the time.


To make a smoother joint between the wings and legs, an angle was sanded along the root edge.

Saturday, October 23, 2010

Whistle Rocket Part 2

I bought a hand launched “whistling rocket” from the nearby WalMart.
The entire rocket is made of foam except for the plastic whistle near the nose of the rocket. I don’t really know acoustic science, I’ll do my best to explain how it works.

The launcher is an air plunger made of heavy cardboard. The rocket is socketed onto the (green plastic, lower left) open tube on the hand launcher. The outside plunger is pulled back to fill the chamber with air.

The rocket is launched by quickly sliding the larger tube into the smaller telescoping tube. Compression pushes the rocket off the smaller tube. Air rushing over and into the whistle on the rocket body makes a faint whistling “cry” as the rocket flys away from you. You can hear the whistle as the rocket decelerates.

The whistle is audible, but not as loud as I had hoped.

To mount a whistle like this on a model rocket would require cutting a hole through the body tube to mount the internal chamber.
Making a model rocket whistle during boost would involve designing a whistle that would be loud enough to be heard after the thrusting phase.
The whistle activation would have to match the speed of the rocket. Enough air would have to be directed into a whistle or reed to be heard from the ground.

Friday, October 22, 2010

Make That Sandpaper Last!


You can’t wet sand the first coat of primer, the water can soak into the body tube and wood fins.
The primer can really load up sandpaper and shorten it’s usable life.
I’ve been able to extend the usable life of 220 through 400 grit sandpaper by brushing and knocking off the accumulated primer.
The brass brush is available at Home Depot and Lowe’s in the paint department.

As this is a wood sanding block, I’ll try not to get the wood wet when cleaning off the buildup.
Instead, I hold the brass brush under running water then shake off some of the excess water.

Using a circular motion on the sandpaper, the brass brush knocks off and removes the buildup.
Repeat the wetting of the brush and removing the primer.

The first picture shows the buildup on the paper.
The second picture is the sanding block after cleaning off the clogged primer.

After brushing off the primer, the sandpaper is finer and a bit smoother than new 400 grit paper. But it’s still usable.
A single piece of sandpaper can last three times as long before throwing it away.

Pigasus! Build Part 12 Fin Prep and Gluing


Here’s the razorback piece.

Before gluing on the fins and razorback, the primer was sanded off the body tube for a stronger gluing area. (This was shown in a previous post) The razorback piece was set on the body tube and it’s root edge length marked. I want to be sure not to sand beyond the root edge span.


This is one of the wing fins.

Look at the top edge and you can see how the flat side was slightly sanded down to expose the balsa for a better gluing surface. The side of he root edge glues to the body tube.

Thursday, October 21, 2010

Installing Untangled Shroud Lines

You can tie on shroud lines without tangling. It just takes a little more time.

Don’t pull all three line loops through the screw eye (or in this case the snap swivel) at the same time. Pull them through one by one for three separate loops.
I mark the centers of the shroud lines with a Sharpie pen. This way all six shroud lines (three loops = six lines) will be an equal length.
First, all the shroud lines are tied onto the parachute material.
With one hand, pinch the two adjoining tape disks together between your thumb and index finger. With your other hand, run your fingers down the line loop to the end. Make a fold at the halfway point of the line loop. Mark that center point with a pen or pencil.


In the first picture you can see the center mark on the shroud line.
The single loop has been fed through the small metal hoop at the end of the swivel.
Before pulling the line tight, take a moment to be sure there is no twists in the line. Pull down slowly and remove any twists that might form.


In picture two, the first line has been pulled tight. The center mark on the line loop is right against the metal swivel hoop. With the line mark centered, both of the (now two) lines are equal length.


Picture three shows all three loops pulled tight against the metal loop end of the swivel. All the center marks are at the top of the new knots. Add a drop of glue over the knot to lock everything in place.

Wednesday, October 20, 2010

Fliskits Mystery - Lost Package!


I took advantage of the Fliskits anniversary special. Jim Flis was offering free shipping for the month of September. I ordered a five-pack of MicroMaxx engines for 30 engines in total. With the free shipping, this was a great price. The order was sent in about the 20th of September.

I was gone for the weekend doing some work with my (former) brother-in-law. When I got back, I checked the mailbox and front porch - nothing.
A week passed and still no package!

I contacted Jim Flis by email, he said to wait a few more days just to be sure it wasn’t caught up in the mail. I waited and still no delivery.

Jim wrote back and said he’d send out another five pack of engines. If the others arrived, he told me not to open them and simply “return to sender”, or I could send him a check for the "missing engines". The new, replacement engine shipment arrived just a few days later.

My neighbor, a pilot for FedEx, had been gone for quite a while. On his return, he knocked on my door with the first FlisKits order!
He explained it looked like it was going to rain. He saw the package on my doorstep and took it into his home. That same day he left for two weeks of flying.

He could have left a note on the door!
I ended up sending Jim Flis a check for the 30 extra engines. I now have 60 Micro Maxx engines.

Pigasus Build, Part 11 Fins


These are the pig legs, one before and one after sanding down the primer.
Some builder's lay down more coats of primer than me, sanding between coats. Before the first color overcoat, their surfaces will be gray overall. I spray and sand just enough just to fill any imperfections left after the Carpenter's Wood Filler.


Next up, the gluing lines for the wings and legs were sanded down on the body tube for better adhesion. The root edge gluing line was wider than usual so I was able to use some 220 grit on a sanding block.

Tuesday, October 19, 2010

Cruise Update Part 2 Arriving in Jamaica

So after arriving in Jamaica I went through immigration. Typical immigration except my work order said I was arriving in Aruba, not Jamaica.

The girl behind the counter said: “I’ll be right back”, she then walked away with my paperwork and passport.

She returned five minutes later and motioned me to follow her through a door.
It was a darkened room, we were joined by a big man. It was like a scene from a bad movie, my first thought: “Uh oh, cavity search!”
He started an interrogation! “Why are you here in Jamaica when the ship assignment papers said the destination is Aruba?”
His delivery wasn’t pleasant. “Which port are you going to meet your ship?” I didn’t know.
“How could you not know what port you are going to?”

I tried to explain the situation, that the ship had to change ports to help with an emergency medical evacuation of a guest.
Questions continued for another ten minutes. After my suggestion, he finally called the port agent.

When he got all the information from the ship, his demeanor changed. He was suddenly my best friend. He was joking now and patting me on the back.

After a 1 ½ hour drive to Ocho Rios, I finally got on board the Statendam.

Pigagus! Build Part 10 Fin Primer


Here’s the balsa and launch lug ready for their coat of primer.

I’ll usually place masking tape, sticky side up on a scrap piece of cardboard and lightly set the fins on the tape. I make the tape less sticky by setting the tape on my jeans pant leg and removing it. Lint is left on the sticky surface making it less tacky.

Smaller fins are stuck standing up with the root edges on the tape.
Larger fins like these are set down flat, rather than running the risk of them falling over under their own weight.
I'll shoot one side with primer and let dry. Everything is flipped over and shot again.

Monday, October 18, 2010

Cruise Update Part 1


What does this have to do with rocketry?
I packed some carded rockets and a Dr. Zooch Saturn SA5 to start when on the ship.
I copied this picture from the new, updated Dr. Zooch website at:
http://klydemorris.goods.officelive.com/NewProducts.aspx

My journey so far:
I arrived at the Orlando Airport at 5:00 a.m. for a 7:00 a.m flight to Aruba to meet the ship.
When checking in, I found out my ticket had been cancelled!
One phone call later told me the ship was re-routed and I would meet the Statendam at Montego Bay, Jamaica.

Understand, this wouldn't normally be a problem. But it's just me carrying two LARGE instrument cases, two suitcases and a backpack.
Of course, my new flight is on the other side of the airport.
You'd point and laugh if you saw me pushing and wheeling the load through the airport.
I should buy stock in Velcro, it's holding everything together.

So I wait - good thing there's free WiFi at the airport

Sunday, October 17, 2010

The Igniter That Refuses To Die!


Here it is - the
IGNITER THAT REFUSES TO DIE!
We're getting close to Halloween, what did you expect?

Today marks the tenth MMX launch on this igniter. The only way I break these things is when the toothpick retainer is pressed into place.
I'll keep reusing it until breaks or burns through.
Needless to say, I have lots of extra new Micro Maxx igniters in my range box.

LAUNCH! Small Stuff 10/17/10


I wanted to get in a small launch before leaving for the cruise job tomorrow morning.
I can't make any guarantees about regular posting for the next 12 days or so. While the ship claims fast internet connections, they are painfully slow!
I'll bring a few small things to work on and post when I can.

The new carded downscale WOLVERINE made it's first flight this morning. I used one of the 35 year old MPC 1/2A3-5m engines.

There was a tight corkscrew at the boost, I'll add a little noseweight and it should be better next time around. Altitude was lower than I would have expected, a better engine choice would be the A3-4t.


My "freebie" Art Applewhite SCIMITAR flew on a A10-3T. Lots of smoke and a fast spin. Ejection came after apogee with the nose down.

The downscale carded SKYWRITER had it's 11th flight! This is a favorite now, finally a Micro Maxx that gets good altitude before the 1 second delay pops the streamer.


The downscale Gooney MISSILE TOE flew on it's MMX engine.
And finally, a Bob Harrington's downscale RED MAXX flew again on a Micro Maxx.

Saturday, October 16, 2010

The WHISTLER! - that didn't! Part 1


Recently there has been forum posts about whistling rockets.

Rockets with split fins like the BSD THOR do whistle. I've heard the THOR whistle at N.E.F.A.R. launches. Bullpups have also been known to whistle.

Estes had their SCREAMIN' MIMI design.
It didn't whistle loud enough to be heard over the engine. There wasn't enough directed airstream to activate the whistle.
The Mimi rocket had tubular plastic "Whoopee" whistles attached to the outside edges of small fins.
You can hear a "Whoopee Whistle" HERE


Two years ago I experimented with split fins trying to get a good whistle. The WHISTLER fins had opposite and angled trailing and leading edges. My hope was to direct and split the airstream over the angled leading edge of the lower fins.
Look closely at the leading edge of the lower yellow fin. You can see the angle cut.

On the BSD THOR, the upper trailing edge and lower leading fin edges are square.

It was launched a twice with a B6-4 and C6-5. No whistle was heard.

Someone would have to build a prototype where the distance between the split fins could be adjusted.
For example, one flight with 1/4" space between the fins. On the next flight, the upper fin moved up to 5/16" between the fins. Adjustments could be made until a possible whistle is loud enough and consistent.

Friday, October 15, 2010

Pigasus Build Part 9 Ears


I wanted the pig's ears to have a blown back look.

To get the correct angle of the ear on the nose cone "head":
1. 220 grit sandpaper was wrapped around the main body tube.
2. The ears were held at what I thought was the correct angle against the sandpaper.
3. The inside edge of the ear was sanded down by going in a straight line, back and forth, over the sandpaper.

Here's the inside angle (or the gluing surface) of the ears, ready to be glued to the nose cone.

After checking the ears on the nose cone, I ended up sanding more off the edge so the ears would lay back farther. This picture was taken before the second sanding adjustment.

Pigasus Build Part 8 Nose Cone Weight


The 1/2 oz of clay weight is formed into a snake and pressed into the pre-drilled hole in the nose cone base.

The dowel was used to press the clay forward and level out the top.


The screw eye is turned into the plywood plug, just far enough until where the screw threads aren't visible.
Don't screw too far in or there won't be any threads to hold the eye in the disk!

The disk edges took a little bit of sanding to fit into the pre-drilled nose cone hole.
After the disk was pushed in as far as it could go, a fillet was applied around the edges using a dowel as an applicator.

Thursday, October 14, 2010

Pigasus! Build Part 7 Fin Filling


If you look at the fin pattern sheet post #2, you know these fins have a complicated shape.

With all the inside surface edges of the wings and razor back pieces, it'd be much easier to fill the balsa before gluing onto the main body tube.
I wasn't looking forward to filling the inside angles but it turned out being much easier than I thought.

Thinned Carpenter's Wood Filler was brushed on all surfaces. The inside edges were sanded first.
I simply folded a piece of 400 grit sandpaper, stuck the fold in the angle cut and sanded back and forth - DONE!

The picture shows the razorback balsa piece with the sandpaper tucked in a recess. The fold of the sandpaper would knock down the filler, two edges at once.

Pigasus! Build Part 6 Engine Mount


The engine mount was glued into the ST-18 (1.840" diameter) body tube.
The rear ring is recessed 3/4" up from the rear.

TIP: On a mount this wide, I don't lay a glue ring in the main tube and slide the mount into the glue. The mount is slid in place, up to the 3/4" line, then add fillets on the bottom and the top.

With centering rings this big, you've got plenty of room to lay a fillet and smooth it out with a finger.

Wednesday, October 13, 2010

Keeping Filler in the Body Tube Seams


It's frustrating when Carpenter's Wood Filler pops out of the body tube seams. Depending on the width and depth of the seam, results are unpredictable.
This is an adaption from ideas suggested on TRF posts from BradyCross.

In the picture, the dried filler has been sanded down, just above the body tube surface. I didn't sand the filler all the way down to the surface - yet. The filler is still a slight raised area over the seams. Most of it was removed with 400 grit sandpaper.
The idea is to remove as much as possible, but not get close to where it could pop out of the seam.

A drop of CA was applied to the filler line and spread out down the seam. The CA would "lock" the filler down and glue it in the seam.
Now I can sand off the remaining filler bump to the surface of the body tube without much worry of the filler flaking out of the shallow seam.

I'll post again with the results after priming and sanding.