
Showing posts with label Rail Buttons. Show all posts

Thursday, July 3, 2025

Aerotech Mega Initiator #89541, Part 20, Installing The Rail Buttons


Mix up a small amount of epoxy.

I wanted some of the epoxy to be on the inside of the body tube, directly around the screw - sort of an interior fillet.

A toothpick was dipped into the epoxy and set into the drilled hole. With an in and out motion, a ring of epoxy was left on the inside and outside. 


Slide the rail button onto the screw.
Dip the tip of the screw in the left over epoxy.


Screw the rail button into place. Tighten until the back of the button is flat against the body tube. 

Don't overtighten, you don't want to strip what threads you are making in the body tube.
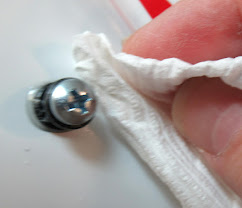

In the above picture,
Notice the squeeze out of the epoxy.

Wipe off the excess. Depending on the drying time of your epoxy, it might run! I use 30 minute epoxy and a drip could form.

Wednesday, July 2, 2025

Aerotech Mega Initiator #89541, Part 19, Drilling The Rail Buttons

The rail buttons are centered between two fins, on the other side of the INITIATOR name sticker.


It's difficult to find the center on a round tube.
I used a piece of paper pressed into the root edge fillets.

Mark the two fold sides with pencil.
With your ruler, find the center and mark.
    
The lower hole is to be placed about 1/2" above the lower engine mount centering ring. That puts the hole position at about 1 1/2" from the rear of the body tube.

The upper hole is 8" above that.

Drill a pilot hole using a 1/16" drill bit.
Sight from the rear and make adjustments using the larger 1/8" drill.


Using the pilot hole as a guide,
Enlarge the rail button hole to 1/8".