Showing posts with label PDF. Show all posts

Saturday, April 1, 2023

Estes EAC VIPER #0820, BT-55 Upscale, Part 15, Decal PDFs Available

After too many adjustments, 
The Estes EAC VIPER Decal PDF is finished - 
and available to Patreon subscribers.

On the right is the BT-55 upscale PDF. 
The BT-50 (original size) is also included on the second page of the PDF file.

There are plenty of extra decals, like the fin stripes. They are tricky to apply and you might need a spare or two.
The fin patterns and a parts list are included on the sheet.

If you are a Patreon member, email me at:
oddlrockets@bellsouth.net
and request the EAC VIPER decal.

After the build was complete - 
I noticed the ESTES AEROSPACE CLUB decal (sticker) is longer on the model pictured on the kit box. 
This longer decal extends from just above the lower fins to about the midpoint of the upper smaller fins.


This decal on the PDF decal sheet is the shorter version shown (above right) in the kit instructions.
Visually it's a better length and makes the model appear larger.

Friday, July 16, 2021

Piglet-sus! PDF Now Available

Let me tell you where I'm at -
You may have noticed some random build tips over the past few days. I keep these in Draft form for times like this.
Recently I built two DARC-1 kits and three Super Mars Snooper kits for Estes. Photos of the builds are done and many blog posts are ready to be published online.
But - Estes hasn't released the kits for sale. I won't publish a build until they are listed on the "New" products page.
I actually have about 60 blog posts in draft form  - short tips that can fill in a empty day. I once read that Charles Shultz had dozens of finished Peanuts strips ready for vacations or sick days.

This next MMX rocket was drawn up years ago as a downsize Piglet version of the Odd'l Rockets Pigasus kit. It flys, and flys well! Just be sure to add the nose weight.

The MicroMaxx PIGLET-SUS PDF is available to Patreon subscribers! 
Shoot me an email at: www.oddlrockets@bellsouth.net 
and ask for the MMX Piglet-sus PDF

The  home printed wraps and detail parts are laminated to cereal box cardstock. There are duplicate printed parts as these are smaller builds and some cuts can be tricky.

Parts needed:
The Body Wrap (24 lb) goes around a BT-5, just over 1 5/8” long.
The Nose Cone is a plastic “Mosquito” style cone. Fill it 2/3 full with clay weight for stability.
The pig nose is made from a 3/16” length of 3/16” diameter launch lug. Cap the end with a small disk of cardstock.
Cereal box cardboard
Centering rings and engine mount are up to you! Roll your own rings - it'll be shown in the build.

I can hear it now - "A Micro-Maxx build?" Sheesh!
Smaller models can test your building skills. 
Micro models are a great first launch of the day. That bare nichrome igniter will let you know if your batteries are good. Bare nichrome in the small nozzle will take a few seconds to light with a regular 6 volt home system. They are also good for a laugh before you bring out the big guns.

Friday, May 28, 2021

FlisKits Space Raider Build, Part 1, Parts


Parts are pretty standard.
That's a 6" long BT-20 and a 6" long 1/8" launch lug.
The long nose block was made from a 20/50 adapter from the spare parts drawer.
I didn't end up using the engine hook.
Balsa isn't shown, I went with 3/32" instead of the 1/8" thick. It's what I had handy.

Jim Flis Patterns for home prints from the NAR Facebook page: 
https://www.facebook.com/groups/2255560886/permalink/10157795697170887
Print all three pages on 110 lb. cardstock
Instructions:
https://www.facebook.com/groups/2255560886/permalink/10157795696185887
Print on 20 lb. copy paper

TIP: I'd recommend using white glue for construction on this one. Yellow glue can discolor home print cardstock models. White glue will dry clear and disappear after the final clearcoat.


Jim Flis drew up a fin cover in black and white.
I drew up four covers and colored them in.

These PDFs is available to Patreon supporters.
Email me at oddlrockets@bellsouth.net
and ask for the Space Raider PDFs.


I had some trouble with the fit of the bottom plate.
I re-drew four separate pieces to fit my build.

My nose cone came out a little short, leaving a gap at the top of the body.
I re-drew the nose cone just a bit longer. These are hard to fold, so three are supplied on the PDF. You might get better results on a second or third try.

Wednesday, October 7, 2020

New CANOPY DECALS for Patreon Supporters!


Here's new canopy decals sized to fit a to fit NC-20, 50, 55 and 60 sized nose cones. tube. These were inspired by Estes and  Centuri style kit decals.

The decals have were printed and test fitted on different sized nose cones. The bottom four rows of canopies can fit both 55 and 60 nose cones depending on your choice of window sizes.

The new decal sheet is available to Patreon member/supporters. Email me at: oddlrockets@bellsouth.net 
and ask for the Canopy decal sheet PDF.

Wednesday, September 30, 2020

New BT-5 Sized DECALS for Patreon Supporters!


Here's the last set of wrap-around roll patterns and detail decals sized to fit a BT-5 tube. These were inspired by Estes and  Centuri style kit decals.

The decals have were printed and test fitted for a near perfect fit on a standard BT-5 tube.

The new decal sheet is available to Patreon member/supporters. Email me at: oddlrockets@bellsouth.net and ask for the BT-20 decal sheet.


Monday, September 28, 2020

Estes Colonial Viper #1310, Part 15, Gloss? Paint & Decals

I did spray gloss white paint, but with the Florida humidity, most all surfaces came up as a flat finish.

TIP: You can improve the gloss of a flat "humidity" finish with careful use of automotive polishing compound. Use polishing compound - rubbing compound would bee too rough. 

Watch your fingernails! They can easily scratch the balsa surfaces. The picture shows the lower half of  the upper fin after polishing with some rubbing compound. It's not a full shiny gloss, but enough shine I can accept.

The decals are now available to Patreon supporters as a PDF for home printing. You could print these on self adhesive paper (stickers, like in the original kit) or on water slide decal paper. 

Email me at: oddlrockets@bellsouth.net and ask for the Colonial Viper PDF Decals. This decal draw is not an exact copy of the Estes kit decals. 

Here's the back end with all the engine decals in place.

Notice the red bars set on the tubes extend and line up with the fin decals. I did go back to the decal draw and make the widths consistent between the pieced decals.

TIP: Set the engine wrap decals first, then match up the red line on the wing decals.


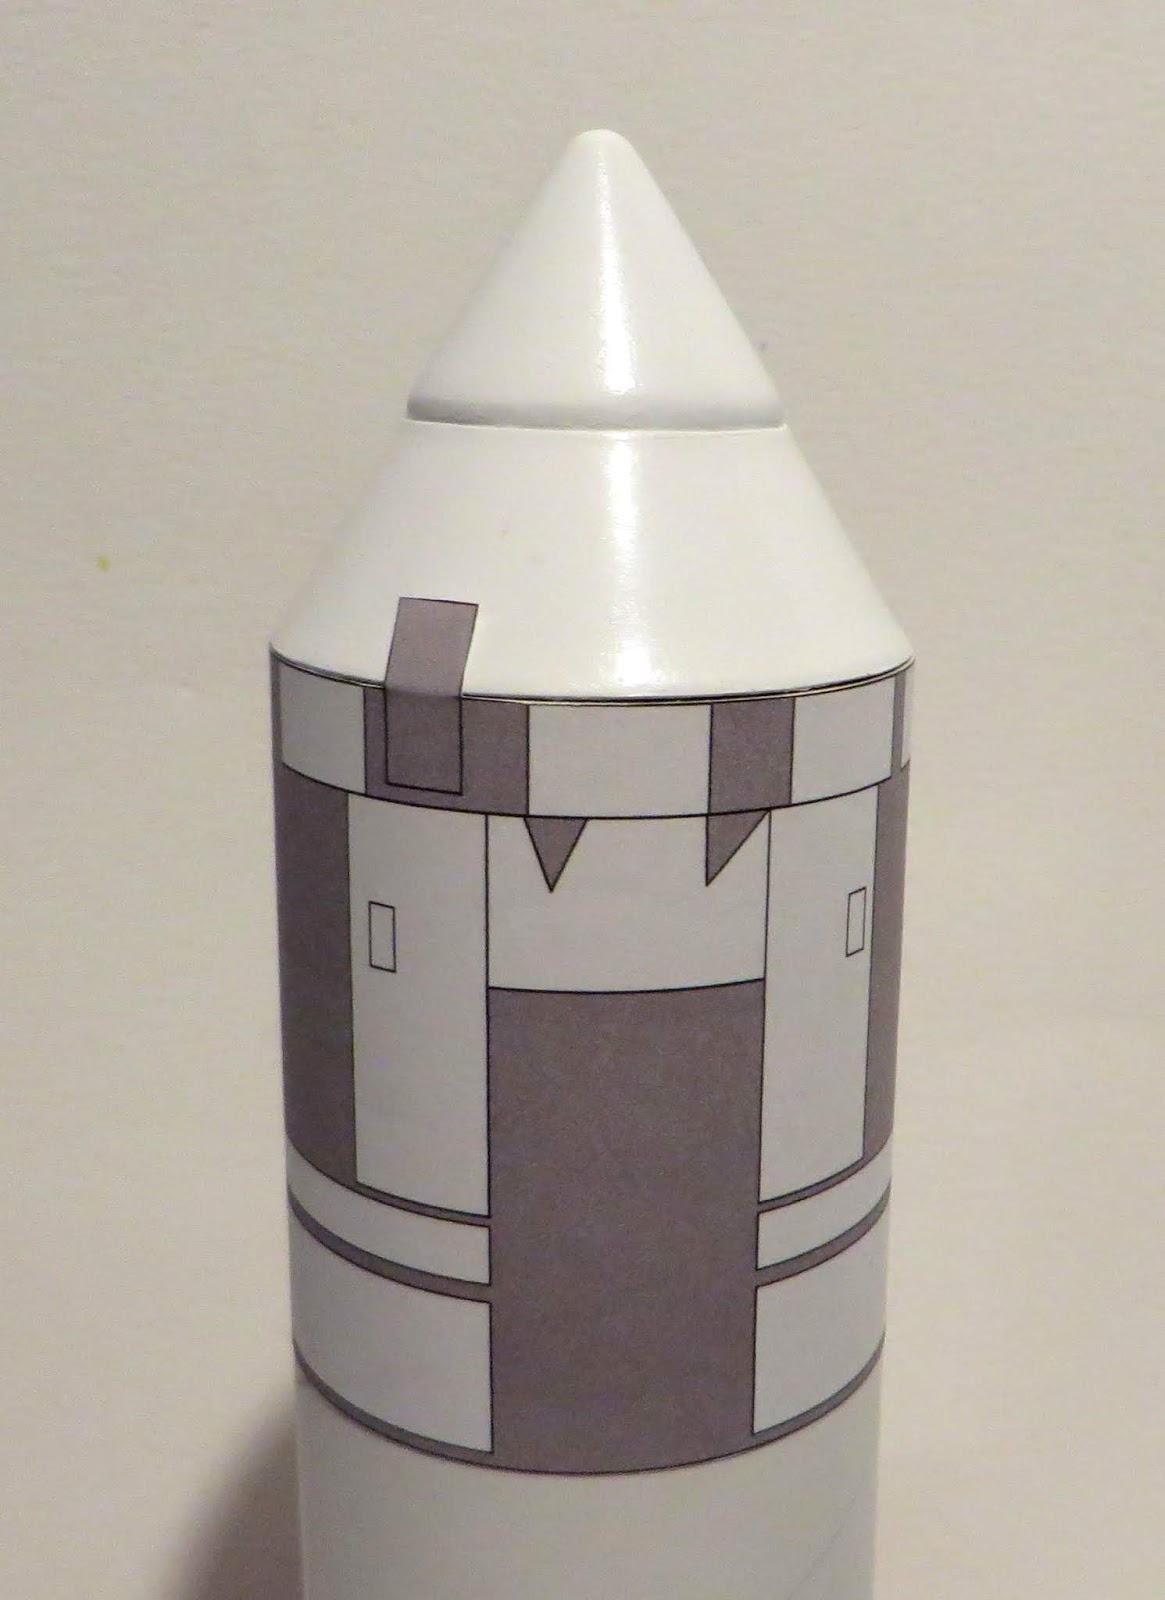
The long red stripe continues down the top of the main body tube and over the nose cone.

This requires a close cut with no clear area over the tube edge and in the nose cone shoulder. 

TIP: This is one of the few areas where I use Future clear coat. I only use it to seal the cut edges with a light wipe using a Q-tip.


Even though the canopy decal looks like one full decal, 
I'd recommend cutting it into three separate pieces. 

Apply the two top windows first, then the two side pairs. Try to get a good white spacing between all the windows.

The rear, top center window was drawn too long. It has been shortened in a decal revision.  

Here we go - One of the joys of home print decals. 
This area cracked an flaked off when I was trying to slide it around.

I don't know if I'll replace it or not.

Monday, September 21, 2020

Estes Colonial Viper #1310, Part 8, Decal & Template Drawing

The decal scan at Jim Z's site is usable but not as sharp as I would like. The original kit provided die-cut stickers, I wanted to use water slide decals.

I spent more time redrawing these decals than any other project to date. There's a lot of detail in the engine wraps.

The decals are now available to Patreon supporters as a PDF for home printing.
Email me at oddlrockets@bellsouth.net and ask for the Colonial Viper Decal PDF.
The templates shown below are also part of the PDF package.

You could print these on self adhesive paper (stickers, like in the original kit) or on water slide decal paper. 

This is not an exact copy of the Estes kit decals. I made a few subtle changes so I could identify them. These decals are for Single Builds Only - Not for sale or to be used in commercial kit production.

Note there is two canopy decals so you can do a double layer of the black if desired.
EDIT: As it turned out, the single layer canopy looked fine set over the gloss white painted canopy. The double layer is available if your decal print isn't dark enough.

The picture posted above right is the second of three revised decal draws. After the decals were placed on the model, a third edit followed to better fit the assembled parts.

The templates were also redrawn.

At the bottom of the fin template is the rudder piece. In the old Estes kit, the balsa grain ran parallel to the root edge, not the leading edge. I drew the rudder fin with the stronger grain orientation. 
In the old Estes instructions, they explain: 
"You may notice that the grain direction of the upright fin is not parallel with the leading edge . . . By running the grain direction parallel to the body, the fin will most likely break off rather than transmitting shock to the body. Since it is much easier to glue the fin back in place than to rebuild the rocket body, the fin was designed in this manner."

Say what? 
Any hard landing could break off a fin. There is so much extra stuff at the tail end of this rocket, it seems very stocky and strong. There are two other fins that could touch down first. Granted, the trailing edges of the other wing fins taper away from the body. I'll take my chances with the grain running down the leading edge of the fin. 

There are some extra canopy pieces. When folding and forming card stock, the first try never seems to be right. I made a few adjustments to the sides curves for a better fit on the BT-50 body tube.


The alignment guides were also drawn.
Print on 110 lb. card stock and back with a second piece of card stock before cutting out.

Friday, September 11, 2020

New BT-55 Size DECALS for Patreon Supporters!

More decals for Patreon supporters, 
This time to fit a standard BT-55 tube -
NASA logos and NASA Meatball logos are included.
Some American Flags round out the sheet.

These wrap around decal ends will match with very little overlap. All have been sized to fit a painted BT-55 tube.

What to expect - 
Home print decals won't print as dark as a traditional silk screened decal in a Estes kit..
NOTE: (Under Printer Preferences) Set your printer to "Card Stock Heavy" and "Photo Paper Printing" for best results. You want the printer to lay down a lot of ink.

Single layer black decals will work great over colors darker than white - even yellow.

If you would like a PDF of the decal sheet to print at home,
email me at: oddlrockets@bellsouth.net and ask for the BT-55 Decal Sheet.

Thursday, September 3, 2020

New BT-50 Sized DECALS for Patreon Supporters!

More decals for Patreon supporters, 
This time to fit a standard BT-50 tube -
Just what you might need to dress up a sport model.

As mentioned earlier - 
Home print decals won't print as dark as a traditional silk screened decal.
NOTE: (Under Printer Preferences) Set your printer to "Card Stock Heavy" and "Photo Paper Printing" for best results.

To get to a full "black" (over a white base) you can double up the decal by using two printed layers.
1. Set one down around the body tube and let dry.
2. Soak the second decal and wet the decal already on the rocket body.
3. Set the second decal down over the first.

The smaller spot art decals - hatches, UNITED STATES, USA and EXPERIMENTAL are smaller and shouldn't need a second layer.

Single layer black decals will work great over colors darker than white - even yellow.

If you would like a PDF of the decal sheet to print at home,
email me at: oddlrockets@bellsouth.net and ask for the BT-50 Decal Sheet.

Monday, August 31, 2020

New BT-20 Sized DECALS for Patreon Supporters!

I'm pretty excited about this one - 
These are generic roll patterns to be applied around standard BT-20 tubes. Below the roll patterns are many pieces of "spot" art to decorate your rockets.
Some of the roll patterns are based on the old Centuri sport model decals. You'd sometimes find one packed in the kit bag.

TIP: Home print decals are not a full opaque print like you'd find in an Estes kit. The Estes decals are printed "old school", by silk screen. Placing a home print black decal over gloss white paint will end up a very dark gray, not a full black. I have used doubled decals (setting a second print over the first) for best results. If you set a black ink jet decal over other colors (even yellow) it will look a more dense black.

Have you ever had a kit supplied roll pattern decal that didn't quite match up after you rolled it around the body tube?

All these patterns have been tested for size on a standard painted BT-20 tube. The picture on the left shows one test. See if you can find the two side edges of the decal wrap. (It's right in front!)
These decal drawings took a while to draw up. After the first print, I ended up going through two more decal sheets adjusting the widths through test fits. Each sheet got three coats of gloss clear acrylic. Between each new print, micro size adjustments were made for a (near) perfect fit!


If you are a Patreon member supporter, I can email this PDF to print your own decals!
Email me at oddlrockets@bellsouth.net and ask for the BT-20 Decal PDF.
More Decal PDFs are on the way in BT-50 and BT-55 sizes!

NOTE: These are home print decals for you to print at home. I don't print up custom decals or send them out through the mail.

Thursday, August 13, 2020

Decal PDFs For Patreon Support Members

Here's a list of the Print at Home PDF decals available to Patreon Supporters:
Email me at oddlrockets@bellsouth.net and tell me what you'd like.

PATREON DECAL PDFs
ESTES
NEW! Colonial Viper #1310 Decals and Templates.pdf
Estes Green Eggs Scrambler K-37, #1237 Decal .pdf
Makes the Estes Green Eggs kit look more like the            OOP Scrambler
Estes Tazz Gyroc K-24 Decals.pdf
Makes the Estes Tazz look like an upscale Gyroc
Estes Mercury Redstone #1921 Decals pdf
Red decals to overlay the pink decal areas in the                early kits
Estes Dragon Ship 7 #1345 Decals
MRN Estes Orbital Trans Lab Decals & Templates.pdf
Model Rocket News DOM Winner Decals
Estes Little Joe II 100th Scale #892.pdf
Decals and Templates for a 1/100th Scale Little Joe II
Estes Thor Agena B K-28 Decals and Templates.pdf
Estes Thor Agena B decals, templates and bonus Nasa Logos 
Estes Mini Shuttle #1391Decals.pdf
Estes Mosquito #1335 Bug Decals.pdf
Re-draws of the Estes Mega and Mini Mosquito Mini Brute Bugs

QUEST
Quest Aerospace One #3015 Decals.pdf
Water Slide Decals to replace kit stickers

SEMROC
Semroc 1 70th Saturn 1B Capsule KS-1 Decals and Templates.pdf
Escape Tower decals for 1/70 scale Apollo Capsules
Semroc Tomahawk KD-2 Decals and Panel Wraps.pdf
Decals and Fin Plate Templates

ENERJET NEWS
Mercury Little Joe I.pdf
Decals for the Enerjet News Little Joe I

GENERIC
USA and NASA Decals.pdf
Generic vertical UNITED STATES and Zooch Decals scan

Monday, August 3, 2020

For Patreon Members - Available Carded Model PDFs!

Here's a list of Carded Model (Downscale) PDFs
available to Patreon Members - Decal PDFs will be on a upcoming post

DOWNSCALE CARDED MODELS

Centuri Astro 1.pdf    (BT-5 size)
Centuri Bandito.pdf    (BT-5 size)
Centuri Hornet.pdf    (BT-20 size)
Centuri Satellite 62SL.pdf    (BT-5 size)
To be stable, use original length 8" dowel legs)

Estes Red Max.pdf    (BT-5 size)
Estes Rogue.pdf    (BT-5 size)
Estes Yellow Jacket.pdf    (BT-5 size)   
Estes Wolverine.pdf    (BT-5 size, somewhat stable)   
Estes Mini Bertha T Engine Downscale.pdf    (BT-5 size)
Estes Sky Writer No. 2.pdf    (1/4" diam. Pencil size Micro Maxx model) 
Demon Estes.pdf    (BT-20 sized downscale)
Estes Patriot.pdf    (BT-20 size downscale)

Estes Sky Shriek_1.pdf    (BT-5 size Micro Max Goony) 
Estes Cloud Hopper.pdf    (BT-5 size Micro Max Goony)
Estes GalaxyGuppy0852.pdf    (BT-5 size Micro Max Goony)
Estes Missile Toe1.pdf    (BT-5 size Micro Max Goony)
Estes Star Snoop.pdf    (BT-5 size Micro Max Goony)

Odd’l Rockets Piglet-sus    (BT-5 size Micro Maxx Goony)
ASP Scale.pdf    (BT-5 based scale model) 
Black Brant VB Scale.pdf    (BT-5 based scale model) 

These models are supplied for a home-print PDF. Print on card stock and roll around standard body tubes. Add a nose cone and streamer.
Print, assemble, clear coat and launch!

Sunday, July 26, 2020

TAZZ / Gyroc Decal Available

If you'd like your Estes TAZZ to look more like the original Gyroc design, a home print decal PDF is now available!
The vertical bar roll pattern fits around the BT-50 body tube. There are plenty of extras on the sheet.
This offer is open to Patreon member suporters.
Email me at: oddlrocket@bellsouth.com
and ask for the Gyroc/TAZZ decal PDF.

Sunday, December 29, 2019

I Wish They Wouldn't Do That - It'd Be Great If They Did This, SHROUDS & TEMPLATES

Eric Pelzer made a great comment on my post about single kit shrouds - 

"What would be really nice of vendors to do would be if they had all their printed sheets online as downloadable PDFs that ensured they printed to the proper size of the original. Ideally, all printed cards would fit on standard 8-1/2" x 11" pages or a legal size pages. Most of us scan them in, but, apparently, my scanning skills must not be good because they always seem to print just slightly off from the original."


Great idea!
It's great that most all instructions are available online now. I usually check them before ordering a kit. At Jim Zs and oldrocketplans,.com, sometimes the scanned PDFs are off or not clear enough to be used.

A note to anyone submitting instructions, fin patterns and card stock shrouds - 
PLEASE INCLUDE A 1" BLOCK or 1" MEASURE SPAN REFERENCE so we can check our home prints!

Saturday, November 30, 2019

I Wish They Didn't Do That - Part 4, Tri-Fold Shock Cord Mounts

I'm not a big fan of the Tri-Fold Shock Cord Mounts. They certainly work, it's just not my personal preference.

Years back, the shock cord mount provided in a kit was on a separate piece of 65 lb.card stock, not printed on the 20 lb. paper instruction sheet. To use this mount you cut up the instructions. You could always make a copy and keep the instruction sheet intact.

I could see a 20 lb. paper mount used in small tubes. A Tri-Fold is bulky and might block the ejection of the chute or streamer. You want the finished Tri-Fold mount to be flat and tight against the inside wall of the tube.
I'd rather see a thicker card stock used in larger models, BT-55 and above. 


I drew up a sheet of different size Tri-Fold Shock Cord mounts you can print on 65 lb. card stock.
Patreon members can send an email to
oddlrockets@bellsouth.net and request the Tri-Fold Shock Cord Mount PDF

Saturday, September 7, 2019

Free Tri-Fold Mounts PDF


Most build as directed by the instructions - including the tri-fold shock cord mounts.
I've never been a big fan of the tri-fold mounts. The mount is usually printed on the instruction sheets, on thin 20 lb. paper. If I have to use these mounts, thicker stock would be a better choice.

I drew these up to be printed on 65 lb. card stock.
There are three different sizes, mounts for BT-20, BT-50,  BT-55 and BT-60 sized models.
TIP: I can't recommend using a tri-fold mount on a BT-5 sized model. The folded mount is usually too thick and can block a streamer or small parachute ejection.


Make your Tri-Fold mounts as thin as possible as shown here: CLICK HERE
This link shows the shock cord glued on all three sections, the way it used to be done. Now most instructions show it glued just on sections 2 and 3.

If you are a Patreon supporter, email me at:
oddlrockets@bellsouth.net
and request the Tri-Fold Mount PDF.

Monday, March 11, 2019

Estes Black Brant II Kit #1958 Build, Part 14, Decal Placement

The Estes instructions show the decal placement using three pictures of the finished model. Each picture is rotated 120 degrees to the left.

I found the pictures confusing, almost as tough as the Mercury Redstone fin painting drawings. One problem - there are three fins on the rocket and four equally spaced vertical bars that have to be placed over and around the fins.
The instructions imply that two different tall bars are to be cut to fit over the root edges of the fins. Only one decal needs to be cut to fit, centered down and over the root edge.

The decals I used were from an old kit and brittle. I did my best to follow the illustrations and still got it wrong! Well, it is close anyway. I'll have to go back and correct some mistakes later.

I should have done this drawing before placing the decals.
If you would like a copy, Patreon supporters can email me at oddlrockets@bellsouth.net and request the - Black Brant II Decal Placement PDF
This is not meant for a decal print, just a placement guide.

With Estes reissuing the Black Brant II kit, this drawing might come in handy. The new instructions might be better.

EDIT: After I finished my drawing I did a search and found a placement pattern had already been drawn by K'Tesh (Jim). There was a thread on TRF about the Black Brant II in 2016. I wish I would have found this before I spent an hour figuring it all out!

Thursday, December 13, 2018

Semroc Saturn 1B, Build, OOP #KS-1, Part 43, Service Module Paint Pattern

One great thing about modeling the Apollo 7, SA-205 rocket is the detail on the Service Module. The detail wrap can be cut from aluminum Trim Monokote and wrapped around the tube.

Here's the drawing from page 284 of Peter Alway's Rockets of the World.


It was enlarged to fit the circumference of the BT-70 and re-drawn.


Here's a test wrap, a simple print onto 20 lb. paper.
It's a great fit with a very small overlap seam.

If you would like a copy of the wrap, Patreon members can  email me at: oddlrockets@bellsouth.net
and ask for the Service Module Wrap PDF

Along with the service module wrap, I'll send the previous escape tower decals and upcoming capsule detail template.

Build time this post: 1 hour, 30 minutes
Total build time so far: 40 hours, 00 minutes

Thursday, November 15, 2018

Semroc Saturn 1B, Build, OOP #KS-1, Part 16, Escape Tower Decals


I never understood how Estes expected anybody to draw these lines and details on the escape motor assembly. Both Estes and Semroc Apollo Capsule instructions suggest this trim. I have plenty of experience using Rapidograph pens and don't know how to pull this off. Straight lines around curved surfaces are very difficult.

Here's a screen grab of the decals I drew up for the trim lines.

If you would like a copy of the decals to print your own, Patreon members can email me at:
oddlrockets@bellsouth.net
and request the Saturn 1B Escape Tower Decals.
I'll send it right out!

The decals take up 1/2 sheet, there are extras so you can practice the soak times and transfers.

The decal sheet got three coats of Krylon UV Clear.

Here's how to cut the decal to prevent tearing. The inside corners are rounded. The top is cut out so it won't overlap the nose cone tip.
For an easier transfer I cut off the lower wrap for a second application.


The top and lines below the pitch control motor (upper circle) is applied first.
The lower section with the jettison motor (oval) and lines are applied second. EDIT: Add a second jettison motor (oval) to the opposite side. Cut it from one of the extras on the decal sheet.
The long vertical lines decal goes on last.

This is one of those rare home print decals that really worked well.
I did have to make some adjustments and fixed the decal PDF.

Build time this post: 2 hour, 00 minutes
Total build time so far: 17 hours, 55 minutes

Thursday, November 1, 2018

Odd'l Rockets Cutaway Engine Build, Part 5, Labels & Finished


The labels are optional, they are set above the cutaway model to show their position.


Use a pencil tip or sharpened dowel to hold down the labels when applying the glue stick.


Here's the finished model.
It's a very easy carded build. It might take a second try to get the end caps to fit well.

If you are a Patreon supporter, email me at: oddlrockets@bellsouth.net and request the home print PDF, Email me at: oddlrockets@bellsouth.net
and ask for the
Cutaway Engine PDF