
Showing posts with label Booster. Show all posts

Saturday, October 12, 2019

Estes Boosted Bertha #001946 Build, Part 3, Booster Engine Mount


Two engine blocks go in the booster stage -
One at the top of the engine as usual, the second is glued even with the top tube edge to help direct the flame into the sustainer engine nozzle. The second higher engine block will protect the end of the longer than normal BT-20 tube.


After the second engine block was glued in even with the top of the tube it was sanded flat and even with the edge.


To keep the build clean, always wipe of the burnt ash before applying glue. Once the ash is wet with glue it'll smear black all over the engine mount tube.


Like other newer Estes booster stages, the centering rings are vented to give you a split second longer for upper stage ignition.

On top is the view from the back,
Here's the view from the front.
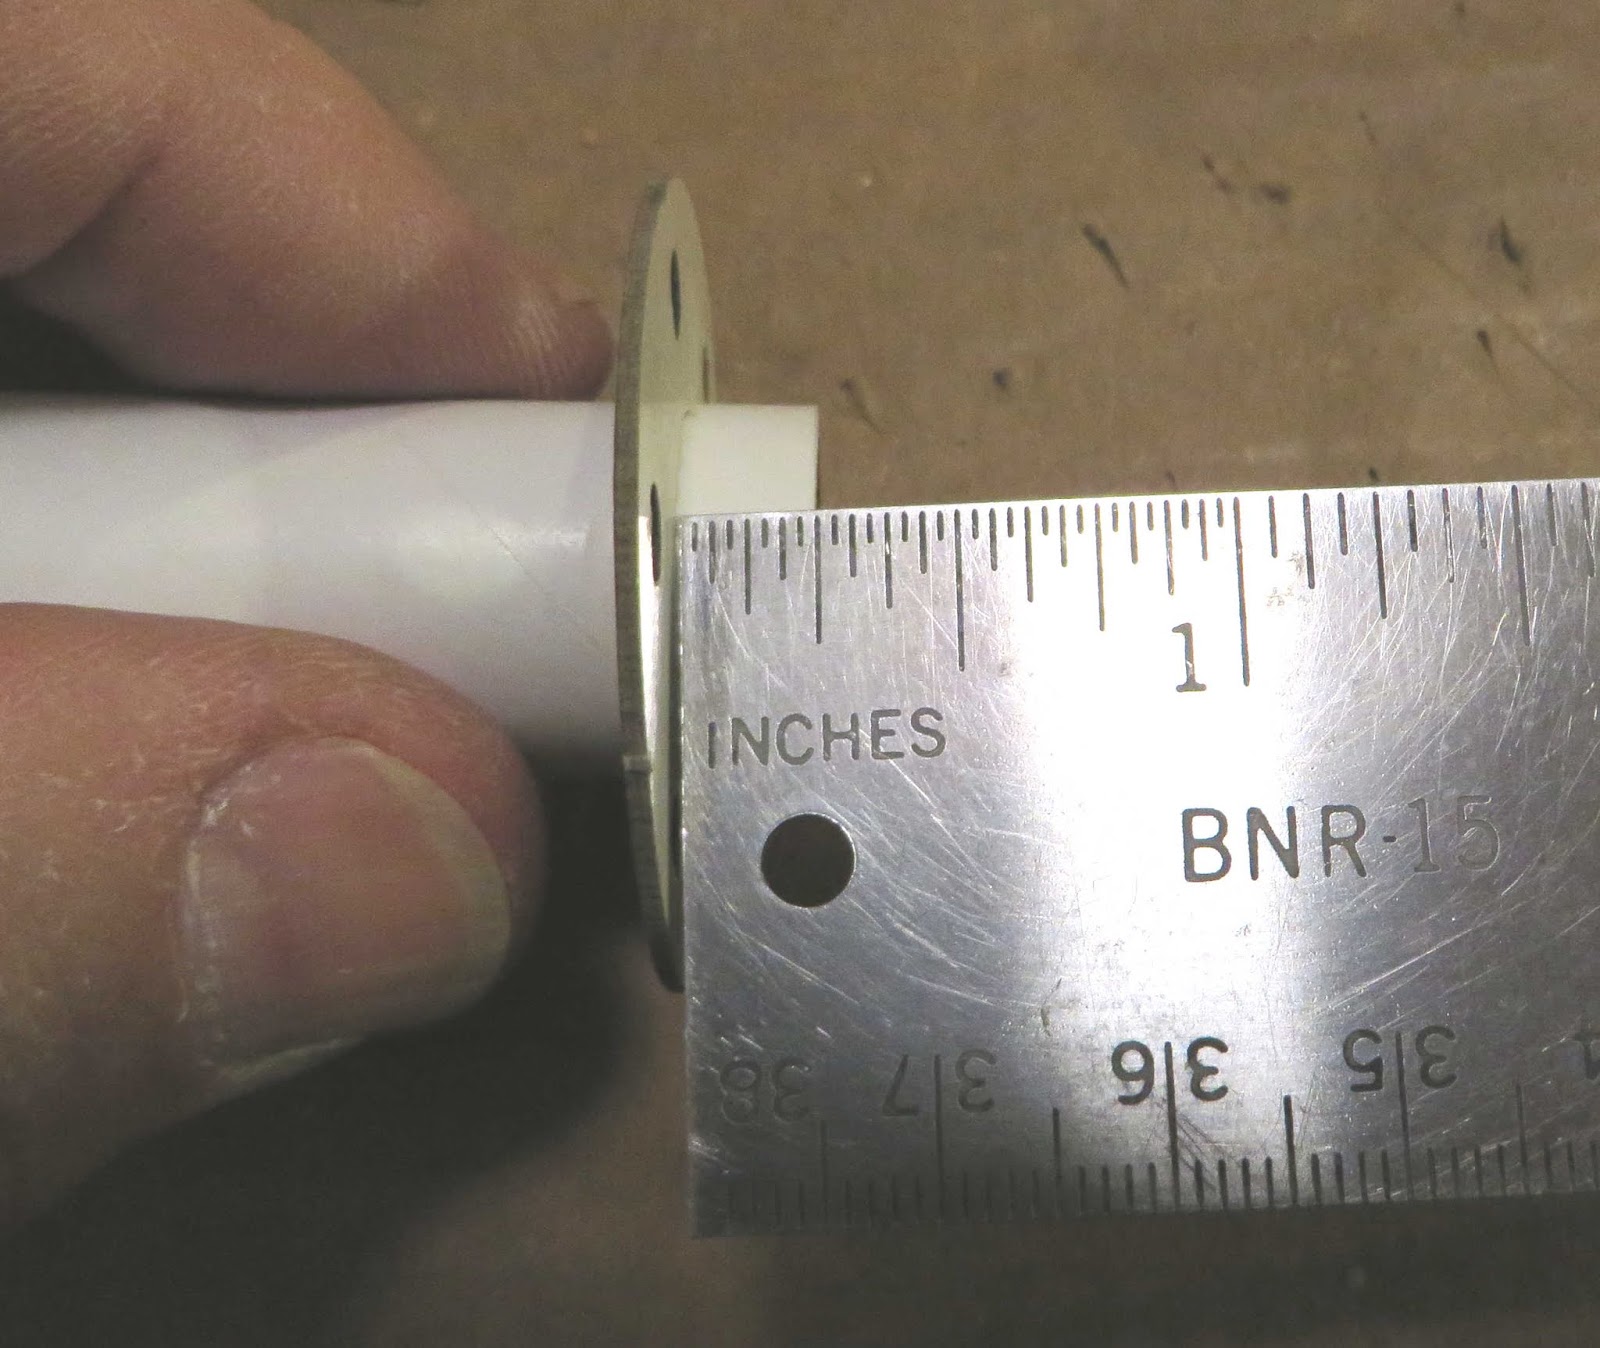


TIP: If you don't have one, get a metal straightedge with square corners ends that start with the inch measurement.
With this type of straightedge you can set it on the flat on the face of the centering ring to check the spacing by rotating the mount.

Wednesday, August 7, 2019

Estes Sasha Build #7271, Part 3, Booster Engine Mount


Don't just punch out the rings, the hold down "tics" should be cut with a hobby knife. The small vent holes are also cut and removed.

It's just me - I like to use a sharpened pencil or dowel to clean up the holes.
Leave the sharpened dowel rough, set it in a hole and turn. This rounds out the hole and cleans up some of the charring.

TIP: Instead of sliding the engine block into a ring of glue from the bottom -
The yellow spacer tube is marked at 1/2" and taped in place at the bottom.
Slide the engine block in from the top and down onto the top edge of the yellow tube.
Apply a glue fillet using a Q-tip from the top along the inside edge of the engine block and tube. On a short engine tube like this, it's easier and cleaner to glue the block in from the top. Set it in place, add the fillet from the top.
The engine mount construction is standard - 
The rear notched centering ring is glued 1" from the low end.
The black retainer ring is slid down from the top and glued against the lower ring.
The inset picture is the front view - 
TIP: That black retainer ring is against the upper ring to help install it perpendicular to the tube. Apply a glue fillet to the ring/tube top joint, then slide and glue the ring against the lower ring. Apply a fillet on the lower side of the ring/tube joint.
In the instructions The upper vented ring is glued 3 1/4" from the low end. I set it a little lower, over the forward end of the engine hook bend.

Monday, March 31, 2014

MPC Vostok Build, Part 4, Booster Assemblies


The four booster halves are marked 1, 2, 3, and 4 on the inside.
The fit wasn't good. The tops and bottoms were sanded reducing the open gap.

After glue was applied the numbered halves were joined.

The only way to force a good fit was to use wrapped rubber bands.

Monday, August 29, 2011

260 Space Booster Build Part 10 Semroc 16 Booster

Here's a post about the 260 build from TRF:
Originally Posted by El Cheapo
"That's cool. Looks like it'll be nice and clean with no excess junk. I like that. I assume the clear fins will mount above the nozzle. Why not make the nozzle into a booster. Semroc makes that little 13mm deal that is pretty sharp. I up scaled it and have used it on my boys Executioner. Works like a champ and seems to get some nice comments".

My response:
"Thanks El Cheapo, I hadn't thought of that. The BT-60 (1.637") and ST-16s (1.640") are really close in diameter. I've built the Semroc booster but haven't used it yet.
I pulled it out to check them side-by-side and it's almost a perfect fit!
The upper shroud and centering ring needs a little shimming, but it's close.
The Semroc Booster 16 is made for a 13mm engine, you could leave out that 13mm engine mount tube and slide in a BT-20 with the right centering rings."


The Semroc booster doesn't have the 1/4" space between the two shrouds but that could be adjusted. The Semroc booster coupler is a little short.
But, for somebody not wanting to mess with printing their own shrouds, this could be a viable substitution.


The picture on the left shows the 260 with the nozzle I've built, slid in place.
Below in in my hand is the Semroc 16 Booster.

On the right is the Semroc 16 Booster in place. You can see the shorter shroud fit is a little wide.

In a later TRF post I understood what El Cheapo was driving at.
He was suggesting to make this a two stage model using a Semroc 16 Booster as the first stage. An internal engine mount (farther inside the BT-60) would be the sustainer!
A great idea, maybe next time!