Showing posts with label Vashon. Show all posts

Monday, January 30, 2023

Old Vashon Commercial

An old Vashon (Pre-Estes) commercial ad I found on YouTube:


To see the video: CLICK HERE
The picture above shows an engine/propellant/timer disk test. Vashon Rockets used Freon, a self refrigerant. You could hold onto the filled rocket body and pull the nozzle plug. The aluminum rocket body would get cold as the compressed gas was expelled. 

Sunday, April 3, 2022

Estes EAC Firecat #0821, Build, Background

The Firecat was an interesting design, the parts and decals certainly looked familiar.

It was the second design available only to members of the Estes Aerospace Club. The first EAC kit came with your membership kit - the EAC Viper.

The Firecat was introduced June 1974 in the first issue of the EAC Spectra newsletter for $2.75.

Last advertised in the July/August 1975 Spectra.
“Offer good only with EAC order form
Offer expires 12/1/75 or when supply is exhausted.
Hurry! Supplies are limited.”
This one has an interesting back story.
The Firecat was a redesign "kitbash" made up from parts from the discontinued Estes/Vashon Honest John.
Freon was outlawed because it depleted the Earth's ozone layer. The Vashon Cold Power line was cut - Estes was stuck with some parts inventory.

By 1975 some Freon powered rockets were eventually redesigned  into "Cold Power Convertibles". You could fly them with the Vashon Freon engine or use the 20/50 standard engine mount and launch with 18mm standard motors. These three kits were Shark, Marauder and Yankee 5. (I don't know why it was named the Yankee "5". If it had five fins, maybe. The rocket only had four fins.)
I built and launched the cold power Shark rocket. 

When fueled, the tank pressure swelled out small rubber gaskets (note the small black dots in the engine in the lower right of the picture) This held down the compressed spring and BT-48 tube until it was released at apogee. 
The launch button housing was connected to a metal cable that released the fueling adapter inside the nozzle.

To see the Shark instructions: CLICK HERE
Instructions provided by Leo Nutz 

One thing I hated about the design - When the rocket was on the shelf, that spring was always extended looking like a cliché broken toy. 
This smaller Freon motor performance was like a B6-4. If the outside temperature was cold, Freon performance was poor. I eventually added the 20/50 adapter to the Shark for the black powder conversion.
The Firecat build starts tomorrow!

Friday, February 5, 2021

More Vashon Jet Glider Comparisons

 Some rocket nerd research - 
It didn't occur to me to look at the older Vashon catalogs at the Ninfinger website: CLICK HERE
This catalog looked to be from the early 1970s. The Vashon line was first sold through the Estes catalog in 1972.

The SHRIKE has a blunt nose and intakes at the front of the wings. The vertical stabs are a triangle shape.


On the right: The old catalog XS-1 Space Shuttle has a longer point nose and no intakes.
The wings look more swept and the vertical stabilizers are a trapezoidal shape. The front of the stabs don't extend beyond the leading edge of the wing.


On the left: Here's the Ebay XS-1 picture from the post a few days ago. 
It has the same blunt nose of the Shrike, intakes and triangular stabilizers.
Estes may have ran out of the XS-1 bodies (they are very similar) and figured: "Who'd know the difference?" 
Do different stickers really make a different model?

Thursday, February 4, 2021

Comparing the Vashon Jet Powered Planes

Vashon Model Rockets have always held a special place for  me. In 1969 they were the only rockets we could launch in California. The state's black powder fireworks regulations were strict!
 
On YORF, Rraeford asked about the Vashon (Estes) Shrike and XS-1 "Jet Powered Planes".
Both of these Ebay listings are shrink wrapped and have never been opened.

To me they seem overpriced, the Shrike at $155.00 with free shipping.
The XS-1 is at $250.00 with $56.75 shipping!
I mail a lot of finished model rockets and have never seen  shipping charges that high!


Apparently, 
These two differently named and packaged models were from the same Styrofoam mold. The only difference seems to be the sticker sheet. 
Unless, there were originally two different shapes and Estes switched over to one design with different packaging.

Some décor was already applied at the factory. That cockpit sticker on the XS-1 is crooked!
 
I did a post on these a few years back, but didn't have package pictures for comparison. The nose of the XS-1 looks longer, but the rounded black area is a cut out in the cardboard to hold and center the nose of the glider.
The Estes catalog art somewhat shows they could be the same shape. To see that post and Estes catalog page link: CLICK HERE

Friday, March 6, 2020

Vahson Valkyrie 2 Complete!

Back Story: 
The first real model rocket I owned was a Vashon Valkyrie 2. In 1969 you couldn't get black powder motors in California without special permits. While I waited for the permit process to run, I ordered a Vashon Valkyrie 2 starter set from the Sears Christmas catalog for $19.95. The Vashon rockets used a liquid propellant - the now outlawed, ozone layer depleting Freon!
Over the years that original Vashon rocket was lost.
I shared a hotel room with Doug Frost at NARAM 60. I mentioned wanting to find an original Vashon rocket but didn't want to pay the Ebay collector's prices. Doug said he had one and would send it to me!
He sent new, unused Vashon parts in the original Vashon box, just like I received in that first Sears order. Everything for a full build was there - except for the parachute release timer.

These timers show up from time to time on Ebay, but usually in a Vashon lot with many other parts I don't need. More parts can raise the final bid price.
Gary S. emailed and let me know an individual Vashon Separator was for sale on Ebay. I ordered it!

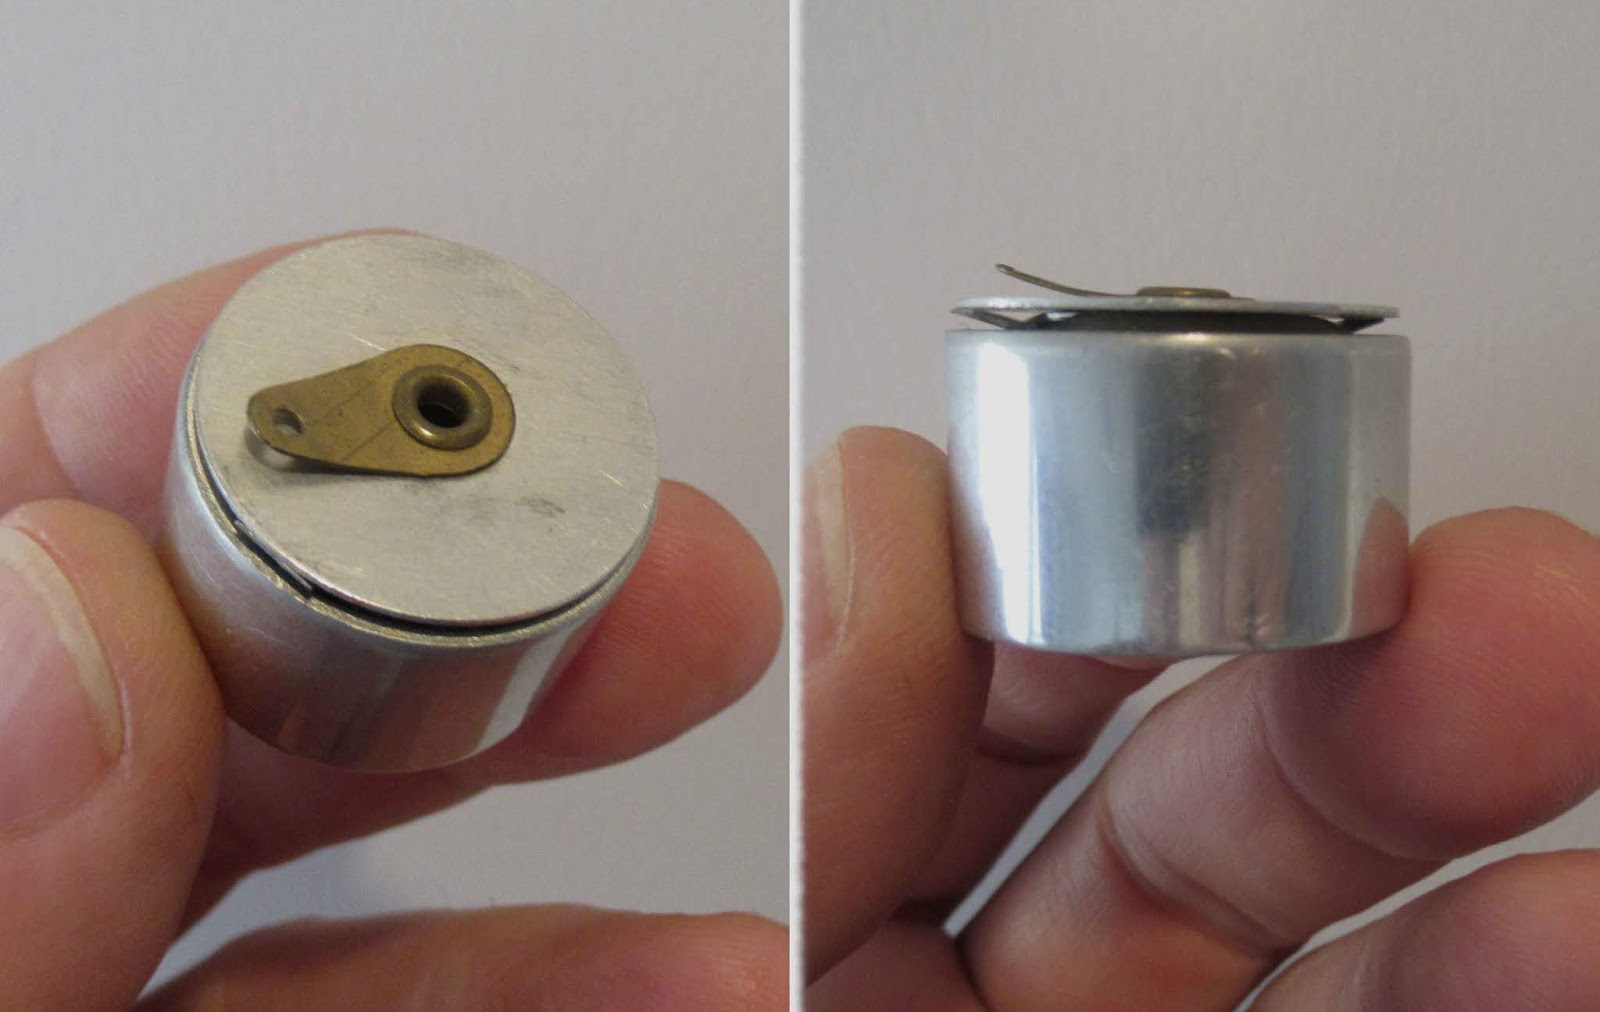
Here's the separator.
That brass piece on the top is the tie point for the shock cord and parachute.
Viewed from the side you can see the two pressure "springs" under the round top cover. When the rocket is pressurized with Freon, these spring grippers expand out and grab the inside edge of the parachute tube.

On the left, the separator is turned over.
The Ebay separator didn't have the connecting nut. The parts Doug sent did have one screwed on the top of the engine. On the right the separator is turned over.
In the center of the nut are small paper disks. Every disk adds a second or two to the "delay" before the parachute tube is released. No ejection, the tube just falls off. Cross you fingers and hope the parachute opens up!


Here's the complete Valkyrie 2! Now I can sleep through the night.

Tuesday, September 11, 2018

Vashon Valkyrie II, Finished


I finally got a Vashon Valkyrie II! Every rocketeer has a model from their past they want to rebuild. This was fun and brought back a lot of memories.
I'll pick up a separator/timer somewhere down the Ebay road. For now the simulated upper parachute section works for me.
Thanks again to Doug Frost for sending me the model!

Monday, September 10, 2018

Cold Propellant Model Rocket Safety Code

In the blog comments, a question came up about substantial metal in a Vashon model rocket.
Tom's comment: 
"I was under the impression that metal body tubes weren't allowed . . ."
My response:
"I think the Vashon aluminum rockets got a "pass" from the NAR. Back then you couldn't get BP model rocket engines in California and a few other states. The liquid propellant Vashon rockets were our only choice. The NAR even had a cold propellant safety code." 


To see it in the Vashon catalog: CLICK HERE

Vashon Valkyrie II Build, Part 17, Parachute B


There were enough round tape disks to attach all eight lines. I was surprised to find out the Mylar disks were still sticky and usable!

I tied a knot at the ends of the four lines. The knot was set at the edge of the round tape disk. The disks were pressed on the corners of the Mylar.


I did a tangle-free shroud line attachment.
To see how it's done, CLICK HERE


The finished, retro 12" parachute.


The shroud lines were tied to a snap swivel.
A round elastic cord (like the original) was tied to a screw eye. This is a BMS balsa cone, The screw eye was screwed into the side, not centered. The tail of the shock cord was set into the open plug hole to keep it out of the way when the nose cone is slid into the parachute tube.

Sunday, September 9, 2018

Vashon Valkyrie II Build, Part 16, Parachute A

Here's the instructions for the parachute assembly.

You are supplied a 12" square piece of 1/4 mil Mylar. This is the very thin Mylar, a lot like the emergency blanket material you can find in the sports section at WalMart. I wouldn't recommend 1/4 mil Mylar for black powder rockets. While it is strong, any hot ejection gas will easily melt it.
My box had a piece of chromed Mylar chute material and a printed parachute. I'll be using the chrome Mylar, that's what my original Vashon rocket had.

The instructions are a bit vague, how can you accurately cut the corners and make an eight sided chute? I know it can be folded and cut, I didn't feel like looking it up in old MRNs.

The instructions say to cut 5" off the corners. I drew up a template to be sure the cut angles  would be right.

Set the corner of the Mylar on the template and line up a straightedge for a straight cut.

TIP: Notice the straightedge is turned over with the raised cork side up. This Mylar is very thin. If the ruler were turned over, the cork would raise the cutting edge. That small raised edge might allow the Mylar to flex when it is cut. You could end up with a ragged cut line.


There was one shroud line in the box.

Since this is such an old kit, I pulled out some old button and rug thread. The older thread had a higher cotton content.

As per the instructions, eight 16" lengths were cut. Actually I cut four 32" lengths of line.

Saturday, September 8, 2018

Vashon Valkyrie II Build, Part 15, Black Trim and Fin Attachment


I wanted to match the trim on the old Vashon catalog cover.

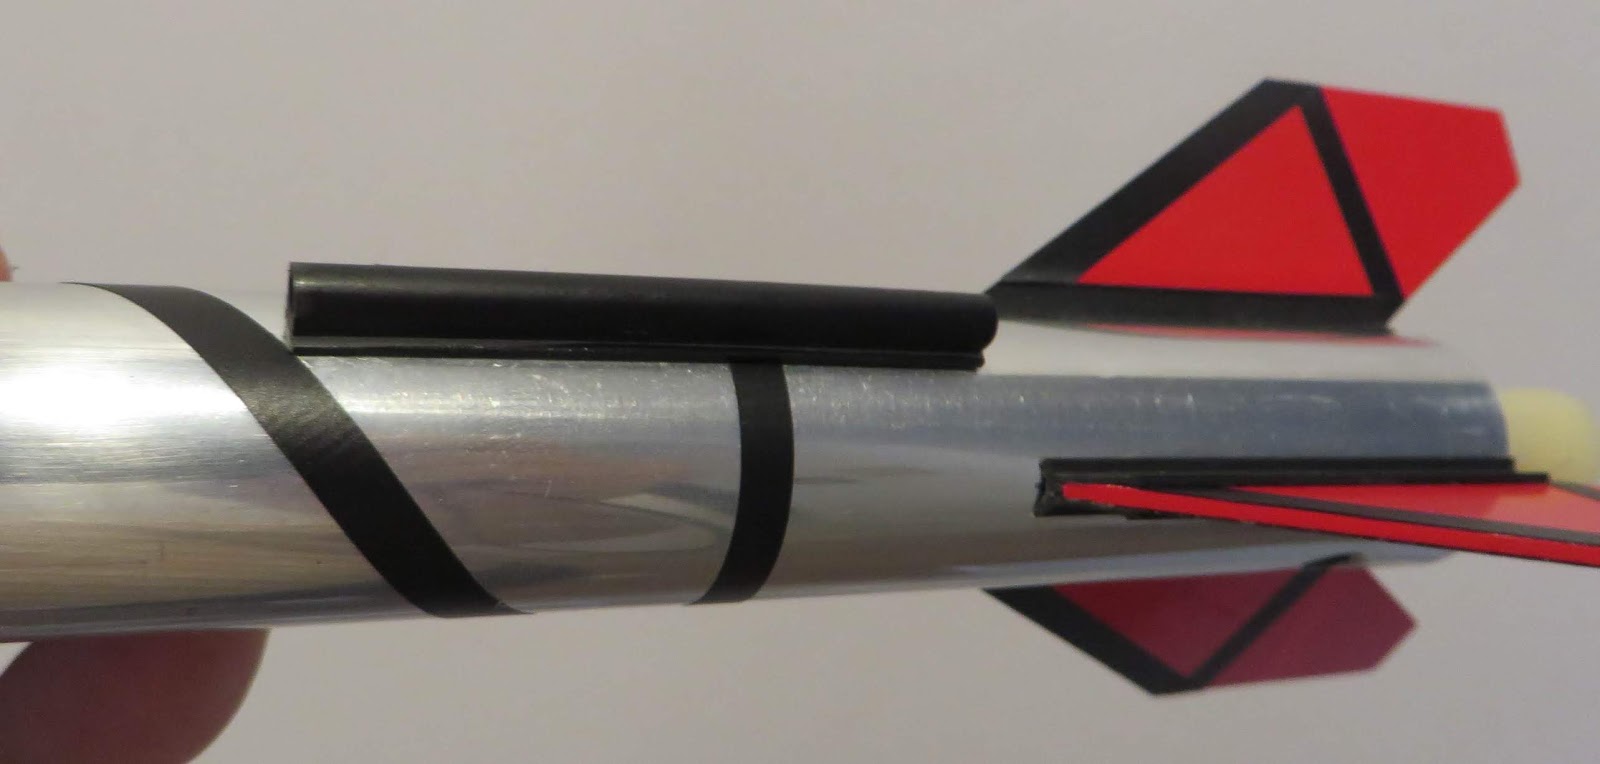
I'm sure they used auto trim tape for all the black lines. I used my old standby, Contact Paper Blackboard Vinyl.


Strips were cut to a 3/16" width. They probably could have been cut closer to 1/8", the catalog picture stripes looked thinner.


The roll pattern wraps around the body make one complete wrap. The stop and start points of the diagonal are in line with each other.


The fin rails and launch lug got a coat of contact cement.

For a cleaner look, keep the cement away from the edges. If the glue overhangs the edge, you'll be left with yellow bits of goop that are very hard to remove.
Brush on a bead towards the center. While the glue is still wet, run your finger down the edge pushing it slightly away from the sides.


With dried glue on the body and the fin rail, walk the rail down the body from the rear. Don't press down on the fin yet, double check the position. If the rail is even with the back of the body and straight on the body, press down locking the fin in place.


The launch lug is centered between two fins.

Friday, September 7, 2018

Vashon Valkyrie II Build, Part 14, Fixing The Rails


The back end of the interior ridges are lightly trimmed to allow the fins to slide in.


Uh-oh! The fin rails are off the model.

I tried to slide the fins in, but the fit was too tight. The glue on the base of the rails on didn't hold when the fins were pushed in.
I ended up removing the remaining contact cement off the rocket body.


On the left is a sliver of the fin rail so you can see the interior profile. The bottom is curved to fit the engine body.
The lower inside ribs were filed down to allow the fin to slide in easier. I could have sanded the fins thinner, but I didn't want to weaken the root edge and have to finish them again.

Vashon Valkyrie II Build, Part 13, Fin Rails and Placement


The fin rails are cut to match the angle of the fin leading edge.


The launch lug also glues onto the engine body.
The supplied lug is 4" long, probably too long for this model. I cut it down to 2 1/4" long.

The glue area is masked and sanded like the fin lines.


I found Weldwood Contact Cement at Home Depot.
Contact cement is interesting. You brush it onto both surfaces to be joined, let the glue thoroughly dry.
Line up the two parts and touch the glued areas. There is an instant grab with little time to adjust.


Applying this glue is like brushing on runny snot!
It drips when you don't expect it, have paper towels ready.

Line up the fin rails before pressing in place.
NOTE: The instructions have you glue on the rails, then slide the fins into the rails. (Yeah, right!)

Thursday, September 6, 2018

Vashon Valkyrie II Build, Part 12, Fin Rail Prepping


A fin marking guide was printed from the "Tools" page at payloadbay.com.
The seam was lined up right above the fill valve.
The fin location lines were marked with a fine point Sharpie.


The lines were extended down the engine body using an aluminum angle.
If needed, any drawn Sharpie lines can be rubbed off the aluminum body.


The fin rails are glued on using Contact Cement. The aluminum body is roughed up so the glue will hold.

A strip was masked off, just a little narrower than the width of the fin rail.


220 grit was used to rough up the glue areas.

Look close, you can see the dulled, sanded strip.

Wednesday, September 5, 2018

Vashon Valkyrie II Build, Part 11, How's It Work?

There's been a few questions about how the Vashon rockets operate.
For a manual launch: 
The plug is pushed into the nozzle. The "Safety Pin" is pushed through small holes in the plastic nozzle extension, locking the plug in place.
The rocket is filled with Freon while venting off  pressure allowing the engine to be completely filled.
When ready, the safety pin is pulled, the plug blows out and the rocket is launched. You are right next to the rocket when the pin is pulled.

For the electric launch - 
A thin wire is wrapped around the gray lead wire at the base of the plug. The wire is held by friction between the nozzle and plastic nozzle extension. The safety pin is slid in place.
After the rocket is filled, the pin is slid out. The plug is still held in place by the wire.
When ready, the lead wires are touched to a battery. The wire is melted, the plug blows out and the rocket is launched. The electric launch allows you to be farther away from the rocket when launching.

The separator/timer is another matter.
When the rocket is being filled, gas pressure expands a "spring" (formed piece of flat spring steel) that grips the inside edge of the parachute tube.

The rocket is launched. The pressure expanding the spring decreases and the parachute tube falls off. No ejection charge, just cross your fingers and hope the parachute falls out and opens up.

Between the engine and the separator module are paper "timer disks". Start with three disks. Add or remove a disk to increase the delay from 3 to 5 seconds after boost until the parachute tube falls off.

Tuesday, September 4, 2018

Vashon Valkyrie II Build, Part 10, Red Paint


Only the nose cone and fins are painted on this one. I'll be using gloss red, just like the catalog cover picture.

This is a rare model there the fins are painted off the model. The root edge gets slipped into a "rail" on the body. They first got a white undercoat.
Notice the dulled right side, lightly sanded with 400 grit. All I do is knock off the gloss a bit without sanding through to the wood.
I can't just tape the fins down onto the cardboard, paint could seep under the edge making a rough mess.

Under each fin is a circle of masking tape, sticky side out. This floats the fin above the cardboard. Sprayed from above the underside edges won't get any paint and stick to the board.

Be sure to let the paint dry thoroughly before flipping it over onto the tape circle to spray the other side.


The nose cone was also sprayed gloss red. This turned out to be one of the smoothest gloss finishes I've ever had!

The printed parachute tube was a bit marred. I used a Sharpie to color in some of the white edges and seam.


The checker print was badly done. The stripe widths are uneven.
I could probably do better using the Contact paper blackboard vinyl. We'll see -

Monday, September 3, 2018

Vashon Valkyrie II Build, Part 9, Filling The Balsa


The fins got a coat of CWF and sanding.

On the left is the follow-up coat of Duplicolor Filler/Primer .
On the right is the filler/primer sanded using 220 grit. This removes almost all of the gray filler. 


After the 220, 400 grit smooths the surface and fills any removing grain the CWF didn't get.


The nose cone also got a good coat of filler/primer and sanding.

Everything was ready for the first coat of gloss white, then the nose cone rolled off the patio table. I have to go back and fill the small dings.

Here's a strange composite picture.
So you don't round off the shoulder lip:

TIP:  Set your left thumb tip right at the shoulder edge. It works like a "bumper" stopping the back and forth travel of the sandpaper held in your right hand. Your left thumb stops the sandpaper so you can't round off the shoulder edge.