Thursday, December 31, 2020

Where's the TOP 10 List?


At the end of each year - I post a Top 10 list, grading the best (and not so great) builds from the past year. 
It's coming up in a few days. I figured those building the Saturn 1b wouldn't want to see a delay in the build posts.
When the Saturn 1B is finished, the annual Top 10 List will be posted.

Estes Saturn 1B, #7251 Build, Part 33, More Decals

I understand these are "camera focus" markers. 
They are tiny! You don't want to be fishing these off the bottom of your decal soaking dish. 
TIPS: Your soak water shouldn't be deep. Using tweezers - float these on the surface of the water, don't submerge them.
On the right, the decal is out of the water, slid halfway off the backing paper. Set it into position on the model, then slide out the backing paper.


The small decals are in position along with the single line of vertical black boxes.
TIPS: Here's a flashback to the old Centuri instructions. In the original Saturn V and Saturn 1B kits, you are supplied with a fin decal number position template.

I made my own out of cardstock. A fin tracing is on both sides.
The corner is cut out for decal positioning.  


With the template placed into the root edge corner -
You can check the position of the lower left and lower right sides of the decals.

Build time:
Place decals: 60 minutes
Total build time so far: 25 hours, 55 minutes

Wednesday, December 30, 2020

Estes Saturn 1B, #7251 Build, Part 32, Decals!

The instructions don't mention this - 
The rocket is still painted with gloss paint to allow a good adhesion of the decals. 

Note I didn't glue the silver Service Module tube onto the rocket yet - that will be glued up after the dull coat is sprayed on the white and black areas. Don't spray any of the silver areas with a dull coat.

Notice the small UNITED STATES and Flag decals. Two are set on a straight line, the other two are curved. The curved decals go on the conical Command Module. The straight line decals go on the silver Service Module.
That one curved decal ends up going over the molded line in the CM.


The four U S A decals are centered in the open area between the wraps and center directly over the vertical white bands on the middle corrugated wrap.


The mission number SA-206 decals also have a white background. These go underneath the vertical UNITED STATED decals.
Plan ahead! Set these down first to better center the tall UNITED STATES decals above.

TIPS: Keep a wrap of paper around the body as you work. Finger oils and dirt can be transferred onto the paint. 


After the first vertical UNITED STATES decal was centered and placed - 
TIPS: A wrap of paper was taped around the body to help line up the tops of the other three UNITED STATES decals.

Build time:
Place decals: 60 minutes
Total build time so far: 24 hours, 55 minutes

Tuesday, December 29, 2020

New Micro Clips

Along with my new heavy gauge blast deflector - I decided to replace my micro clips. 

Copper is a better conductor than the steel clips included with my 6 volt Estes controller. 
I found them on Ebay, four for $4.95 plus shipping.
Copper micro clips were on my original Electro Launcher from 1970.
I prefer the flat jaw clips, not the larger alligator clips with the jagged teeth.

If you bend your igniter ends out away from the nozzle, you can connect to the side and outside the engine nozzle flame. These copper clips could last a long time.

Note in the right side picture the spring relief on the red wire out the top of the yellow controller. The wire exiting the top of the controller is a weak point in the design, the wire can wear and break.
To see how to install the ball point pen spring - CLICK HERE

Estes Saturn 1B, #7251 Build, Part 31, Gluing On The Fins


Most builders would glue on the fins in order of the instructions, mask and paint afterwards. I thought this would be too difficult especially in the tight fin root areas. This is why I painted the fins before assembly.

In the picture, the glue tab has had the paint scraped off for a better glue bond. The root edges will also have any paint scraped and removed.


It's not shown in the picture, but the root edge contact areas were scraped before the fins were glued in place.

The root edges of the fins are a tapered wedge so there is some careful removal of paint on the lower body.

Some Fabri-Tac glue was pressed into the fin tab recess using a toothpick to apply a small drop. 


After the fins were glued on, some liquid glue was dropped into the rear of the root edge joint and allowed to run inside any gaps. 

Build time:
Scrape and glue on fins: 40 minutes
Total build time so far: 23 hours, 55 minutes

Monday, December 28, 2020

Estes Saturn 1B, #7251 Build, Part 30, Command Module Mask & Shroud Line Harness

It isn't pictured here, but I did do quite a bit of touchup to the white and black mask areas. I'll add 20 minutes time below for the touchups.
   
The umbilical is painted silver.

I used five pieces of marked Scotch tape on the smooth plastic. Notice the fourth and fifth pieces are set at an angle, rounding off the corners.
I also do this on squared fin corners. I'm just knocking off the sharp corner tip, not going very deep.

The picture on the right is the rest of the capsule and tower masked off, just to spray the umbilical.


After the tape masks are pulled, the results were clean.

You'll have to mask off this silver later on when the dull coat is sprayed - otherwise the silver paint with look like a dull gray color.
The center of the LEM shroud lug is cut out.
This one had thick plastic, I couldn't just punch it out. It took a few cuts with an X-Acto to remove it.

The inside edges will be rough. I used a small diamond file to smooth it. A rough edge might wear through a shock cord.  
GOTCHA: You are supplied with a long length of shroud line to tie on the upper body chute harness. 
Give it a tug - If it easily breaks, replace it with stronger string. I always have some #10 cotton embroidery thread handy. It is very strong.

Build time:
Mask & Paint Umbilical, Clear Lug, Tie Swivel: 40 minutes
Total build time so far: 23 hours, 15 minutes

Sunday, December 27, 2020

Estes Saturn 1B, #7251 Build, Part 29, Scalloped Fairing & Centering Rings


I applied a small fillet and removed the excess with a Q-tip. You don't want the glue to get in the way of the centering ring position.


You can use a little more glue on the bottom ring. The scalloped fairing won't touch the inside joint glue.

The scalloped fairing is slide down from the top. 
I was concerned the fairing might scratch the white paint on the booster tubes, but there was no problems.


The scalloped fairing is slide down from the top. 
I was concerned the fairing might scratch the white paint on the booster tubes, but there was no problems.

Slide all the way down to the bottom.

A centering ring is slid down the central tube and seats on the top of the booster tubes. 

Glue is applied. This will be covered by the overhang of the upper tube.


The final centering ring is slid on and fillets are applied to both sides. 


Build time:
Set Fairing, Glue Tubes & Rings: 20 minutes
Total build time so far: 22 hours, 15 minutes

Saturday, December 26, 2020

Estes Saturn 1B, #7251 Build, Part 28, Engine Hook Notch

A notch is needed in the low centering ring to allow engine hook movement. The notch location is set between two of the booster tubes.

Slide the engine mount in place and mark the width of the hook in pencil.
The instructions imply the notch is cut and removed. I decided to make a smooth "ramp" inside.
In the upper right picture a small slot is cut and removed from the centering ring.


The sides are cut straight down, but no cut is made at the bottom of the notch.
The notch was pressed into the ring notch cut earlier. No need to remove a segment of body tube


Some glue is rubbed over the notch.


The engine mount is glued into the central core tube. 
I used my sanding block to press the engine mount even with the bottom of the centering ring.

Build time:
Make notch and glue in engine mount: 20 minutes
Total build time so far: 21 hours, 55 minutes

Friday, December 25, 2020

Merry Christmas - Y'All!


Reprinted from 2010 -

OH, ROCKET - TREE
Space Modeling Parody of Oh, Christmas Tree

Oh, Rocket-tree Oh, Rocket-tree,
How lovely is thy smoke trail,
Oh, Rocket-tree Oh, Rocket-tree,
Fly Vertically without fail.

With C6-3, we’ll rubberneck,
At peak of flight, a rear eject,

Oh, Rocket-tree Oh, Rocket-tree
It landed close - oh whoo-o-pee.


"But I heard him exclaim, as he sailed out of sight,
"Merry Christmas to all, and to all a good flight."

"Say, little Bobby, Did you get a Wedgie for Christmas?"

The Wedgie is an OOP Odd'l Rockets kit that had available skins to fit the triangle sides.

Estes Saturn 1B, #7251 Build, Part 27, Painting The Fins, Outside Edge Color Separations


TIP: When the tape on the leading edge tape was lifted, the paint line was rough.

A Mister Clean Magic Sponge was wetted and wrung out. Wipe a Q-tip on the damp sponge, picking up some of the cleaner. Run the wet Q-tip down the white side leading edge and a little over onto the rough black paint line. After a few passes you should be able to remove some paint and clean up the paint edge.
Here's another fin mask reveal.
The plastic fin surfaces are very smooth, Scotch tape works well for a mask.

On the left the masking tape is pulled, the Scotch tape is underneath, some of the Sharpie ink came up on the masking tape overlay.
The outside edges of a few of the fins are split half black, half white.
The outside edge is thin!

TIP: I put a few pieces of tape over the sharp edge of a single edge razor blade. The opposite rolled over side was used like a small straightedge. The ultra fine point Sharpie was used to draw a thin border line. 

Build time:
Spray one side of fins: 15 minutes
Spray other side of fins: 15 minutes
Remove tape, touch up fins: 55 minutes 
Total build time so far: 21 hours, 35 minutes

Thursday, December 24, 2020

Estes Saturn 1B, #7251 Build, Part 26, Masking & Painting The Fins


I used the height of the black/white body separation line to draw a mask line on the fin sides.

I stacked some CD cases to get close to the correct height. A piece of cardboard between the cases got it to the right height.

A horizontal pencil line was drawn on the fin.
TIPS: Keep track of the fin positions! Mark the fin positions on the inside of the body and root edge of the fins.  

Notice some black paint got on the underside of the sharp scallops on the shroud. This will have to be removed with some careful use of Goo Gone on a Q-tip. That black paint could rub off onto the eight white booster tubes when it is slid over them. The fit is tight!   


I used marked Scotch tape down the pencil lines for the edge masks.

On the left  is a low black mask, 
on the right is a high black mask.


I double checked the fin mask line to be sure it was 90 degrees to the body.
You can set any true small square into the root edge corner. 
Here's all the fin masks - 
I know there is only seven showing, one fin remains white.

I painted the fins off the body because I didn't see an easy way to mask them after they were glued on.

Build time:
Mark & mask fins: 25 minutes
Total build time so far: 20 hours, 10 minutes

Tuesday, December 22, 2020

Estes Saturn 1B, #7251 Build, Part 25, Painting Lower Body & Gluing RCS Nozzles

The black areas on the lower body has been outlined. 

Notice the interior surfaces have been masked. If paint got on the inside of the scalloped shroud, it might drag and mark the white tubes when the shroud is slid down from the top. The fit of the scalloped shroud over the tubes is very tight.

On the right - the full mask leaving the black areas exposed.


I purposely took this picture with light reflection on the black Sharpie border line. There is a slight difference under a bright light. This will go away when the model gets a flat finish clear coat.
Back and forth in the instruction order - 

I applied a drop of Fabri-Tac glue to the center pin area on the underside of the nozzle piece.
This drop was spread out with a toothpick. The trick is to use enough glue to hold the nozzle piece in place, but not too much that the glue could squeeze out on the sides of the body tube.   
Some medium CA glue was squeezed out onto scrap cardboard. 
Some glue was picked up on a toothpick tip. The glue was transferred to the pin on the inside of the body tube.

Build time:
Mask & Spray Low Section: 20 minutes
Touch up low paint: 20 minutes
Glue on RCS Nozzles: 15 minutes
Total build time so far: 19 hours, 45 minutes

New Blast Deflector Plate


I ordered a new blast deflector plate from the NAR Technical Services or NARTS store.
It's described as a: Heavy Duty Blast Deflector 5" Diameter 12GA Steel

It is definitely heavy duty - 1/8" thick! 
My old Quest deflector plate was 4" diameter, this one is 5". Well worth $5.00.
It comes with a center split sleeve bushing like the old Estes plates did.

To see the product listings - CLICK HERE

Estes Saturn 1B, #7251 Build, Part 24, Outline Lower Body

The four painting pictures can be confusing. 

TIP: It's not mentioned in the instructions - starting from the left side, every picture (going to the right) is a quarter turn of the model.

To get a better idea (and play it really safe) I first taped the lower body with the black areas exposed. After I was sure, I marked the black areas with a "B". The tape was removed after pencil marks were made at 17/32" from the top of the tube.


After the tube black areas were marked, the scalloped fairing was set in position. The black outlines were continued up the fairing.
This would be a very difficult assembly to mask and spray with the fins in place. I'll paint the assembly and fins separately. The root edge areas will be carefully scraped off and the painted fins glued on later.
You are welcome to glue the fins on now and mask, but I find this works better for me.

The picture shows the black outlines and widened lines. 

Build time:
Sharpie Outline Low Section: 40 minutes
Total build time so far: 18 hours, 50 minutes

Monday, December 21, 2020

Launch, L.A.S.E.R., Groveland, FL, December 20, 2020


Cool weather, low winds and a small chance of afternoon rain. I took the 70 minute drive to Groveland to join the L.A.S.E.R. monthly launch.

I tried the MMX BLUE BIRD ZERO first, but had trouble with ignition. Bare nichrome in a tiny nozzle is iffy sometimes. I did get the launch in later in the session. Altitude was around 50 feet - but no streamer, just the nose cone ejected. No damage.


I did get two stable flights with the new Odd'l Rockets F-18 HORNET prototype! Good launches with B6-4 and C6-5 engines!

The B6-4 (left picture) was arrow straight to an estimated 350'. Full chute, some drift under the 12" chute - no damage.
On the right is the later C6-5 launch, I taped the chute partially closed, what I like to call a "Hillbilly Hat". Peak altitude was probably 675'. It still drifted, and landed in the road a few hundred feet away. Problem was - there was a fence between me and the road.

I pretty much grew up on a ranch, I know how to climb over a line of barbed wire at the top of the fence, but it's been a few years. I got the rocket back - before it could get run over. The barbed wire did it's job, I scratched up my right hand.


David Hofmann brought a few square rockets, New Way style.
Here's a square, Der Big Red Max.


Jim Lytle launched a Styrofoam Snowman and a Christmas tree! This one was more stable than what you saw on that Discovery Channel "Rocket Around the Christmas Tree" TV special.


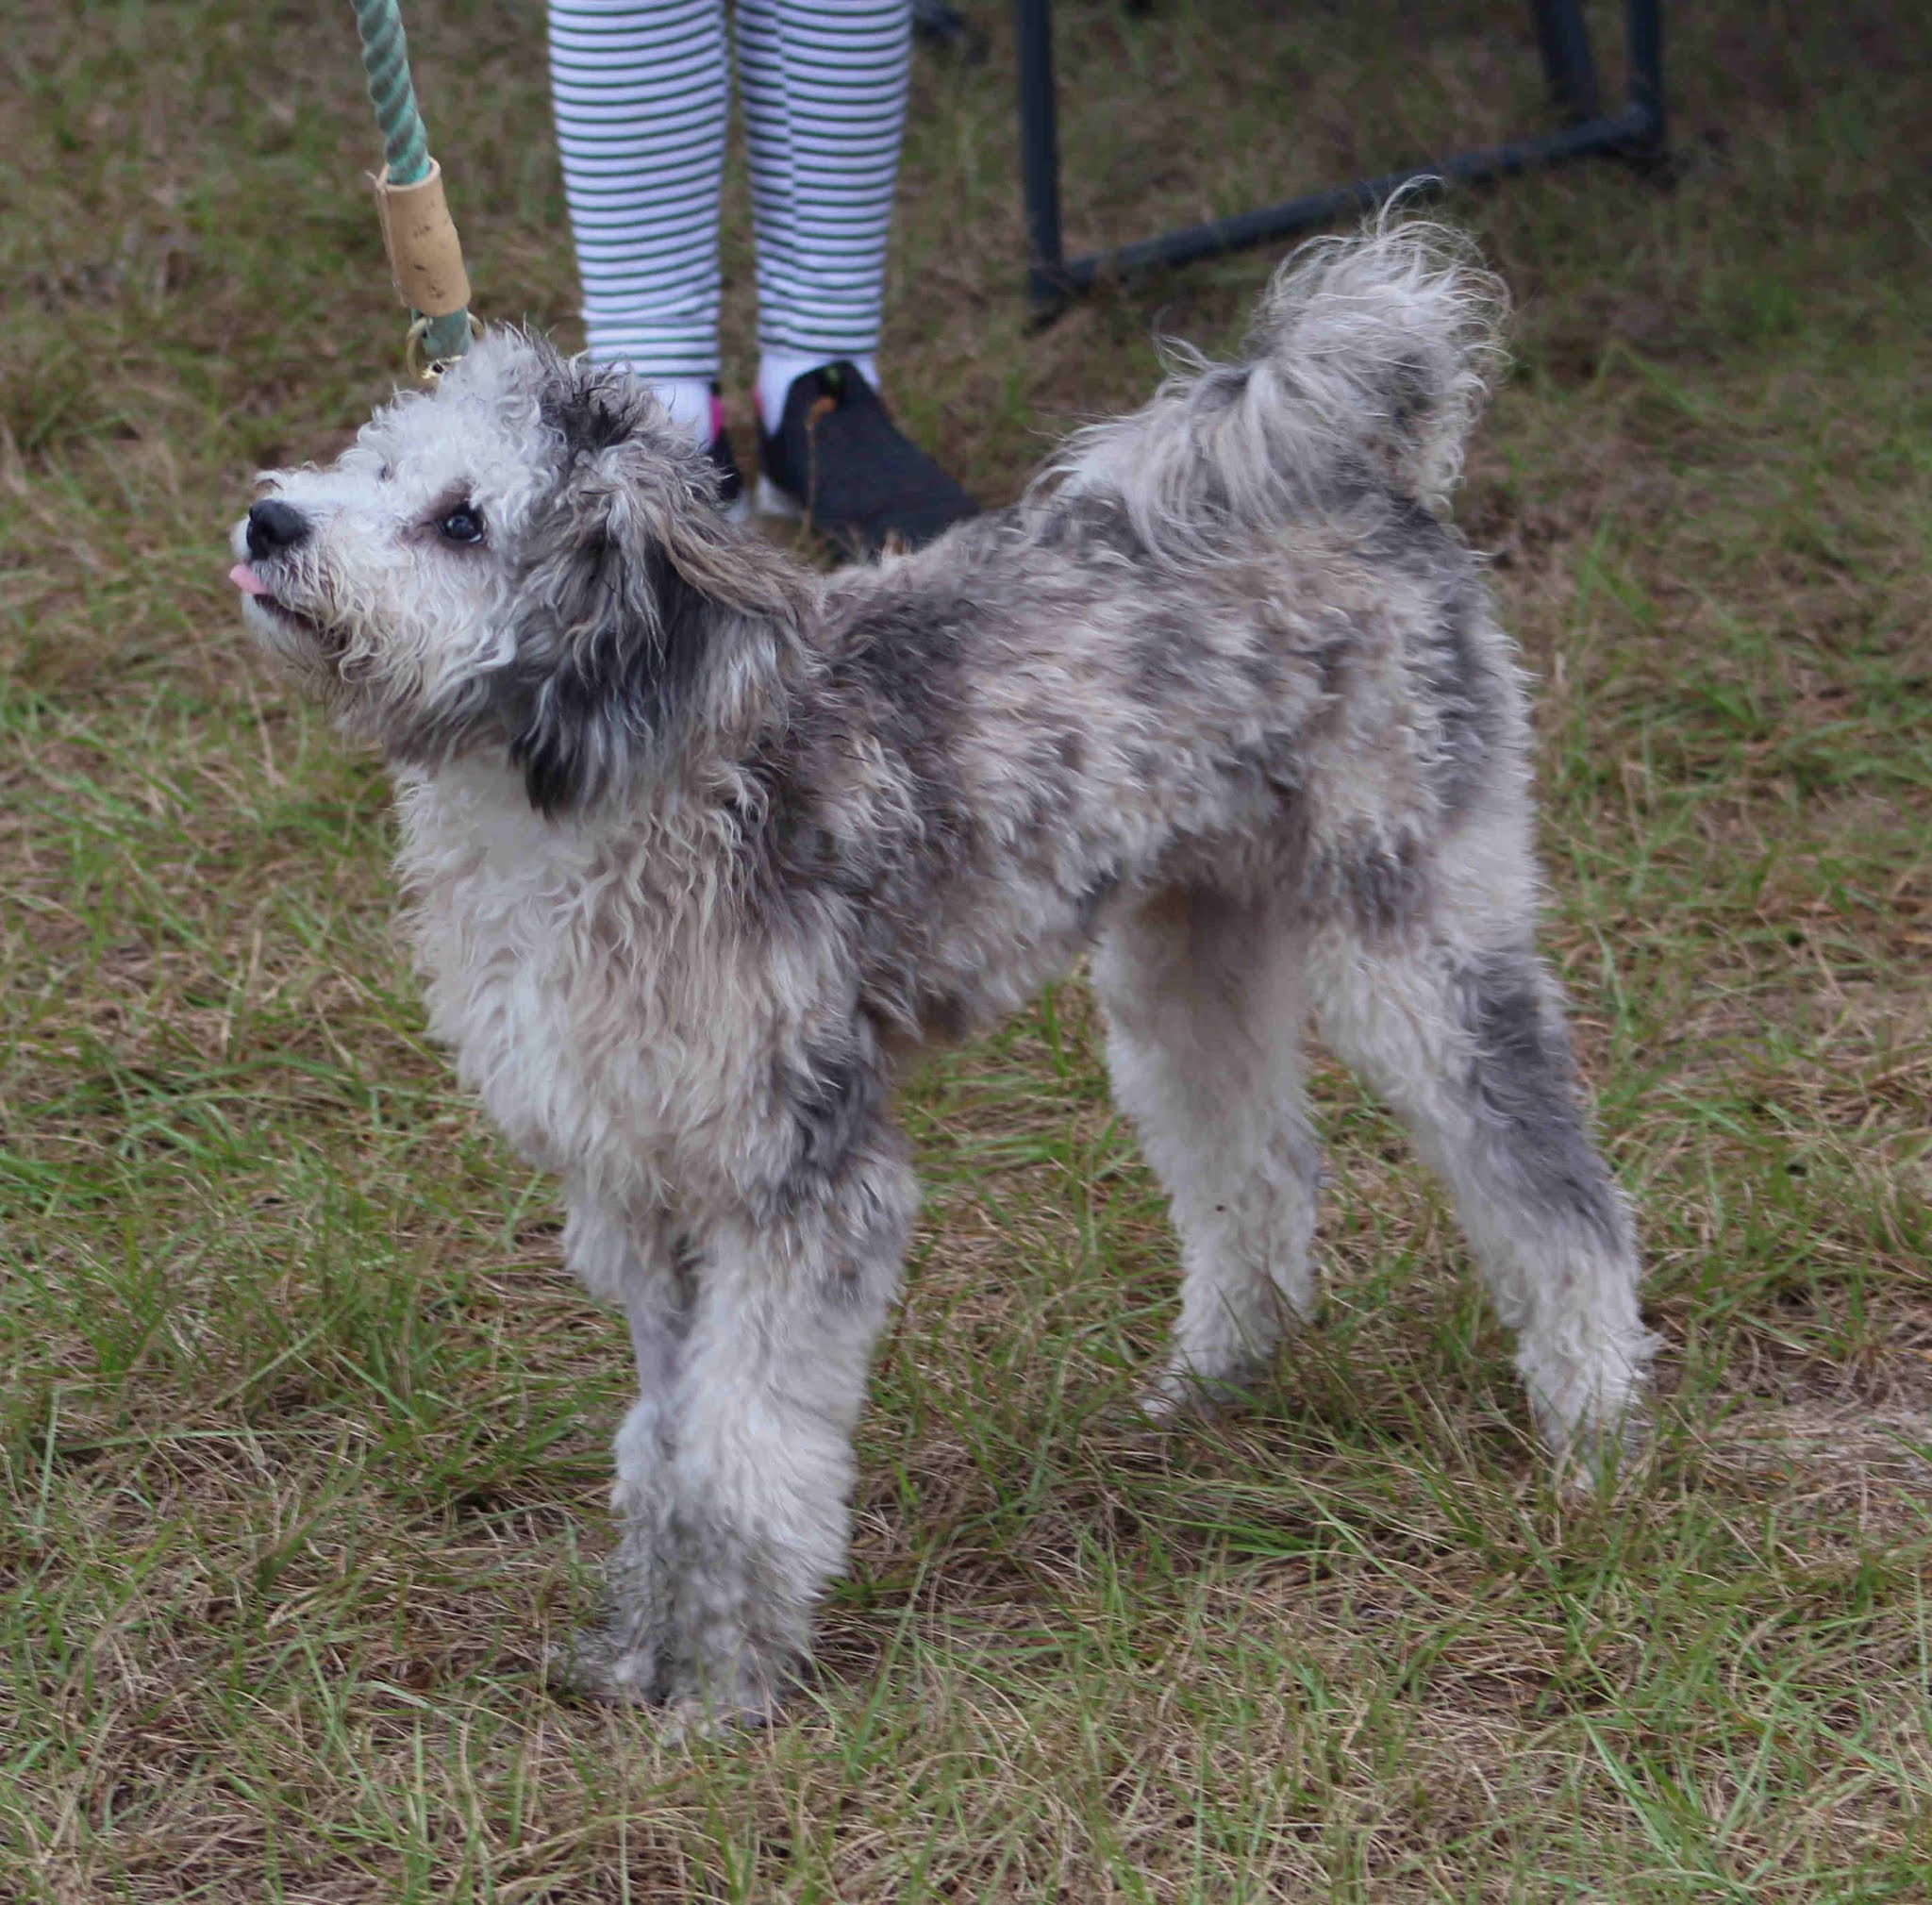
Today's visiting launch dog was "Beau", a Cavalier King Charles Spaniel mix.


Astron Mike launched a helicopter recovery rocket along with some gliders. This one is a pop-pod glider made from foam board with a hand rolled tube. 
Mike's gliders are large and light. Most have long, lazy circling recoveries.


I haven't launched the MX-774 in a while, today with an Estes B6-4 to 350'. This build was a kitbash made from an Estes Bullpup.


There's club President, Mike Meridith decked out for the holidays.

Mike landed one of his Frank Burke R/C gliders to the applause of the club members!


My only Q-Jet composite motor of the day was this B4-4 flight in my GOONY X-15.  I couldn't get the igniter to ignite - the first one was broken. Q-Jet igniters can be fragile!
Finally, ignition! Grey smoke and quiet compared to the B.P. motors.
Estimated altitude would be around 325'. 


Whey do they miss the grass and land on the only blacktop in the area?


Ted Moo observes the action after launching his helicopter rocket twice with good success.

Also launched - Semroc SNAKE JUMPER with an Estes B6-4.
I got six in the air today - recovered all with little damage.
I was most excited (and a bit nervous) about trying the larger (and slightly heavier) engines in the F-18 Odd'l Rockets prototype.