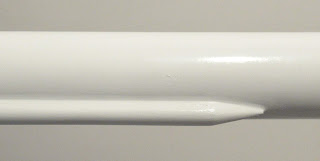
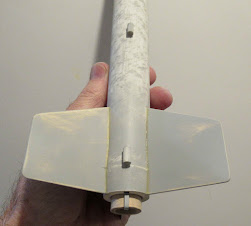
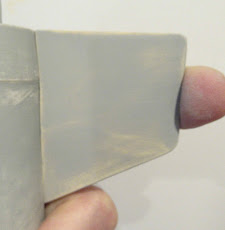
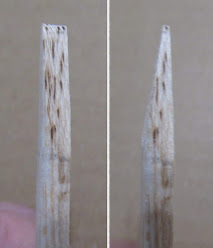
Here's the fin areas after the second white undercoat and some light sanding. It'll still take one more light undercoat before sanding and color.
Showing posts with label S Wac Corporal. Show all posts
Showing posts with label S Wac Corporal. Show all posts
Thursday, June 20, 2024
Semroc Wac Corporal Build, Waiting For Paint To Dry
Monday, June 17, 2024
Semroc Wac Corporal Build, Part 14, Watching Paint Dry
I see too many posts on the rocketry forums and Facebook about paint problems.
"Did this ever happen to you?" followed by a picture of a rocket with wrinkled paint.
Back to the current Wac Corporal build -
Before another spray coat, I'm waiting a full 48 hours for the first white undercoat to dry. The rough areas have been sanded.
READ and follow THE DIRECTIONS on the can!
Most cans say: Re-spray within one hour or after 48 hours.
Paint dries faster on balsa fins and Kraft paper tubes.
Balsa and paper tubes "breathe!" and can dry through both inside and outside surfaces.
Plastic nose cones require much more time to dry.
Plastic is "sealed" and dries slower from the outside surface in.
To prevent blushing of the finish, spray when humidity is the lowest.
Check this address: https://www.timeanddate.com/weather
Type in your city and check the afternoon hours for the lowest humidity.
I'm not saying these tips will prevent all paint problems.
But, it may help with some concerns.
Rustoleum 2X paint is problematic, especially the Gloss White. Random cans can spray pigment (a rough, cottage cheese) that has settled on the bottom of the can. Shaking helps but may not break up all the settled pigment.
Sunday, June 16, 2024
Semroc Wac Corporal Build, Part 13, White Undercoat & Sanding
I think I've done a good job making smooth fillets. I think I've picked up all the excess glue before it has dried.
The first white undercoat usually brings attention to all the flaws.
On the left is an uneven glue fillet.
On the right is after careful sanding with some older 4000 grit.
You can sand yellow wood glue.
Sand under a bright light. Sanding dulls the gloss white. Low areas that need more sanding will still be glossy.
Here's a noticeable glue booger near the leading edge of a fin.
Here's a noticeable glue booger near the leading edge of a fin.
On the right is after sanding to surface.
In 48 hours, another white undercoat and probably some more sanding.
Saturday, June 15, 2024
Semroc Wac Corporal Build, Part 12, Tunnel & Launch Lugs
In the old Estes Wac Corporal kit, the open ended tunnel covered the long launch lug. It had to be glued between the fins.
Two short lugs are used in the Semroc kit.
Both are glued in line, directly over the engine hook.
The lower lug is glued right above the tail cone/body tube joint.
Thursday, June 13, 2024
Semroc Wac Corporal Build, Part 11, Fitting The Fins
There was still some uneven areas around the tail cone/body tube joint.
Each fin was individually fit to the tail cone and body tube.
Look close and you can see a small gap at the rear and just below the top of the tail cone.
Here's the same fin after fitting. The gaps are gone.
For a reference I marked the fin at the shroud/body tube joint with pencil.
Wednesday, June 12, 2024
Semroc Wac Corporal Build, Part 10, Fitting The Tail Cone
The shroud is glued onto the lower ring and the first ring of the two center rings.
Lightly form the shroud edge by "molding" it into the wet glue underneath. For now, I'm only molding the low, smaller side.
Dry fit the engine mount into the tube.
TIP: Slide in a turn the mount and shroud until you find the best fit against the tube.
Mark the best position with a pencil mark on the tube.
Now you can apply some glue inside the tube and around the exposed middle centering ring. Slide in and turn the mount until the pencil mark lines up with the shroud joint.
Form the wider shroud edge as before, rolling the burnisher over the tube and shroud joint.
This will make for less filling later on.
The raised shroud overlap can be sanded down a bit. Just lower the thickness a little, not too deep.
Tuesday, June 11, 2024
Semroc Wac Corporal Build, Part 9, Fitting The Tail Cone
The kit supplies one tail cone shroud printed on cardstock. I rarely get a good fit onto both tube diameters with one shroud.
I scan and copy at least three of them onto 110 lb. cardstock. Assemble all three - one of them should have the best fit.
Do plenty of dry test fittings for a smoother final look.
One shroud on the left is a poor dry fit, both ends are a bit wide.
On the right, one of the other shrouds and a better fit. Both the middle centering rings have been dry pressed into the wide end. The second ring is outside the shroud top and gives you an open edge for gluing and a slip fit of the ST-11 main tube.
The lower ring is glued in place, even with the end of the motor mount tube.
I use the flat face of my sanding block to press the ring even.
TIP: There was still a very slight gap in the small end of the shroud. I wanted to increase the outside diameter of the low ring.
I applied a thin line of wood glue. Smooth and even it out using a fingertip on both sides of the glue ring.
After it dries, run a finger around the ring and you'll feel high and low areas. Some 400 grit will take down the high spots.
Monday, June 10, 2024
Semroc Wac Corporal Build, Part 8, Second Coat Of Primer/Filler
and a spray of primer/filler and sanding,
takes care of the balsa grain. Not today.
Before sanding the filler/primer I had to rub some CWF into the remaining visible grain.
Keep this CWF rubbed in filler thin and close to he surface.

Sanding did take down the raised areas but also cut int the CWF underneath and into the balsa.
The root edge was masked off again using tapered pieces of masking tape.
Onto some scrap cardboard to spray one side.
That long masking tape strip has the sticky side facing up to hold the fins for spraying.
Spray one side and let dry.
flip over the fins and spray the other side.
Sunday, June 9, 2024
Semroc Wac Corporal Build, Part 7, Forming The Tunnel
I had started forming the tunnel when I had worked on the build before.
Sand the underside curvature by wrapping 220 grit around a body tube. Sand straight up and down motions.
TIP: You'll get a tighter fit if you sand the inside contour on a smaller diameter body tube. The kit tube is 1.17" diameter. I sanded the underside of the tunnel on a slightly smaller .976" diameter BT-50 tube.
Round off the long sides.
Saturday, June 8, 2024
Semroc Wac Corporal Build, Part 6, Launch Lugs
I cut new lugs from some extras I had.
The seams in the launch lugs were filled with CWF at the same time as the body tube.
I slide the lugs onto a Q-Tip for a holder when brushing on the filler.
Leave the lugs on the holder when sanding the CWF to surface.
Some CWF filler may have gotten inside the lug edge. You don't want the lugs to get hung up on the launch rod.
Clear, clean up and round the lug by rotating a sharpened dowel in the lug ends.
Friday, June 7, 2024
Semroc Wac Corporal Build, Part 5, Fin Shaping C
Start the leading and trailing edge tapers.
I've again marked the first high point with pencil.
Round off the sides to an rounded taper. The center area is the high point.
On the left is the root edge view,
on the right is the leading and outside edge view.
Here's all three, the shaping done.
The fin on the left has had the remaining ink sanded down with 400 grit.
The edges are lightly rounded with 400 grit. Keep the root edge square.
Thursday, June 6, 2024
Semroc Wac Corporal Build, Part 4, Fin Shaping B
On the right you can see the taper cutting into the black inked edge.
It's a compromise. You want the outside edge thin while still keeping it strong enough to survive a hard landing.
Now sand down that face joining the two different widths - a smooth flat face from the root edge to the thinner outside edge.
Wednesday, June 5, 2024
Semroc Wac Corporal Build, Part 3, Fin Shaping A
The kit includes a cardstock marking guide to mark the centerline of the fins. It is supposed to be half the thickness of the 3/16" thick balsa.
Set the fin into the cardstock piece and trace around the top edge of the fin. On the right, the pencil line wasn't perfectly centered.
The instructions say you could use a marker to draw this centerline - NEVER use ink when making model rockets! The ink can bleed through the finish paint.
Instead of a hard to see simple centerline, I mark a high contrast edge.
Sealing the wood stops the ink from soaking in.
I seal the edges with a wipe of super glue. This also strengthens a thin fin edge.
Drip the CA glue onto a Q-tip and wipe the glue onto the side edges - but NOT the root edge. The root edge is left unsealed as it is glued to the body tube.
Mark the sides of the fin with a wide point marker.
Don't apply ink to the root edge.
Tuesday, June 4, 2024
Semroc Wac Corporal Build, Part 2, Parts
Apparently I started this build and got sidetracked. One of the centering rings is glued onto the motor mount tube.
Outside the glue tab of the tail cone cardstock has been trimmed off.
The tunnel shaping has been started.
A name decal is included but there were no name markings on the real rocket, except for round numbers.
The parachute is one of the newer Semroc multi-sized chutes. You can cut a 12", 18" of 24" chute from the sheet.
The fins are 3/16" thick! To form them you are supplied a cardstock centerline template. More on this later.
I'm not a big fan of the cut launch lugs. The laser cut lugs are always burnt brown and the ends uneven.
But for some reason, conical nose cones always get banged up and dented after a few launches.
Monday, June 3, 2024
Semroc Wac Corporal Build, Part 1, Fin Shape
Here's how Estes shaped the WAC Corporal fins in the 1960s.
The tapered sides are incorrect and the tips of the fins have sharp corners.
I doubt there were many available pictures and scale data available then.
This picture implies the fin taper shown above.
Sunday, June 2, 2024
Semroc Wac Corporal Build, Background
The WAC Corporal was the first sounding rocket developed in the United States and the first vehicle to achieve hypersonic speeds. These were the first missiles launched at White Sands.
For more information: CLICK HERE
I don't remember buying this kit!
This was one of Semroc's "Deci-Scale" models, 1/10th the size of the original rocket.
This is advertised as a semi scale model.
The real Wac Corporal was 12" in diameter. The kit body tube is a Centuri Series 11 at 1.17" diameter.
The kit has a cardstock boat tail.
12" parachute recovery.
If you were flying rockets in the 1960's you probably had an Estes Wac Corporal. It seems this was the first "scale" model produced by Estes.
The Estes version was built around a BT-20 and was only 11.8" tall.
A long launch lug was hidden under some balsa strips making the tunnel.
This smaller model didn't include a boat tail. Two lead disks were screw eyed into the nose cone for 1/4 oz. of nose weight.
To see the original ESTES instructions: CLICK HERE
Subscribe to:
Posts (Atom)


