Showing posts with label Quest. Show all posts

Sunday, May 25, 2025

Quest Intruder Kit Bash, Part 16, Comparisons


The original Estes Interceptor -
Lots O' Decals! 
I kept track. It took four hours to apply all of them.


The Quest Interceptor - 
Notice the same fins shapes but no plastic details on the fin outside edges.
Check out that canopy decal swoosh.


My kit-bash, 
The INTERTRUDER!

Saturday, May 24, 2025

Quest Intruder Kit Bash, Part 15, Finished Masks & Decals


While I liked the design of the Quest Intruder, it didn't have the flash of the overly decaled Estes Interceptor.
Bigger graphics work and can help a plain design.


The underside, 
I know, I stole the wing and rudder decals from the Estes Interceptor. The original Quest kit stickers were ruined and I didn't want this kit to sit in the bag. A kit bash would make a more interesting build.


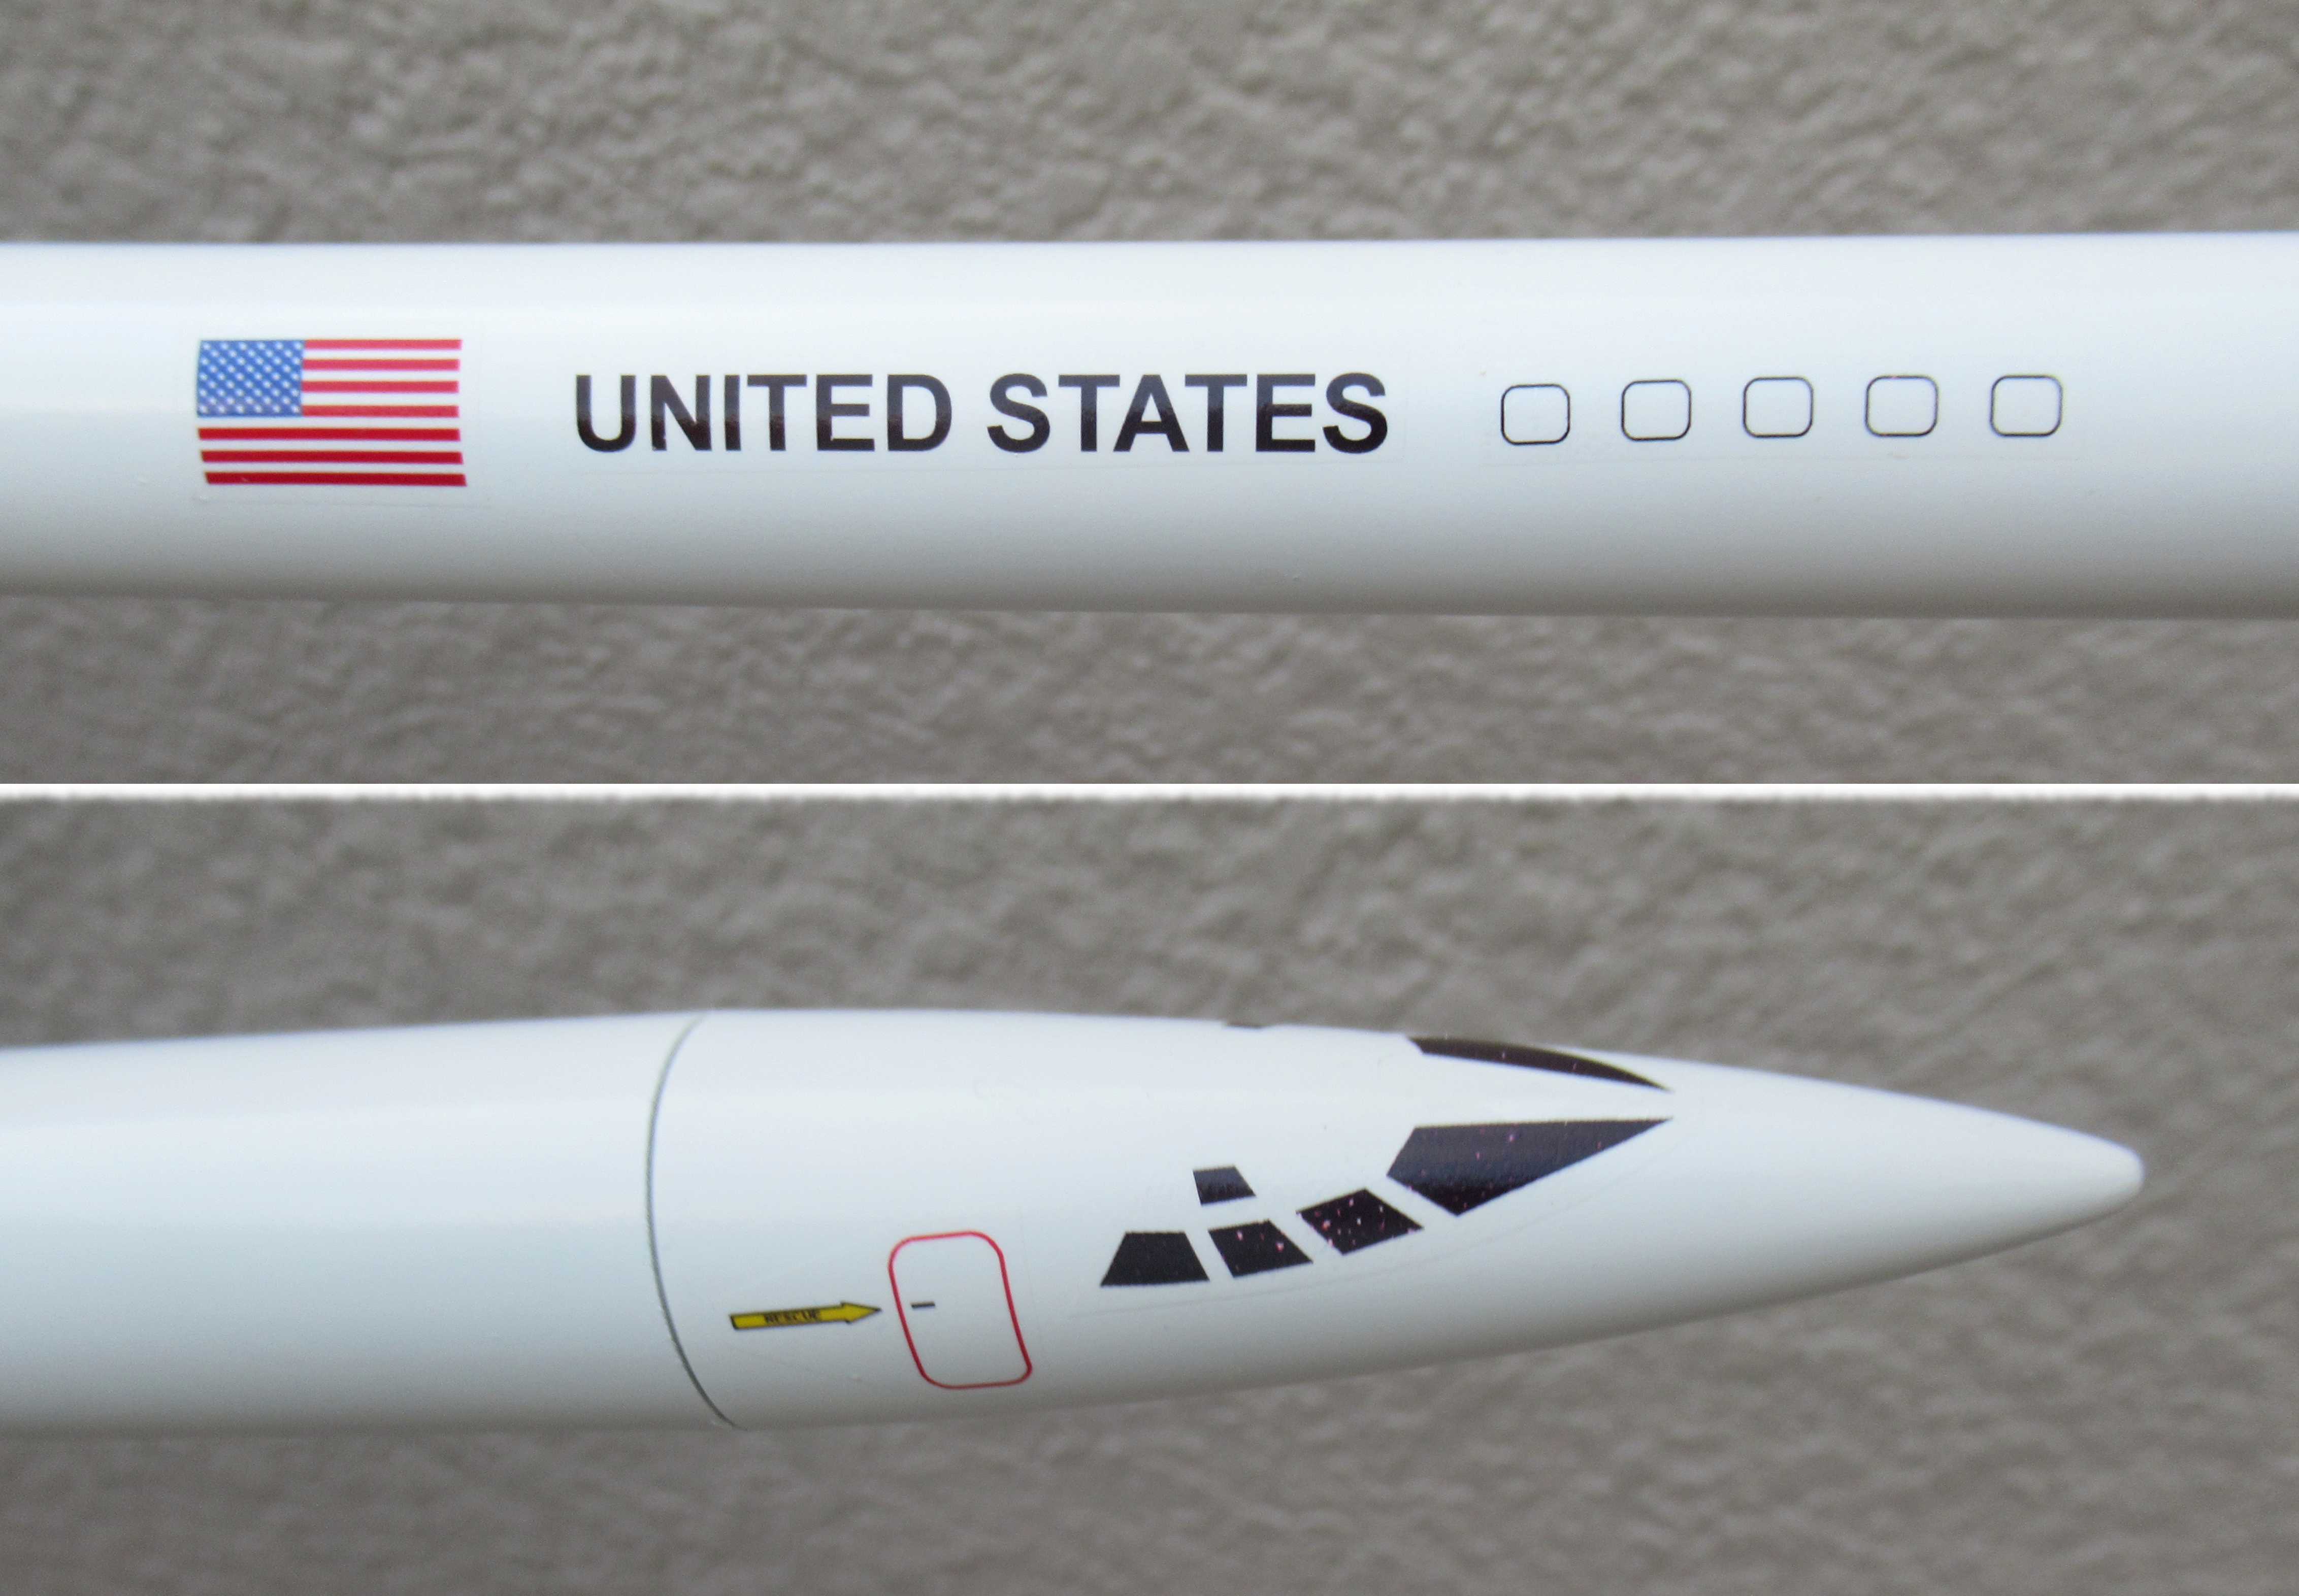
The rounded, square windows.


My favorite decal, the Orbital Transport style canopy windows. I didn't like the Nike "swoosh" canopy in the Quest kit.

Friday, May 23, 2025

Quest Intruder Kit Bash, Part 14, Finished Masks & Decals


Here's the back end mask. The white paper covers allowed me to mask the red engines while the black toothpick spikes were sprayed.

After the black spikes dried, two more paper covers went over the black spikes and the red motors were sprayed. 


After the masks were removed -

The red mask turned out great, nice and sharp.
The black mask needed some touch up with a brush. The glue fillet was smooth but recessed not allowing a good seal.


Look close. you might see some pencil lines on the trailing lines of the wind flaps.
These were drawn purposely long and were to be trimmed to size.


Canopy decals are usually fitted over curved nose cones.
Experience has taught me to cut them as shown in the picture, This allows the decal to flex.

Note there aren't any sharp cuts on the inside arc. Don't give your decals a chance to tear.

Thursday, May 22, 2025

Quest Intruder Kit Bash, Part 13, Masking The Spikes

I don't mask like others.
I learned about Scotch tape masks from an Apogee Peak Of Flight Newsletter.

For years I masked using brown paper tape and even the more expensive Tamiya tape. Results were iffy at best.
In time I got better at smooth fillets giving cleaner masks.

After the first white undercoats look close at your fillets. Uneven fillets can be sanded using very fine 400 grit sandpaper. Masks come out clean and sharp when the glue fillets are smooth.

Most 3 fin, nose cone masks have a different, second color fin.

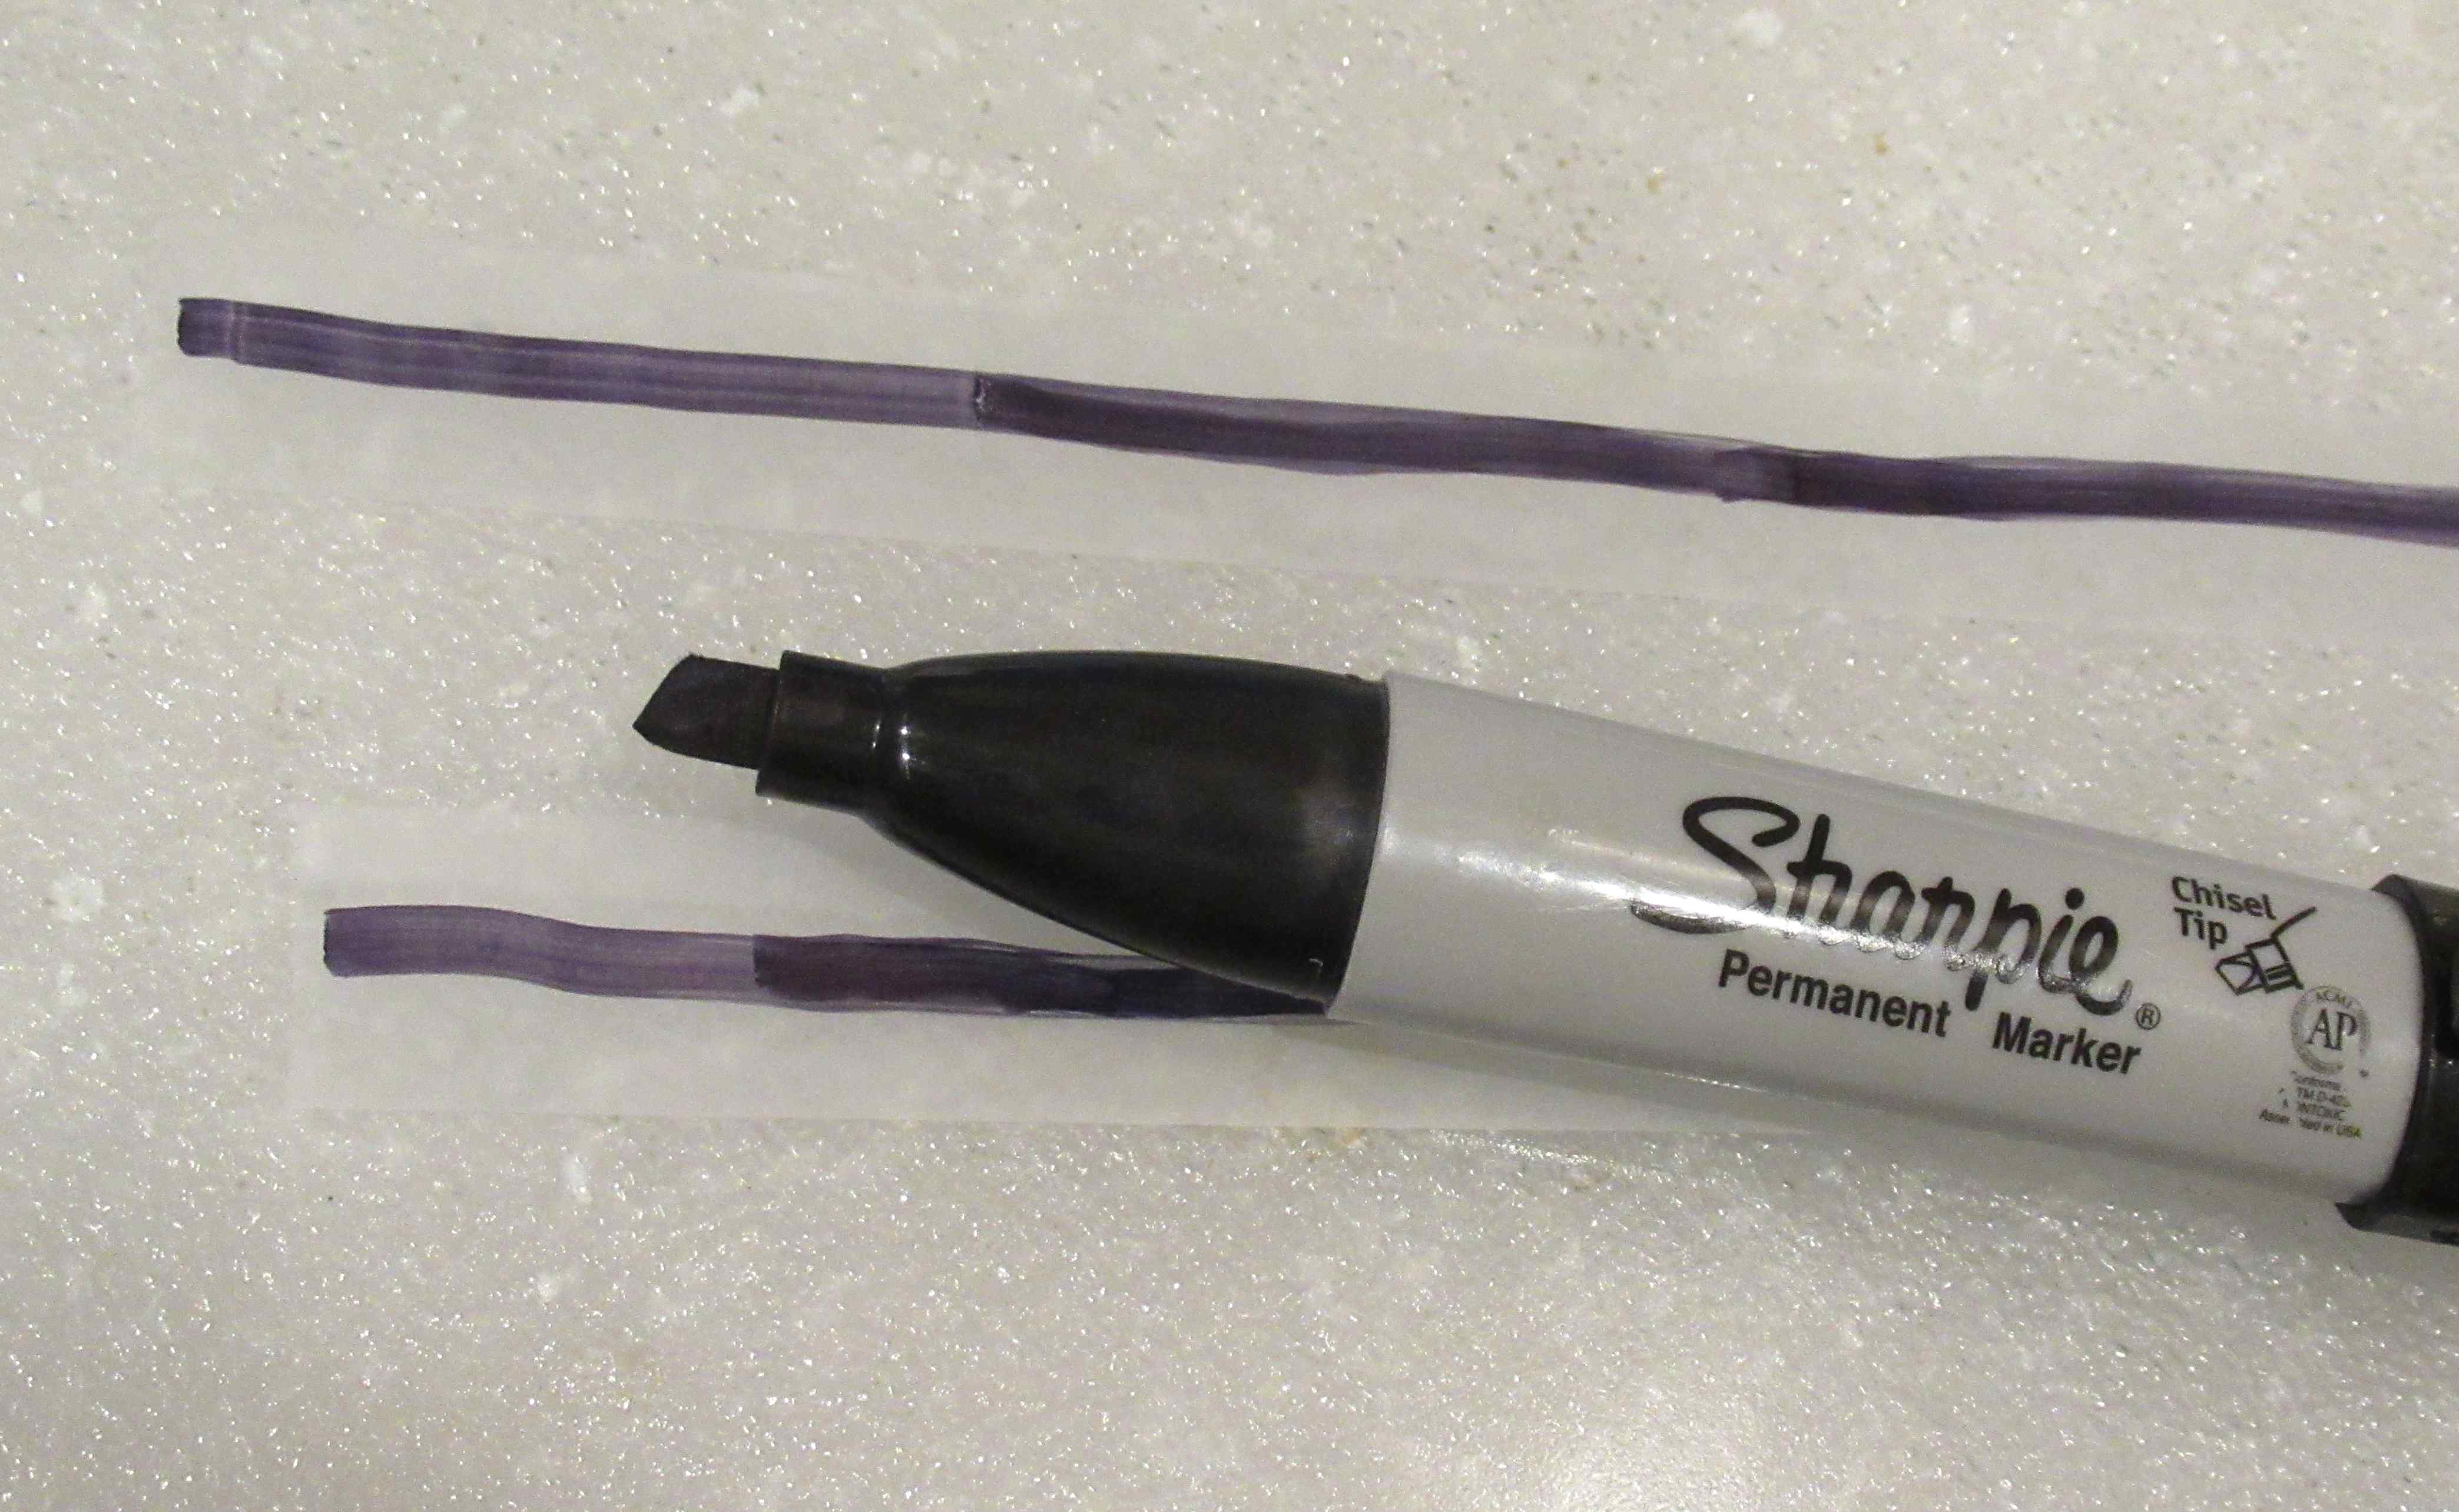
I lay clear Scotch tape on a plexiglass cutting board.
Down the center of the tape strip I mark a straight line. Wipe a paper towel down the line removing any excess ink.

This is cut through the ink line using a knife and straightedge. 
This gives you two half strips. The black ink lets you see the edge of the tape down the mask line. 


Here's the back side of the engine mask. The ends roll over and set down the side at an angle.


Here's another view with a mask on both sides.


The rest of the rocket body is covered with a thin plastic grocery bag.
A hole was cut in the bag and the fin tip slid through.
The bag was slid down far enough for brown masking tape to join the bag and Scotch tape. The brown masking tape covers the gap.

Wednesday, May 21, 2025

Quest Intruder Kit Bash, Part 12, Decal Print Fit Test

TIP: Before committing yourself and wasting a sheet of water slide decal paper - 
Do a print on plain white copy paper.

I can bet you'll want to make some size and line width adjustments before printing on decal paper.
Cut the paper prints to size and check them on the fins and body.

The model hasn't been shot with a final gloss white yet.


The Interceptor style wing decals (shown above) fit well, but the rudder fin decals were a little tall.

The tops and bottoms will be trimmed back in Corel Draw. 
I've still got to add the white stars to the blue box.


The canopy decal looks good, but is a little large for the nose cone - a simple reduction fix.

Tuesday, May 20, 2025

Quest Intruder Kit Bash, Part 11, Drawing Up New Decals

Here's a shot of the Quest kit decals.
These were peel and stick.

The red and dark blue triangles had to be pieced together with American flags between them.

I didn't like the nozzle or canopy stickers. The canopy is black, looks like a flipped over "U".
The nozzle wrap is all the triangles side by side.
The round windows need some tweaking.


And, the Estes Interceptor decals.

There are a LOT of them! I remember taking four hours to apply them all.

The decals I drew up would be a combination of the two. There will be fewer decals than the Interceptor has.


Here's what I drew up for home print water slides. I hate the looks of thick, shiny stickers.

I've always liked the bold wing decals from the Estes Interceptor.
The nozzle wrap has been redone.
The canopy windows take cues from the Orbital Transport.
The round passenger windows are now rounded rectangles.
I set two sizes of INTRUDER name decals. I may use them depending on the remaining space on the sides.

The stars in the blue blocks still need to be added.

Sunday, May 18, 2025

Quest Intruder Kit Bash, Part 10, Details

The jet pods and guns are missing on this Interceptor look-alike. I wanted to add these details, but not an exact copy.

I started with some shaped dowels on the wing tips.
I was happy with the angled back end of the dowels, but the simple rounded front didn't look good.


I went through my spare parts and found two BT-5 nose cones. Cutting off the tips could make some ramjets, but set on the rounded dowel ends it didn't look right.

More on this (and a solution) in an upcoming post.
In kit-bashing there is usually some trial and error.


I noticed some rough plastic on the nose cone shoulder. This is where the nose cone was broken off the molding "trees".

I applied a drop of medium CA glue for a raised fill.


After drying hard, 
this was sanded to surface filling the rough recess.

Saturday, May 17, 2025

Quest Intruder Kit Bash, Part 9, Joining Two Rounded Leading Edges


Joining two rounded leading edges can be tough.
How do you sand a rounded edge in a tight corner?

Round the smaller (forward) fairing piece leading edge first. Leave the leading edge of the wing fin square for now.
Then glue is to the (still square) larger wing fin.


My sanding block is at a 45 degree angle.

Round the wing leading edge while feathering the inside corner.
Don't sand hard into the corner.


Here's the finished round leading edge with (hopefully) a smooth transition between the two pieces.

Friday, May 16, 2025

Quest Intruder Kit Bash, Part 8, Balsa Fin Prep


Here's the parts off the die-cut sheet.

There were doubles of everything except for the lower, small fin! 


I had to cut out another piece. There was enough "free" balsa on the sheet.
Trace, cut out, stack and gang sand.


I checked the fit of the two piece wing and upper tail fin pieces. Shown in the left picture, there was a gap.

Some fine sanding with a block gave a better fit.

Thursday, May 15, 2025

Quest Intruder Kit Bash, Part 7, Die-Cut Balsa


The hold down tics on the die cut balsa sheet were pretty wide. You'll definitely need a sharp knife to separate the pieces off the sheet.


Here's the back of the sheet. You can't see the die cuts meaning the blades didn't go all the way through the sheet. It took a lot of work to cut and free the fin pieces.


With old-school die cuts, there will be some variance between the pieces.

You'll have to stack and gang sand them using a sanding block with 220 grit.


After sanding, the forward fin fairing tips ended up uneven.

Line up the backs and trim the front tips even.

Wednesday, May 14, 2025

Quest Intruder Kit Bash, Part 6, Shock Cord & Engine Mount Gluing


Here's the finished engine mount with the Kevlar line rolled up inside.

The Kevlar line is pulled out and tied to the elastic shock cord with a simple overhand knot.

Roll up the elastic and Kevlar and push into the motor mount tube before gluing the mount into the main airframe tube.


I used and old dowel to apply the glue into the main airframe tube before sliding the engine mount in.

Set the dowel beside the engine mount just below the upper centering ring. 
Mark the dowel at the end of the engine tube.

Apply a ring of glue around the top of the dowel. 
Insert the glued tipped dowel into the tube up to the pencil mark on the dowel. Roll the glue around the inside of the tube.


Quickly slide in the mount into the main airframe tube.

You can use the flat face of a sanding block to help press the mount tube ends even.

Tuesday, May 13, 2025

Quest Intruder Kit Bash, Part 5, Engine Mount & Kevlar


The Quest instructions use the engine block height to mark the slit cut line. 

Pencil mark and cut the 1/8" wide slot for the engine hook.

The instruction say to glue the two rings 1/2" from the top and bottom of the engine tube.

I don't think that offers enough flex of the engine hook when sliding in an engine.
I set the low centering ring 7/8" from the bottom.


Instead of 1/2" from the top of the tube - 
The upper ring was set over the upper bend of the engine hook, approximately 1/4 from the top of the tube.

I've pencil marked the ring to show how the ring is centered over the hook.
This strengthens the mount. 

The instructions have you tie a double overhand knot to secure the Kevlar under the upper ring. That thick knot might bulge the outer tube - not much room between the 20/50 rings and 1" diameter tube.

I rolled the Kevlar around the tube with the overhang tail twisted under the start of the line. The twisted Kevlar end is pushed into the glue fillet.

Monday, May 12, 2025

Quest Intruder Kit Bash, Part 4, Parts Prep & Centering Rings


The shoulder base was glued into the nose cone using Fabri-Tac glue.

This glue works great on simple plastic to plastic and plastic to body tube joints.
It is not recommended for delicate assemblies like a Mercury Redstone tower.


The Quest instructions offer a great TIP:.
For a better fit over the engine mount tube: Use the tapered nose cone to compress down the burrs and slightly widen the diameter of the centering rings

I'm replacing the thin yellow engine mount tube with an Odd'l Rockets heavy wall BT-20H. This will require a some  peeling of the inside layers of the centering rings to fit the  slightly wider diameter tube. 
It doesn't take much of a peel for a good sliding fit.
Odd'l Rockets BT-20H heavy wall tubes are only available through jonrocket.com. 


TIP:
In the left pic: To prevent peeling, don't cut an engine hook recess slot on the diagonal inside seams. 
Right side pic: Start your notch on the other smooth side.
On the left: The engine hook notch is cut. I marked it with pencil to show up better in the picture.

On the opposite side of the engine hook notch, the upper ring gets a Kevlar notch made with a diamond file.

Sunday, May 11, 2025

Quest Intruder Kit Bash, Part 3, Parts Prep


I always check the tube end cuts with the flat face of a sanding block.

The cut was off and took some square sanding with 220 grit on the sanding block.


The tube had a slight dent that would show up with paint applied.
I filled it with some thinned CWF and followed with 400 grit sanding.


There was some molding flash on the nose cone end plug.

This was trimmed and sanded off. 


The nose cone tip had some mold lines at the rounded tip.

On the left is the before - 

On the right is after sanding with 400 grit.