Showing posts with label Q Raptor. Show all posts

Sunday, July 14, 2013

The Big Fix - Quest Raptor Decal Replacement

Here's how the Raptor looked right after the build and before the "no ejection" flight. I had to replace 4" of crunched body tube and the name decal.

I checked some free font websites but couldn't find anything close.
The red scratches to the left of the "R" were easy to draw up.
The font I picked out was close and still had the same visual weight.
I set the name a bit smaller, I had thought the original Raptor name was pretty large.
The decal will be sliced where the two tubes butt together.
I forgot to draw up the band of bolts near the nose cone joint - next time!

Friday, June 28, 2013

The Big Fix - Raptor Nose Cone Touchup

On the nose cone end the paint was gone and the exposed plastic was rough.
The edge was sanded smooth with 400 grit.

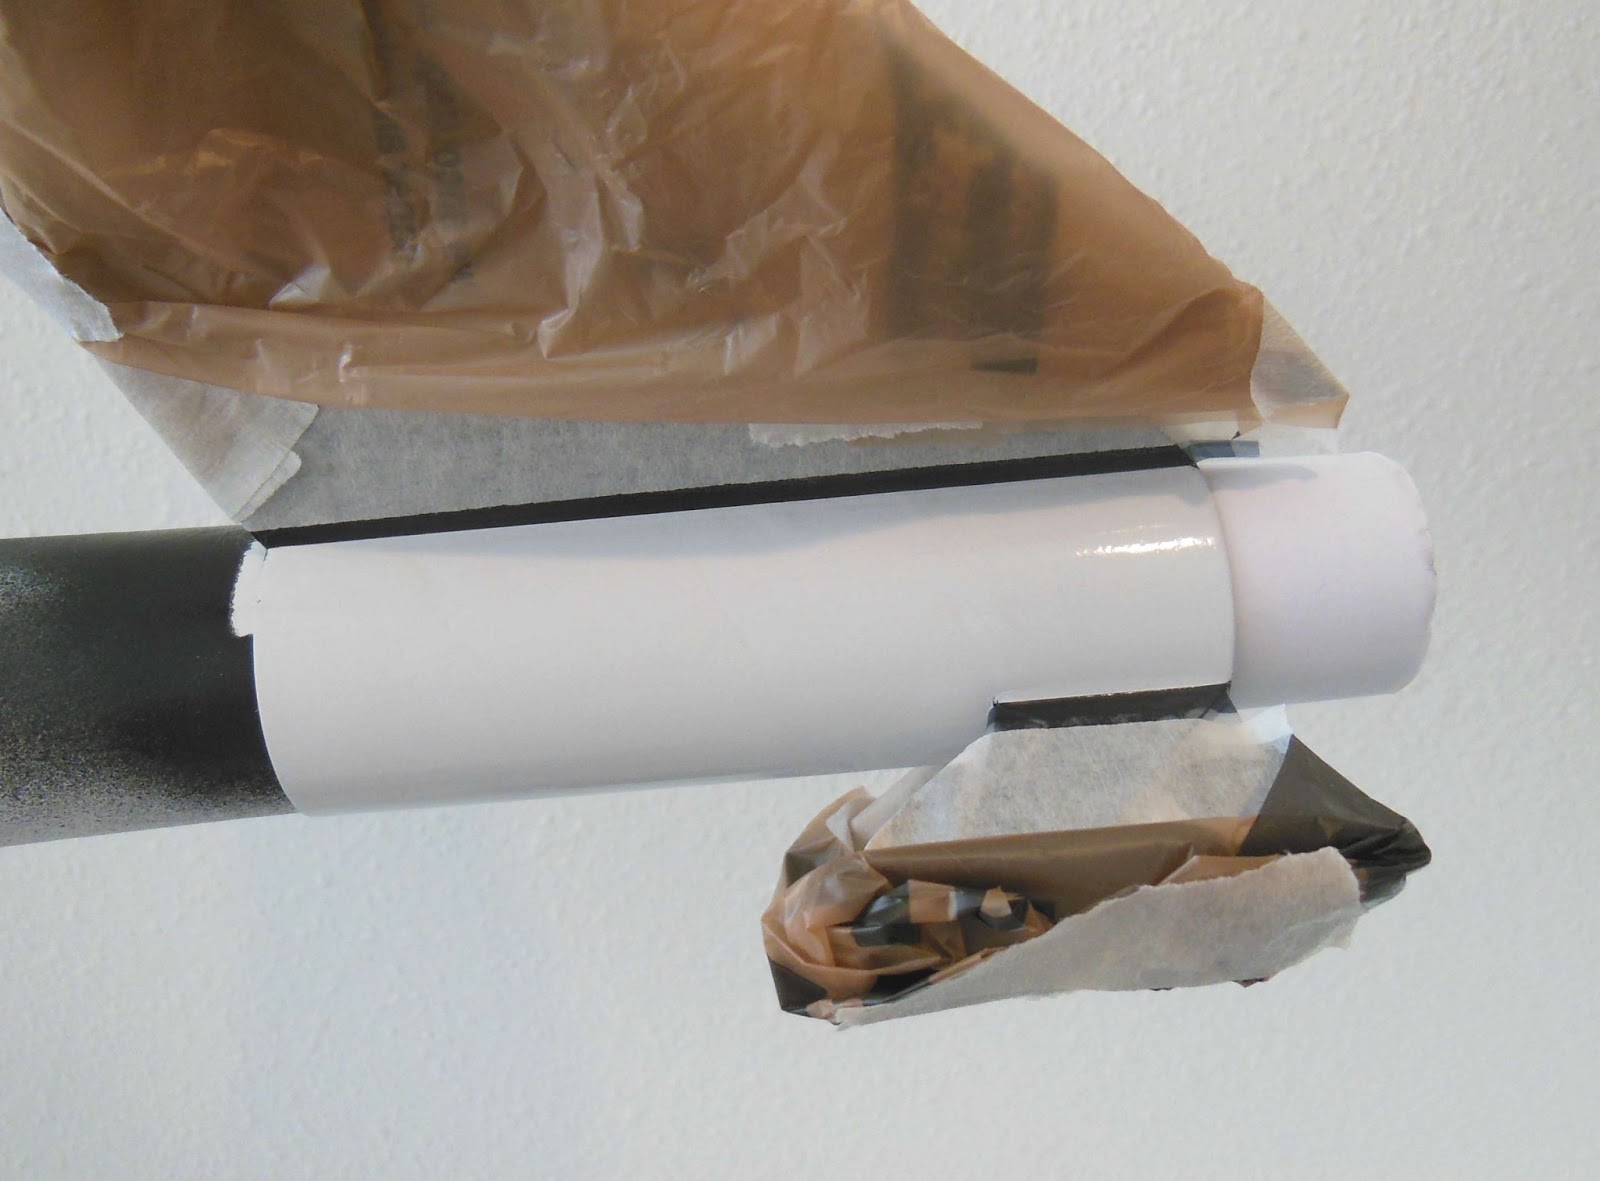
The picture shows how the nose cone was held for primer spraying.
The hand grip looks strange but I was trying to cover up the black tape canopy. I didn't want to cut out another canopy.
Held this way the paint will (hopefully) blend in with the existing paint.


First a coat of primer filler and light sanding.

After that the nose cone was held again like in the first picture.

Aluminum paint was sprayed over just the tip.
Here's the blend without any sanding or polishing.
It's not perfect but certainly re-flyable.

Tuesday, June 25, 2013

The Big Fix - Raptor Body Tube Replacement

I have three models due for a big fix.
The Quest Raptor was launched on June 1, 2013 with an Estes B6-4. Boost was great but there was no ejection charge.
The model nosed in and landed on the gravel road.
The plastic nose cone tip was dinged, no cracks. The body tube was split and crumpled 3 1/2" down from the top. The big fin unit broke off clean, right down the glue line.

Here's how the model looked after picking up the pieces.
You can see where the nose cone split the body tube, it was shoved in about 1 1/2".
The fin unit popped right off, re-gluing will hide any rough edges.
The engine mount broke free and slid forward until the nozzle was 1/2" inside the body tube.
First things first:
The crumpled body tube will have to be cut off.

For a knife guide a double wrap of 110 lb. card stock was rolled and taped around the tube. The knife edge will easily follow along the wrapped card stock edge.
On the lower left you can see the card stock wrap is taped to the tube so if won't slip when cutting.


I used a piece of the crumpled scrap tube to make a coupler.
A new piece of Quest 35mm tubing was cut to replace the old tube.


The decal will have to be removed.
TIP: If the paint is really dry, you can take off the decal using Scotch tape.

Press the tape down and lift. Some pieces of the decal should come up.
It could take a minutes and a few pieces of tape but eventually you'll remove the decal.

I didn't scan these decals, I should have!
A new name decal will have to wait until I need decals for another model. I won't print up a decal sheet unless the sheet is full.

Tuesday, May 21, 2013

Quest Raptor Build Finished


What a sharp design! It's a bigger than you might think, almost as big as the Quest Aerospace One.
Thanks to Scott (Rokitflite on YORF) for the great design.
I agree with JeffyJeep on TRF, you are better off painting this one beforehand in sub-assemblies then glue it all together. It would be a tough mask otherwise.


Be careful when gluing on the fin unit. You'll be tempted to glue the fins on backward.
The outside edges and red pads face forward!
Use the double glue technique on both the fin unit and underside tank.

I was a little disappointed with the decals. The eight piece canopy would be too hard to place and space evenly. Other decals had print transferred from the instruction sheet on them.

The kit face card says it could be flown with an A6-4 engine, but I wouldn't chance it!
I'll fly it first with a B6-4, but this is really a C6-5 bird.

Monday, May 20, 2013

Quest Raptor Build Part 21 Loose Ends

The shock cord was tied to the nose cone shoulder lug with a Duncan Loop knot. See the knot instructions HERE
This is my favorite knot for tying a shock cord to a screw eye or lug.
Both of the line ends face down making less chance for the end to get caught between the shoulder and body tube.

The supplied shock cord was only about 18" long so I'll add more length to it.
The parachute will be clipped on to a loop in the shock cord about 1/3 the way down from the nose cone.


I forgot about the launch lug!
The lug will be sprayed aluminum. It's sitting on three toothpicks for a small spraying handle.
I'll have to sand off the lug paint and scrape the body tube where it will be glued.

Quest Raptor Build Part 20 Nose Cone Canopy Decal


All the decals had a clear overcoat except for the canopy decal. When put in the water, this decal would separate into eight separate pieces!

I thought the decal was too large anyway so I cut out a new one from my roll of Contact Paper Blackboard material.
My canopy was a little smaller with simpler cuts.

To be sure it was centered when sticking down the eight pieces a strip was stuck down the center from the nose cone tip to the shoulder.

All the pieces were set down on either side.


Here's the finished canopy.
This is easier to do than you might think.
I was happy with the results.

Sunday, May 19, 2013

Quest Raptor Build Part 19 Decals

Be very careful when cutting out the decals! There is some white type that is almost invisible against the white backing paper. Maybe that's why some kit decals are printed on a blue backing sheet.

Most decals went on easily, there were a few I didn't know where to place.
Unless I'm building a model for a manufacturer, I rarely put on company name decals like "Quest" or "Estes".
The TM letters were cut off the BIG Raptor name decal.
The word "Starcruiser" was cut off the big "QMR7" wing decal. I felt it was crowding the long rear wing elevon/No Step decal.
I left off a few others, this model is decal intensive. The design stands on it's own without that many BIG decals.

The decals were packed next to the instructions with no backing sheet.
Some of the ink from the instruction sheet had transferred onto the decals.

I was hoping the ink would come off when the decals were soaking but it didn't.
I ended up laying down the decals and lightly scraping off the transferred ink. It's not perfect but better than it would be if I left it as is.


There was one small "DO NOT TOUCH" decal. I checked the copy with a magnifying glass.
Here's what the small type said:

DO NOT TOUCH
Quest Starcruiser
Do not touch this rocket. 
This includes any sales people any kind. 
Only specific authorized personnel 
including Bill Stine and friends

Saturday, May 18, 2013

Quest Raptor Build Part 18, Assembly

This shows the tube masks used for a better glue bond.

The tape strips are used for alignment, an extension outside of the tube masks. Keep the masking alignment strips towards the outside and away from the gluing area.
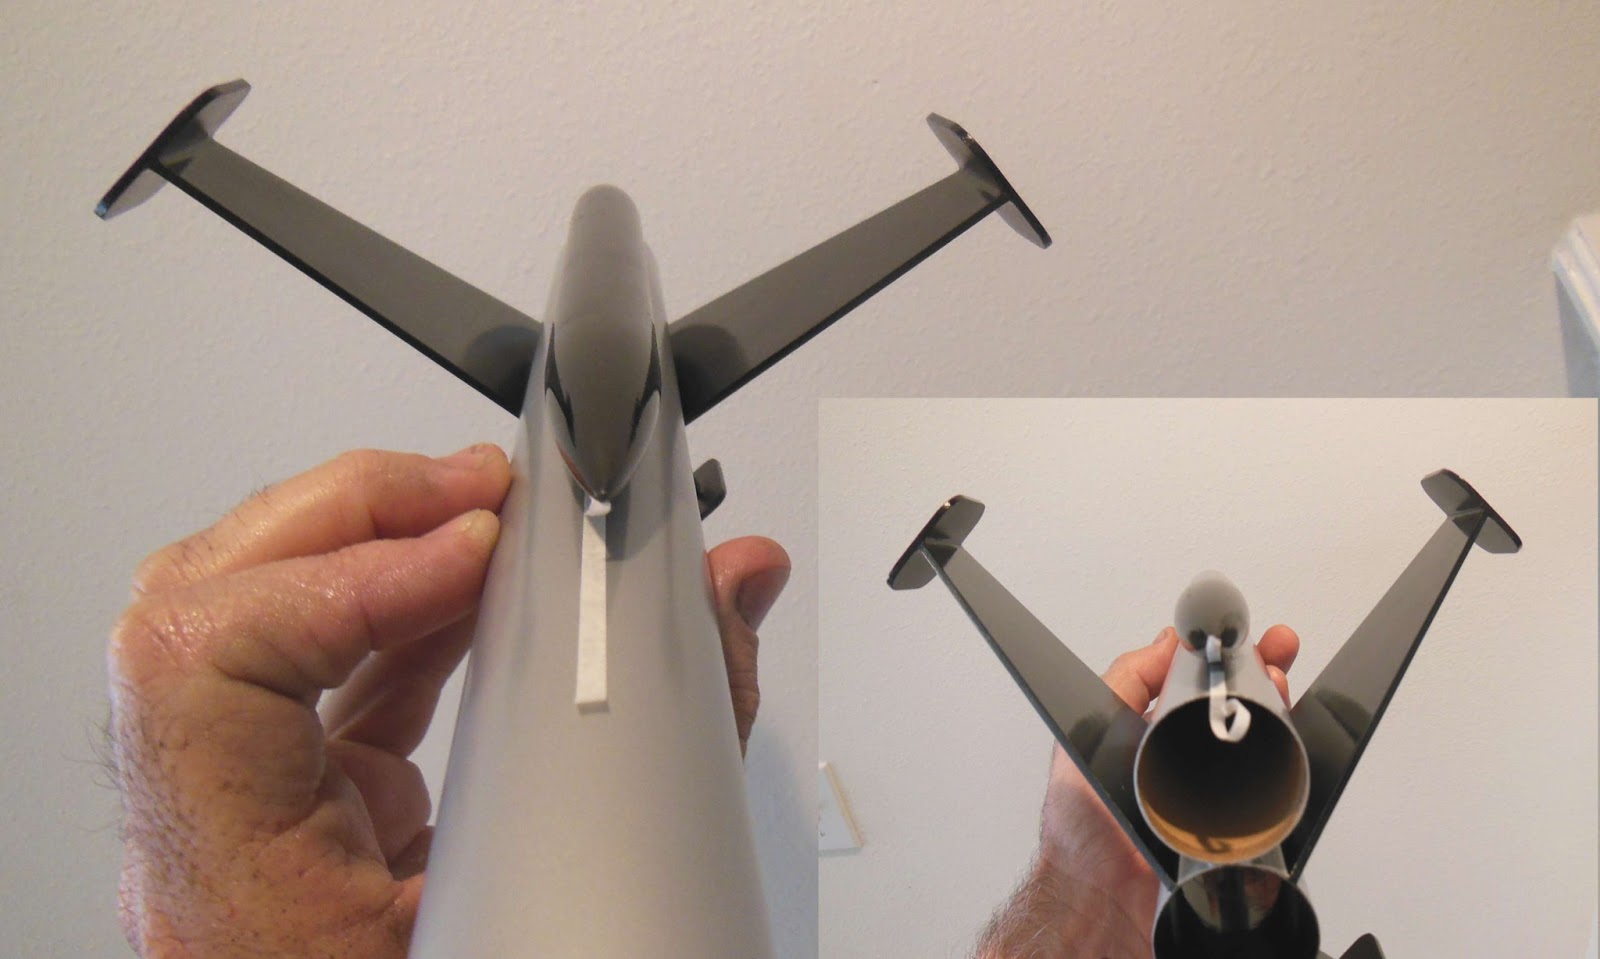
Here's how the underside tank was glued and aligned.
Main picture is the front, the inset is from the back.

Simply line up the two strips of tape and the tank should be directly over the glue line. Still, sight from the front and back to double check straightness.


Even without decals, this is a great design. It should turn heads at a club launch.

The fins are large but being swept forward they should recover without damage.

Quest Raptor Build Part 17, Assembly

This model was painted before gluing on the fin unit and tank assemblies.
You don't have a pencil line to glue onto and it's hard to see the masked glue area of exposed tubing.

Strips of masking tape were cut and laid down outside of the "naked" tube lines. More strips were set inside the intake tube. All I have to do now is apply glue and line up the tape strips.

The fin and tank assemblies were set in place using the "double glue" method. You'll want these two assemblies to grab but still be able to adjust them.

After the glue dried a drop of thin CA glue was allowed to run down the joint.

I also added an end fillet of white glue.
This was smoothed out with a Q-Tip swab. You'd never get a fingertip in there to smooth out the glue.

I'm a little surprised how many of these cotton swabs I use now.
They are very handy for removing excess glue. I also used them to press down the edges of the tape masks. There is no chance of scarring balsa with the soft end swabs.

Wednesday, May 15, 2013

Quest Raptor Build Part 16, Red Trim


You could mask again and paint the red pads. But to be honest, I've done enough masking on this one!
I'll use Monokote trim to cover the pads.

As long as the surface is smooth the Monokote will be fine.
It's very opaque and covered the black paint well.


A red square was set on the outside pad face and trimmed.

The rounded edges were trimmed with the pad set down on cardboard.
Trim carefully, you don;t want to cut into the balsa pad.


After trimming, the tail section is almost complete.


Another final red trim strip about 3/16" wide was set on the forward end of the intake tube.
Simply press into the fillet area and trim square with a razor blade.

Quest Raptor Build Part 15, Aluminum Mask


This is the tail section masked and ready for the aluminum paint.

The instructions say to use silver paint. Silver is certainly shinier but quickly shows fingerprints.
The aluminum covers easily and drys fast.


With the tape removed the tail section is ready for the red trim on the outside of the pads.

Tuesday, May 14, 2013

Quest Raptor Build Part 14, Black Mask

Normally you would paint the body the lighter color then mask and follow with the darker second color.
I'll be painting the main body silver, or aluminum which I prefer.
TIP: Laying masking tape over metallic paint is never a sure thing. The masking tape can leave marks on a silver surface.
So this time I'll paint the black first, re-mask and paint the lighter aluminum.


Above left is the first mask for the black.
On the right: Doesn't the masked tail section look like the Mister Mulligan plane? I'm not saying the plane was an influence here. I just thought it was interesting.
The white undercoat is masked off to leave the lighter undercoat for the aluminum to follow.


I used clear Scotch tape for the masks.
I don't use the more expensive specialty masking tapes. If the surface is smooth (in this case, the fillet) you can get a very sharp edge.


Here's the rear section ready for the second mask.
The black fin areas will be covered and the tube areas sprayed aluminum.

Monday, May 13, 2013

Quest Raptor Build Part 13, Fillets and Masking


The fins on this model sweep forward. It's tough to get glue into the leading edge joint on the smaller fins.
I applied a small drop to the stick of a Q-Tip. The drop was set into the joint.


Any excess was smoothed out and picked up with the cotton end of the swab. There is no way you'd get your finger into that small corner to smooth out the fillet.
TIP: The inside of the tube was masked using tape in the tube sticky side out.
This tape was set in half in half out.
A cone of rolled paper was pressed into the tube for a painting handle.
To secure the paper roll, more tape was applied over the tape sticking out of the tube.

Sunday, May 12, 2013

Quest Raptor Build Part 12, Fin Gluing

Here's the position of the tank against the main airframe tube.

The nose cone tip is even with the rear of the body tube.
A pencil line has been drawn. Before spraying tape will be applied where the tank will glue to the body.


The fins have been glued in place.

At the top of the body tube a tape line has been set down where this assembly will be glued to the main airframe.

Saturday, May 11, 2013

Quest Raptor Build Part 11, Fin Gluing

The black under body "tank" was sprayed black. There was no way to hold on to this piece so it was shot the forward half first, the back half held by my left hand.
After that side dried, it was flipped over and the bare side was painted.

At the right edge of the picture you can see the gloss black reflection going to a duller finish. This is where the two separate sprays met.
This was was hit with polishing compound after everything dried.

The inset picture shows the finished nozzle, also painted gloss black. No paint is on the centering ring edges.

TIP: Before gluing on the fins I found a small recessed area on the body tube. I had already drawn the fin lines on the tube. These were erased and one of the new lines placed right over this small dent. Now the dent will be hidden under a fin root edge.

The inset picture shows the body tube sanded to the side off the fin alignment line. These larger fins are big and go to the body tube edges.
Once the fin is set on the pencil line, there is no way to be sure it is perfectly straight. On this model I'll glue the four fins to the left of the line lining up the edge of the fin root next to the pencil line.


You can see the small fin root edge glued next to the pencil line.

Friday, May 10, 2013

Quest Raptor Build Part 10, Black Nozzle Prep

The black parts got primer and were sanded smooth.
You don't really need a white undercoat when the assembly pieces are black. A white undercoat helps brighten any lighter or "transparent" color. With black it doesn't make much difference.

On the left is the black underbelly "tank". Look close and you can see how rough the tube still is after the first black coat. Let it dry and sand a bit with 400 grit. Follow with another coat of black

The rear nozzle is also painted black.

The centering ring edges need to be free of paint to adhere when the mount is finally glued in place.

To mask the forward end of the mount, a ring of tape was set over the edge of the rear ring followed by some paper taped on over that first ring of tape.
An used engine casing was slid into the mount to keep the black spray paint out of the mount tube.

Quest Raptor Build Part 9, Black Parts Prep

Here's the under belly "tank" after the seam was filled and the primer sanded.
I've taped off a gluing strip down the length of the tube.

This tank will be sprayed black before gluing onto the body.
Any Raptor build review recommends building and painting in sub-assemblies.


The marking guide cut from the instruction sheet wasn't as accurate as I would have liked. I made my own out of a strip of copy paper.


The interior of the short 4" long intake tube is black.

Paper was wrapped around the outside to mask the outside and the interior was sprayed black.

Thursday, May 9, 2013

Quest Raptor Build Part 8, Pad Tab Filling


Check to be sure the pads are square as the glue is drying.


The pad joints were filled with thinned CWF.

I used a razor blade to "glide" the excess CWF off the pad.
Don't press the blade down hard, leave a thin coat above the pad face.

Sand off the excess with 400 grit on a block.

Wednesday, May 8, 2013

Quest Raptor Build Part 7, Fin Primer and Gluing


The fin pieces will get a primer coat off the model.

The gluing edges were taped off to leave naked balsa for a better gluing area.

Here's how the pieces were taped flat for grey primer spraying.

All the balsa pieces were lightly stuck down on some masking tape, sticky side up.

The primer was shot and all pieces sanded with 400 grit.
I screwed up here!
The larger wing "pads" are glued from one side to the other. The mask strip is long.
The smaller fins are only glued on the center area of the pads.
I masked the small fins like the larger fins.

I ended up flipping the mask line side to the outside figuring this masked strip would be better filled after gluing the pad in place.

On the wings, the interlocking tab was a little taller than the thickness of the pad piece.
I removed the pad, and sanded down the wing tab slightly.
The inset picture shows the tab even with the pad surface.