Showing posts with label Decals. Show all posts

Saturday, August 30, 2025

Centuri Skylab Build, #KB-4, Part 24, Decals!


I drew up the decals from the scans at Jim Zs. These were sized for the slightly larger diameter Centuri ST-7 tubes.

Shown on the left - 
The second lined wrap decal was cut a bit shorter to fit the BT-20 tube.


When cutting a decal like this,
Round out the clear areas instead of cutting into the corners.

A sharp inside corner could end up tearing.


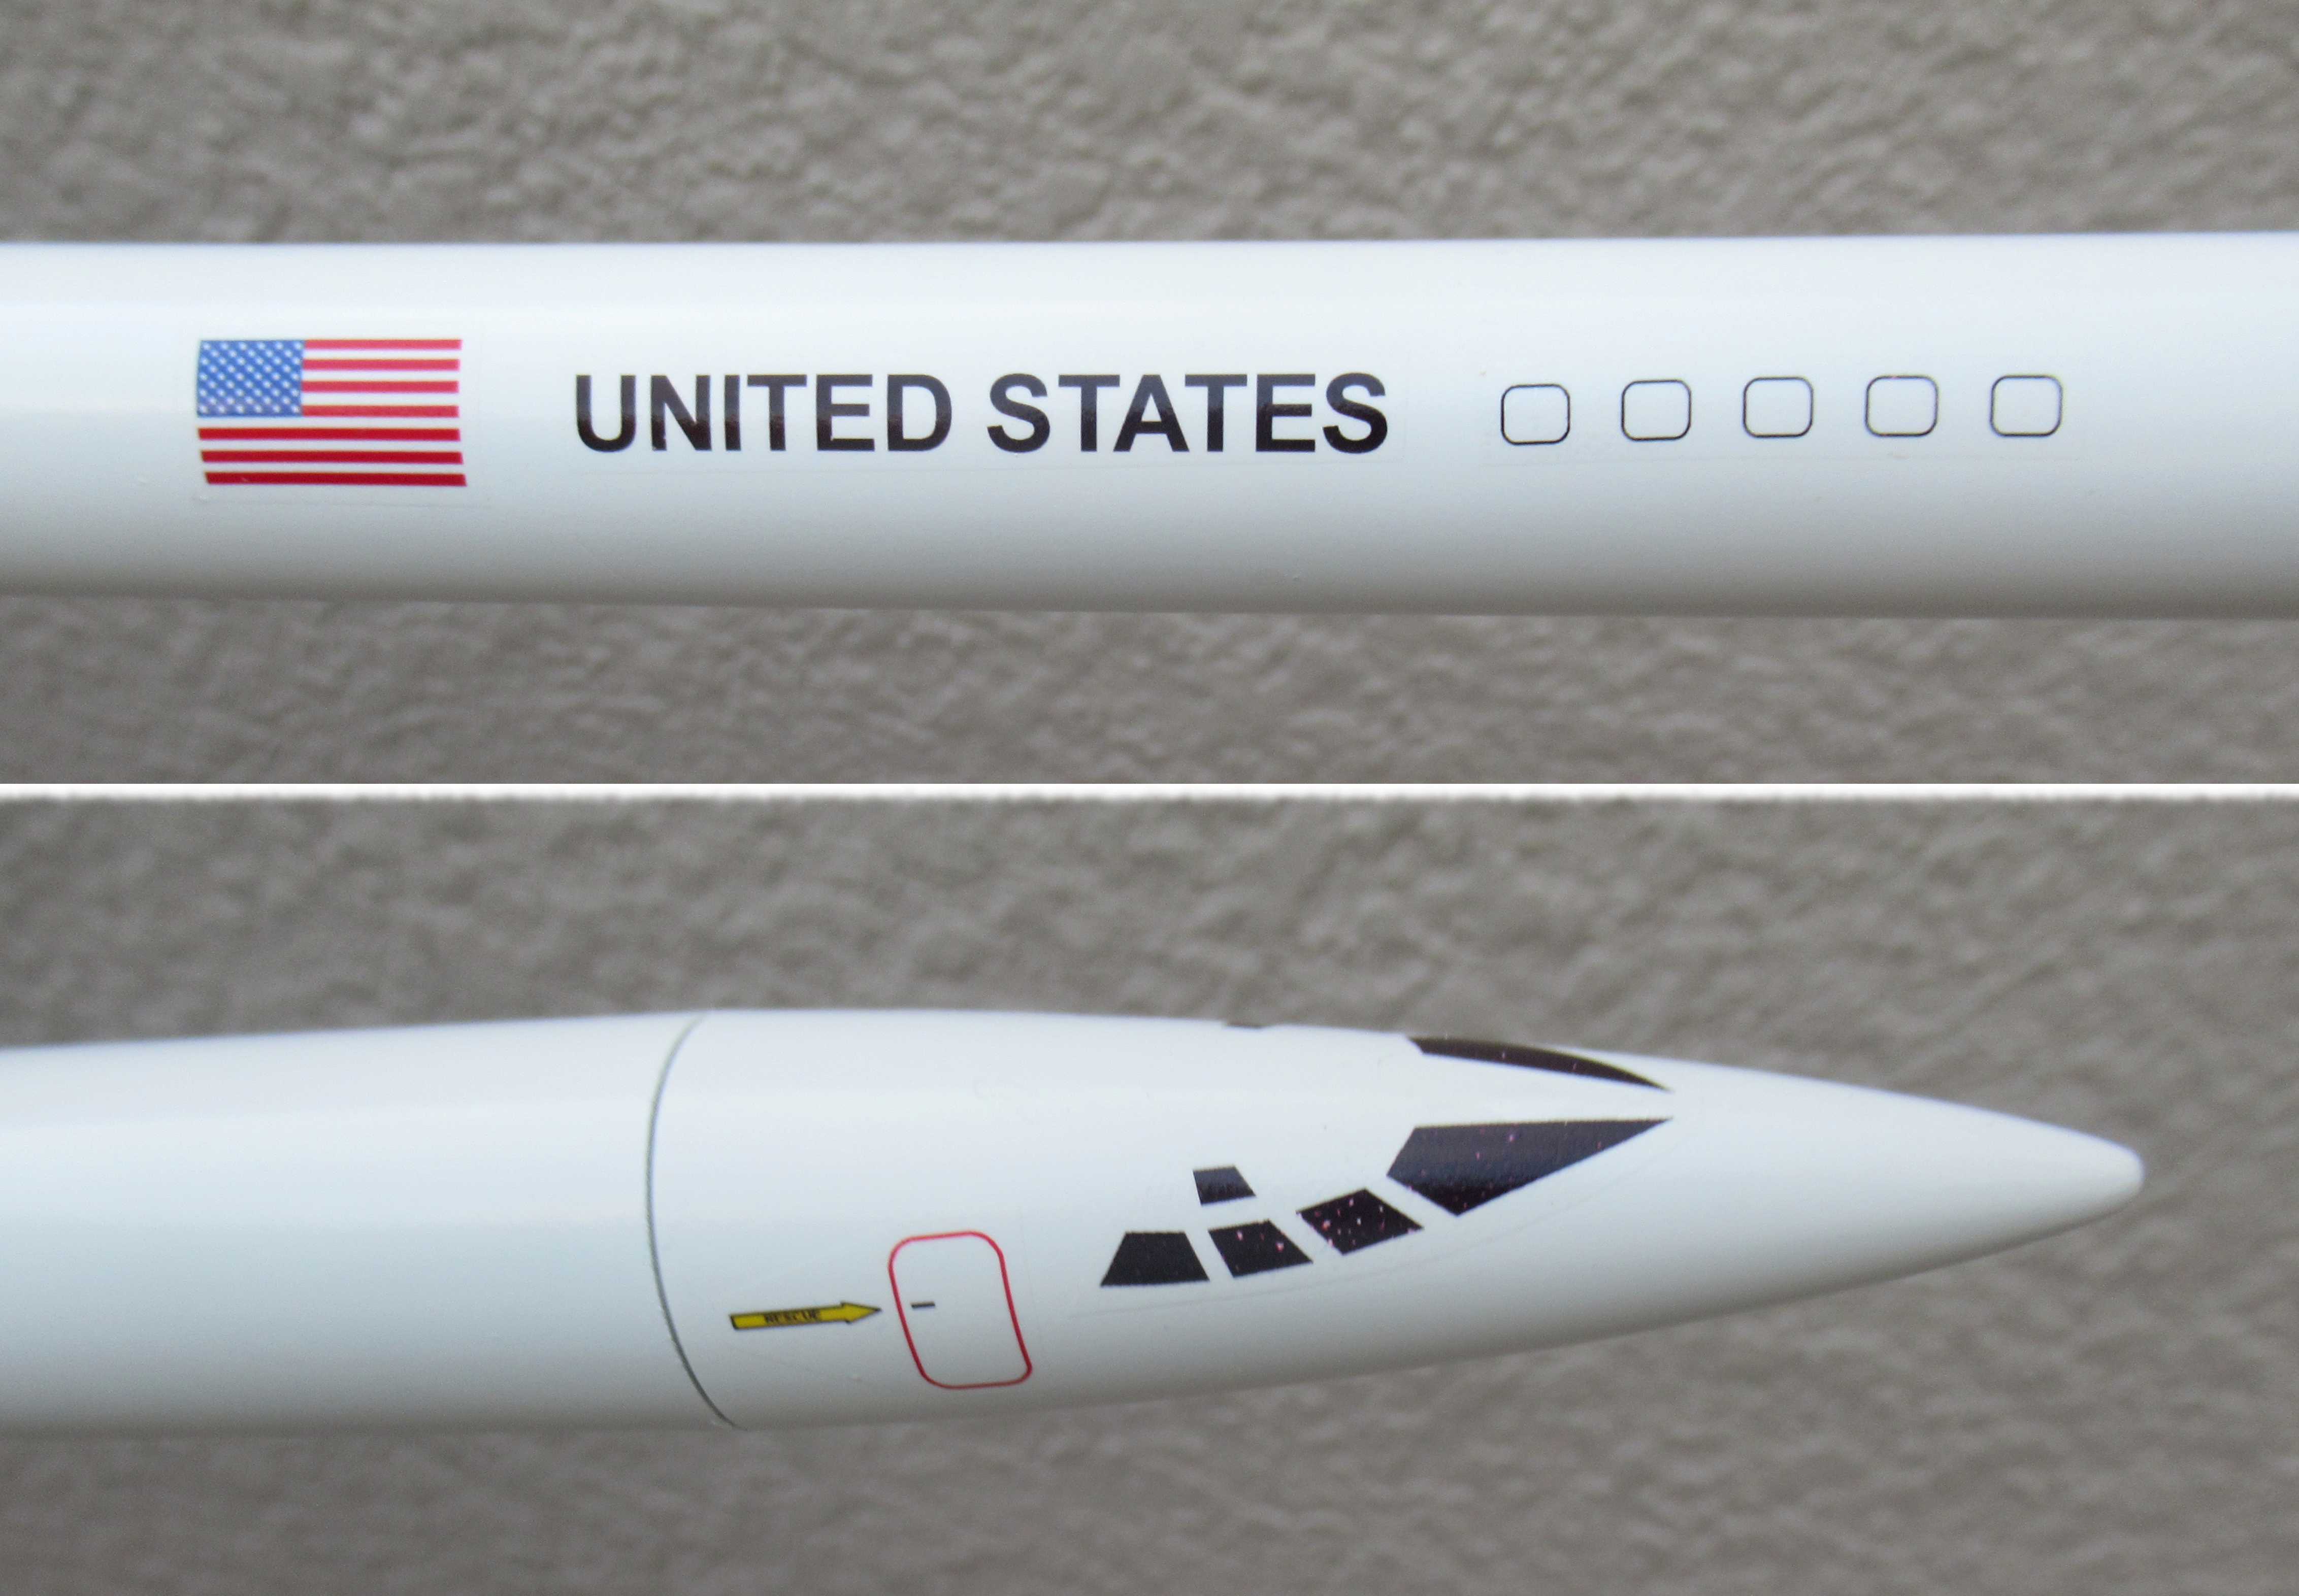
This louvered hatch decal goes over the nose cone.
The 3D print has a raised line.
Smooth and work the decal into the ridge with a wet Q-tip.


Here's the finished nose cone.

Those small camera focus targets are always difficult to set on straight.


Friday, August 29, 2025

Centuri Skylab Build, #KB-4, Part 23, Fin Face Decals


I had to trim the solar panel decals after trying a dry fit on the square fins.

Cuts were made on all four sides almost to the vertical and horizontal lines.


These transferred easily. Wet the entire flat surface before applying the large decal. Centering took a moment or two.

The final look was better than I hoped.
While this doesn't have the raised texture of the original kit stickers, it still gives the right impression.

Sunday, August 3, 2025

Estes Mini Bomarc Clone, Kit #TK-5, Ink Lines Added

I printed up some decals for the Skylab. I only used 3/4 of the sheet leaving me some open area. The Mini Bomarc "ink line" decals were added to the Skylab decal page.

Being narrow, these were a little tricky to apply and keep straight.


The detail lines do add to the finished look.
I didn't roll the ends over the rounded leading and trailing edges. There's a very slight gap.

Saturday, July 26, 2025

Estes Mini Bomarc Clone, Kit #TK-5, Part 18, Ink Lines?


The instructions show "ink lines" over the wings, stabilizer and rudder.
How can these be drawn? I thought about using a extra fin point Sharpie but it would be hard to control. 
On a Mini Bomarc build in the 1970s, I drew the lines with a fine point Rapidiograph pen with mixed results 


The lines were added to the decal art.
It'll have to wait until I print some more decals and sneak these in on a page. These will be added to the model at a future date.

Home print decals and fin templates are available to Patreon subscribers. Email me at: oddlrockets@bellsouth.net 
and ask for the Mini Bomarc decals.

This is the same idea used on the line decals I drew for the 1/70 scale Estes Saturn 1B tower details. To see the capsule instructions: CLICK HERE
How could you possibly draw these fine lines over curved surfaces?


Here's how those escape tower decals looked when applied. 
I'm hoping for clean details like this on the Bomarc.

Friday, July 25, 2025

Estes Mini Bomarc Clone, Kit #TK-5, Part 17, Those White Backed Decals


On the right side, 
the white decal has been set down. Let dry.

On the left,
The maple leaf ring has been set over the top of the white decal.


For the Canadian flag decal,
I used a strip of masking tape for alignment.
Set the white decal, let dry.


On the rear tube is the smaller maple leaf circle white underlay.


All the decals in place.
The 6312 number decal is centered underneath the flag.


The French decal on the right side.
English goes on the opposite side.

Thursday, July 24, 2025

Estes Mini Bomarc Clone, Kit #TK-5, Part 16, Those White Backed Decals

From the original kit instructions,
Here's the decal placement.

There is some white in the background of the maple leaf circles and the Canadian flag.

I used one of my white decal layering tricks to get the right look. A clear decal sheet is sprayed with gloss white paint. White spray paint is all that's needed, no clear coat. 
This makes a water transfer white decal.


After the white paint dries - 
Over a bright light, set the sprayed decal sheet over the home print decals.
Trace the white areas needed lightly with pencil. Trace just inside the blue ring.


The white under the Canadian flag should be a good rectangle right up to the red border.

The round white circle can be inside but still covered by the thick blue ring.

Sunday, June 29, 2025

Estes AMRAAM AIM-120 Downscale, Build, Part 13, Decals


Applying a light color home print decal over gray paint will end up a much darker color.
You'll need a white underlay.
Black decals don't need any white underneath.


You can either:
Use a white decal strip under the light colored decal or - 
Spray gloss white onto a clear decal sheet.


TIP: Cut a strip of the white sheet, the same width of the colored band.

Lay the white underlay strip down first as a regular water slide decal and let dry.

Apply the yellow strip decal directly over and on top of the white band. 
I didn't find it necessary to use the white strip under the brown decals. They were darker and didn't show much difference over the light gray paint. 

Set the strips down a little long, and trim against the root edge of the conduit with a single edge razor blade.

Friday, June 27, 2025

Estes AMRAAM AIM-120 Downscale, Build, Part 11, Gray Paint & Decal Print


Here's the lower half, painted with Ace Hardware Light Gray.


The upper half, also in Light Gray.

There are still some glue boogers that need to be sanded.
Another final light gray coat will follow.

The nose cone is painted white.
I drew up decals for the downscale BT-50 size.

The decal sheet is only available to Patreon supporters.
Email me at oddlrockets@bellsouth.net and ask for the AMRAAM decals.
The home print PDF also includes fin patterns and a parts list.

The picture shows an early version of the decal sheet. I've made changes so the decal positions match the Estes sheet.

Saturday, May 24, 2025

Quest Intruder Kit Bash, Part 15, Finished Masks & Decals


While I liked the design of the Quest Intruder, it didn't have the flash of the overly decaled Estes Interceptor.
Bigger graphics work and can help a plain design.


The underside, 
I know, I stole the wing and rudder decals from the Estes Interceptor. The original Quest kit stickers were ruined and I didn't want this kit to sit in the bag. A kit bash would make a more interesting build.


The rounded, square windows.


My favorite decal, the Orbital Transport style canopy windows. I didn't like the Nike "swoosh" canopy in the Quest kit.

Friday, May 23, 2025

Quest Intruder Kit Bash, Part 14, Finished Masks & Decals


Here's the back end mask. The white paper covers allowed me to mask the red engines while the black toothpick spikes were sprayed.

After the black spikes dried, two more paper covers went over the black spikes and the red motors were sprayed. 


After the masks were removed -

The red mask turned out great, nice and sharp.
The black mask needed some touch up with a brush. The glue fillet was smooth but recessed not allowing a good seal.


Look close. you might see some pencil lines on the trailing lines of the wind flaps.
These were drawn purposely long and were to be trimmed to size.


Canopy decals are usually fitted over curved nose cones.
Experience has taught me to cut them as shown in the picture, This allows the decal to flex.

Note there aren't any sharp cuts on the inside arc. Don't give your decals a chance to tear.

Tuesday, May 6, 2025

New Way Letter - Go Build, Part 14, Decal & Parachute


The LETTER GO NAME is a water slide decal.
Before transferring, mark the center lightly with a pencil,


Then mark the center of the white span between the upper two black trim strips.


I set the decal at the pencil marks. I thought it was centered but got it wrong!


It was repositioned using a visual centering.

You are supplied with two LETTER GO decals. I used only one.


The elastic shock cord is tied to the Kevlar line.


The elastic is tied to the nose cone lug leaving a 8" tail. A small metal ring is attached at the end of that 8" tail.

The snap swivel (and parachute) is clipped to the metal ring.

Tuesday, February 25, 2025

Estes Star Seeker (Tri-Pack) Kit #0866, Part 9, Decals


After the door/windows decal has dried,

Cut through at the nose cone joint with a new razor blade.

I don't normally use Future clear coats. I find it unnecessary.
It will hold down an exposed edge that could be subject to peeling back.

On the left, a Q-tip was used as a brush to seal the decal on the leading edges.
On the right, another decal where the edge ends at the body tube.


The Kevlar was tied to the elastic shock cord using a simple overhand knot.

I'll trim off some of that excess.


In the comments I was warned about how easily the fins will break off on a hard landing. There's not much of a root edge to glue onto the body tube.
I decided to slow the descent with a streamer.

It'll probably still break off, but I gave it a try.

The body tube is short, but I could fit in the wadding, streamer and nose cone!

Sunday, February 23, 2025

Estes Star Seeker (Tri-Pack) Kit #0866, Part 8, Decals


I'm making the decals available to Patreon subscribers.
Both the BT-5 and BT-50 sizes will be on a home print PDF.

To get a canopy decal to fit around a nose cone, 
Cut with a rounded relief in the center for a some flexibility. 
Note: Rounded. Sharp corners can lead to tears of the decal film.

After the canopy was in place - 
The door and window decals were transferred. 
The nose cone body tube joint will be cut after the decals dry.


Enlarge the picture to see the wing reflection centered down the windows. 

This can happen with home print decals - 

The blue in the wing decal started to break up. This is usually caused by too many tries at repositioning. 
The decal sheet has two sets for the BT-5 size model.


There is some overhang on the outside edge.

After the decals dry, you can slit and remove the excess using a sharp razor blade.

Tuesday, February 11, 2025

Estes Black Star Voyager Build, Part 36, Dot Decals

A three dot decal is placed on the upper fin leg.
The low dot on the right was placed 2" from the edge of the fin.

I've learned with Estes decals - they are thin! On the plus side, when dry they really hug the surface. 
TIP: Where decals are on both sides of a fin, set one side and let dry. Come back, then set the other side. Too many times my fingers have lifted and moved that (not fully dried) decal on the other side and lifted it.


I aligned the other dot strip by sighting down the leading edge of the fin.


The lower fins get a single dot on both sides.
To make sure of the position, I made a cardstock template and punched a hole to line up0 and position the decal.


Here's the template flipped to align the dot decal on the other side of the fin.
Look close and you can see the dot in the punched hole.


I don't normally add the Estes logo. You are supplied with two Estes logos, one white and one orange on a white background.

I went with the white decal, it wasn't so bright.