The decals are placed and the build is complete.
Showing posts with label NW Boxie Birdie. Show all posts
Monday, June 13, 2022
New Way Boxie Birdie, Build Part 7, Decals & Finished
Sunday, June 12, 2022
New Way Boxie Birdie, Build Part 6, White Paint, Red Trim
In the pictures below you can see the masking tape placed on the inside surfaces.
The birdie is painted gloss white and allowed to dry.
Lightly set the top red vinyl trim in place.
Check underneath from all four sides to be sure it is centered before pressing down in place.
Roll over the sides of the top vinyl piece and burnish into place.
The long rectangle red piece is started directly at the center line of the launch lug. This hides the seam when the rocket is slid down the launch rod.
Saturday, June 11, 2022
New Way Boxie Birdie, Build Part 5, Assembly
Apply a line of glue around the inside edge and press in place.
Check to be sure it is level and even before the glue sets up.
The engine mount tube gets a line of glue inside the end to slip around the engine block already in place.
Slide in and over the engine block.
Some glue will be pushed up inside the tube at the bottom of the engine block.
TIP: It's a good idea to remove as much of the glue as you can. I used a long Q-tip to remove the excess glue.
It's probably not a concern with this rocket as the engine is ejected. But on other models, a hot engine could melt glue on the inside of the engine mount tube making it hard to remove.
The cap is in place -
The square launch lug is glued into the rectangular hole and through the centering square inside. The top is even with the low edge of the cap assembly.
Friday, June 10, 2022
New Way Boxie Birdie, Build Part 4, Gluing Together The Body
the cage was held together with the cap slid in place - no glue.
You can see the engine block inside the top.
I set the rear centering square in place and leveled it as best I could.
The corners were marked with a pencil.
Small bits of glue were set at the pencil marks.
The plate was pressed into the glue dots and leveled.
New Way Boxie Birdie, Build Part 3, The Top Cap
The engine block is glued to the top piece of the cap.
The four sides were hit with the white eraser and cleaned up. Not really necessary as the entire top is covered with red vinyl.
All four sides are glued together in a square form.
I used the top and engine block assembly to align the four side pieces square. No glue on the top yet!
When the sides are dry, you can glue on the top with the engine block on the inside.
Thursday, June 9, 2022
New Way Boxie Birdie, Build Part 2, Parts Prep
Most laser cut cardstock has some charring and smoke discoloration.
You can clean up most of it with a white eraser. White eraser leaves no marks - a pink eraser could leave some pink marks.
The picture on the right shows the cleaned up part.
I lightly sanded the tab sides, the tabs that would be seen on the finished model.
On the right, the tab edges were sanded with 400 grit on a sanding block. You can certainly see the difference. The charred edges might be hard to cover with white paint. Clean them up for a whiter finished model.
Wednesday, June 8, 2022
New Way Boxie Birdie, Build Part 1, Parts
Thanks to Rick Randall of New Way Rockets!
I inquired about some short square tubing for an upcoming project. Rick sent me a few kits to try!
I've sent him some Odd'l Rockets stuff.
Of course I was interested in the Boxie Birdie! I've been producing Odd'l Rockets Birdie kits for years.
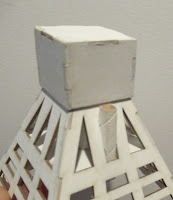
Like many of the other New Way kits, the Boxie Birdie is square.
Most all the parts are cleanly laser cut cardstock.
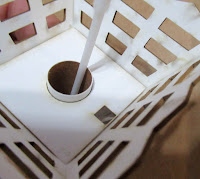
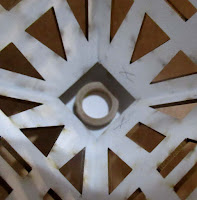
The engine mount tube is round to fit 13mm motors.
The launch lug is square
Two Q-tips are included to help with glue application.
Here's that square launch lug
Pre-cut red vinyl is supplied for color trim, no masking needed!
Four, small water slide decals of logo and model names.
Subscribe to:
Posts (Atom)