Showing posts with label DZ Ares I-X. Show all posts

Tuesday, October 13, 2015

Dr. Zooch Ares I-X, Finished


This one turned out better than my first Dr. Zooch Ares 1 built back in 2010.

This one is the same size. The first Ares 1 had a very small 6" parachute. The Ares 1-X kit now has a 12" chute.
Dr. Zooch actually had three different versions of the Ares series. The rocket design changed over time.

This model works well as a small field flyer with a A8-3.

Monday, October 12, 2015

Dr. Zooch Ares I-X, Build, Part 15, Ends and Edges


The escape tower dowel and shrouds were glued onto the capsule top.

Sight from the sides and from the top to be sure it is straight.
Turn the rocket body and make adjustments before the glue sets up.


Right below the rear shroud is a short, uncovered length of BT-20.
The white tube didn't match the white of the shroud.

I sprayed some copy paper with the same white I used on the build.


Here's the painted paper wrapped in place with a glue stick.

Saturday, October 10, 2015

Dr. Zooch Ares I-X Build, Part 14, Flame Fins

In the Zooch line many of the "finless" rockets use Flame Fins.
I've built a few Zooch kits and used to paint the fins yellow, orange and red. They all ended up looking a bit cartoony.

Look up some actual NASA launch shots and you'll notice launch flames go from bright white to yellow to grey.

After the fins are filled and glued in place the assembly gets an overall shot of gloss white.


After the white dries, yellow is shot. Aim towards the bottom of the fins and it should blend pretty easily.

After the yellow dries, shoot the grey at a 45 degree angle starting below the bottom fin tip. You are actually starting the spray on the painting wand and going up to the right along the outside edge.

Here's the fin unit glued into the bottom of the model.
This is one of the few Dr. Zooch models where the flame fins are glued in permanently. Other fin units remove for display.

Friday, October 9, 2015

Dr. Zooch Ares I-X Build, Part 13, Detail Wraps

An optional step is to cut thin strips of card stock and glue them to the SRB making raised straps.
The extra detail is worth the effort.

Cut the strips from the printed black box on the patterns sheet.


Use a glue stick (again) to glue the bands over the print bands on the SRB wrap.

Start and finish the wraps at the SRB seam. A pointed dowel was used to burnish down the ends.


Here's how the SRB looks now. I used some white cardstock for the white wraps.


The supplied screw eye seemed small.
I substituted a larger one.

Screw it in on the side of the shoulder base, not in the center filler plug.

Thursday, October 8, 2015

Dr. Zooch Ares I-X Build, Part 12, LAS Dowel and Shrouds


I filled and painted the lower taper of the nose section before gluing on the wraps. I would be harder to mask and paint them later.

The inset shows the overlap of the BPC wrap.
Wrap and mark, cut off the overlay and glue around the nose.
The BPC wrap is made and set on (not glue yet) the nose cone tip.
The balsa tip sticks trough the hole. Sand the tip down and even with the top of the BPC. Lift off the BPC.
Sand the tip down an additional 1/32". This makes the recess for the dowel to glue in.

You can now glue the BPC cone on. The sides were molded to the edges of the service module wrap while the glue is still wet.

I didn't glue the LAS dowel in place yet. I decided to glue on the small skirt and party hat to the dowel so the assembly could be painted separately, off the model.
It took a few dry fits to get all the positions correct.
The inset shows the two shroud edges being "molded" together.


The left shows a dry fit. A small glue fillet was set where the dowel sticks through the party hat shroud.

The nozzle were glued on, evenly spaced around the dowel.
The wrap of tape is a level height reference.

Wednesday, October 7, 2015

Dr. Zooch Ares I-X Build, Part 11, Launch Abort System or LAS


The small LAS skirt and "party hat" are cut from the pattern sheet.
TIP: Cut the centers out first, it leaves you with more to hold onto.
Use sharp scissors, the inside arc is small.


Just like the larger shrouds, you can shape them in the heel of your hand. Use a smaller dowel on a small shroud.
The four LAS nozzles are made from fancy toothpick ends.
One of the four was shorter than the others. It doesn't matter, the ends are cut off anyway.

TIP: I usually draw angles on my work board for a consistent cut reference.
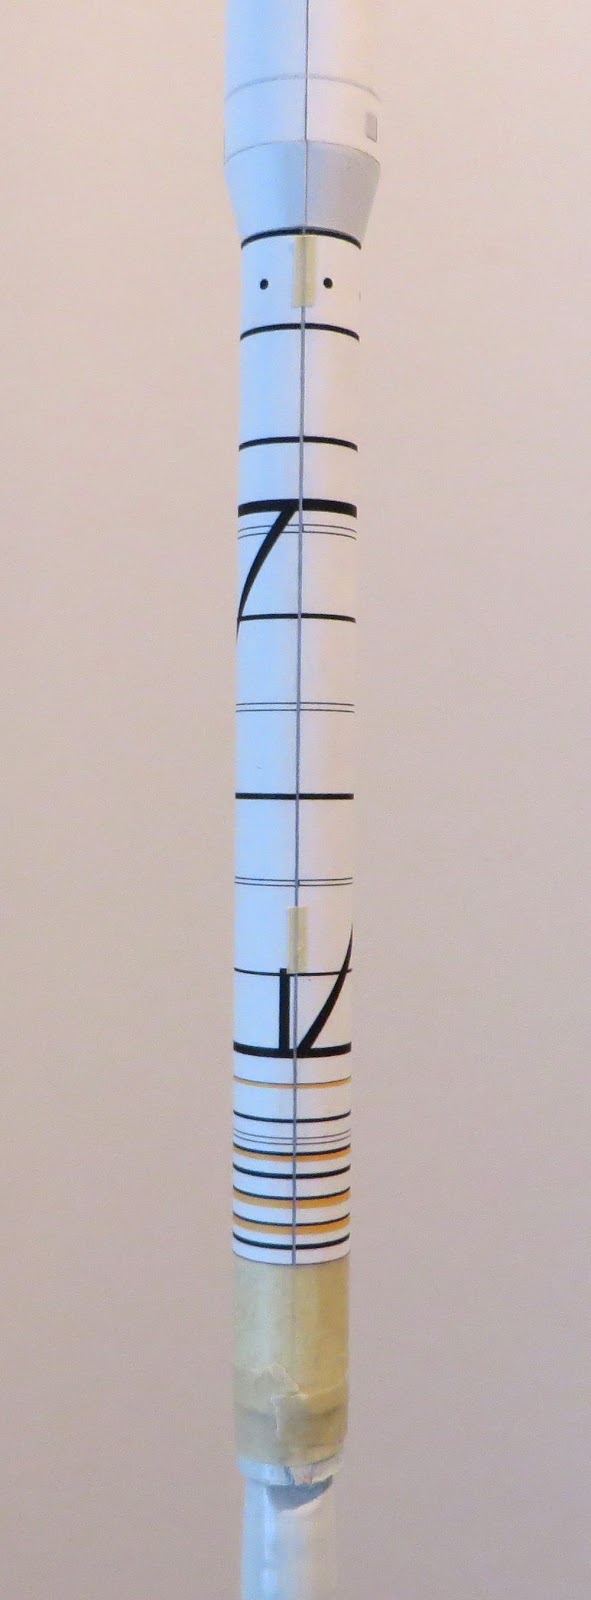
Afterwards I cut them even shorter, into the next wide band.


Using a small round diamond file, a concave curve was made in the base for a better glue joint on the sides of the LAS dowel.

Tuesday, October 6, 2015

Dr. Zooch Ares I-X Build, Part 10, SRB Skirt

A 20/50 ring is used to support the open edges of the SRB skirt.

The sides of the 20/50 ring is tapered to fit inside the open end.
The inset picture shows using the shroud to match the sand angle.


After sanding the ring seam was filled with CWF.
Just the bottom of the ring got a coat of CA and was sanded smooth.


Before gluing in the ring the low edge of the SRB skirt got a coat of CA for strength.

The shroud was slide over the tube end and the tapered ring slid inside. Do a dry fit first then use glue.

Monday, October 5, 2015

Dr. Zooch Ares I-X Build, Part 9, Clear Coats


The SRB (longer, lower wrap) is applied. Be sure to line up the seams.
Something I didn't mention earlier,
Before the glue sets you can mold the shroud edges into the larger body tube. Roll a burnisher over the edge for a smoother seam transition.
The laminated lug standoffs are thick. I sanded a slight contour on the root edge for a better gluing area on the BT-20 tube.

Wrap some 400 grit around an engine casing and sand a curve into the bottom.
TIP: Why use an engine casing? You'll get a better fit sanding over something with a slightly smaller diameter.


You should really give the wraps a good coat of clear. The paper wraps pick up dirt and oils pretty easily.
The lug gluing locations and exposed bottom tube are masked off .
After the clear coat dried and tape removed, the lugs were glued in place.

Sunday, October 4, 2015

Dr. Zooch Ares I-X Build, Part 8, Lugs and Standoffs


The instructions say the supplied lug is 1" long, my kit lug was 1 1/4" long.


The standoffs are two pieces of balsa, 1/8" X 1/2".
Sometimes it's easier to make straight short chop cuts with a single edge razor blade. Just press through the balsa with a new blade.

The lug was cut into two 1/2" sections.
TIP: To cut the lugs, slip it over a dowel. The dowel supports the lug wall so you won't crush it with the rolling knife pressure.


After a glue fillet, the lugs and standoffs were set on a dowel ready for a fill coat of CWF.
The dowel handle makes it easier to hold onto the small lug assemblies.

Saturday, October 3, 2015

Dr. Zooch Ares I-X Build, Part 7, Flame Fins

Flame fins are a standard Dr. Zooch kit feature on models that wouldn't normally have fins. Easier and stronger than clear fins.

On the left is the flame fin template. There are many small sharp edges that would be very hard to cut and fill. I tend to round them off for simplicity.


This is the four fins after gang sanding.
To sand the rounded inside edges I use some 400 grit wrapped around a pen barrel.


After gang sanding I'll go back over the fins again individually adding some extra divots. This is so all the fins won't have exactly the same profile.

After filling the fin grain with CWF, again use the 400 grit around the pen barrel to sand the divots smooth.

Friday, October 2, 2015

Dr. Zooch Ares I-X Build, Part 6, Body Wraps

Page 4 has you glue on the longer BT-20 wrap first.
I attached the smaller BT-50 upper wrap first. I figured I'd practice on the smaller wrap before tackling the long BT-20 wrap.

Dr. Zooch always instructs you use white glue on the inside edges. I didn't have good luck with this method the first time around and now use glue sticks.


Just like the shrouds, you can pre-curl them in the heel of your hand.


An even coat of glue stick was applied and the wrap was quickly rolled onto the body tube.
Lay over a clean piece of copy paper and burnish.
If the seam ends aren't staying down, slip some glue underneath with with knife blade and burnish again.

Thursday, October 1, 2015

Dr. Zooch Ares I-X Build, Part 5, SRB Shroud


Here's the three shrouds I made.
The best fitting shroud was used and the other two thrown away.

The inset picture shows the 2050 rings in place on either side of the 1" long BT-20 tube.


Do some dry fitting before gluing.

The ends of the shrouds were evened up by gently turning them on sandpaper on a block.
The ACM assembly was glued into the top of the long BT-20.

I used a glue stick to attach the shroud. It's not as wet as white glue from a bottle.
There will be a raised shoulder over the bottom of the BT-50. This will disappear when the upper wrap is added.

Wednesday, September 30, 2015

Dr. Zooch Ares I-X Build, Part 4, Shrouds


As I usually do, scans were made so I can print out more shrouds and the tube wraps if I screw things up.
I tend to print extra shrouds and make up four or five. I check the fit and then use the best one.

Cut out the SRB shroud.
Here I'm running some 400 grit along the curves sides to smooth off any high spots. They are there, just run your finger over the edge and you can feel them.


Don't pre-form a shroud by pulling it over the edge of a table top, try the method shown in the picture.
Roll over it in the heel of your hand with a smooth burnisher or clean dowel.
You only have to try this once to see how well it works. The curve will be smoother with no creases.

I roll my shrouds with the printing on the inside. Sometimes it's hard to cover printer ink with spray paint.
This makes it a little harder to line up the overlap tab but the finished look will be cleaner.

A glue stick was used and the overlap tab clamped with tweezers while it dried.

Tuesday, September 29, 2015

Dr. Zooch Ares I-X Build, Part 3, Engine Mount Bands

The engine mount uses a reinforcement band under the top bend of the engine hook. It's a card stock wrap that strengthens the typically weak BT-20 tube.

The band goes around the tube. I used a shorter piece that will fit between the two surrounding fin roots.

The instructions also suggest masking tape over the engine hook. This textured tape wrap would be visible on the finished model.

I ended up using a card stock wrap instead of masking tape.
It'll be smoother and look better on the finished model.

The inset shows the wrap seam which was set down to be hidden under a fin root edge. Fins aren't glued on yet - this was just to show how the fin root line will sit over the wrap seam.

You can see the second coupler glued into the top of the engine mount tube.

Monday, September 28, 2015

Dr. Zooch Ares I-X Build, Part 2, ACM and Couplers


It's a good idea to number the instruction sheet pages.
The loose sheets are easy to get mixed up


You make couplers from the 1" long BT-20 tubes.
Another one will be needed for the engine mount so go ahead and make them both now.
Mark a straight line down the tube and cut through the tube down the line. The tube is short and thin, you can use sharp scissors. Slide into one of the other 1" long BT-20 tube sections. Mark the overlap.


Cut off the overlap. I tend to cut short (inside the drawn overlap line) and sand with a block to a good fit.
Check the fit in the BT-20 and sand if needed.


Here's the finished coupler slip fitted into the 1" long BT-20.

Making couplers from body tube segments is a good technique to know. It can come in handy when you don't have a "real" coupler.

Sunday, September 27, 2015

Dr. Zooch Ares I-X Build, Part 1, Parts


I've built a Zooch Ares before, but not this version.
The Ares 1 build was posted on rocketreviews.com CLICK HERE
This was back in 2010. The review had posted pictures of the completed model, but not much build information.

The parts are all good quality, typical of the Zooch kits.

Some parts of interest:
The 1/4" wide elastic is 18" long.
The Kevlar is a loose wrap, almost like a ribbon. I'll probably leave it off this one and substitute some longer elastic.
Four small LAS nozzles cut from ends of fancy toothpicks.
The screw eye seems too small.


Zooch nose cones are pre-weighted and have the hole plugged with wood filler.
The screw eye goes in off center, to the side of the filler.