Saturday, June 30, 2012

Estes Thor Agena B Build Part 31 Fillet TIPS


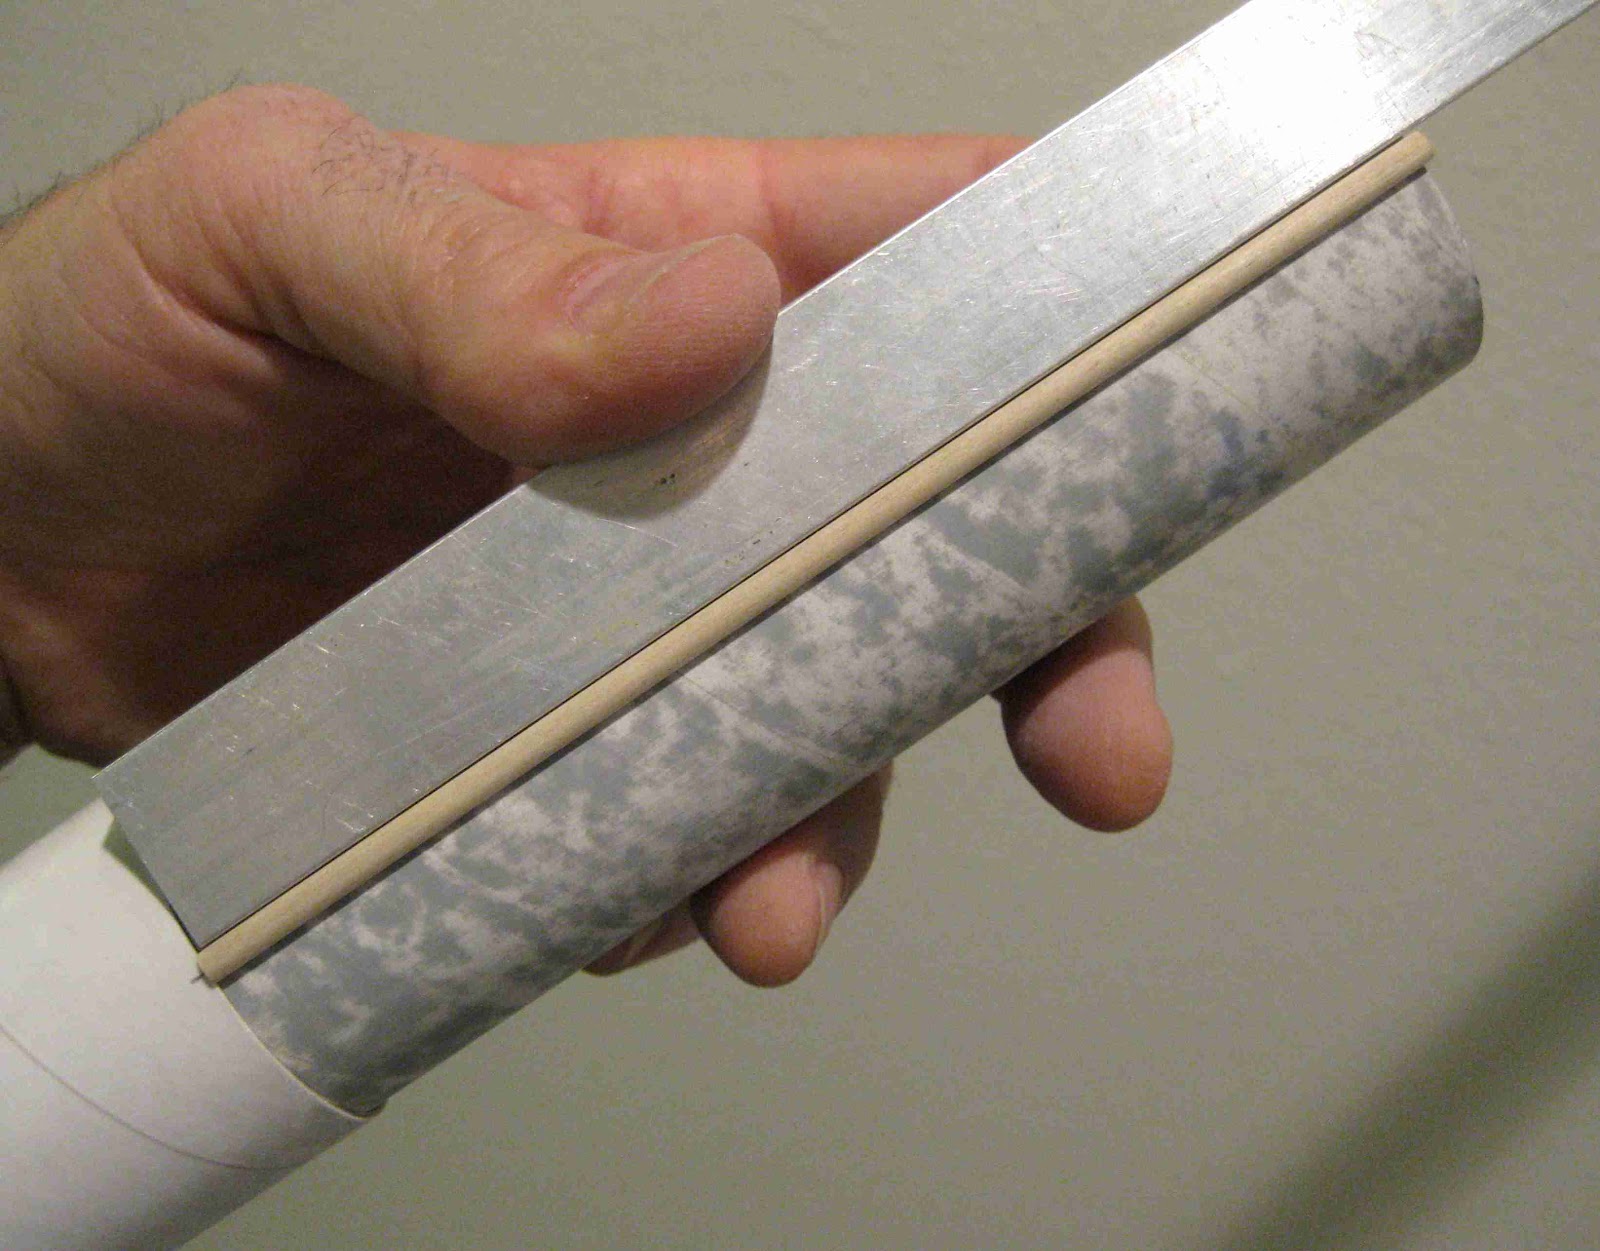
The lower tunnels are 5 1/2" long, much longer than a root edge of a fin.
If you were to lay a bead of glue down the joint and smooth it with a finger, you would have a lot of (drying) glue to remove by the time you got to the bottom of the tunnel.

You should tackle the fillet in sections.
Smooth the first third of the glue bead and wipe the glue off your finger. After wiping off your finger, rub off any dried glue skin off your fingertip before smoothing anymore of the remaining fillet bead. Any little bits of glue left on your finger will transfer off your finger and leave unsightly glue lumps in your otherwise smooth fillet.


After being sure your finger is clean, smooth the second 1/3 of the glue bead.
Again, wipe the excess glue off your finger. Remove the glue "skin" off your finger.


So you won't end up with a blob of glue at the end of the tunnel -
Turn over the body tube and smooth the remaining 1/3 of the fillet by going up and away from the end of the tunnel.


Check the tunnel ends and remove any wet glue with a Q-tip.

Here I'm smoothing out the the glue at the tunnel end with a toothpick.

Estes Thor Agena B Build Part 30 Tunnels

Use your aluminum angle again to insure the upper tunnel is straight down the body tube.
The front end of the tunnel is glued .20" from the front end of the BT-52 tube.

Figure 11 of the Estes instructions show the tunnel on the center of the tube. With the front end of the tunnel at .20" from the end, it sits forward and not centered. The picture below shows the correct position.


This is the model up until now. Balsa and seams were filled, all was primed, sanded and the tunnels glued in place.

Friday, June 29, 2012

Estes Thor Agena B Build Part 29 Tunnels

Use your aluminum angle to be sure the tunnels are glued on straight.

On the lower right, the section of body tube from the removable fin can was taped in place. The tunnel ends were butted up against the top edge of the sleeve. Both ends of the tunnel will be even at 1 1/2" above the end of the BT-60 tube.


After the tunnel glue was dry, the upper end was sanded flush with the end of the body tube.
220 grit was used on a sanding block.


In this picture the balsa adapter is on the left, the body tube is on the right.

This shows the fit of the tunnel ends before and after fitting.
The lower tunnel was just sanded flush with the end of the body tube. Before gluing, the upper tunnel segment end needed a slight angle sanded on it for a better fit at the joint.

Estes Thor Agena B Build Part 28 Tunnels


You should extend the tunnel lines over the lip of the lower BT-60 body tube.
This will give you a centering tick mark at the end of the half round.
When the half round is glued down, it'll cover up all of the pencil line except for this end lip tick and the line below the end of the tunnel.


Because the body tube was already primed, you should sand off the primer down the pencil line.
Use a sanding block and redraw the line after it is sanded off.


The tunnels were cut just a little long. The pencil line is the cut line.
After the glue dries, the tunnel end will be sanded down and flush with the end of the body tube.

Thursday, June 28, 2012

Estes Thor Agena B Build Part 27 Priming TIPS


TIP: I'm using the base of my thumb as a "bumper" to prevent the body tube edge from being rounded or sanded off.
The base of my thumb raises and stops the sandpaper from rolling over the edge and keeps the tube end square.

On the left I'm trying to get the nose cone base even with the body tube sides.
Go easy here, sometimes you can sand down to the bare balsa.
In the picture most of the grey primer has been sanded down to the CWF underneath.

You can "reseal" the exposed balsa when the color coats are applied.
Spray, lightly sand and repeat until the balsa is filled.


This is a dry fit of the Thor Agena B up until now.
I decided to prime the body tubes and balsa before adding the half round basswood tunnels. It's harder to sand to the surface of the tubes with the tunnels in the way.

Estes Thor Agena Build Part 26 The Real Thor Agena B

Brian Coyle and Chas Russell sent me some great pictures of the Thor Agena B.
These pictures give a better idea of what the back end looked like.

The nozzle is a bell shape, not the straight edged shroud in the Estes kit.
The horizontal bands have a raised "bead". The flat bands (2 and 3 from the bottom) are flat and thicker bands like on the Estes cardstock shroud print.


Here's a side view of the turbine exhaust.
The low angled side (lower left) looks to a a straight cut and not a curve like shown in the instructions.
And, the vernier housing.
It's a much more complex shape than what I've made.

The turbine exhaust and nozzle look to be more of a aluminum color than silver.
The instructions have you paint the small nozzles black.

Wednesday, June 27, 2012

Estes Thor Agena Build Part 25 Tunnel Sealing

All the basswood pieces - tunnels, antennas and vernier nozzle housings - get sealed with clear varnish. You could use sanding sealer or dope.

I don't get too fancy with this, most all of it gets sanded off anyway.
I dip a paper towel into the varnish and rub it over the surface. Try to keep the varnish off the flat gluing sides.

After you're done, throw away the paper towel. No brushes to clean.


Sand smooth with 400 grit sandpaper.
This varnish will load up your sandpaper to it'll probably get tossed, too.

Two coats are needed for a good sealing.
Sand between both coats.

Estes Thor Agena B Build Part 24 Open Rocket File

I've prepared an Open Rocket (.ork) file for the Thor Agena B.
This file has the small Delta shaped fins, not the old style clear fins. I wasn't able to add the removable fin unit (body tube segment) sleeve.
With .25 oz. of weight in the nose cone, stability is 1.29 cal. with a C6-5.

A B6-4 will get it to 291 feet. A C6-5 will cap out at 705 feet.

If you'd like a copy of the file, email me at:
oddlrockets@bellsouth.net

Tuesday, June 26, 2012

Estes Thor Agena B Build Part 23 Removable Fin Unit

The Estes kit had clear fins "glued" to a clear coupler wrapped around the body tube.
After my experience with the 260 Booster's clear fins breaking off on landing, I wanted to try something else.

On the right is the OOP Dr. Zooch Discoverer Thor, with it's small Delta shaped fins.
(The first two pictures are from John Lee's review on rocketreviews.com)
You can see the resemblance between the Thor Agena B and the Discoverer Thor.

Trying to stay away from clear fins, I thought I'd compromise a bit and make a removable fin unit with the Delta shaped fins. Not scale, but still in the same Thor family.

Looking at the second picture, I could get a rough idea of the fin size from the 1" square grid on John Lee's cutting board.

The original Thor Agena B kit fins have a 1 1/2" root edge.
I'll draw my Delta fins with that 1 1/2" root.
The leading edge is a 45 degree angle to the outside of the trailing edge.
The four fins were cut from 3/32" balsa.

An outside wrap was cut from some scrap BT-60 tubing I had in my spare parts box.
Cutting the sleeve down it's length leaves a gap. The open gap will allow the sleeve to be taped tight around the body tube.

The original kit had three clear fins. This model will have four smaller fins.

An email from Dr. Zooch let me know that his Discover Thor kit had 1/2 oz. of weight in the top of the adapter. The smaller fins in the Zooch kit made nose weight necessary.
I'll have to figure out a way to put clay weight near the nose cone. 

The sleeve was cut to 2 3/8" long. It'll cover and protect the nozzle, turbine exhaust and vernier assemblies on a rough recovery.
This will set the fins a little lower and help with stability.

Here's how the fins will look on the removable fin unit. Note the nozzle is covered.

While it's not scale, I think it still captures the feel of the Thor rockets.
I don't display my Dr. Zooch rockets with the flame fins installed. I'll display this one with the slip on fin unit removed.

Monday, June 25, 2012

Estes Thor Agena Build Part 22 Turbine Exhaust Wires

Here's the start of the bend of the modified "V" piece from Step 17.

I've already made the first bend on the right side.
The center is a 1/8" flat area that rests against the turbine exhaust.

My small pliers are 1/8" wide, an easy measure.
The left side was bent up to made the "V".


The two ends of the "V" are 3/4" apart.

After checking and adjusting the wire for the 3/4" width, the right long end of the wire was cut.


After cutting, pinch both ends together to be sure the sides are the same length.
I had to cut off a small amount from the top wire.
Here's the wires I have so far.

Notice the "V" shaped wire. It is not the same silhouette as shown on the instructions. That's the bend I came up with by following the measurements and 3/4" wire spread indicated in the instructions.

I cut the fuel tank vent wire from the wire stock.
After checking back on the directions, the fuel tank vent wire is made from a scrap piece of thinner nichrome wire.
I'll wait until everything is painted before adding the wires.

Estes Thor Agena Build Part 21 Turbine Exhaust


Press the square corner of the gusset into the joint of the flange base and launch lug. Be sure the base edge of the gusset is on the line. The side of the gusset should go straight up the lug.


Use you tweezers to correct the angle of the gussets if needed.
Follow up with a small drop of glue at the top of the gusset. Apply the glue drop with a toothpick tip.
Remove any excess glue with a toothpick.

Do the same with the bottom of the gusset at the edge of the circle.

When all is dry, carefully cut around the flange base edge with sharp scissors.

This was my second attempt at the gussets. They are very small and hard to handle. The gussets on the original SP-28 PDF print were probably hand drawn with a thicker pen line and hard to cut in a consistant size.
The new gussets were drawn in a "hairline" thickness and when cut out were closer in size.

Sunday, June 24, 2012

TIP: Cleaning Up Flat Finish Paints

I've mentioned these Eraser Sponges before.
Here you can see how well they clean up - even on a flat finish.
Enlarge the inset picture to see the dirty decal area before.

Flat finishes can easily pick up dirt and oil from handling.
The Mr. Clean Magic Eraser (or in this case the Scotch Brite Easy Eraser sponge) really cut through the dirt.

Don't use much water on the sponge and keep paper towels at hand to pick up any beads of water.

Estes Thor Agena Build Part 20 Turbine Exhaust

I tried to use the small gussets from my print of the SP-28 pattern sheet.
The line thickness was pretty thick. The gussets I'd cut out were inconsistent in size.

I decided to redraw them using a hairline thickness line. This way when cutting them out I could cut right on the thin line for a more consistent size.

These gussets connector flange will be on the new Nozzle PDF. If you'd like one, Patreon members can email me at:
oddlrockets@bellsouth.net
and request the Thor Agena B pattern sheet PDF.


The 3/4" long launch lug was glued to the center circle on the connector flange.

I'll wait to cut out the round flange after all eight gussets are glued in place.
It's just easier to tack down the gussets when the assembly is made on a wider, more stable base.

The gussets are so small, most of the cuts can be made by just pressing a razor blade on the hair lines. Be ready to cut some extras, you'll lose a few.
Cut them out as you need them. Cut only one, then glue in place.

Use the smallest ended tweezers you have to hold the gusset over the diagonal cut. This leaves the square sides open for glue.

The glue bottle was set on it's side and one small drop was squeezed out the nozzle. The gusset edges were rubbed over the glue drop. Use very little glue for positioning on the flange base and side of the lug.

Saturday, June 23, 2012

Coming Soon from Estes

There are plenty of kits coming soon on the Estes website:
http://www.estesrockets.com/

On the left is the JETLINER, a Goony style model. According to the description, it'll reach 150' with an A10-3t.
The instructions are already online for this one:
http://www.estesrockets.com/media/instructions/003230_ESTES_JETLINER.pdf

Other notables on the way:
PULSAR PINK - a crayon rocket.
COSMIC INTERECEPTOR - a large D, E and composite E model. This 2" diameter, level 4 build retails for $48.99. The instructions were just posted at:
http://www.estesrockets.com/media/instructions/001351_COSMICINTERCEPTOR.pdf
NIKE SMOKE - Many have shown interest in this one, the newest in the Pro Series II line.
And - a few RTFs or almost ready to fly sport models.

Friday, June 22, 2012

Rocketry Items from Alaska

I'm heading home after a two week cruise.
In this Anchorage Alaska hotel, the Internet connections are a little faster than the ship.

Wherever I go I keep an eye out for rocketry related items.
This morning I was killing time waiting for transportation to the hotel. 
Paging through the June 18 issue of Newsweek magazine, this HP ad was inside the front cover.
It shows the launch of a MPR stretch Alpha style model. The copy reads:
"If you're going to do something, make it matter"


Watching the float planes take of and land in Ketchikan, I was checking out the colors schemes. I especially liked the white, red and copper colors on this one.
This scheme would look great on a 4 fin, nose cone model.


It seems the Odd'l Rockets kits are popular with school groups. While I was away, I got a HUGE order for kits.
Once back home I'll be bagging kits, finishing up the Thor Agena B and a Zooch SLS build for a client and starting another build for the blog.

Thursday, June 21, 2012

Estes Thor Agena Build Part 19 Turbine Exhaust

The turbine exhaust is made from a 3/4" long piece of 1/8" diameter launch lug.

Step 12 of the instructions has you cut and glue the turbine exhaust (lug piece) in place before the super detailing is done in Step 16.
Refer to Step 16 before gluing on the turbine exhaust lug. You can't do all the extra detailing if it is already glued onto the rear centering ring.

The instructions say to cut it to 3/4" long, then trim the top curve. Leave the lug long for now, for easier handling and cut it to length after forming the top.

Cut the top of the lug at the angle shown in the instructions using a sharp razor blade.


Sand the curve into the top angle using 400 grit sandpaper over a dowel.


When sanding a lug like this, the outside Mylar wrap can stay attached and turn inside the lug.

Coax the turned layer out and up with a sharpened dowel.
Sand of the Mylar wrap with more 400 grit.

You may have to repeat this a second time to get it all.

After the top is formed, cut off the bottom so the lug is 3/4" long.

Taper the new flat end so it is at the correct angle to the large nozzle shroud.

I'd recommend using CWF to fill the seams on the turbine exhaust lug before going any further. It'd be hard to fill the lug seams after all the "super" detailing to come.

Estes Thor Agena Build Part 18 Long Adapter Fill TIP

The long transition has a an angled "step" about two-thirds the way up.
I wanted to keep the edge fairly sharp.

To help keep the edge straight, the side of a pencil tip was rubbed over the outside edge.

After brushing on FNF, the bulk of it was sanded off using 220 grit on a block.
(This self-adhesive sandpaper is closer to a 320 grit.)

Some of the pencil line sides were sanded off. But, I was able still keep some of the line and the angle edge sharper, not rounding it off.

TIP: Here's another way to clean up the joint between a adapter (or nose cone) shoulder and body tube.

Fold some 400 grit sandpaper with a very sharp crease.
Open up the joint between the balsa shoulder and body tube.
Set the creased sandpaper in the open joint.
Slide the body tube down pinching the sandpaper in the joint against the shoulder.

CAREFULLY turn the balsa shoulder against the sandpaper that is wedged into the joint.
Continue all the way around the shoulder sanding down any small irregularities.

It won't take much sanding to clean up the shoulder edge. Go lightly to define a sharp line on the shoulder.
The body tube edge will help guide the sandpaper.

Wednesday, June 20, 2012

Estes Thor Agena Build Part 17 Antennas


After tapering the end to a wedge, the stick was set on the drawn template and the angled top trimmed off.


Here I've started the cut for the root edge.
I'm cutting a little outside (to the left) of the start of the taper.

I can sand the antenna to the correct width, removing any rough knife cuts.


As always, extras were made.
I'll pick the best two and throw away the seconds.

Estes Thor Agena Build Part 16 Antennas

Antennas are shown on the Exploded View and looked on as optional.

I don't know why the instruction drawings weren't full size templates, they are just slightly larger than the finished parts.

I redrew them in the correct size on the instruction sheet.

Some scrap 3/32" thick basswood was sanded down to the 1/16" thickness needed.

The antennas (before cutting off the tapered top) start as a 11/64" square.

The strip was set on my machine square and the end sanded at a 90 degree angle.
I slid the strip to the right and drew a pencil line for the root edge.


The right side was sanded to a sharp wedge shape, the pencil line was left at the 1/16" thickness.

In the end, the antenna will be cut off on that pencil line.