Showing posts with label Wet Sanding. Show all posts
Sunday, July 24, 2016
Estes Red Max Build, Part 7, Undercoats and Wet Sanding
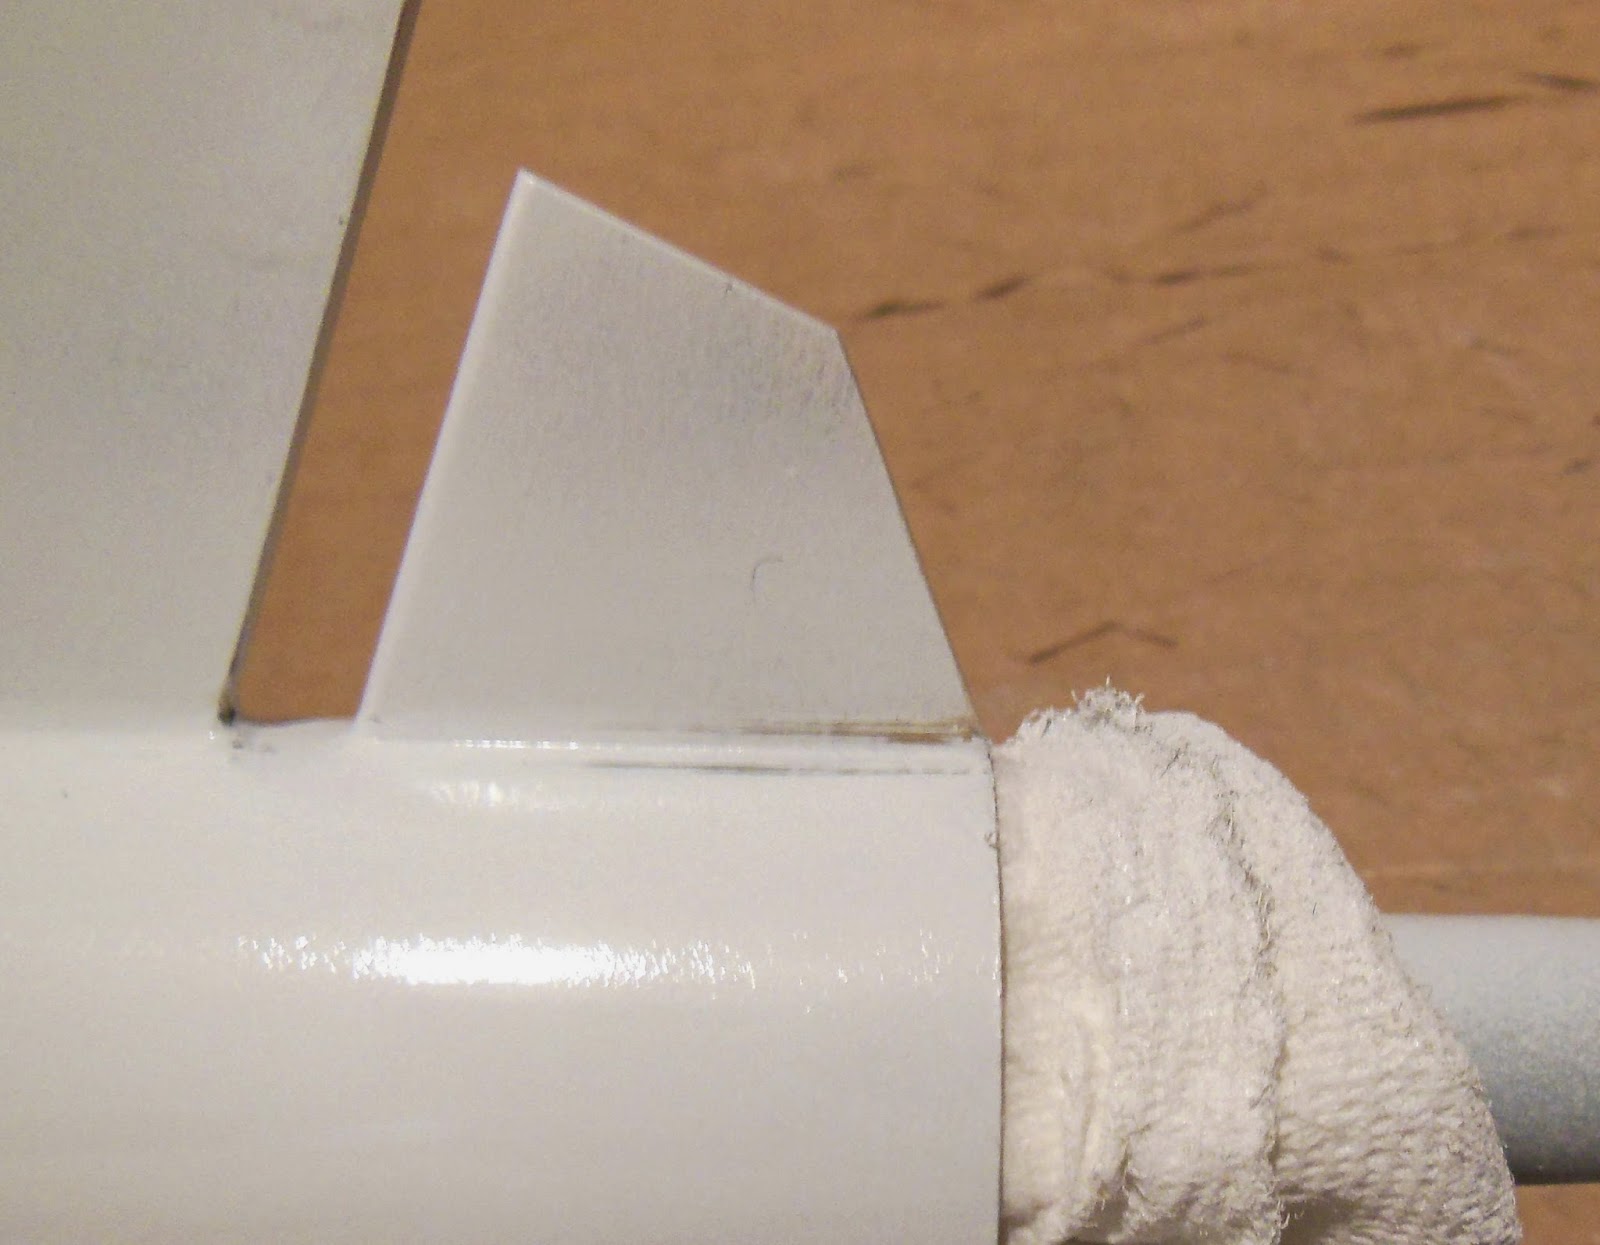
TIP: The fin positioning line is carried under the back edge of the body tube.
With the fin positioned onto the body tube, the line would be completely covered. With the line continued over the back lip you have another alignment point.
The last post mentioned how little glue is used to first position the launch lugs. The same goes for the fins.
A very thin line of glue is applied. After I'm sure the fins are in line additional fillets will make a stronger bond.
The first white coat showed the raised fin grain on a few fins.
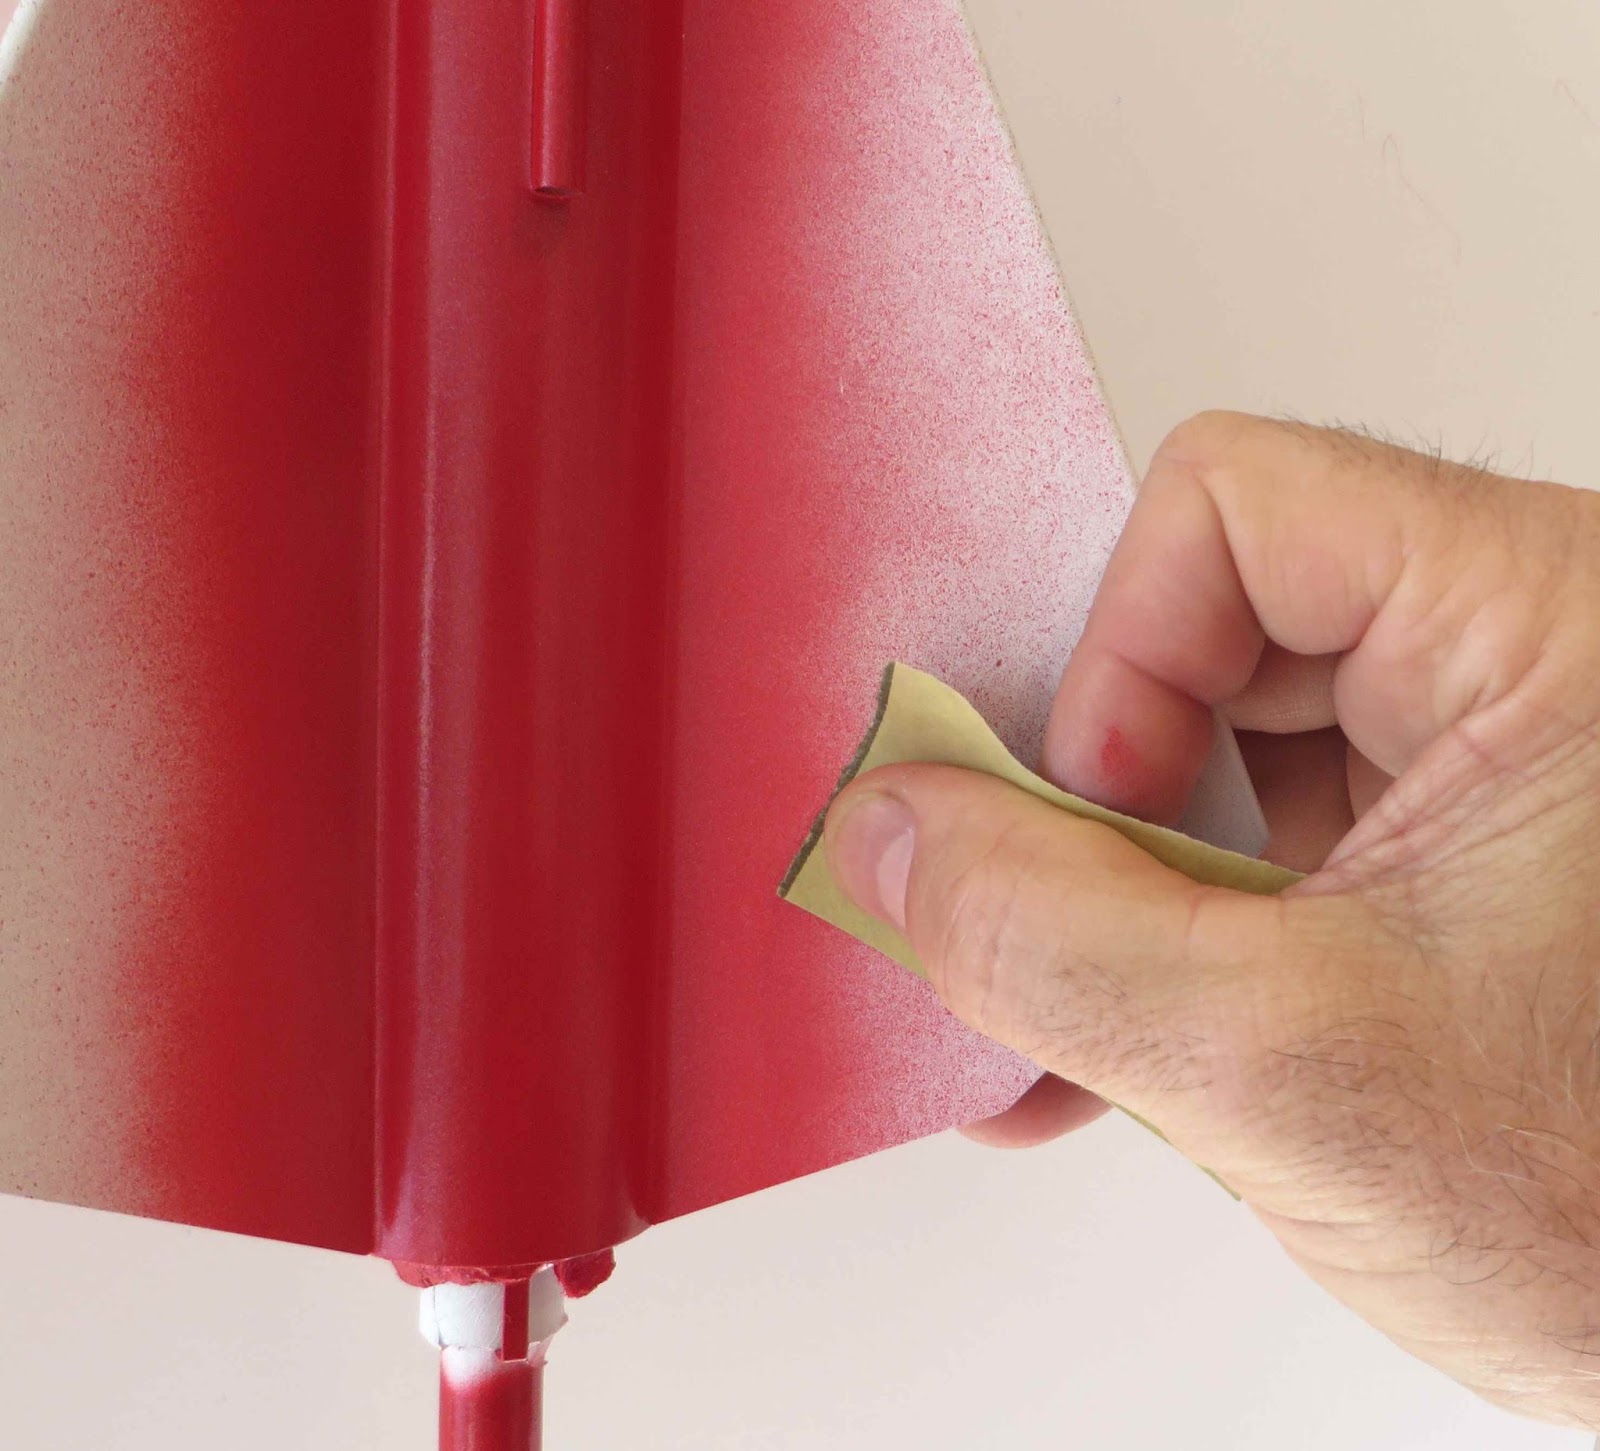
I did some some damp sanding with 400 grit. I hope these will disappear after the next white coat is applied.
The 400 grit I use now is the Norton Premium sandpaper.
It doesn't load up like the older black 400 grit did. Any paint that does stick is easily removed under running water with a soft brass brush.
Two 1" x 2" pieces were all that was needed to wet sand two Red Max kits. After brushing off the crud, the small pieces of sandpaper will be used again.
TIP: Don't use large pieces of sandpaper to wet sand your models. If you cut a larger piece (maybe 4" x 4") you'll probably sand using the just edge areas leaving the center clean. Cut that 4" square piece into smaller pieces to use the sandpaper more efficiently.
Friday, April 15, 2016
Estes Hi-Flier XL, #3226 Build, Part 16, Red Paint
The rocket is to be spray painted red and black, the decals add the third color trim.
I could have sprayed the model (and fins) an overall red but simply sprayed the tube and over the fillet areas. The black should easily cover the white and red paint after masking off the red.
Always spray light colors first, darkest last.
When a "blend' is done like this, the over spray can feel rough.
Wet sand (damp sand) the rough areas so the black will go on smoothly.
Friday, February 6, 2015
Wet Sanding Part 3
These new paint formulations can drive you nuts!
Currently I'm using Rustoleum 2X painter's Touch. It's got a LOT of pigment in it and can cover with fewer coats. That thicker pigment can clog up the spray nozzle.
I think the spraying is going fine until I check the dried surface.
The picture at the right shows a small blob of paint.
Wet sanding will let you knock down that blob and get the surface back to a decent sheen.
Wet sand first with 400 grit. Don't sand too hard, you don't want to go into the gray primer. (Then you'd have to repaint again!)
Follow wet sanding with 800 grit, then 1000 grit, 1200 grit then 1500 grit.
It sounds like a lot of work but it really isn't too bad.
Most of the sanding is with the 400 and 800 grit. After that, the finer grits take less and less passes the finer you go. The 1200 and 1500 grit papers are more like a polish. The finest grits take very little sanding. You can go up to 2000 grit if you want. All the fine sandpapers are sold in auto supply stores.
After the 1500 grit, automotive polishing compound is used, applied with a wet sponge.
Keep rubbing the polishing compound until it dissapears on it's own, then polish off with a cotton cloth. I use old cut up T-shirts.
Thursday, February 5, 2015
Wet Sanding Part 2
When wet sanding, you don't have to go all the way down to the wood surface. Just "knock down" the surface imperfections. Take the sandpaper out of the water and shake off the excess. Keep a paper towel handy for drips.
The fin on the right had some "orange peel" from the spray.
When wet sanding, I try to just knock down the roughness.
The picture shows the fin after wet sanding with 400 grit.
Try to stay away from the edges, it's too easy to sand off the paint and expose the balsa underneath. TIP: I use my finger slightly above and over the edge to act as a "bumper" to stop the sandpaper before it has a chance to roll over the edge.
The edges tend to take care of themselves, just don't get too close.

TIP: Wet sanding the body tube is easy, until you reach the ends.
My finger is set inside the edge, once again acting as a bumper so the sandpaper is pushed up before rolling over the end of the tube. The paint isn't sanded off exposing the raw tube edge.
Keep any water away from the inside bare tube.
A coating of CA glue, applied with a Q-Tip, will seal the tube ends and keep any water from soaking in.
Wednesday, February 4, 2015
Wet Sanding Part 1
A few things to consider about wet sanding:
You can leave wet/dry sandpaper in water, even overnight before sanding. It won't ruin the sandpaper.
I wet sand using water. Some use water with a drop of soap, some even use light oil.
While some have had good results, I don't wet sand filler or primer coats.
Carpenter's Wood Filler is water based, it does not seal wood fins, the nose cone or body tube. Wet sanding over CWF will break down the filler. The water will get into the tube and swell the wood.
- I usually wet sand after using color coats that have fully covered and sealed the surfaces.
- I lightly wet sand with 400 grit and finer sandpapers. Wet/Dry sandpaper is black in color.
- Keeping the sandpaper wet prevents it from getting loaded up with the surface paint that's removed from the model.
You should be able to wet sand a rocket the size of a Big Bertha with one small 1" X 3" piece of 400 grit sandpaper!
Thursday, September 4, 2014
Estes Guardian Build, Part 6, Fillet Smoothing
I've been asked how to get fillets smooth and even.
On the right are the Titebond M&TG fillets after spraying with the white undercoat. There is some roughness and ridges.
This is a white undercoat I can now wet (actually damp sand) the fillets.
400 grit was wrapped around a Q-tip end for cushioned sanding.
After sanding the sides, be sure to go around the front edge of the fin / tube joint. this is where most of the glue "boogers" will show up under the color coats.
When sanding off the fillet glue ridges, just sand off the top, don't go too deep.
Here's how the sanded fillets look. All I've done is knock down the top of the glue ridges. Some of the paint is filling the remaining dips.
Your color coats are your last "fill" after CWF sanding, then primer sanding.
Another shot off white and the color coats follow.
Keep a close eye on your sanding. Sand and check, sand and check.
Here I've sanded too far and almost went into the balsa!
On the right are the Titebond M&TG fillets after spraying with the white undercoat. There is some roughness and ridges.
This is a white undercoat I can now wet (actually damp sand) the fillets.
400 grit was wrapped around a Q-tip end for cushioned sanding.
After sanding the sides, be sure to go around the front edge of the fin / tube joint. this is where most of the glue "boogers" will show up under the color coats.
When sanding off the fillet glue ridges, just sand off the top, don't go too deep.
Here's how the sanded fillets look. All I've done is knock down the top of the glue ridges. Some of the paint is filling the remaining dips.
Your color coats are your last "fill" after CWF sanding, then primer sanding.
Another shot off white and the color coats follow.
Keep a close eye on your sanding. Sand and check, sand and check.
Here I've sanded too far and almost went into the balsa!
Tuesday, January 28, 2014
Estes Hornet Build Part 6, White Undercoats and Sanding
The fins and launch lug both got two fillets with Titebond M&TG.
Here's the model assembled. After primer sanding it's ready for a white undercoat.
The finished model is yellow and black. You'll need a white undercoat for the light yellow color.
With the white paint on you can see the Titebond M&TG boogers at the leading edge joint.
These can be sanded off using 400 grit wrapped around a Q-tip for cushioned sanding.
The front and back end of the body tube look really rough but this will be easily smoothed off with 400 grit.
The roughness of the body tube came after the filler primer was sanded down to the surface.
After 400 grit wet sanding this rough tube won't be noticeable. Some of the newer white body tubes just sand rough like this.
Here's the root edge fillets and launch lug fillets after wet sanding with 400 grit.
Remember, only wet sand after the tubes are considered sealed with paint. CWF is water based and does not seal tube seams or balsa.
Wet sanding is more like damp sanding. Be careful at the tube ends, don't let water get inside the tubes!
Saturday, December 14, 2013
Estes Paveway III Build, Part 10, White Undercoat and Sand

After the first white coat the dried the fillet boogers were sanded down with 400 grit.
The same fillet sanding was done on the back end along with a little more sanding of the tail cone joint seam.
Another coat of white followed.
The back end is gray to just above the fin can.
This mask intersects the launch lug. I should have looked ahead and planned better. If the lug was glued about 3/8" higher the mask would have been easier, but I followed the kit directions.
A small strip of Scotch tape was placed. It's easier to work around the launch lug first and then go around the tube with a longer piece. The ends of the longer piece end on either sides of the lug fillet.

After the gray mask was pulled, here's the color separation.
It's pretty clean and will be covered with an aluminum band later on.
This is the great Fixall gray spray paint mentioned earlier on the blog.
Here's the back end view.
There are a lot of complex surfaces here, most got fillets of Titebond M&TG. It came out well.
Tuesday, October 1, 2013
Semroc Cherokee D Build, Part 8, Wet Sanding Tips
Here's something I learned when wet sanding clear finishes on some homemade banjos.
The Cherokee D is a BT-55 based rocket standing almost 22" long.
The entire model was wet sanded using that one small piece of 400 grit sandpaper.
TIPS: Keep your sandpaper wet but not dripping wet.
Let the sandpaper soak in the water for a few minutes. Shake off the excess water and lightly sand a small area.
Dip the sandpaper back into the water. You should be able to rub most of the sludge off with a finger.
The water will help keep the sandpaper from loading up with the rough paint you are taking off the model.
As mentioned before, you are just removing the tops of any small paint "bumps" or "orange peel."
Before wet sanding you should have enough paint on the surface so you don't risk sanding too deep and into the body tube or balsa.
When wet sanding you are just taking some of the top surface paint off, not going down to the bare rocket surface. Leave a color coat of paint on the rocket!
Monday, September 30, 2013
Semroc Cherokee D Build, Part 7, Wet Sanding Tips
The Cherokee D got an first shot of gloss white.
I can't sand until the white coat dries, at least 24 hours in the Florida humidity.
Now that the color coat has been added wet sanding can follow.
When sanding flat surfaces, stay away from the edges.
It's too easy to sand the paint off a sharp corner.
TIP: Notice how the sandpaper is bent away from the sharp edge of the fin. The sandpaper can't roll over the sharp edge if held like this.
If you sand off the paint and go down through the primer (or balsa!) you might have to spray primer again.
To be safe, stay away from the edge by about 1/16". Those edges will take care of themselves and should be smooth in the end.
Here's how the back end looked after "damp sanding" with 400 grit sandpaper.
Look close at the fin on the upper left. I almost sanded through to the balsa! Sand, stop and check - sand, stop and check!
TIP: Pay close attention to the top of the leading edge where it meets the body tube. It's hard to get a Titebond M&TG fillet to roll smoothly around the top.
Wrap some 400 grit around a Q-tip for a cushioned (small) sanding "finger".
One great thing about the Titebond M&TG is it's sandable!
Well, it doesn't sand like a piece of wood, but it's easier to sand than a white glue fillet.
BUILD TIME - Wet Sand White = 25 minutes
TIP: After you spray the first color coat, hold the model up to a bright light and look close at all the surfaces.
Wet sand (actually more like damp sanding) with 400 grit. Sand over any rough areas.
After the next color coat is applied, all those rough areas should disappear. You should have a good gloss surface when the next coats are sprayed.
TOTAL BUILD TIME so far = 4 hours, 5 minutes
Sunday, September 29, 2013
Semroc Cherokee D Build, Part 6, Primer Coat, Sand And White Color Coat
A few small standard steps won't been covered with pictures this time.
This build was going to concentrate on build time and tips.
BUILD TIME - CA Tube Ends and 24mm Engine Mount Gluing = 5 minutes
BUILD TIME - Mark Tube for Fins, Glue Fins = 15 minutes
BUILD TIME - 2 applications of Titebond M&TG Fin Fillets (not including drying time between fillets) = 12 minutes
BUILD TIME - Launch Lug Mark and Glue = 3 minutes
TOTAL BUILD TIME so far = 3 hour, 5 minutes
TIP: You really don't need four coats of filler/primer and sanding between coats.
I spray one thicker coat and sand with 320 then 400 grit until the tube and surfaces look like the picture at the right. Remove most of the filler with 320 grit. If you sand down to the white tube while using the 320 grit you've probably taken too much primer off. Follow with the 400 grit until you get that "patchy" look.
BUILD TIME - Primer Spray (not including drying time) = 5 minutes
BUILD TIME - Sand Primer, 320 then 400 grit = 20 minutes
BUILD TIME - First White Coat = 5 minutes
I can't sand until the white coat dries, at least 24 hours in the Florida humidity.
TIP: After you spray the first white undercoat, hold the model up to a bright light and look close at all the surfaces.
Sand over any rough spots. Wet sand only after the first color coat. Don't wet sand on bare tube or bare wood. Bare surfaces will soak up any water used in wet sanding and swell up! Only wet sand over sealed surfaces.
Wet sand (actually more like damp sanding) after color coats with 400 grit.
After the next color coat is applied, all those rough areas should disappear. You should have a good gloss surface overall.
As always - these are the methods that work for me.
Your methods (and finished results) probably work best for you!
TOTAL BUILD TIME so far = 3 hours, 35 minutes
This build was going to concentrate on build time and tips.
BUILD TIME - CA Tube Ends and 24mm Engine Mount Gluing = 5 minutes
BUILD TIME - Mark Tube for Fins, Glue Fins = 15 minutes
BUILD TIME - 2 applications of Titebond M&TG Fin Fillets (not including drying time between fillets) = 12 minutes
BUILD TIME - Launch Lug Mark and Glue = 3 minutes
TOTAL BUILD TIME so far = 3 hour, 5 minutes
TIP: You really don't need four coats of filler/primer and sanding between coats.
I spray one thicker coat and sand with 320 then 400 grit until the tube and surfaces look like the picture at the right. Remove most of the filler with 320 grit. If you sand down to the white tube while using the 320 grit you've probably taken too much primer off. Follow with the 400 grit until you get that "patchy" look.
BUILD TIME - Primer Spray (not including drying time) = 5 minutes
BUILD TIME - Sand Primer, 320 then 400 grit = 20 minutes
BUILD TIME - First White Coat = 5 minutes
I can't sand until the white coat dries, at least 24 hours in the Florida humidity.
TIP: After you spray the first white undercoat, hold the model up to a bright light and look close at all the surfaces.
Sand over any rough spots. Wet sand only after the first color coat. Don't wet sand on bare tube or bare wood. Bare surfaces will soak up any water used in wet sanding and swell up! Only wet sand over sealed surfaces.
Wet sand (actually more like damp sanding) after color coats with 400 grit.
After the next color coat is applied, all those rough areas should disappear. You should have a good gloss surface overall.
As always - these are the methods that work for me.
Your methods (and finished results) probably work best for you!
TOTAL BUILD TIME so far = 3 hours, 35 minutes
Thursday, July 26, 2012
Wolverine Rocketry Phoenix AIM-54A Build Part 21 Wet Sanding
After spraying the fins with the first coat of white, I had some sanding marks and near "sand-throughs" showing. It looks like I didn't smooth enough with the 400 grit after the initial sanding with 220 grit.
These rough areas will need to be smoothed out.
After the color coats have started, you can consider the wood to be sealed well enough for some wet sanding.
Wet Sanding isn't really WET!
Dip some wet and dry sandpaper in water and shake off the excess water.
Sand a bit and wipe off the "mud" with a paper towel.
Be very aware of the body tube ends, the inside bare surfaces can absorb water and swell up!
When I wet sand I'm only knocking down the surface a little bit. Don't sand down to bare wood - just lightly take off the "top" of the painted surface.
To put it another way, you are dulling the gloss paint a little.
Maintain the sharp tapered edges you've already shaped.
Notice in the picture the edge of the sandpaper only goes up to the sharp edge.
Not over the "ridge"
When I'm wet sanding, I don't sand over the edges. They'll take care of themselves.
This is the same fin after wet sanding.
Near the trailing edge you can see the balsa starting to show through.
I almost sanded to far here. If water gets into the wood fibers you'd probably have to prime and sand again.
After re-shooting with the white you can see the difference.
The flash makes the surface look "pebbled". In person the finish is smooth.
These rough areas will need to be smoothed out.
After the color coats have started, you can consider the wood to be sealed well enough for some wet sanding.
Wet Sanding isn't really WET!
Dip some wet and dry sandpaper in water and shake off the excess water.
Sand a bit and wipe off the "mud" with a paper towel.
Be very aware of the body tube ends, the inside bare surfaces can absorb water and swell up!
When I wet sand I'm only knocking down the surface a little bit. Don't sand down to bare wood - just lightly take off the "top" of the painted surface.
To put it another way, you are dulling the gloss paint a little.
Maintain the sharp tapered edges you've already shaped.
Notice in the picture the edge of the sandpaper only goes up to the sharp edge.
Not over the "ridge"
When I'm wet sanding, I don't sand over the edges. They'll take care of themselves.
This is the same fin after wet sanding.
Near the trailing edge you can see the balsa starting to show through.
I almost sanded to far here. If water gets into the wood fibers you'd probably have to prime and sand again.
After re-shooting with the white you can see the difference.
The flash makes the surface look "pebbled". In person the finish is smooth.
Subscribe to:
Posts (Atom)