Monday, December 31, 2018

TOP TEN BUILDS for 2018, Part 2

There's a two-way tie for fifth position in the countdown.
(I can't take all this excitement!)


5. Estes CITATION PATRIOT
You gotta love a big, dumb rocket! Okay, not really dumb.
This reissue kit was very well produced with big, tricky water slide decals!
To see the build: CLICK HERE


5. Quest STRIKER AGM
Not the greatest kit but was fun to paint and decal it like the Enertek Astro 2000. Fin fit always seems poor against the plastic boat tail.
To see the build: CLICK HERE


4. Apogee MINI CONDOR B/G
I've never had much luck with boost gliders until NARAM 60. After some test tosses my first flight had a tight turn for 25 seconds. There was too much weight on one wing tip. I guessed and pinched off a bit of clay.
The next flight duration was over 3 minutes long! The timers could only see it for a minute and a half, it didn't circle. A LONG recovery walk!
For the build: CLICK HERE


3. Estes DRAGON SHIP 7 Clone
A very involved build for the NARAM 60 Classics competition. I got high build points, but my documentation was sorely lacking. The judges wanted it to look just like the Estes catalog page. Over the gray paint, my orange decals ended up looking maroon.
For the build: CLICK HERE


2. Vashon VALKYRIE II
I'd been looking (and Ebay bidding) on original Vashon V2s for a few years. This was the first model rocket I ever owned in wais missing but I cobbled together a look-alike. The parachute tube is a BT-50H with a wrap of chrome Trim Monokote. The nose cone was fashioned from a balsa cone in the spare parts drawer.
For the build: CLICK HERE

And the NUMBER ONE build and probably best kit of the year -

1. BMS SATURN V
A very well engineered kit. Just the right amount of detailing in a manageable size.

On the blog in 2018 - 
23 Models were built. The Semroc Saturn 1B and Orbital Transport aren't included, they are still under construction.
According to my Flight Log on rocketreviews.com, I had 82 Launches in 2018, 29 more than in 2017.

To see previous year Top 10 listings, do a search for "Top 10" in the search bar on the upper right.

Sunday, December 30, 2018

TOP TEN BUILDS for 2018, Part 1

Each year I look back on the builds and pick the Top Ten.
These countdown from 10 to 1, from the worse to the best kits.
Some choices are personal and might not agree with your experience.
But, it's my blog . . . so there!


10. Model Missiles LEDUC 22
Sorry, this was a terrible card stock and foam build. I can build most kits, but sometimes you have to throw in the towel and admit defeat. Badly fitting parts and a few hours lost.
To see the incomplete build: CLICK HERE


9. CMR POP LAUNCH LUGS
I made a few of the old CMR style pop lugs for NARAM 60. These may have helped win competitions in the 1970s, but weren't effective against the piston launchers I saw in August.
For the build: CLICK HERE


8. Estes SCISSOR WING TRANSPORT
This one brought me back to my teens except for the plastic swivel hub and stick on decals. You don't put stickers on a classic model reissue.
For the build: CLICK HERE


7. Estes SAROS Clone
Another rocket I never owned in my teens. It was interesting to replicate the plastic tail cone from tubing, card stock and couplers. Disappointing that it wasn't stable! Nose weight added.
For the build: CLICK HERE


6. Estes MINI MARS LANDER
A fun downscale of the classic kit. The simplified lag details still capture the feel of the original. Even with a clear coat, the old decals were trouble.
For the build: CLICK HERE

The Countdown continues tomorrow!
To see previous Top 10s, do a search for "Top 10"

Saturday, December 29, 2018

Yikes! Custom Engine Mount on Ebay

Here's one I found on Ebay:

"Custom made model rocket mount for A-C size engines for RC cars, boats, airplanes, etc. I couldn’t find any mounts for rocket engines that wasn’t for a rocket, so I made my own.

Color, shape, and size will vary, but if you send me a message for customization, I’ll be glad to fit your needs such as a unique shape, screw holes, compatible for zip ties, blockage for back thruster, etc

Does not come with a rocket engine.
This product has not been tested, but if your mount break, I’ll be glad to replace it or repair it for free.
Model rockets are flammable and dangerous. Use this at your own risk.
This product is made out of polylactide is a biodegradable and bioactive thermoplastic aliphatic polyester derived from renewable resources, such as corn starch, cassava roots, chips or starch, or sugarcane.

The material is not fire resistant and will burn, melt and possibly catch fire if exposed to the rocket’s flame. If used as intended, it should not cause any problems with the mount. The mount is tightly fitted to the rocket and might require nose slip pliers to remove with a twist turn."

Only $2.99 and $3.50 for shipping.

I always wondered how cassava roots would work in an engine mount. 
Well . . . it is colorful.

Estes Orbital Transport, Kit #K-42, Part 11, Glider Surface Fill & End Disk


The glider wing and rudder parts are cut from 1/16" thick balsa.

I hand picked out some balsa with very little grain.


I rarely use the Hobby Lite filler. It's not really good for general rocket building but should be lighter than CWF and primer/filler.
The filler was dry and needed water and a lot of stirring to mix to a good consistency.

The filler was rubbed into the grain with a fingertip and the excess removed with a credit card.

The rear of the glider tube gets a round disk, Estes called it a NB-20B. I don't have that part handy.

To get close to the thickness, I laminated four layers of 110 lb. card stock. A glue stick was used and the layers dried in a heavy book.


A pencil tracing was done around the BT-20 tube.


The disk is cut our with scissors. Any bumps are rounded out with sandpaper before gluing onto the tube end.

Here's the flat bulkhead glued onto the tube.
The overhang was sanded to match the outside diameter of the BT-20. A wrap of masking tape prevented me from sanding down the tube end.

Friday, December 28, 2018

Estes Orbital Transport, Kit #K-42, Part 10, Decal Correction

Working a bit ahead - I wanted the decals to read "ASTRON" like the original Estes kit. The decals I bought from Semroc read: "Semroc Astronautics Lines". This is not a big deal, I just wanted it to read like the model I built in the 1970s.


To get an approximate point size, I measured the decal words "Astronautics Lines". Those two words were 1.64" wide.
I went into Corel Draw and found the Arial Bold font to be very close to the original used.
I set the words "ASTRONAUTICS LINES" to 1.64" wide. That made the type font 9.742 points.

Read aloud, it sounded redundant. Then I realized the Estes kit wording was "ASTRON AEROSPACE LINES".


Here's what I ended up with for the main booster and glider bodies.
If you would like these decals, Patreon members can email me at oddlrockets@bellsouth.net
and ask for the Orbital Transport PDF.

Estes Orbital Transport, Kit #K-42, Part 9, Launch Lugs Alignment

The printed PDF tube marking guide probably wouldn't fit the BT-50H heavy wall tube. I went to payloadbay.com and entered the 50H diameter and an eight fin count.
This fit the tube perfectly. The tube was marked for all the fins with pencil lines.

OOPS! While I could use 4 of the 8 equal spacing lines for the lugs and main wings, it turned out that the Ventral Fins and Spacecraft Support pieces are not equally spaced!
Use the kit supplied fin space wrap for the smaller body fins.


TIP: You could just glue the dowel standoff onto the tube. I sand a very slight "flat" on the bottom of the dowel. It's a minor adjustment that gives a stronger bond.


I checked the alignment of the two lugs using my aluminum angle.

Double check to be sure the lugs and standoffs are sitting up straight as the glue sets.


The forward lug was glued on 8 1/2" from the front end of the main body tube.

The lug and standoff is right below the 8 1/2" mark.

Thursday, December 27, 2018

Estes Orbital Transport, Kit #K-42, Part 8, Launch Lugs & Standoffs


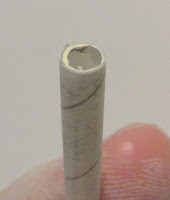
Two launch lugs are cut to 5/8" long.

I usually sands the ends flat and square with 400 grit on a block.
The Mylar skin usually rolls over on the inside. Pick it out with the tip of your knife and sand it off.


Reform the inside of the lug with a sharpened pencil or dowel. Turn the dowel in the direction of the seam wrap so it doesn't unravel.

The right side picture shows the dressed lug end.

I cut the dowel standoffs a bit long and glued them to the lugs.
The long standoffs are sanded to the length of the launch lug.

There really isn't a need for the dowel standoffs. In 1969 Estes might have thought it would be a better match for their C-Rails.
The end of the engine mount tube extends 1/2" out the back of the main body tube. The seam was filled and sanded. Filler/primer followed with sanding to surface.

The engine mount was glued into the main tube.
TIP: Notice the 1/2" mark is extended all the way around the tube. When gluing the mount you are working against the clock, before the glue starts to set up. With the 1/2" line drawn all the way around you won't be searching for a short pencil line.

Wednesday, December 26, 2018

Estes Orbital Transport, Kit #K-42, Part 7, Scramjet Assembly


I checked the filled scramjet housing top piece from the laser cut sheet from BMS. I thought maybe I had sanded the piece smaller. The part may have been cut too small.


The new center piece was longer and extended beyond the front of the top cover!

More trimming and filling.


There - that's better!


The top cover was glued in place.

I rolled a round pencil over the piece to even it up with the sides.


The assembly was turned over and the center vane piece was glued in place.

Tuesday, December 25, 2018

Merry Christmas!


Here's hoping Santa left a rocket kit 
or two under the tree!

Merry Christmas to all -
And to all a Good Flight!

Estes Orbital Transport, Kit #K-42, Part 6, Scramjet Assembly


The open inside ends of the tubes got a wipe of CA glue.

Sometimes I'll fill the inside seams if they are visible on the finished model. These scramjet tubes are BT-5 and small and not easy to fill.

All the outside tube seams were filled with CWF and primer/filler.


Two sets of tubes are glued side by side.

The instructions have you glue the ramjet assemblies onto the wing. I'll fill the balsa and assemble them off the model. There is no way to fill the grain when everything is glued up.


You'll notice that the Scramjet assembly parts are already CWF filled and the primer/filler sanded before assembly off the wing.
There is now way to fill the naked balsa after it would be glued to the bottom of the wing.


The sides are glued on first with 1/2" of the tubes extending out the back.

I used my machine square to be sure the sides were glued on straight.


The 1/16" thick top pieces were short!

I'll have to cut and fill new pieces that will reach all the way across.

Monday, December 24, 2018

Estes Orbital Transport, Kit #K-42, Part 5, Wing Assembly


I had already filled the large rear wing pieces and then realized I didn't include the long forward strake!

I filled the strakes with CWF. After they are glued on the assembly will get a shot of Filler/primer and sanding to fill the seam.


GOTCHA: Interesting that the instructions have you glue the wing on and round the leading edge - except for 3/4" at the root for the strake gluing. This isn't the best way to get a smooth joint. I'd recommend gluing the strake on the wing first, smooth the joint, then glue the entire wing assembly to the body tube.


Before gluing, check the fit of the strake against a strait edge.
Sand the short edge now, the before is on the left. If you glued the strake on without fitting it, you would be stuck sanding the root edge flat.


The strake edge was rounded before gluing onto the main wing.
The leading edge of the wing will be rounded.

After the glue dries, round the leading edge of the wing up to and meeting the round edge of the strake.


There might be a small lip in the corner.
I wrapped some 400 grit around the Q-tip stick to smooth out the inside corner.

Sunday, December 23, 2018

Estes Orbital Transport, Kit #K-42, Part 4, Cutting Out The Balsa


I double checked the squareness of some parts with my machine  square. Hold the balsa and square up to the light to check it.
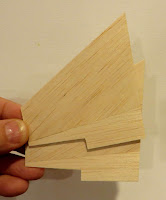
The two large wing pieces are glued together.
Here they are under my trusty clear cutting board. The top has a pebbled surface, the underside is smooth.
With the counter top underneath, this provides an even heavy pressure for gluing.


Here's how they came out.
It took very little surface sanding to smooth out the joint.

There was some slight sanding at the root edge to get both pieces flat for gluing onto the body tube.
I tried a dry fit of the the scram jet engine housing.
After doing this I knew the balsa would have to be filled before assembly. The short BT-5 tube seams will be filled before gluing them side by side.

Most of the wing edges remain square, the angle cut pieces in the housing will be rounded.

Saturday, December 22, 2018

Estes Orbital Transport, Kit #K-42, Part 3, Cutting Out The Balsa

Look at all the fin templates! In the kit these were printed on light card stock.
NO die cutting, No laser cut fins in 1969. You would cut out the template, trace with pencil on the balsa (follow the correct wood grain!) Then cut them out with a sharp knife.
The matching pieces may not be cut the same so stack them and sand both with a block.


There were 32 balsa pieces in all!
I remember it taking a while to cut them out. I kept track this time -
Cutting out the templates - 20 minutes
Tracing and cutting the balsa pieces - 1 hour, 5 minutes
Stack and sanding - 20 minutes
1 hour, 45 minutes total 


When you trace templates with a pencil, you'll probably end up cutting them a little large.
I used the card stock templates as a size guide and sanded to balsa to what I thought was the correct size.

I checked the sizes of the pieces against a laser cut O.T. set from BMS. The JimZ's templates printed up bigger than the original kit size.
While I appreciate having the instructions online -
EVERY SCAN SHOULD HAVE A 1" REFERENCE SQUARE!
I had to go back and size the pieces to the BMS laser cut parts.