Showing posts with label Custom. Show all posts

Thursday, March 28, 2019

Custom SLV Build #10044, Finished


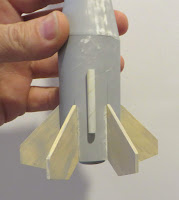
The picture at the left shows the wrap edge matches.
This is a detailed model at a good price. There were a few glitches along the way, the miss-matched lower shroud could be a problem for a younger builder. This is listed as a Skill Level 4 kit.

While I'm not a big fan of stickers, the trim looks great. Two main colors in white and black with the third smaller orange trim.

Wednesday, March 27, 2019

Custom SLV Build #10044, Part 12, Sticker Trim - Clear Peel & Stick


There is still one more large white paper shroud sticker.

There is no reference for the starting position. Set down lightly, check the end alignment, lift and try again until everything lines up.

Again, notice the seams all start and finish down the launch lug line.

There are numbers that go between every two facing fins. Using a knife blade tip for positioning is easier than using your fingers.

The face card shows small square stickers under the numbers. These probably should have been printed on the sheet directly below the numbers so both could be set down at the same time. I left them off.
The UNITED STATES clear sticker goes down the upper tube, centered between the other decor bands.
Notice the center pencil marks. Mark the tube area center and mark the sticker. This saves you some time when getting the sticker in the right position.


GOTCHA: While the rocket design looks good, there isn't much room for the parachute in the upper short BT-50 tube. I'll probably have to fold the 12" chute in half and work it into the lower BT-20 tube. It won't fit into the BT-50 section when you add wadding and the length of the nose cone shoulder.

Monday, March 25, 2019

Custom SLV Build #10044, Part 11, Sticker Trim - White Peel & Stick

The kit includes two small sheets of peel and stick decor, one white paper and one clear plastic. I applied the white roll patterns first.

Always do a dry fit before peeling off the backing paper.
Here I found out the wrap didn't meet up, so position the ends (start and finish) in the back down the launch lug line.


There is a small gap but it won't be seen with the launch rod behind the model.
TIP: Face all the gaps and seams in line - on the back side of the rocket.


There are no cutting guidelines so I cut them close and hoped for the best.


You are able to position and lift the stickers a few times to get the positioning right. It took a few tries to get the ends to match up.

I did another masking tape line to help with the visual gap spacing at the top. The correct fit of the wrap is also dependent on where you start the wrap, higher or lower on the shroud.

Custom SLV Build #10044, Part 10, Masking Fins & Dowel Trim


All six fins are masked and painted gloss black.

Even though the fin leading edges were left square, I still do a diagonal mask over the top corner tips. On the left there is one diagonal corner masked off. I've yet to add the second piece on the lower side. This just leaves off the corner ticks.
I thought the dowels would be too hard to paint with a brush after they were glued on, centered at the two BT-20 body tube joint. I painted them  black earlier.
I only used six of the eight dowels.

A strip of masking tape was rolled on for low end positioning. A pencil line was drawn and the paint carefully scraped for best glue adhesion.


The dowels were glued on and in line with the six fins.

Just like the stick on decals cover up the shrouds,  the dowels visually camouflage the body tube seam joint.

Sunday, March 24, 2019

Custom SLV Build #10044, Part 9, White Undercoat & Sanding


TIP: I'll usually paint a model with the nose cone slightly pulled out, maybe 1/16". This gets a bit of paint inside the shoulder. When the model is on the launcher sometimes the nose cone isn't fully seated in the tube. If you take a picture before the flight you won't see the unpainted shoulder. In this kit, the nose cone is black plastic.


Here's the model after the first white undercoat has dried. I've done some light sanding on the surfaces, smoothing out any glue blobs. Look close at the launch lug fillet. I did have to sand down through the paint to smooth it out.

The body tubes joint wasn't smooth. After sanding I could see this would require another white coat, sanding again and then a final coat of white.


The shroud joints also needed more sanding. The paint does act like a final filler after the sanded CWF and filler/primer coats.

Here's both of the shroud adapters after the last heavier coats. The final finish coat should be applied slower and thicker, but not heavy enough to cause runs.

Interesting thing about this Custom kit, the sticker decor does help cover up any flaws in the shrouds.

There is a little distortion in the pictures, the shrouds are actually on straight.

Saturday, March 23, 2019

Custom SLV Build #10044, Part 8, Fin & Launch Lug Gluing

The instructions say to glue on the dowels centered over the tube joint. They are painted black afterwards with a small brush.
The dowels would be hard to paint black after gluing in place.

I set them down on a strip of masking tape and hit them with a coat of filler/primer. The backs won't get any paint so they can be glued to the tube later.
After sanding the dowels were stuck down again and sprayed gloss black.


The six small fins were glued onto the lower BT-60, even with the end of the tube.

After three were glued on, the remaining three fins were glued between those.


I probably should have scraped off the launch lug locations before the fins were glued on. I was able to scrape the filler/primer for a glue line but had to be careful between the fins.


The builder has to assemble the 12" parachute.
The tape disks and shroud lines are adhered the old school way, a simple loop of the shroud line and a tape disk.

I wanted a stronger attachment. The disk was pressed in place, a hole punched and the shroud line tied on.

Custom SLV Build #10044, Part 7, Dowel Trim


Two dowels are provided for trim. Short lengths go over the joint between the two body tubes.

Sand the dowels smooth with 400 grit before cutting them to length.

Both dowels are cut to 1 1/2" lengths, four lengths from each 6" dowel.
GOTCHA: I checked the length and found the dowels were just short of the 6" length needed. I wanted all eight dowels to be the same length so I cut them all a little short at 1 7/16" long.

TIP: It's easy to roll a knife blade over a dowel to cut it. It's also very easy for that cut line to travel.
Go slow - Roll forward a half turn around the dowel then roll back to your starting pint. Roll back a half turn and joint the cuts.
Make sure the blade is perpendicular to the dowel and take it slow until the cut line is established.


Before filler/primer is sprayed, set all the dowels on a straight edge to be sure they are all the same length.

Friday, March 22, 2019

Custom SLV Build #10044, Part 6, Upper Shroud & Tube Gluing


On the left I'm rolling off the inside burrs so the ring will slide over the BT-20 a little easier.

On the right are both 20/50 rings stacked and glued even with the top of the second upper BT-20 tube. 
The instructions say to apply a ring of glue 3/4" from the bottom of the lower ring. A dry fit showed the glue line should go a little below that. Dry fit the shroud and trace the low edge with a pencil to find the line.
Note there is very little glue where the shroud edges will make contact.


TIP: Before gluing any two tubes together with a coupler, sand the ends flat and do a dry fit. You might be surprised how many kit tubes are not cleanly cut.


After the tubes were joined the assembly got a shot of filler primer and fine sanding. There were some high areas especially around the seam joints.

Thursday, March 21, 2019

Custom SLV Build #10044, Part 5, Lower Shroud Assembly

Looking ahead in the instructions -
The two remaining 20/60 rings are glued together. These will support the base of the card stock shroud.
TIP: Plan ahead - Be sure you have a good fit over the BT-20 tube before gluing the rings inside the shroud base. You wouldn't want to have any problems trying to force a tight fitting ring over the BT-20 with the flexible shroud on top.


The ring is lightly pressed in place with no glue. Try to get it evenly spaced around the edge.

TIP: Apply a LIGHT glue fillet around the edge, applied with a Q-tip. You won't need much glue, too much glue could soften and deform the shroud edge.
TIP: Don't just blindly glue the card stock adapter in place. Slide it down and check the fit. Rotate the shroud around the tubes until you find the best fit at the joint. Mark the best fit with pencil on both parts (see left). At the top, draw a pencil line around the top of the shroud. This is your glue line for the top joint.

Apply a small bead of glue on the top of the BT-60 and a hair below the pencil line.
DON'T USE MUCH GLUE! You wont need it.

Slide the shroud down the tube from the top, turn the shroud and line up the pencil "best fit" lines.

TIP: While the glue is still wet, "mold" the wet soft edges with a Sharpie barrel or smooth, clean dowel.

Wednesday, March 20, 2019

Custom SLV Build #10044, Part 4, Shrouds - Oops!


After trying to form one of the larger lower shrouds I found a problem.

GOTCHA: Look at the ruler next to the shroud sides. One side is 1/32" wider than the other! You couldn't get a good fit on the BT-60 side of the adapter.


Here's what I mean - 
The wide end of the shroud is uneven.

TIP: Always scan and print up extra shrouds. You never know when you might need extras. I wish every kit included more than one!


Here's my quick-fix -

I cut the arc a little wider on the outside. It's worth a try!

Tuesday, March 19, 2019

Custom SLV Build #10044, Part 3, Engine Mount Placement


Here's how the instructions say to lay in glue beads in the 3" BT-60 tube. When assembled, the top and bottom rings are to be flush with the ends of the body tube. The instructions imply a lot of glue, on all parts.
I cut the replacement BT-60 tube at 3 1/16" so I could have an overhang and a fillet ring at the bottom.


The top rings will be flush with the tube edge.
A ring of glue was applied around the inside top after the bottom rings were slid in - otherwise most of the glue would be slid around throughout the inside of the tube.
On the left is the top ring, flush with the edge of the BT-60 tube.

On the right is the back end. You can see the slight body tube lip extending beyond the ring face. This allows me to apply a glue fillet in that lip edge.

Monday, March 18, 2019

Custom SLV Build #10044, Part 2, Lower Body Support Assembly

The kit supplies six 20/60 centering rings. These are die-cut, thinner than what you might find in a current Estes kit. That's fine, the way they are used makes for a very strong internal structure.

TIP: With die-cut rings you will have one side that is slightly rounded. Plan ahead - use that rounded edge to your advantage. Push the tube in rounded edge first, not the squared edge on the other side. You'll usually find a smoother fit without rolling back the edge of the body tube.


The first ring is glued 3 1/4" from the rear of one of the BT-20 tubes.


A 2050 ring butts up against the larger ring and is glued in place.

A second 20/60 ring is pushed up against the 20/50 ring and is glued.


At the rear the same 20/60, 20/50, 20/60 "sandwich" is done again, this time with the forward ring 1/2" from the end of the tube.
The engine block is glued in.
The yellow spacer tube is marked at 1/2" and presses the block in up to that mark.

TIP: There is no engine hook on this model. While the instructions suggest friction fitting the engine for flight, I'd recommend a simple wrap of tape around the exposed tube and engine.

Sunday, March 17, 2019

Custom SLV Build #10044, Part 1, Parts


From the Custom Rockets website:
"Satellite launch vehicle. Impressive, slow liftoffs that look so real. Features injection-molded plastic nose cone, six die-cut balsa fins, and 12” parachute recovery. Self-adhesive decals. Flights of over 750 feet."

This is one of three, Skill Level 3 kits from Custom. I've build their PONG and Nomad kits in the past. I've launched the Nomad 17 times, most often with B6-4 engines.

This is a tall model at 23.5 inches and in today's market, a good value at $13.49 retail.
It's a fairly involved build with two card stock reducer shrouds and six small balsa fins.

If I remember correctly, this kit was purchased on Ebay. It was sent in a padded envelope and one of the BT-20 tubes was bent. There is a 3' length of BT-60 tube not shown at the right. That BT-60 was also crimped. I'll have to look in the spare parts drawer for replacements.

The six fins are die-cut balsa.
Parts of interest:
The yellow launch lug seems thicker walled than normal. It also has deep seams.
A 24" length of 1/4" elastic shock cord. Considering the small parachute pack area I'll probably switch out for some 1/8" elastic.
The kit included one sheet of two card stock shrouds. I probably scanned and printed more before setting this build aside.
The molded plastic nose cone is very good quality. The finished model will be white overall with black fins. I wish the nose cone was a lighter color.


The upper sheet is some pressure sensitive decor, peel and stick printed on white stock.

The lower peel and stick "decals" are printed on clear plastic film.

Wednesday, November 26, 2014

Custom P.O.N.G. at Seattle Museum of Flight


Bill Stine referred my name to Custom Rockets about building a Custom PONG kit for the Seattle Museum Of Flight rocketry display. I had one upstairs, finished and never flown! CLICK HERE
The is the same model that was built on the blog. It was to sent to Custom Rockets for consideration.


At the last NARAM, submitted models were voted on to be included in the Model Rocketry display. CLICK HERE 
Along with the chosen NARAM models, each major rocket kit vendor will have a model from their product line. This PONG model will represent Custom Rockets.