Showing posts with label E Terra GLM. Show all posts

Friday, October 16, 2020

Estes Terra GLM #7292 Build, Finished


I really like the heavy walled tube on this kit.
It's considered a "Beginner" kit, but there is still some construction involved.
The colored body tube wrap is very well applied.
The new ramjet nose cone looks pretty sharp.

Thursday, October 15, 2020

Estes Terra GLM #7292 Build, Part 5, Decal Stickers


The sticker "decal" edges are pre-cut. The borders seem a little wide. The fold in the picture shows how wide they are.

I re-cut the border edges closer to the prints.


The instructions show the stickers being added after the fins are glued in place.
TIP: I prefer to place the wrap stickers first, then glue the fins on. It's easier to do the bolt line strips in one long piece instead of cutting them to length around the fin edges.

The masking tape wrap gives me a alignment line for the sticker edge.


After the strip is in place, cut thru the strip over the fin slot.

TIP: Cut through the center of the strip, don't trim off the overhang. Let the overhang fold in when the fin tab is pressed into the slot. You'll get a tighter fit of the fin with the folded in sticker ends.

Wednesday, October 14, 2020

Estes Terra GLM #7292 Build, Part 4, Fins, Nose Weight & Nose Cone Fit


The three fins fit well into the pre-cut slots in the body.

TIP: You can glue the fins on now, but it's easier to apply the bolt strip stickers as a wrap, first in one piece. Place it as a single strip, instead of in three separate pieces. The stickers are shown in the next post.


TIP: The instructions always say to make "snakes" out of the clay nose weight.
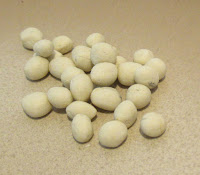
Instead of chasing the clay snake around the inside of the nose cone with a dowel, cut the clay into small pieces and roll those into little  balls. Drop them into the hole in the NC shoulder a few at a time. Press in with a dowel tip.


The nose cone fit was loose.

TIP: I built up the inside wall with more of the Beacon Fabri-Tac. A bead of glue was applied and smoothed with a finger. After that dried the nose cone was dry fitted. More glue was added until a better fit was obtained.

Tuesday, October 13, 2020

Estes Terra GLM #7292 Build, Part 3, Launch Lugs & Shock Cord Mount


On the left is the square openings for the launch lug tabs.

TIP: On side of the lug has mold marks. Turn the lug over so they face the bottom and won't be noticed.


Looking from the rear both the two lug pieces line up. They also line up with the engine hook.

TIP: When you can, glue on the launch lugs in line with the engine hook. When sliding the rocket down the launch rod, this sets the engine hook to the back keeping it away from the micro clips and igniter wires - if you bend the igniter wires forward.


On the left is what's left of the plastic tree and two pieces you don't use in the build. On the upper left is the interior shock cord clip and down on the lower right is a third launch lug segment.


The shock cord "cowl" is glued on, over the upper hole in the body tube.
The rubber shock cord is fed through and knotted. The knot end is pulled under the cover.
TIP: Use tweezers to stuff the cord end under the hood.

Monday, October 12, 2020

Estes Terra GLM #7292 Build, Part 2, Engine Mount Gluing


The engine mount tube is notched for the centering ring plastic caps. Be sure you have the long notch at the top. Dry fit the rings to be sure the notches are in the right positions.


Look at the bottom of the upper notch. There is a gap for the top bend of the engine hook.

I used the Beacon Fabri-Tac for the plastic to tube joints.


Here's a closeup of the upper ring slid in about halfway.

After the top and bottom rings are glued in place, center the engine mount section with the upper extension over the engine hook. The hole at the top is for gluing on the launch lug base later.


There are three sides to the engine mount internal supports.

On the left you can see the slot for the TTW fin tabs.

Below right: There is a raised line and notch in the side pieces. Dry fit to be sure, then apply glue.

Saturday, October 10, 2020

Estes Terra GLM #7292 Build, Part 1, Parts


The new Terra GLM kit comes boxed.
The plastic fins were originally used in the AGM-57X Heatseeker kit, introduced in 1998.
The Heatseeker kit was an "E2X" or Easy 2 eXecute.
The new Terra GLM is listed as a "Beginner" kit.


Here's the specs -
B4-4, B6-4 and C6-5 engines are recommended.


The kit is pre-colored, no painting needed.
Most all the parts are plastic except for the tubes, shock cord, parachute and clay weight. The body tube is slotted for the fins, launch lugs and shock cord anchor.


The parts of interest:
The body tube color wrap is very clean and tight, better than I've seen in the past. This 1.1" diameter body tube has a thick wall, much stronger than a regular BT-50.
The decals are stick-ons.
The ram-jet style nose cone and coupler might be from a new mold, I can't recall seeing this shape in the past.
The fins are well molded and sharp.