Showing posts with label S Interrogator. Show all posts

Saturday, July 13, 2013

Sirius Interrogator Build Finished

From the Sirius website, David Miller wrote this about his line of kits:
. . . "These really are the sort of things I loved to build in the "Golden years" of Estes and Centuri, and I am trying to bring back some of that feeling in my kits. . . I also love the kits that had lots of decals and were of the Future/Fantasy variety, thus the Atlantis Refit and now the Interrogator."


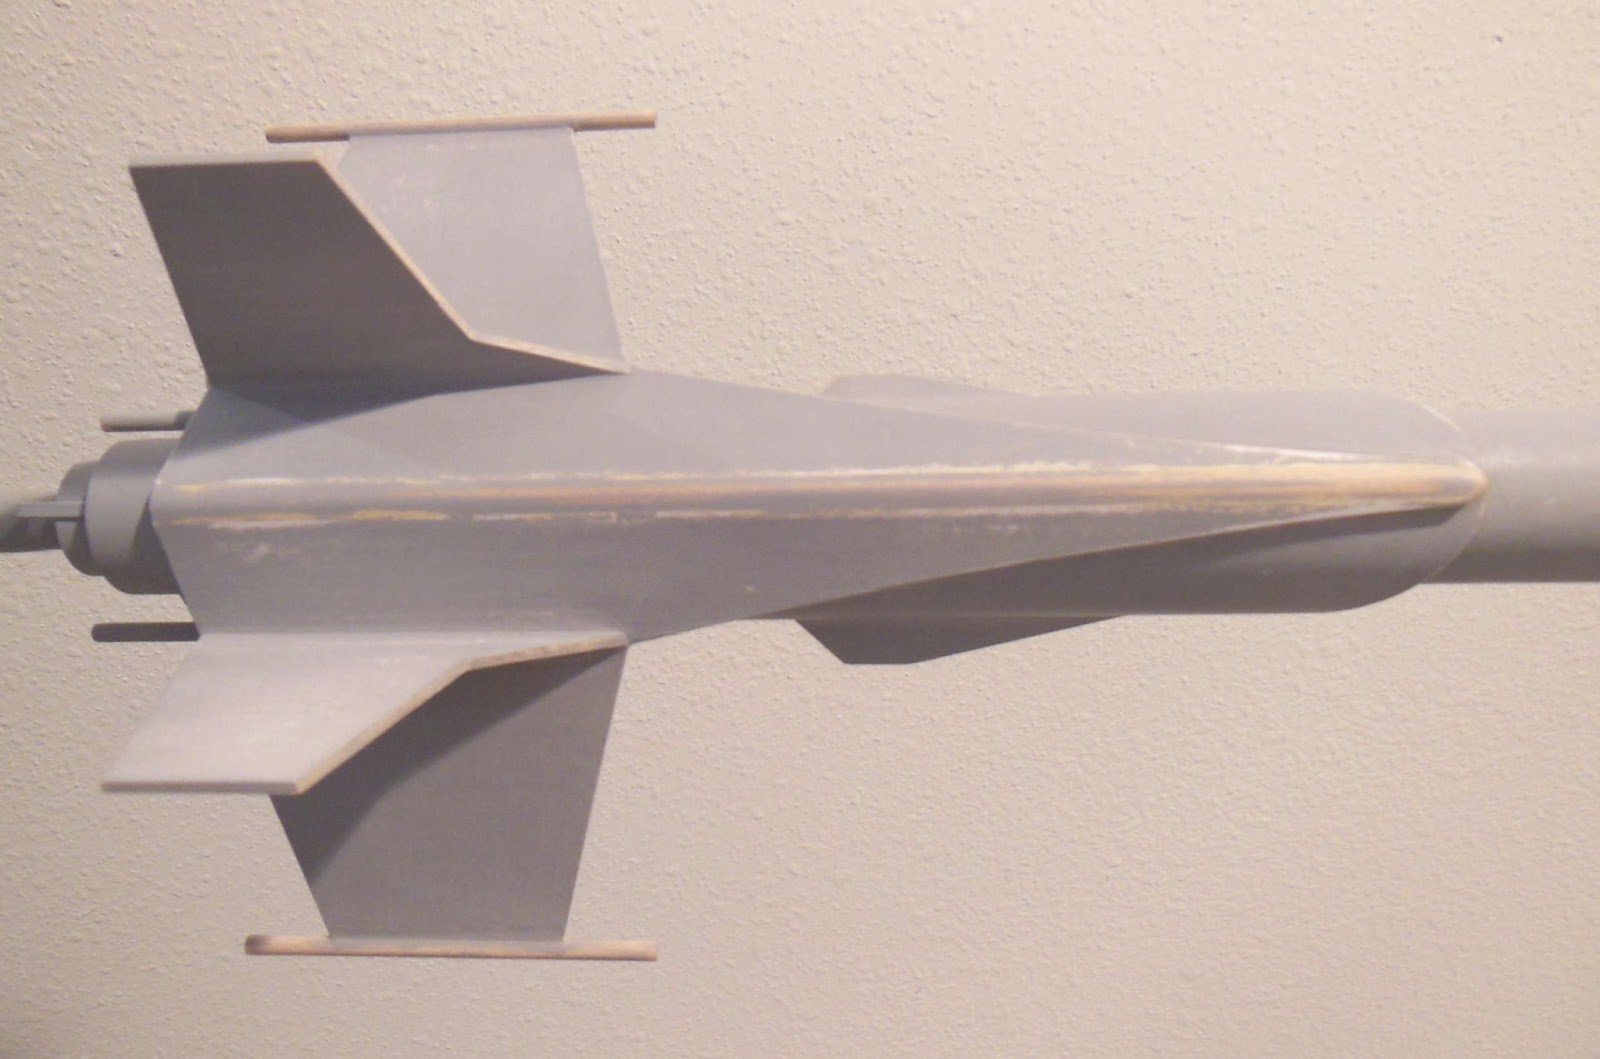
This model does remind me of the Estes Interceptor era models, a classic look with plenty of detail.. 


The overlapping main wing and intake tube are big features.
The PRM laminated fins strengthen the 1/16" thick fins.
The decals add a lot of fine detail.

This is my first Sirius kit. I'm impressed -
Highly recommended!

Friday, July 12, 2013

Sirius Interrogator Build Part 14, Ends and Edges

The instructions mention you can paint the inside of the ramjet tubes.
I decided to use the Contact paper blackboard covering.

A strip about 1 5/8" X 1" was cut.
The 1 5/8" side just covers the inside diameter of the BT-5 tubes.

The black vinyl was rolled sticky side out around a dowel and slid into the tube. Don't stick it down yet.

Press the entire piece into the tube until about 1/16" remained outside the end of the tube.

Use the dowel to press down just one side edge. Roll the vinyl in place rolling from one side to the other until it is evenly rolled into place.
This could take a few tries to get it stuck all the way around.


Trim the edge of the vinyl even with the end of the tube without cutting off any of the white paint on the edge.


Here's the end result -
Black interior in the back, white interior in the front.

Rather than have the paint blister an peel off the engine hook from engine flame,
I sometimes scrape the paint off the hook.
It's almost like a small bit of chrome trim and will look better and cleaner after a few flights.

Thursday, July 11, 2013

Sirius Interrogator Build Part 13, Decals

The Sirius decals transfer easily and really hug the surface well after blotting.
The instructions say to soak them for 30 seconds, mine were ready for use after just over 20 seconds.
Many of the decals are transferred in group "blocks". Be careful before you cut apart a decal that might be part of a larger area group.


As the instructions direct you - 
Set this yellow/orange decal down first. The placement of other decals rely on it's position.


Dry fit decals before soaking to be sure of how they will be centered.

The rear tube wrap has to go around the trailing dowel ends.
Mark the center with a pencil mark and set the center down first at the top engine hook side.
When the decal meets on the other side the spacing should be close.

The decals took 2:15 to apply.

Wednesday, July 10, 2013

Sirius Interrogator Build Part 12, White Color Coats


I still needed some sanding between the white coats.
The wing/dowel joint took a little extra time.


It was worth it in the end, the transition angle is filled and smooth.
There are a lot of nooks and crannies on this one.
Before spraying the final (heavier) coat be sure you've got everything covered with an opaque white color.

This design looks great even without all the decals!

Sirius Interrogator Build Part 11, Fillets and Primer Filler


The wing dowel joint got filled with CWF.
Here it is after sanding.


Primer Filler followed with more fine sanding.


The bottom ramjet tube joints got a fillet with Titebond M&TG.


Another shot of primer filling and sanding.

Finally, the first white color shot.
This model only requires an overall gloss white finish.
Decals provide all the color and trim.

Tuesday, July 9, 2013

Sirius Interrogator Build Part 10, Dowel Wing Joint Detail

The tip of the wing and dowel needed some cleaning up, The match was close but didn't have a good flow.

With the intake tube cut to a curve I though the front of the wing should also have a rounded tip.

The sides got a piece of tape for protection from the sanding block.


The tip was rounded off with 400 grit on a block.


Here's the finished tip sanded round.

Sirius Interrogator Build Part 9, Strakes, Lug and Ramjet Details


The forward strakes are glued on the previously masked lines.

Beneath the wing root edge the lug is glued on.
The lug will be hidden under a ramjet tube.


Ramjet tubes are glued even with the rear end of the intake tube.

The remaining two dowels are glued in the joints and overhang the rear.

Monday, July 8, 2013

Sirius Interrogator Build Part 8, Wing Gluing


The small ramjet tubes got a shot of filler/primer before assembly.
Sitting on the spraying wand - the upper tube has been sanded.


The wing dowel seams were filled with CWF.

The upper seam is dried and ready for sanding.
The lower dowel seam has been sanded smooth.

The instructions were followed to glue the wings on.

The tube is taped down. Before gluing on the wing sides, be sure the tube is straight with the penciled center line facing up.

The wing sides are glued on butted up against the 1/8" dowel.
The dihedral is automatic when the wing dowels sit flat on the work surface.

Sunday, July 7, 2013

Sirius Interrogator Build Part 7, Rudders and Dowel Tips


As directed in the instructions, it's a good idea to "set" the PRM edges with some CA glue. This insures the edges stay down.

The exposed balsa edges also got two applications of medium CA sanding between coats. This filled most of the end grain balsa. I did an additional fill with some CWF and sanding to be sure.


The rudders are glued 3/4" from the root edge of the wings.
Be sure to "mirror" the wing sides so the rudders are on the top of the right and left sides.

Here I'm using an angle to be sure they are set to 90 degrees.

There is an optional step: A 1/16" wide strip is cut out from the PRM where the rudder sits. I didn't think it was needed, in the end the rudders are glued securely without removing the PRM at the root edge area.
(Note: This optional step is probably directed to the larger Interrogator upscales.)


Tape some waxed paper to your work surface.
One dowel is glued to the outside edge of the wing.

Mark the center of the outside edge an the center of the dowel for easier alignment.

Saturday, July 6, 2013

Sirius Interrogator Build Part 6, PRM Fin Covering

At one time, PRM covering was sold through the Estes catalog.
PRM stands for Paper Reinforcement Material.
It's a white self-adhesive paper, great for reinforcement of thinner balsa.
It's also used when you don't feel like filling the balsa grain.

This kit also gives you the option of cutting out fins in the traditional way -  cut out and fill the balsa grain. A separate card stock fin pattern is supplied.
These days, 1/16" thick fins seem too thin and weak. The PRM paper lamination makes the thin balsa very strong.


I did lightly sand the flat balsa sheet with 400 grit on a block. This removed any "fuzzies" and should give a smoother surface for better adhesion.
The backing is peeled off and the entire printed sheet is applied to the balsa. Burnish and smooth out the RM.

A second piece of un-printed PRM is applied to the back.

Use a new blade, you'll want a clean cut through all three layers.

TIP: Set your straight edge over the fin surface and keep all your cuts to the outside of the fin. This way your blade has no chance of slipping in and cutting the fin surface.

Friday, July 5, 2013

Sirius Interrogator Build Part 5, Intake Tube Gluing


The BT-50 main frame tube is marked for gluing on the intake tube.
I decided to prime the tubes before gluing everything together.

The gluing lines were masked with thin strips of masking tape.


After the primer/filler was applied and sanded the masking tape was removed.

Glue is applied and the ramjet tube is glued onto the interior BT-50.

The root edges of the two wing sides but up against a 1/8" dowel glued down the top center of the intake tube.

Thursday, July 4, 2013

Sirius Interrogator Build Part 4, Tube End Seam Filling


I applied some medium CA on the tube edges with a Qtip. I only apply the CA to about 3/16" inside the open end.
Fine sanding got the edge to a hard smooth cut.

On the upper right, the edges of the BT-5 ramjet tubes were sanded smooth with sandpaper wrapped around a pen barrel.


The angle cut BT-55 intake tube and BT-5s had interior seams that might be visible when the model is assembled.

CWF was applied and sanded smooth.

Wednesday, July 3, 2013

Sirius Interrogator Build Part 3, Intake Tube Cutting


The intake tube cutting guide is cut out and wrapped around the BT-55 tube.
Mark with a pencil and cut with a sharp knife.

As the instructions say, use multiple light passes. Don't try to cut through in one pass!


The tube is marked for the forward strakes using the same cutting guide.
Sand the angle cut using sandpaper on a block.


After sanding the cut edge smooth you might have a lip rolling over the end.

Use a finer sandpaper and take off the rolled over edge paper.

Tuesday, July 2, 2013

Sirius Interrogator Build Part 2, Engine Mount

Nothing out of the ordinary with the engine mount.
The Kevlar was tied under the forward centering ring.

TIP: The instructions did teach me an better way to measure the correct length of the Kevlar to prevent a possible zipper.
Typically, I'll tie on a length of Kevlar to the mount and roll the Kevlar inside the engine tube. Then the mount is glued in place.

The Sirius method is simple and makes more sense.
With the Kevlar tied on, set the engine mount beside the main air frame tube.
Estimate the position of the mount when it is glued in place, usually with the engine mount tube 1/4" beyond the main air frame tube.
With the Kevlar taut, tie an overhand loop so the Kevlar won't extend beyond the top of the tube. Cut off the excess Kevlar tail.

Previously -
I would tie on the Kevlar then glue the mount in place. I'd feed the Kevlar through the front of the tube and mark here it meets the top of the tube.
Then feed the Kevlar out the back. An overhand loop is tied so the mark of the Kevlar is at the top of the loop. The elastic is tied to this loop.
After all of that, the shock cords are fed back through the back end of the engine mount and forward out the top of the main air frame tube. Whew!

Monday, July 1, 2013

Sirius Interrogator Build Part 1, Parts


This is one I've looked forward to building for quite a while - The Sirius Interrogator.
This is the 18mm engine version, Sirius also makes upscales of this design.

From left to right, the parts of interest:
Three water slide decal sheets! Lots of decals with clean graphics.
1/16" thick balsa
PRM (Paper Reinforcement Material) One printed with the fin patterns, one blank
Fin Pattern sheet (for those who may not want to use the PRM)
Intake Tube Cutting template
8 Sided 12" Mylar Parachute


A side note:
Here's what the box looked like when it arrived! This is no fault of Sirius Rocketry! USPS did the number on the end of the box.
The kit was well packed and there was no damage to the parts.