Showing posts with label Dowel Shaping. Show all posts

Monday, October 10, 2022

Estes Solar Sailer II, Kit # 2044, Step 5, Dowels & Small Fin Fitting


The fin marking guides from the Jim Z website fit!


The 1/8" diameter x 18" long dowel was cut into three sections, 5 1/4" long.

The dowels are shown here after they got a shot of filler/primer and sanding with 400 grit.
There isn't much grain in a dowel, but they will be smoother if filler/primer is used. Look close, there is some gray primer left in the fine grain after sanding.
 
The instructions say to glue the down end even with the trailing edge of the fin. 
I prefer to glue it on with a small overhang, then sand it even with the fin edge.

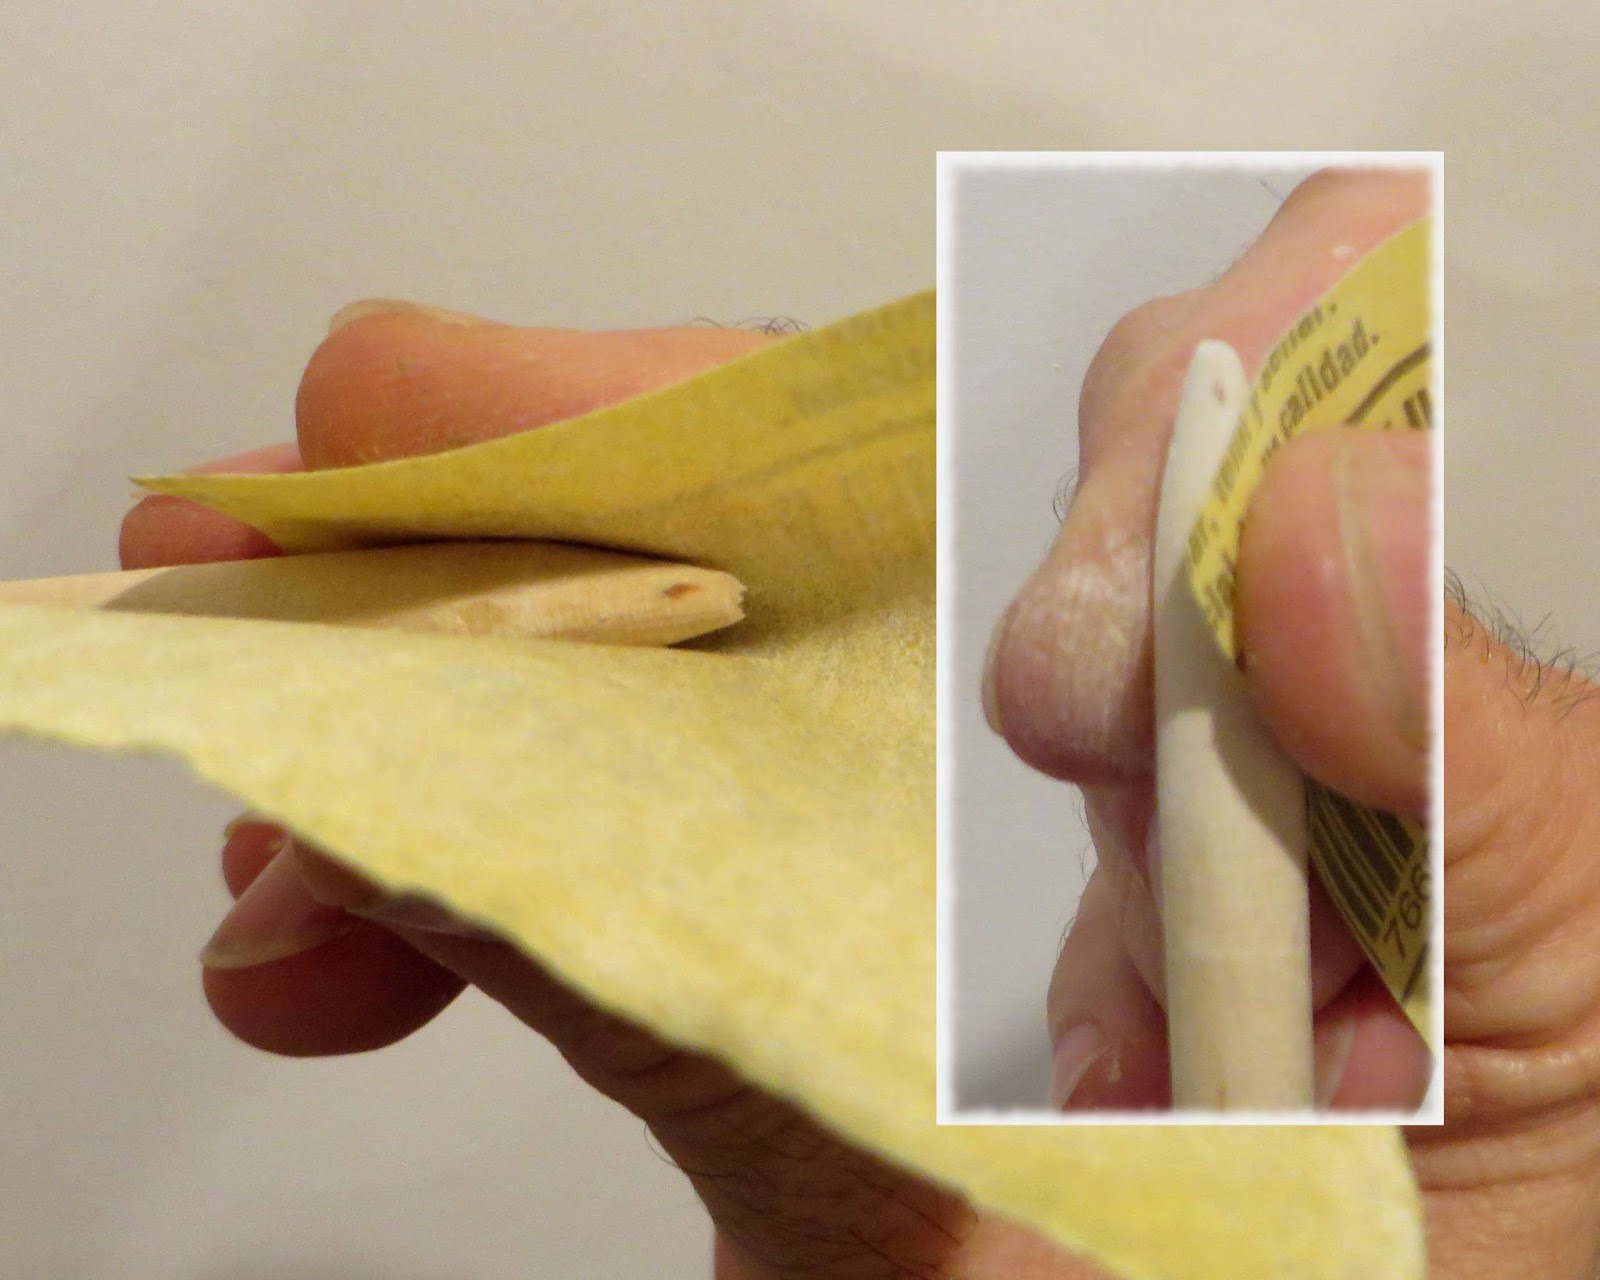
The picture on the right shows how small and narrow the glue bead on the fin is. If the dowel ended up not on center, I can cut through If needed. The instructions suggest using the folded instructions under the fin as a spacer to center the dowel on the outside edge. I used my fingers to feel for the center position, running them down the dowel joint as shown on the left side photo.
 
When lined up the small forward fin on a straightedge, there was a gap.

On the right, the fit is better after some block sanding on the high spots.

Saturday, April 11, 2020

Estes MRN Orbital Transport Laboratory Build, Part 5, Fin Dowel Positioning


I did a test fit of the 1/8" dowel in the slot I just cut.
The instructions have you glue the small triangle fin after the main fin is attached through the "drilled" body tube hole. I decided to glue it on now for easier filling of the joint.

On the left is the glue joint before squaring up the edge. the right side shows a sanded square and better fitted joint.


The slotted fin was set against the instruction print to find how high up the drilled holds would be. From the back end of the body tube the holes should be around 1/2" up.

Thursday, November 28, 2019

Lawn Dart Rocketry SLAT/S Build, Part 4, Conduit Tunnel Shaping


While the balsa fairings dry, I worked on the Conduit Tunnel.
I don't have any half rounds, we'll carve one from a full dowel.

Draw a center line down both (opposite) sides of the dowel.


Carve off the back half of the dowel.

Notice on the right, I didn't carve all the way to the half center lines.
By the time you sand a curve into the flat back, you'll end up close to that center line.


On the left is the dowel before shaping the underside. You can see gaps on the side where it should fit the body tube curve.

On the right is the dowel after shaping the flat underside.


You could wrap sandpaper around the body tube but chances are the concave curve arc would be too shallow leaving a gap.

TIP: When shaping a part to fit a body tube, use a tube (or engine casing) that is smaller than the tube it has to fit on. You'll usually  sand the inside curve wider than you intend to. Using a smaller tube or casing will give you a tighter fitting part.

Friday, November 15, 2019

Estes Space Corps Corvette Class, #7281 Build, Part 3, Fin Details


There are four pieces of launch lugs in the kit.
Three shorter lugs are used for the fin details (guns)
The fourth is the longer 1/8" standard lug to slide down the launch rod.

Here I've slid the lugs down some Q-tips handles to brush on some seam filling with CWF. Brush it on, let dry and sand off leaving the filler in the lug seams.


Before cutting the dowel to three 2 1/2" lengths, smooth sand it. It's easier to smooth when it is still a long piece.

The dowel is cut and the ends rounded.
The dowels were sprayed with filler/primer and sanded smooth.


The dowels are held in the launch lugs with some wraps of masking tape.
TIP: After getting the right friction fit, I unrolled the tape. The tape length was about 2 3/4" long.

TIP: Before wrapping the tape, mark the center of the dowel and the tape strip. Match the center marks and wrap the tape, keeping the sides even.

Thursday, August 15, 2019

Estes Sasha Build #7271, Part 9, Antennas Shaping

I assume the short fin dowels are "antennas", that's what I'm calling them.
I sealed the long thin dowel with a wipe of clear varnish applied with a paper towel. The dowel was lightly sanded without altering the diameter.

TIP: Instead of cutting then rounding eight short dowel pieces . . .

Round the end of the long dowel, then cut off a single 1" length. Set that piece aside.
Then round the end then cut off another 1" length until you have eight pieces.

It's easier to round one side of the dowel while it is long enstead of eight short pieces.


The dowel is glued into the slot on the root edge.

Check from the front to be sure it is in line with the fin.

Thursday, August 17, 2017

Estes Starship Nova #1371 Build, Part 15, Wing, Rudder Dowels and TIP


TIP: Recently I've been cutting off the corner tips on the parachutes. This allows the shroud line knot to be a little closer to the tape disk hole.


Three dowel lengths are cut - Two at 3" long and one at 4 1/2" long.

One end of each dowel is rounded.


TIP: You could simply glue the dowels on the outside edges of the rudder and wing extension piece. Sometimes I'll sanded a slight curve into the outside edges with some 220 grit wrapped around the dowel.

On the right is the is the sanded inside curve. It makes a better fit and a stronger glue joint.

Friday, June 30, 2017

F-104 Starfighter Prototype Fix


On the first F-104 prototype I used some already cut dowels from the F-16 kit. Larger wing tanks will be used on the next build.
These larger tanks will change the C/G, I hope no nose weight is needed.

In the picture the larger new tank is set over the first one.


It's really not very difficult to shape the dowel ends. Each end takes about ten minutes of carving and sanding.

Trivia: Somewhere on line are the original plans for the the Estes Mars Snooper. The fin pods were made from just dowels, not nose cones and tubing.


Thursday, June 15, 2017

Better Bomb Details on Odd'l F-16

The bomb (or tank) wing details on the Odd'l Rockets F-16 kit were a compromise. Being a small vendor I certainly couldn't afford to have molds made for short run kits. Carved dowels were used for the larger tanks under the wings. They look good, but the shape could be better.


These steps show how to form the back end of the wing tank dowel with a longer taper.

Knock off the rear edges with a pencil sharpener. You don't have to take it to a sharp point, just remove some of the excess.


On the left, the edge to be removed was marked with a pencil.

Make small chip cuts smoothing out the curve.


Wrap some 220 grit around the dowel and turn it against the sandpaper like a slow moving lathe.

After that, sand up and down as shown in the inset picture.


Here's the new shaped tank next to the F-16 tank. Both look fine but the new shape is better and more streamlined.