Showing posts with label ASP MMX Hawk. Show all posts

Tuesday, May 4, 2021

ASP Micro Hawk Build, Finished


This was a fun, small build. I've always like the looks of the Hawk.
The US ARMY decals are set between two fins on the open sides without the tunnels.

Sanding the tunnels even with the ends of the body tube segments made for a good fit at the joint.

MicroMaxx rockets are a great first launch of the day giving you a chance to check your controller and check the winds.

Monday, May 3, 2021

ASP Micro Hawk Build, Part 8, Tunnels & Tying Things Together

Note: I haven't glued the coupler into the upper tube yet. This allows me to glue on the tunnels then sand them to the correct length, flush with the ends of the body tubes.
   
The already painted tunnels were cut just slightly long. These were glued onto the main body tube using a thin line of Fabri-Tac. Keep the glue line narrow so it won't squeeze out along the sides after placement. 
After I was sure the tunnels were straight, a small bit of CA was applied to the end joints using a toothpick tip. 
With the tunnels overhanging the tube ends, the ends can be sanded flush with the ends of the body tube.

The shorter upper tube tunnel (with the tapered rounded top) is also glued on overhanging the low end. Sand the overhang flush with the bottom of the tube.

The Kevlar line is slid through the coupler and the  larger lead weight tied on. This larger weight is larger and won't slide back through the coupler.

Glue the coupler with the weight on top into the upper tube and nose cone assembly.

The picture on the right shows the upper assembly turned over. The two remaining smaller weights are pressed into the tube and held in place by friction and a drop or two of epoxy.


The Mylar streamer is taped onto the Kevlar line.

The streamer is rolled tight. To pack it and the Kevlar shock cord it helps to have some long tweezers handy.

Sunday, May 2, 2021

ASP Micro Hawk Build, Part 7, Mask & Paint Adventure! TIP


This wasn't an easy mask - I used my regular Scotch tape for the tube areas between the fins. 


Here it is after shooting with gloss black.

When the tape was removed, two sides were good and showed clean lines - 


The other sides weren't. 
Thought I would cheat and run a ultra fine line Sharpie down the fillet area masks - 

It looked better, but the black area ended up wide and outside of  the fillet joint.
After masking off the black fin surface, I sanded off the black ink as best I could with folded 400 grit. There was still some very slight discoloration left from the black ink.

So I cheated!
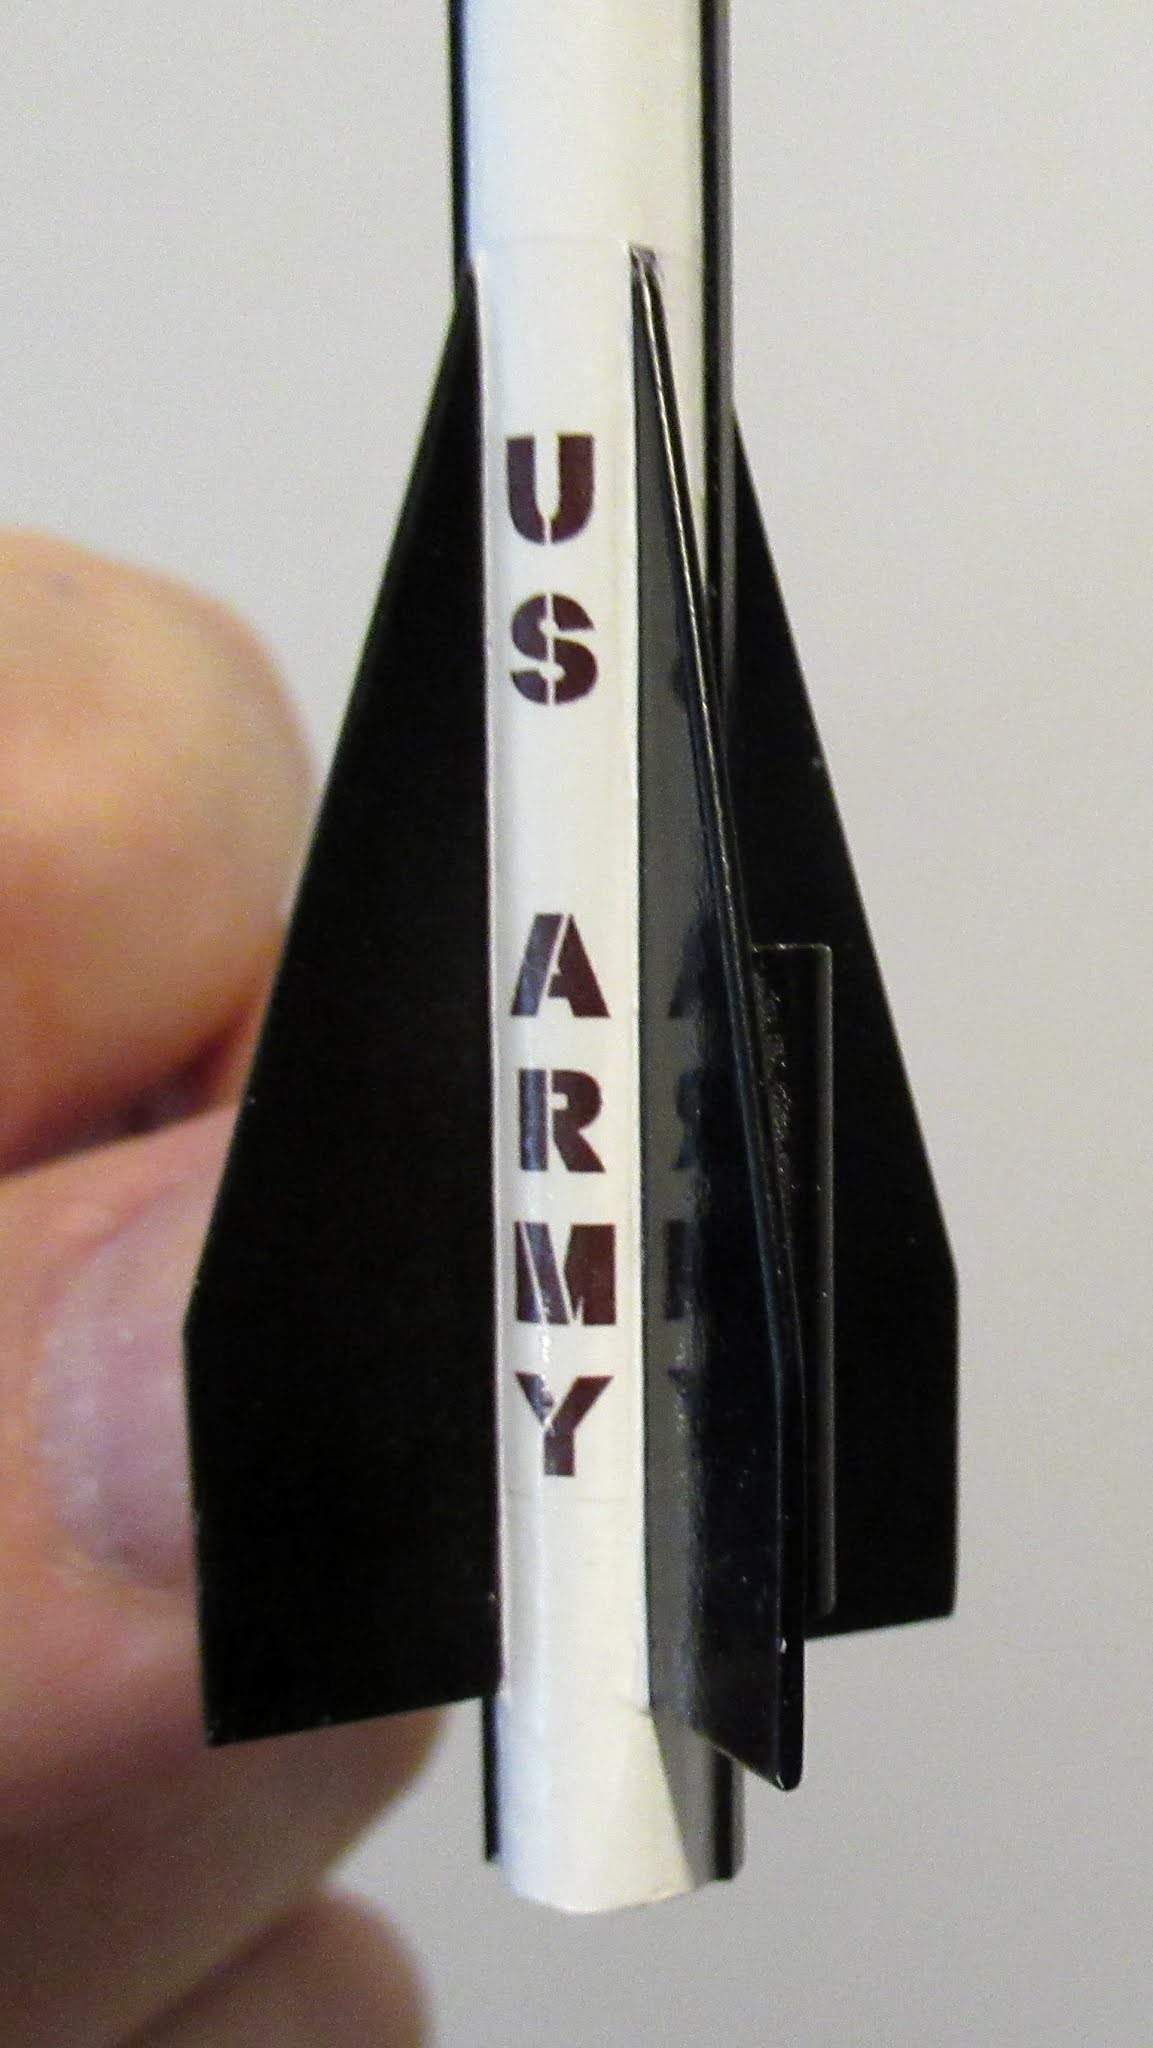
TIP: Strips of white decal paper were cut to the width of the body tube between the root edge lines. 
No clear coat was applied, I wanted the decal fix to stay very thin. A white decal patch like this will slide and transfer when soaked with no clear overcoat. The clearcoat would be added if the decal were run through a printer to seal the printer ink.

The white decal covered any leftover ink and squared up the root edges!

This type of fix doesn't always work. The white decal looked much better and straighter than my original mask. This rocket is very small and the fix isn't noticeable. The decal film remained thin without the clearcoat.
Some clear Pledge was lightly applied with a Q-tip to seal the edges.

Saturday, May 1, 2021

ASP Micro Hawk Build, Part 6, Fillets, Launch Lug & Tunnels


Fold a piece of 400 grit sandpaper and sand the CA fillets smooth.

Run a fingernail down the fillet to check how smooth it is. A smooth fillet is needed for a clean masking line. 
I glued on the launch lug so it would be hidden behind a fin. This put it a little farther back from the measurement mentioned in the instructions.

That plastic rectangular piece isn't a standoff, but a spacer and is removed after the lug is glued on.


The front end of the tunnels are rounded off.
I set it against my finger to check the shape.


The tunnels haven't been cut to size yet. 
I'll paint it first then glue it on afterwards. I couldn't see how to paint something so small and narrow once it was glued in place.

Friday, April 30, 2021

ASP Micro Hawk Build, Part 5, Gluing On The Fins

The fins are glued on with the trailing edge 1/4" from the back end of the tube.
I wrapped a strip of tape to have a consistent line for the rear edge of the fins.

The picture on the right shows how the fin will sit. After glue is lightly applied to the root edge, start the fin on the body at the rear corner and pivot turn the root edge down onto the alignment line.


I used the acetone based Fabri-Tac glue to initially tack the fins in place. The Fabri-Tac gives you some working time if you need to adjust the fins before it sets up.

Glue the opposite fin on. Sight across the back end to be sure they are in line.
After the Fabri-Tac dries, I used some medium CA glue to lock the fins to the body tube.
Squeeze out a drop of CA glue onto some scrap cardboard. Dip a toothpick tip into the glue, you don't need  big drop of glue. A little CA goes a long way.
Draw the toothpick tip down the root edge of the fin/body tube joint making a fillet.

Immediately pick up any excess glue with a swipe of a Q-tip.

Thursday, April 29, 2021

ASP Micro Hawk Build, Part 4, Tube Spiral Fill & Fin Marking


I still like to fill body tube seams, even on a model this small.

Two Q-Tips slid in the back end make a good handle when applying the CWF filler.

The nose cone had a slight lip, a little wider than the shoulder.
Sanding down the edge on the 3D print nose cone was easy.

Now it easily slips into the upper short body tube. It was glued in place using medium CA glue.
On this smaller diameter body tube, the tube marking guide fit perfectly! 

You re supplied with a small plastic angle to extend the pencil lines down the body tubes. Good thing ASP includes this tool, These tubes are too small in diameter to mark in a door frame.

Wednesday, April 28, 2021

ASP Micro Hawk Build, Part 3, Cutting Out the Fins

The instructions have you cut out the fin cutting guide. I left mine on the instruction sheet.

All the cut lines were extended beyond the fin borders with a pencil and straightedge.


With the fin material taped down on the template, it was easy to extend pencil lines onto the plastic sheet.

You only have to cut (score) about halfway through the sheet plastic. You can then flex and crack the fins down the cut lines. Be sure the sharp upper tips are well scored for a clean break at the narrow tops.

On the right - 
I used small flat end pliers to crack the narrow excess plastic from the outside edges of the fins.
 

The fins are small and a little tricky to true up. Still, stack them old school and hold tight while sanding on some 220 on a block. 

I rounded the leading and trailing edges with 400 grit. 
 

Tuesday, April 27, 2021

ASP Micro Hawk Build, Part 2, Engine Block & Kevlar Tie

You are supplied with two brown couplers.
Mark one coupler at 1/4". With a sharp knife, cut off the 1/4" end to be used as an engine block.

I like to restore the round shape and press down any burrs by rotating the block on a sharpened dowel.

The Kevlar line is tied on the engine block. Pull the knot to the top side of the block so the tied bulge won't contact the inside of the body tube.

The coupler is marked at 3/4" for a depth gauge. 
Note the top of the coupler was rounded off with 400 grit for easier insertion.
Slide the block into the long tube, no glue yet. Push into position using the long coupler up to the 3/4" pencil mark.

The inset picture shows a small amount of glue on the tip of a Q-tip. Insert in the back without touching the inside of the tube. Wipe off the glue at the engine block / tube joint.

The picture looks like I'm holding a Camel cigarette.

Monday, April 26, 2021

ASP Micro Hawk Build, Part 1, Parts


After building the BIG TLP Hawk, how about  small one - 
I still have to paint and draw up decals for the bigger Hawk.
This one I will finish and apply decal.

Enlarge this picture to see the specs - It's only  4.15" tall!

There are three full pages of instructions, printed on both sides.
From the left going clockwise to the center - 
1" x 8" orange Mylar streamer, Kevlar line, 3D printed nose cone, Styrene angle,
Fin and Tunnel material, water slide decals, two 1 1/2" long brown couplers, nose weights, two main body tubes.


Parts of interest:
The nose cone is very smooth for a 3D printed part.
Two US ARMY water slide decals
Three split lead weights
Plastic launch lug and placement spacer