Thursday, March 31, 2016

Estes Hi-Flier XL, #3226 Build, Part 1 Parts


This is the XL version of the original BT-20 Estes Hi Flier.
I understand the smaller Hi-Flier is a best seller. It makes great sense for Estes to produce the upscale. A standard three fin, nose cone design built around the strong BT-60 tube.
All parts are high quality including an 18" parachute, two 11.25" long BT-60 tubes and a thick walled BT-50 engine mount tube.


I'll be adding a homemade Centuri style baffle using the red coupler.

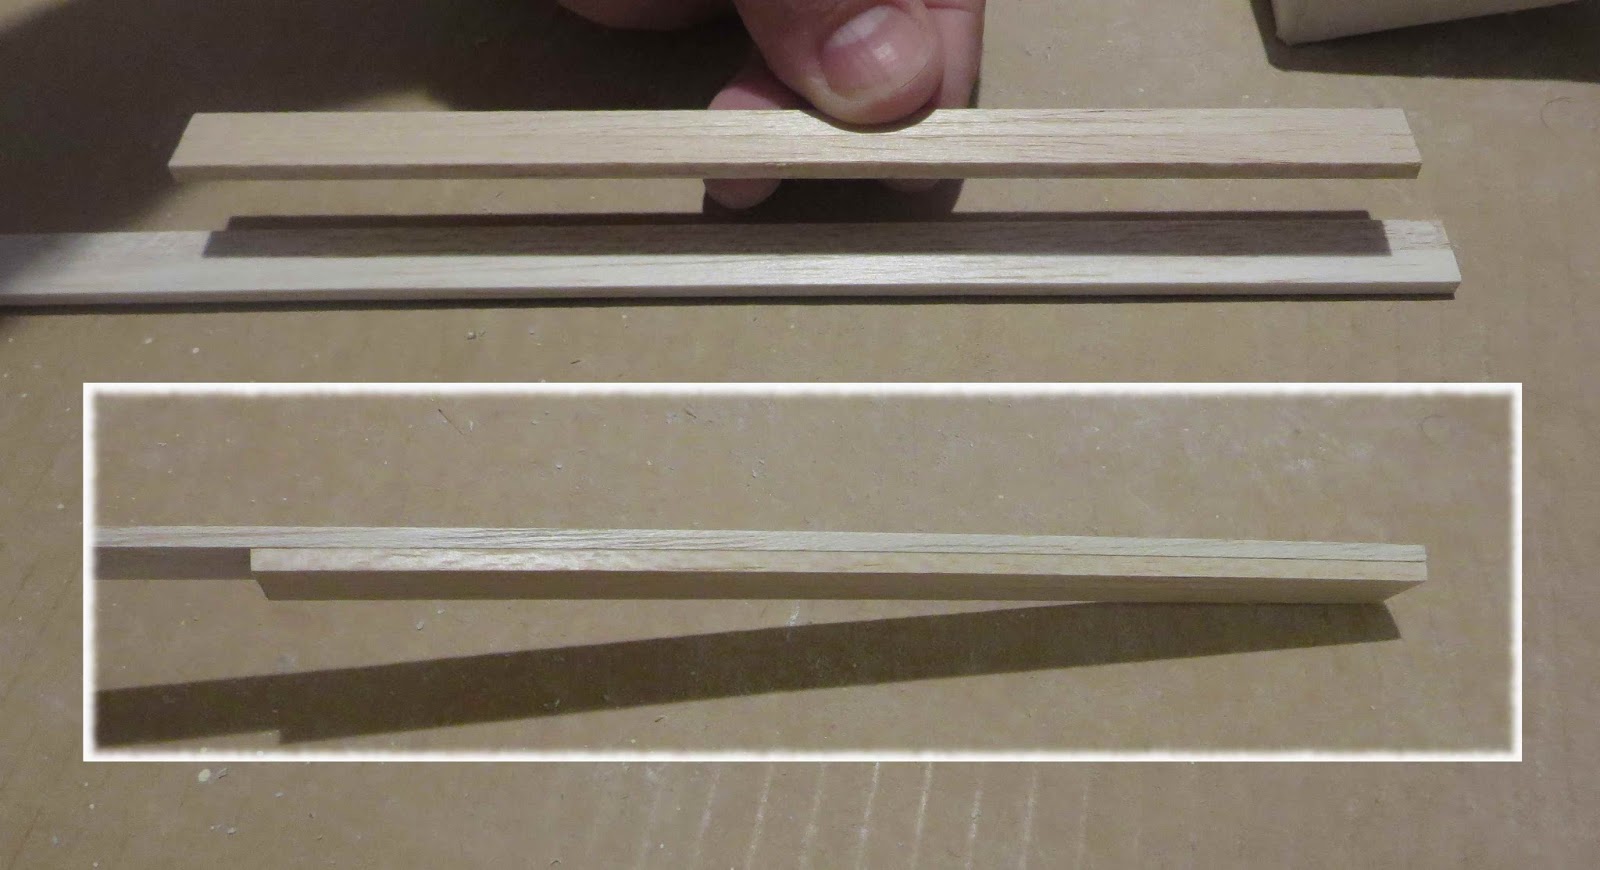
The 1/8" thick balsa fins are large. The wood is pieced together and laser cut.


There are enough decals for both sides of the three fins.
Look closely between the grey bands and you can make out the the white ink areas.


Wednesday, March 30, 2016

Madcow Bomarc Finishing Break

I assembled the Madcow Bomarc three months ago when I was drawing up the instructions.
Finishing got as far as a white undercoat and some smooth sanding.
In Florida we've had rain every afternoon so I haven't been able to paint.

We'll finish it up soon!

Making Rockets Last Longer?

On TRF, DrumGuy89 posted the question:

"I have been lurking around the forum gathering info for sometime, I enjoy building rockets and spend a lot of time and attention on my models. I would like to hear your tips and advice on how to increase the durablitiy of our prized rockets. Not too worried about winning a competition or set an altitude record. Been wondering about aftermarket airframes, ca gluing body tubes, kevlar cord, baffles, paper reinforcements on fins, and any tips you may have to make rockets that last!"


DaddyIsABar wrote:
"Flying is hard on any rocket. It is going to break but repairing it is fun too. More than bulletproofing in the building process is using good flying techniques. The only way to make a rocket last is to fly it well every time. That is really hard to do. A light, stock built rocket flown well will last forever if you repair and maintain it. You must never do anything even slightly stupid with it. Avoid any inclement weather, any trees, any hard landing surface, use only sensible motors, careful prep and always have the perfect sized recovery system in place. Never launch at night or with tall grass around, never close to any roof. A well built, good old school Alpha is the best model, simple paper tube and balsa, never use a C motor. Keep it simple and it will last forever, you may have to replace the shock cord, hundreds of flights. If that gets too boring then more risk will equate to more damage and loss."
Great advice!

Anyone who follows the blog probably knows my building preferences.
For any newbies, here they are in a nutshell -  

I don't use BT-20 or BT-50 tubes. The tube walls are thin and prone to buckling, 
usually right above the fins at the top of the engine mount.
Where I can I use ST-7 tubes (thicker walled) or heavy walled BT-50s.
You can get both at Balsa Machining Service.

  • You can replace soft balsa fin stock with harder grade or use basswood. 
  • Plastic nose cones won't nick like balsa.
  • The old standby of using a LONG shock cord can cut back on snap back damage.
  • Seal all exposed surfaces.
  • Coat baffle plates (the sides facing down towards the engine mount) with glue.
  • Models get the most damage on a hard landing or driving to and from the launch site.
  • Keep your fingers clean, especially when making shrouds.
  • A better built model will always last longer. Take an extra five minutes on each step of construction and do it right!
In the search window, do a search for "Tips"


Some actually fiberglass LPR body tubes. I think this is unnecessary. While it might be an interesting construction exercise, LPR body tubes are strong enough on their own.
As mentioned above, I shy away from BT-20 and BT-50 tubing, the Estes tubing that tends to buckle. That's where a glued in coupler can help. A coupler also protects the body tube right above the top of the engine from the ejection charge. 
For more information and pictures, CLICK HERE

Monday, March 28, 2016

Madcow Bomarc Build, Part 9, Gorilla Glue and Nose Cone Weight

I read about the old style brown Gorilla Glue on the forums. To see the posts, CLICK HERE. Read posts 8 and 15.

Some nose cone plastic is waxy, most glues won't stick to it. The Gorilla Glue seems to work. It held the nose weight very well over the past few months when the model was first assembled.

Today I hit the nose cone against a counter top a few times to see if I could jar the nose weight loose. I hit it pretty hard, probably harder than any boost acceleration could effect the weight. The nose weight finally came loose!
It's an easy fix, I squirted more glue into the nose cone and dripped in a little water. It set up and the weight is again held in the tip of the nose cone.
Even clay weight in an Estes kit can sometimes work loose.

The whole trick to using Gorilla Glue is water.
The instructions on the back label tell you to dampen the two pieces that are to be joined together.
A little bit of water activates the glue and it foams up.

I wouldn't recommend using Gorilla Glue for general model rocket construction. It can come in handy for some things like nose weight retention.

Sunday, March 27, 2016

Cheap Egg Nose Cones and Payload Section


Happy Easter Today - These go on sale tomorrow!
Cheap, smooth, bulbous payload nose cones.

While you can't usually find a body tube that fits the upper half, glue a coupler on the bottom to match whatever body tube you have.


Your model could end up looking something like the Quest Courier...

Madcow Bomarc Build, Part 8, Conduit and Nose Cone Work


Here's the front and back end views with the conduit glued on.
In the upper picture there is a slight gap on the conduit sides. This will take a few fillets of Titebond M&TG.
The rear picture shows the tapered conduit fit around the base of the rudder.
Now the model is looking like the Bomarc.


The nose cone has to be opened up for the nose weight.
Cut an opening on the opposite side of the shock cord tie.
The plastic was easily cut with a hobby knife.

Saturday, March 26, 2016

Madcow Bomarc Build, Part 7, Rounding The Conduit Ends


Mark both the front and back end 1 1/2" from the ends.
The first rough cuts were made with a knife.


Don't round over the ends yet, just sand the side profile.
After the sides are tapered and even then round the top.


Here's the finished front and back.
Round over the edges down the entire length of the conduit strip

When rounding the ends remember, the front end is twice as high as the rear rudder end.

Shuttle Mock-up Scrapped

An email from Manuel Mejia, Jr. 


Now I have seen just about everything on the road:

Off SR 528 just before you reach the Indian River to go to Cape Canaveral and Cocoa Beach on Merritt Island, there is a marine junkyard.  Resting at the site is a tour ship that used to travel the St John's Rover from Sanford (the Rivership Romance). It was a an old Great Lakes packet boat that was deemed too rusted by the US Coast Guard to be usable so it was sent to the Breakers.  Both vessels can be seen from SR 528.

Next to it is the USS Intrepid, the Shuttle Mockup that was next to the Astronaut Hall of Fame.  It too is off to the breakers.

It is a sad metaphor for the US Space Program.  Pity, I wonder if the British Science Museum is aware of this junkyard find.  It will not be there for very long.

Manuel Mejia, Jr.
Astatula, FLA, USA
Manuel just followed up with this email:

I received word from Britain that they may want to take the Shuttle and put it on display in Lencolnsire at the British Space Center.

Friday, March 25, 2016

Madcow Bomarc Build, Part 6, Making The Conduit

Two of the long balsa strips are glued together, side by side.
After drying, cut the two glued pieces to 19 3/4" long. In the picture on the right that part is on the bottom.
From the remaining balsa strip,  cut two pieces 7 1/2" long. Glue these two side by side.
Glue them onto the longer piece, even with the front. The inset picture shows the "step" that fits over the front edge of the wing.


Here's the back end before the long overlay strips was cut to 19 3/4" long.
The back end goes over the spacer strip and over the stabilizer.
A notch will have to be cut through the center for the rudder tab to fit in.
In the picture I've marked where the rudder will fit.
Now the end can be cut to 19 3/4" length.


Here's the notch and measurements for the cut.
The notch should be made 1/8" x 1 1/4" long.
Mark and cut right down the center.


After cutting the notch do a test fit with the rudder notch in place.

Cessaroni (CTI) Explosion

From http://rocketn00b.blogspot.com
Two injured in Stouffville-area business explosion, fire

One victim airlifted to Toronto hospital

To see the newspaper report, CLICK HERE 

Thursday, March 24, 2016

Throwback Thursday Pic 6


Here's a meeting of the Watsonville Area Rocketeers, probably in 1976. I'm the tall guy in the middle.
We launched two miles from the city airport. I'd call the airport in the morning of a launch and let them know.
Back then I produced a two sided, one page newsletter called the "Flypaper". I distributed them at two local hobby shops to publicize the monthly launches.
We set up individual launchers in a line, what Harry Stine called the "Misfire Alley" system.

Madcow Bomarc Build, Part 5, Wing and Fin Gluing

The tied shock cord is rolled up and stuffed into the engine mount tube.
The engine mount was glued into the rear of the body tube. Both tube ends are flush.

The main tube has been marked down its length for gluing on the wing assembly.

While the wing assembly glue dries, mark the tube for the two ramjet pod locations.
Cut out the wrap, roll and tape it around the front end of the tube. On the wrap is a line that says: "Center Line of Wing". Set this over the pencil line running down the tube.

Mark the pod locations and extend those pencil lines down the body tube length.

Apply a line of glue down the body tube on the center pencil line.

Set the body tube over the wing and press into the glue.
The rear edge of the stabilizer is even with the body tube end.
Double check the alignment before the glue can set up.

Wednesday, March 23, 2016

Madcow Bomarc Build, Part 4, Fin Assembly

All the fin and wing assembly pieces are squared up with a sanding block.
Study the picture below to see how the parts fit together.

There are three rectangular pieces, the longest one goes between the rear of the wing and the stabilizer. The two shorter rectangular pieces are used on the ramjet pods.


I chose to round the leading sides and trailing side edges.
Don't round any edges that will have any strips glued to them. All edges that are vertical in the above picture should be left square.

It's up to you, the edges could be left square.

Fiddles and Fenders, Design Inspiration


People wonder where designs come from. Fin shapes and color schemes are usually inspired by something seen before.

I read about this one online and had to try it for myself.
The "F" holes on violins are an interesting shape.


There are some who think the shape came from a carefully peeled orange skin.


The Fender guitar head stock design was suggested by Merle Travis, the great fingerstyle player and composer of "Sixteen Tons".


The silhouette is roughly based on a side view of a violin headstock.

Why bring this up?
Rocket design ideas are all around you. You just have to keep yourself open to unconventional shapes.

Tuesday, March 22, 2016

Madcow Bomarc Build, Part 3, Engine Mount


The assembly of the motor mount is standard, but heavier duty.
The engine hook got a few wraps of electrical tape.
The rear plywood centering ring is notched for engine hook movement.
The forward ring has a notch on the outside for the braided Kevlar.


Here's a drawing I did for the new Madcow instructions.
To see the posted instructions, CLICK HERE
The braided yellow Kevlar is tied around the top of the engine mount. The line goes through the notch in the upper ring.
A yellow glue fillet goes over the Kevlar wrap and the overhand knot.


The yellow Kevlar is tied to the white nylon shock cord with a simple overhand knot.
For now, the end of the Kevlar is taped to prevent it from unraveling.

Monday, March 21, 2016

Madcow Bomarc Build, Part 2, Parts Prep

I usually dress up the parts before construction.
This involves squaring up the edges and filling nose cone seams.

The burnt edges of the laser cut fins (wings) were squared up with 220 grit on a sanding block.
Most laser cut parts are cut at a slight angle. The laser cut line on top is narrow, the bottom of the cut is slightly wider.
Hold and square the pieces at a 90 degree angle. When you have pieces that will butt up against and glue to other pieces a squared side is important.


The body tube had a slight uneven cut. This is seen on many kits, most builders won't even notice it. Thicker body tubes are harder to cut and should be checked.
Sand and square up if needed by using a block with 220 grit.


After sanding the raised nose cone molding seam, I tried two different methods to fill the concave areas.
I've been wanting to try the Squadron Putty on a plastic nose cone seam.

The upper half got a raised bead of medium CA, the lower half got the Squadron Putty.
On this plastic the Squadron putty didn't adhere as well.
You can see the darkened area where the CA glue was sanded down.
The plastic in this nose cone requires roughing up and a coat of primer for the final color coats to stick.

Sunday, March 20, 2016

Madcow Bomarc Build, Part 1, Parts


This will be a fun build. I've always liked the Bomarc design ever since I had the Estes Citation Bomarc in the mid 1970s. I picked up that kit at the Estes factory.
This is a very heavy duty model. The centering rings are die-cut plywood. 
The fins are laser cut from basswood. The parachute is 18" nylon.
The ramjet nose cones are balsa, the tunnel strips are balsa.

Parts of interest:
Two 1/4" thick walled launch lugs are included.
The shock cord is a thick braided Kevlar tied to a long white nylon cord.
A 6" square parachute protector.
Black plastic nose cone with a long shoulder.
18" nylon parachute.


One of the more interesting parts is the main body tube.
The walls are very thick at .05".
It is almost a BT-60 diameter. The outside diameter is 1.6". A standard BT-60 is 1.637" diameter.

Old MRN Idea Box, Feb. 1965


Mojo1986 (Joe) is sellng some old Estes Model Rocket News issues on Ebay.
Here's an "Idea Box" post from the Feb. 1965 issue.

I have pretty good luck cutting body tubes, I usually won't end up with the "rough cut" shown on the left.
Using a coupler to stiffen up the end is a good idea, especially when cutting the thin wall BT-5, 20 and 50 tubes.

Saturday, March 19, 2016

Centuri Astro 1, Finished


This is the 1971 catalog Astro 1. I'm still working out some masking problems I had on the 1969 version.

It's a sharp design, 4" taller than the Estes (equivalent) Alpha. This was the starter rocket kit for first timers.

Friday, March 18, 2016

Centuri Astro 1, Build, Part 13, Wrap Top Trim


There was a little clear edge that overlapped the top of the body tube.
Another sharp razor blade was used to trim off the overhang.
Wait until the decal is dry before doing a trim like this. The decal will just flop around if it is still wet and pliable.


For a smoother color transition at the nose cone / body tube joint, a Sharpie was used to blacked the body tube edge at the black decal band tops.


I don't know what happened here -
There must have been some oil on the primered nose cone.
The black paint didn't stick and pulled up near the shoulder.

Let it dry, sand smooth, primer and re-shoot the black.

Thursday, March 17, 2016

Throwback Thursday Pic 5


Here's another shot from NARAM 17 in 1975.
That's Vern Estes test firing an engine in a thrust measuring device. He designed it, the company was under Gleda's name. Putting it under his wife's name might have had something to do with a "No Compete" clause with Damon. Just a guess on my part.
The engine test company never went anywhere, as far as I know.

Centuri Astro 1, Build, Part 12, Decal Wrap Fix


This is the second decal wrap I printed and it was still too wide!

I guess I shouldn't feel too bad, I've had a few kit wrap decals that overlapped.

I applied the wrap so the seam is right above the launch lug. When the rocket is on the launcher (with the lug behind the tube for a picture) you won't see the vertical bar that was trimmed.

I used my aluminum angle to cut through the decal overlap.

The cut was made before the decal was totally dry and still flexible.
Use a new razor blade. a dull blade could flake the decal ink.

On the left the overlap is peeled off.
On the right is the trimmed decal with matched corners.
Sure, it's not perfect, one of the vertical bands is narrower than the others but it looks better than the overlap did.