Showing posts with label RSG Hawkeye. Show all posts

Monday, November 22, 2021

Rocketship Games MMX Hawkeye, Finished


The stickers look good. They are thin so the edges aren't that noticeable.

I think the gray, white and black trim colors look good and were easier than masking a tiny rocket.

The two black launch lug "guns" are actually even, there is some camera distortion.
The kit supplies two "Hawkeye" name stickers, the Estes kit only had one. I applied one on each side.

In the Estes kit, the red square stickers go on the base of the nose cone. Stickers don't have much "give" and wouldn't probably conform to the NC taper so I set them back on the body tube.

I like MMX models. They are as big a build challenge as larger rockets and don't take up as much space in the Rocket Room between flights.

Sunday, November 21, 2021

Rocketship Games MMX Hawkeye, Part 8, Stickers


The kit supplied stickers are die-cut.
TIP: Don't set these in place using water! The top surface ink isn't sealed and the ink bled on the first decal.
There are extras so this wasn't a concern.


Some of the stickers are tiny!

I found it easier to place them from the tip of my hobby knife.
There is no streamer or parachute, the model uses nose-blow recovery like the larger original Estes kit.

Tie the Kevlar line to the nose cone lug. Stuff the loose end inside the hollow base of the nose cone.

TIP: Here's a general tip for friction fitting some engine applications.

Instead of wrapping tape around the base of the motor, try some thin strips down the casing.
Notice the top of the tape, how it rolls over the casing lip. This prevents the tape from folding over when pressed into the body tube.

In the picture at the right, you can see the tail of the tape strip sticking out at the nozzle end.

Saturday, November 20, 2021

Rocketship Games MMX Hawkeye, Part 7, Paint & Details

Here's the model after an initial white undercoat and sanding down the fillet blobs.

The instructions suggest white fins and a gray body.
I thought that would be some difficult masking as the model is so small.

I opted to paint it more like the original Estes Catalog picture, an overall light gray with a white nose cone.
It occurred to me - Wait to glue on the small faux motor tubes - leave those white. Glue them on after the light gray overall paint dries.
Also, wait to glue on the black plastic launch lugs. 


On the left is the main body painted an overall light gray.
the nose cone was left a gloss white.

On the right side picture you can see some of the gray paint scraped off to glue on the white faux motor tube.
One motor tube is glued on.
The two launch lugs were left black, not painted. These were glued in place using medium CA glue.

Squeeze out a drop on scrap cardboard.
The lugs were held with tweezers and drawn through the CA puddle leaving a thin line of glue on the underside. 
Set the lug in place using the tweezers. Note the scraped line exposing the body tube surface for the second lug on the left.

Friday, November 19, 2021

Rocketship Games MMX Hawkeye, Part 6, Engine Block & Fin Gluing


I made a "Block and Tackle" (Jim Flis idea) to set the engine block in the body tube. 
A simple 1/8" wide wrap of tape stops the engine casing when pressing the engine block in place. This will leave a friction fitted MMX engine with 1/8" extended out the back of the tube.
Here's the toothpick included in the kit.
I measured just below the engine block position so it would hit the glue before ending up in it's location.
The Kevlar line is tied to the loop at the top of the red engine block.

Mark the toothpick with pencil,
A drop of glue is applied to the top of the toothpick and set in the tube using the pencil line as a depth gauge.
The block is slipped in and pressed into place with the taped engine casing.


The wings and rudder fins are glued onto the laser cut lines on the body tube.

The forward small vane fins are glued to the lines towards the front of the tube.

Dry fit the Dorsal Bar piece before applying any glue. You may have to widen the slot to slide over the Rudder fin.
The Dorsal Bar piece is glued over the top rudder fin.

Mine overhang the back by about 1/16". That will be trimmed off after the glue dries.

Thursday, November 18, 2021

Rocketship Games MMX Hawkeye, Part 5, Filler/Primer Sand & Kevlar Tie


This shows the before and after sanding of the filler/primer shot coats. You can easily see the gray filler/primer left in the grain pores when it is sanded to surface.
The CWF filler fills 3/4 of the balsa.
The filler/primer fills any remaining grain.
A simpler two-step process than the old four coat sanding sealer fill.

Here I've sanded the filler/primer off most of the upper end of the main tube. After sanding, the laser cut fin positioning lines were still visible and useable.
This is the 3D printed combination engine block and Kevlar tie point.
This piece has ridges, like most of the 3D printed parts I've seen. The nose cone was much smoother. The ridges won't matter, the engine block won't be seen inside the body tube.

As suggested in the instructions, I applied some glue to the end of the Kevlar to keep it from unraveling.

Wednesday, November 17, 2021

Rocketship Games MMX Hawkeye, Part 4, Dorsal Bar Fill and Nose Cone & BT Smoothing


The dorsal bar is thin and delicate.
I had one side crack and glued it back with CA. 
The original kit didn't have the slot extending to the rear. In the Estes kit the rectangular piece was glued 1/16" forward of the Rudder fin.

I sanded the filler/primer off the top with the piece still taped to the scrap cardboard.


The nose cone is very smooth for a 3D printed piece.

The shoulder was a bit wider than the main body tube. I reduced the side diameter with my sanding block, followed by smooth sanding with 400 grit.
The body and Faux motor tubes had the seams filled with CWF and sanded to surface.

Here I'm ready for a shot of filler/primer. Some Q-tips were folded over to make short painting wands. I used a baggie to cover my hand and keep the paint off.

Tuesday, November 16, 2021

Rocketship Games MMX Hawkeye, Part 3, Balsa Prep and Primer


The balsa grain was filled while the parts were still on the laser cut sheet. I wouldn't normally fill the balsa this way, but the pieces are very small and the balsa thin.

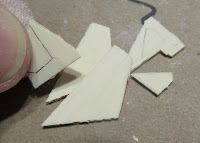
Here I'm breaking apart the the pieces off the sheet.
A bit more CWF was rubbed into the edges and allowed to dry.
On the left, some 400 grit was wrapped around a dowel to sand the round trailing edges of the wing pieces.
The leading edges were rounded.


The pieces were set down on scrap cardboard for a shot of filler/primer.
There is an extra vane piece.
The slotted "dorsal bar" (runway) piece is not shown here.

Sunday, November 14, 2021

Rocketship Games MMX Hawkeye, Part 2, Balsa Filling


Normally I would brush on thinned CWF - but these fins are very thin and would probably warp!

I left the fins attached to the sheet for filling.
To keep the coverage thin, I dipped a fingertip in the CWF and rubbed a thin coat over the surface.
I'll worry about the leading and trailing edges later.

On the left is the thin coat of filler.

On the right, I've set the balsa under my Plexiglass sheet to dry. 
After it was dry, there wasn't any warping.

Saturday, November 13, 2021

Rocketship Games MMX Hawkeye, Part 1, Parts

The Rocket Ship Games Hawkeye is a Micro Max version of the OOP Estes kit. 
4 1/2" tall with a 7mm diameter body.


The nose cone is 3D printed and very smooth.
Note the fin alignment lines are lightly laser marked on the body tube.
The red 3D printed piece on the left is the engine block / Kevlar anchor tie.
The fins are laser cut from 1/16" thick balsa.
The "decals" are stickers on clear plastic. The decal edges are "kiss" cut.
The two black tubes are launch lugs. Both are positioned higher on the body under and against the upper vane fins.
Coiled black Kevlar. 
A toothpick (not shown) is included used as a glue applicator for the red engine block.

Friday, November 12, 2021

Rocketship Games MMX Hawkeye, Estes Kit Background


The original Estes Hawkeye kit # 0873 was available from 1986 to 1996. 
The finished model was 8.5" tall. The main airframe tube was a BT-5.
The fins were die-cut cardstock. The two faux motors were rough surface fish paper couplers.
The water slide decals were printed in red, white and blue. 


The original Estes instructions are at Jim Z's: CLICK HERE
This illustration shows the Estes kit water slide decal sheet and two couplers.
Other than the smaller size, there are some differences between the two kits.

The fins in the Rocketship Games kit are 1/16" thick balsa. The Estes kit had cardstock fins.
Notice the runway strip. In the Rocketship Games version it is longer with a center slot. The slot surrounds the Rudder fin root edge. 


In the original Estes kit, the couplers are even with the low end of the central body tube.

In the Rocketship Games model they are forward of the tube end by about 3/32".