Showing posts with label S Cherokee D. Show all posts

Sunday, August 2, 2015

Cheap Cherokee D Upscale?

On TRF, K'Tesh noticed the Pro Series II Argent model fins looked like the old Estes Cherokee D. He build a beautiful 2.5" diameter upscale Cherokee D using parts from the Argent kit and nose cone from the Pro Series II Partizon or Estes part # 072413. New upscale fins were cut from plywood.
CLICK HERE to see the TRF thread.
All the upscale information is in that thread.

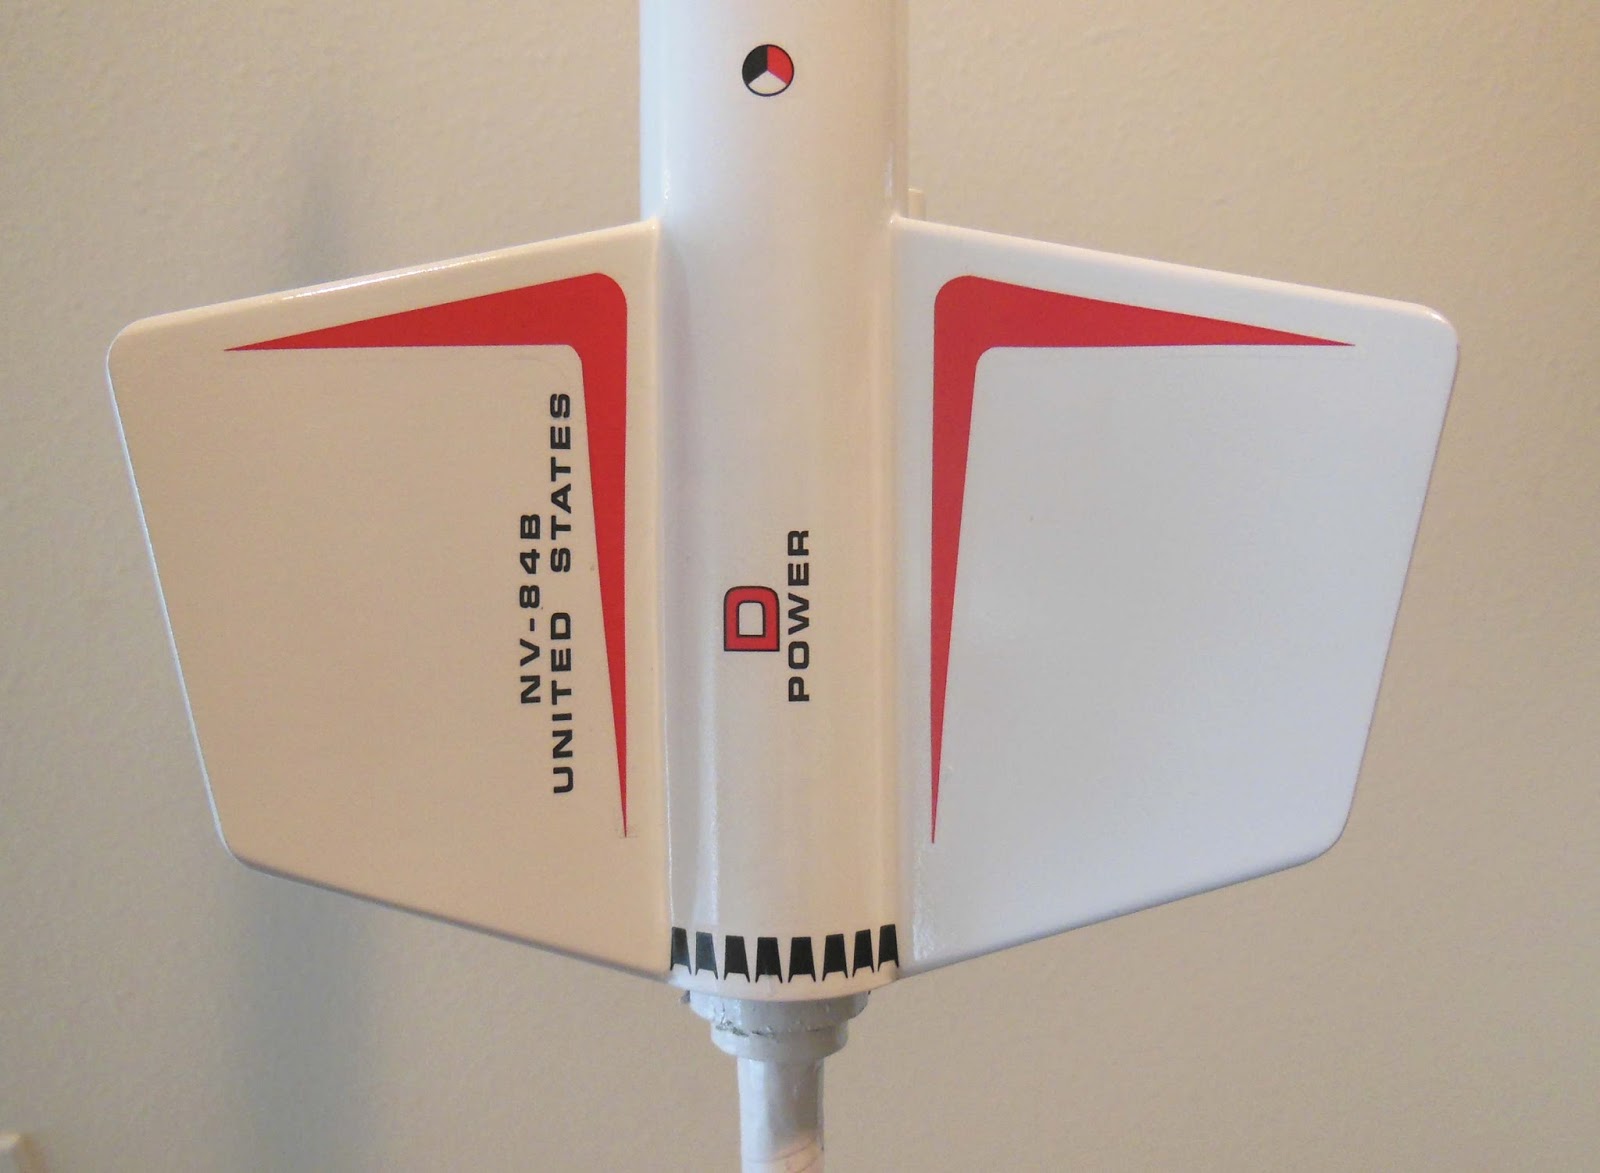
Here's the comparison between my Cherokee D build and the Argent fins:


On TRF, JR Kennedy posted:
"I wonder what the cost-point would have to be for Estes to start doing these sort of re-releases in the PS-II format?  Hummmm.  That BIG Cherokee D sure does get my BAR juices flowin'!"

K'Tesh added:
If you're serious about rectifying the issue... At this time Estes has its Christmas in July sale going. Buy a Partizon for $22.50, and mod from there. It has everything you need except for the decals.

Great thought!
I usually see Mega Der Red Max rockets flown at larger field club launches.
I would think a upscale Cherokee D would be popular.
Who knows, maybe the next Pro Series II SPEV (Spare Parts Elimination Vehicle) could be a Cherokee D?
Decals would raise the price though. K'Tesh got his vinyl deals from Sticker Shock.

Saturday, October 5, 2013

Semroc Cherokee D Finished


This was a fun build!
I'd built one in the early 1970s and flew it with C engines. Back then I didn't have the guts to try it on a D.

The Estes instructions say you can leave the narrower star roll decal attached to the large roll pattern or separate them.
I decided to go with what I saw in the old catalogs and separated them.


Near the back end are the black "vent" decals, the same style used on the Orbital Transport.
Below the launch lug side the vents are split, three on each side. The original kit had two small 1/8" lugs, one on each end of the tube. Those vent decals sat on either side of the low lug.
This version has a single 3/16" lug, more appropriate for D engine flights. The supplied vent decals were drawn to be split around a low 1/8" lug. I set the decals like the original kit placement.
The model was loaded with a D12-5 to find a position for the center of gravity decal.

Start to Finish BUILD TIME = 6 hours, 30 minutes

Friday, October 4, 2013

Semroc Cherokee D Build, Part 11, Decal Detail

This was harder than I thought it would be.
I was hoping to just drop in the old Estes logo in place of the Semroc name.
Looking at the old pictures, the Estes logo seemed to have been slightly changed to fit the space in the Cherokee D roll pattern.
The words "Model Rocketry" and "Scientific Space Age Hobby" were removed.
The Estes logo (with the Mercury capsule and vapor trail arc) was squashed a bit.


The picture on the left shows what I ended up doing.
The vapor trail arc was carefully cut off the top and bottom.


The Estes oval was centered in the open area on the roll pattern.
The arc jet-stream pieces were set down more to the sides of the oval.

If you look at the decal sheet from the Ninfinger site the balance seems about right.

Some trivia: The Estes logo went through some changes over the years.
The logo first featured a Mercury capsule, then for a short time an Apollo capsule.
The Cherokee D kit first had the decal shown here then the modern logo used now.

BUILD TIME - Decal Detail Placement = 20 minutes
TOTAL BUILD TIME so far = 6 hours, 30 minutes

Thursday, October 3, 2013

Semroc Cherokee D Build, Part 10, Decals

Decal placement took a LOT of time!
There are almost too many decals on the half sheet. Take your time cutting them out, it's easy to cut into a nearby image.

TIP: Notice the NASA logo - it's meant to be cut out with the red "V" decal as one piece. Trust me, it'll save a lot of time positioning if you leave them together.
The NV-848 UNITED STATES type stays next to the other red "Vs".


I'm removing the SEMROC name from the roll pattern decal. It's nothing against Semroc, I'll be replacing it with something else.

TIP: If you ever remove something from the middle of a decal try to make the corners round - no sharp edges. The decal will be less likely to tear when the cut corners are round.

It may have been just my kit, but the decals took a long time to soak and release. Soaking took 60 seconds plus a few minutes sitting on a paper towel before they released from the backing paper.

The red "Vs" are hard to place.
TIP: Make a simple spacing tool to assure the decal edges were the same distance from the root and forward edges. Draw a pencil tic on a piece of paper and slide it down the decal edge to check your spacing from the root edge and leading edge.

These decals grabbed pretty quickly.

TIP: Keep a soft paint brush handy. If your decal won't slide anymore - Dip the brush in water and brush over the decal. The brush and water will help lift the edges so you can re-position the decal if needed.

BUILD TIME - Decal Placement = 1 hour, 50 minutes
TOTAL BUILD TIME so far = 6 hours, 10 minutes

Wednesday, October 2, 2013

Semroc Cherokee D Build, Part 9, Paint


Before the last (heavier) white paint coat you'll want to remove any dust or pieces of lint.

Some use a tack cloth but they can sometimes leave a sticky residue.
I'll usually just dust off the model with a 1" utility brush.
This model has an easy paint job. White body and a red nose cone.
The decals are what really make this model.

A piece of masking tape goes half on - half off the edge of some copy paper.
Wrap this around the nose cone shoulder using the taped rolled paper as a handle.
Spray away!
Two thin coats, light wet sanding between coats.
Then the final, heavier "wet" coat.

BUILD TIME - Spray White and Red = 15  minutes
TOTAL BUILD TIME so far = 4 hours, 20 minutes

Tuesday, October 1, 2013

Semroc Cherokee D Build, Part 8, Wet Sanding Tips


Here's something I learned when wet sanding clear finishes on some homemade banjos.

The Cherokee D is a BT-55 based rocket standing almost 22" long.
The entire model was wet sanded using that one small piece of 400 grit sandpaper.


TIPS: Keep your sandpaper wet but not dripping wet.
Let the sandpaper soak in the water for a few minutes. Shake off the excess water and lightly sand a small area.
Dip the sandpaper back into the water. You should be able to rub most of the sludge off with a finger.
The water will help keep the sandpaper from loading up with the rough paint you are taking off the model.

As mentioned before, you are just removing the tops of any small paint "bumps" or "orange peel."
Before wet sanding you should have enough paint on the surface so you don't risk sanding too deep and into the body tube or balsa.
When wet sanding you are just taking some of the top surface paint off, not going down to the bare rocket surface. Leave a color coat of paint on the rocket!

Monday, September 30, 2013

Semroc Cherokee D Build, Part 7, Wet Sanding Tips

BUILD TIME - First White Coat Shot = 5  minutes - dry time not added.
The Cherokee D got an first shot of gloss white.
I can't sand until the white coat dries, at least 24 hours in the Florida humidity.
Now that the color coat has been added wet sanding can follow.

When sanding flat surfaces, stay away from the edges.
It's too easy to sand the paint off a sharp corner.
TIP: Notice how the sandpaper is bent away from the sharp edge of the fin. The sandpaper can't roll over the sharp edge if held like this.
If you sand off the paint and go down through the primer (or balsa!) you might have to spray primer again.
To be safe, stay away from the edge by about 1/16". Those edges will take care of themselves and should be smooth in the end.

Here's how the back end looked after "damp sanding" with 400 grit sandpaper.
Look close at the fin on the upper left. I almost sanded through to the balsa! Sand, stop and check - sand, stop and check!

TIP: Pay close attention to the top of the leading edge where it meets the body tube. It's hard to get a Titebond M&TG fillet to roll smoothly around the top.
Wrap some 400 grit around a Q-tip for a cushioned (small) sanding "finger".
One great thing about the Titebond M&TG is it's sandable!
Well, it doesn't sand like a piece of wood, but it's easier to sand than a white glue fillet.

BUILD TIME - Wet Sand White = 25  minutes

TIP: After you spray the first color coat, hold the model up to a bright light and look close at all the surfaces.
Wet sand (actually more like damp sanding) with 400 grit. Sand over any rough areas.
After the next color coat is applied, all those rough areas should disappear. You should have a good gloss surface when the next coats are sprayed.

TOTAL BUILD TIME so far = 4 hours, 5 minutes

Sunday, September 29, 2013

Semroc Cherokee D Build, Part 6, Primer Coat, Sand And White Color Coat

A few small standard steps won't been covered with pictures this time.
This build was going to concentrate on build time and tips.

BUILD TIME - CA Tube Ends and 24mm Engine Mount Gluing = 5  minutes
BUILD TIME - Mark Tube for Fins, Glue Fins = 15 minutes
BUILD TIME - 2 applications of Titebond M&TG Fin Fillets (not including drying time between fillets) = 12 minutes
BUILD TIME - Launch Lug Mark and Glue = 3 minutes
TOTAL BUILD TIME so far = 3 hour, 5 minutes


TIP: You really don't need four coats of filler/primer and sanding between coats.
I spray one thicker coat and sand with 320 then 400 grit until the tube and surfaces look like the picture at the right. Remove most of the filler with 320 grit. If you sand down to the white tube while using the 320 grit you've probably taken too much primer off. Follow with the 400 grit until you get that "patchy" look.

BUILD TIME - Primer Spray (not including drying time) = 5  minutes
BUILD TIME - Sand Primer, 320 then 400 grit = 20  minutes
BUILD TIME - First White Coat = 5  minutes

I can't sand until the white coat dries, at least 24 hours in the Florida humidity.

TIP: After you spray the first white undercoat, hold the model up to a bright light and look close at all the surfaces.
Sand over any rough spots. Wet sand only after the first color coat. Don't wet sand on bare tube or bare wood. Bare surfaces will soak up any water used in wet sanding and swell up! Only wet sand over sealed surfaces.

Wet sand (actually more like damp sanding) after color coats with 400 grit.
After the next color coat is applied, all those rough areas should disappear. You should have a good gloss surface overall.

As always - these are the methods that work for me. 
Your methods (and finished results) probably work best for you!

TOTAL BUILD TIME so far = 3 hours, 35 minutes

Saturday, September 28, 2013

Semroc Cherokee D Build, Part 5 Nose Cone Shape and Balsa Fill


The BNC-55AC nose cone is bit different. It's the same nose cone used in the Estes Arcas kit.
You can check it out on the Semroc website or in the Jim Z instructions.

Instead of being a standard ogive shape - 
Right above the shoulder is a slight dip in the diameter. Be careful not to sand this down or sand it off. That slight concave dip is supposed to be there.
The nose cone tip is rounded off.
It's really an elegant, subtle change.


Here's the strangest combination picture I've ever posted.
(One hand has to hold the camera!)
You should lightly sand down the grinding marks before filling the nose cone grain.

TIP:
The left thumb acts as a bumper to prevent you from sanding over and removing some of the raised lip.
My left hand thumb is held right up to the raised shoulder lip.
The right thumb does the up and down sanding and stops at the left thumb.

If you do this correctly, you sand down until the side of your right thumb hits the left thumb stopping the sandpaper before it can reduce the shoulder lip.


After you've sanded the sides of the nose cone, pull it slightly out of the body tube.

TIP:
To clean up the joint a bit more, fold a piece of 400 grit sandpaper in half.
Run the folded sandpaper gently along the down the open joint.
Go lightly, you are just knocking off any uneven edges on the nose cone shoulder.


Here's how a fin should look after the CWF filler dries.
On the right side, You can still see the brush marks.

TIP:
First sand the flat sides of the fins first with 220 or 320 grit, knocking off the high brush mark lines. After that, sand smooth with 400 grit.

BUILD TIME (Nose Cone Sand, Balsa and Tube Seam Fill and Sand, Sand Balsa and Tubes = 1hour, 15  minutes
TOTAL BUILD TIME so far = 2 hours, 30 minutes

Friday, September 27, 2013

Semroc Cherokee D Build Part 4, 18mm Engine Mount


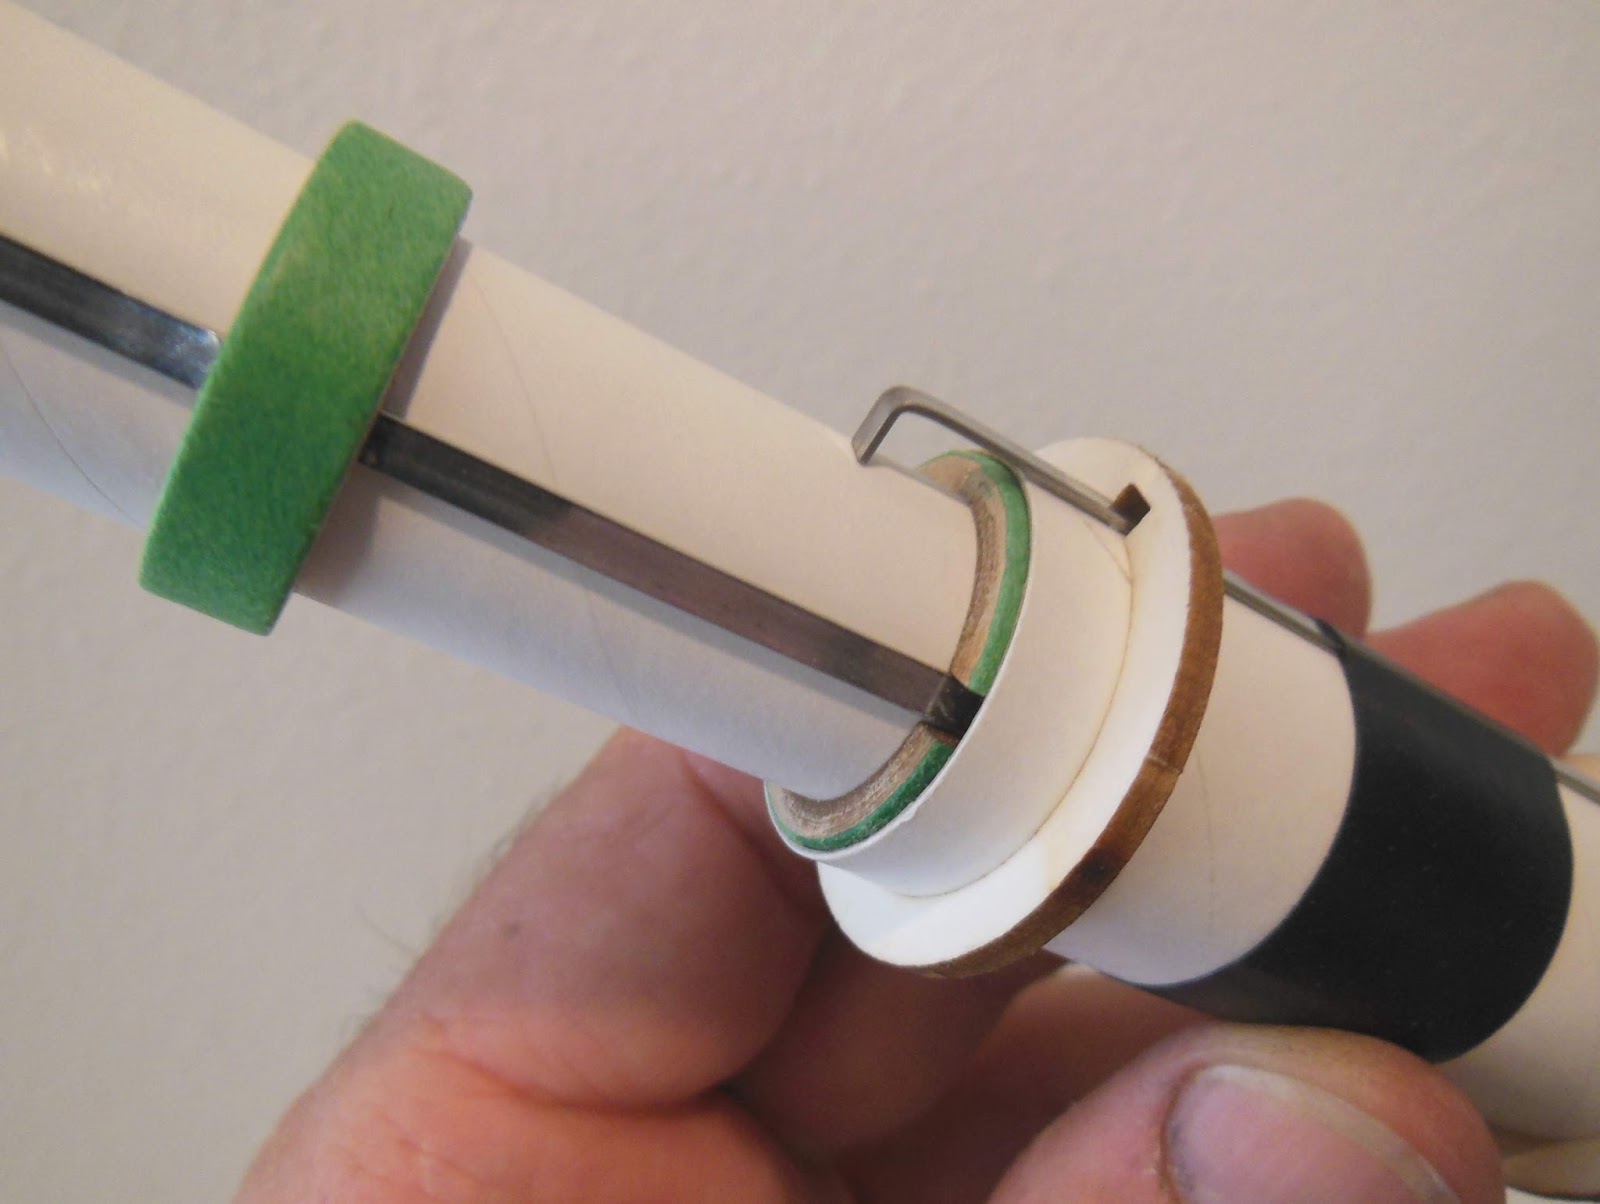
The split 2050 ring is flush with the rear of the 18mm motor mount tube.
TIP:
The cut ends of centering rings are rarely square, usually "wedge" cut at an angle.
For a better look and flush fit, sand the low (exposed) side flat before gluing on the engine mount tube.
The top centering ring goes just over the top of the engine hook.
TIP:
Again, notch the ring for a better fit.
On the left you can see the notch, I filled it in with pencil.
It's just an angled notch, it isn't cut all the way across. Just the end is notched where it lays over the hook bend.

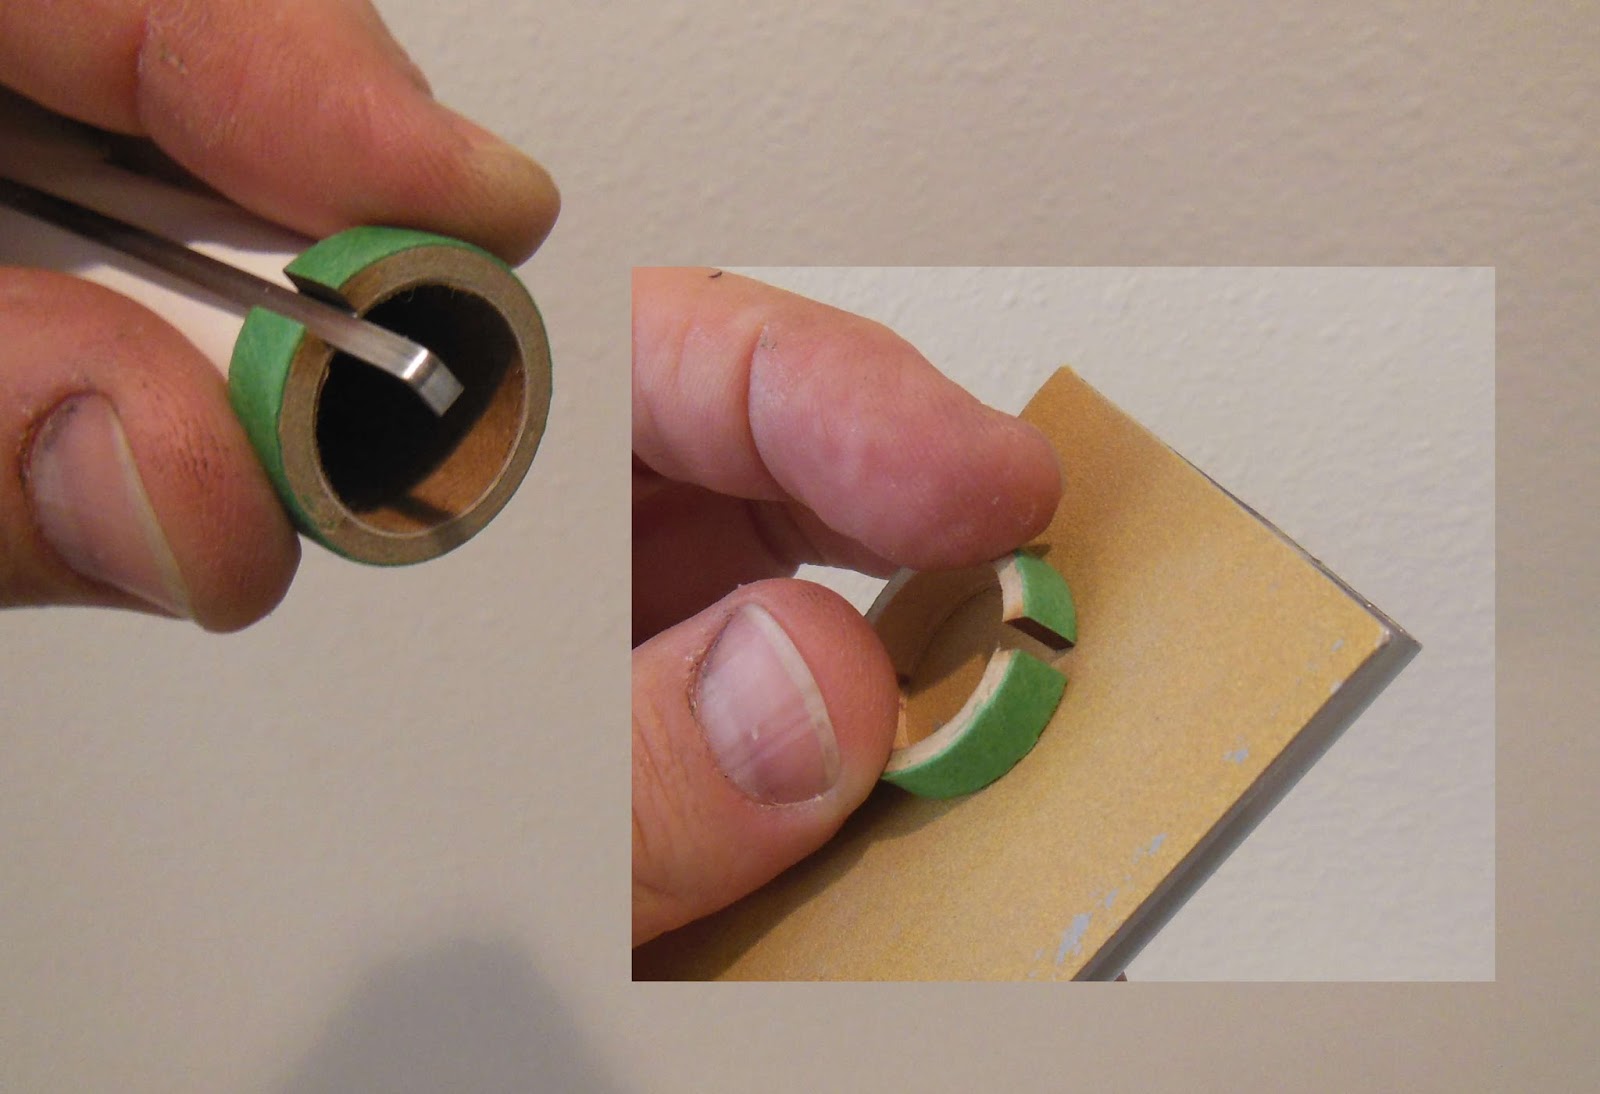
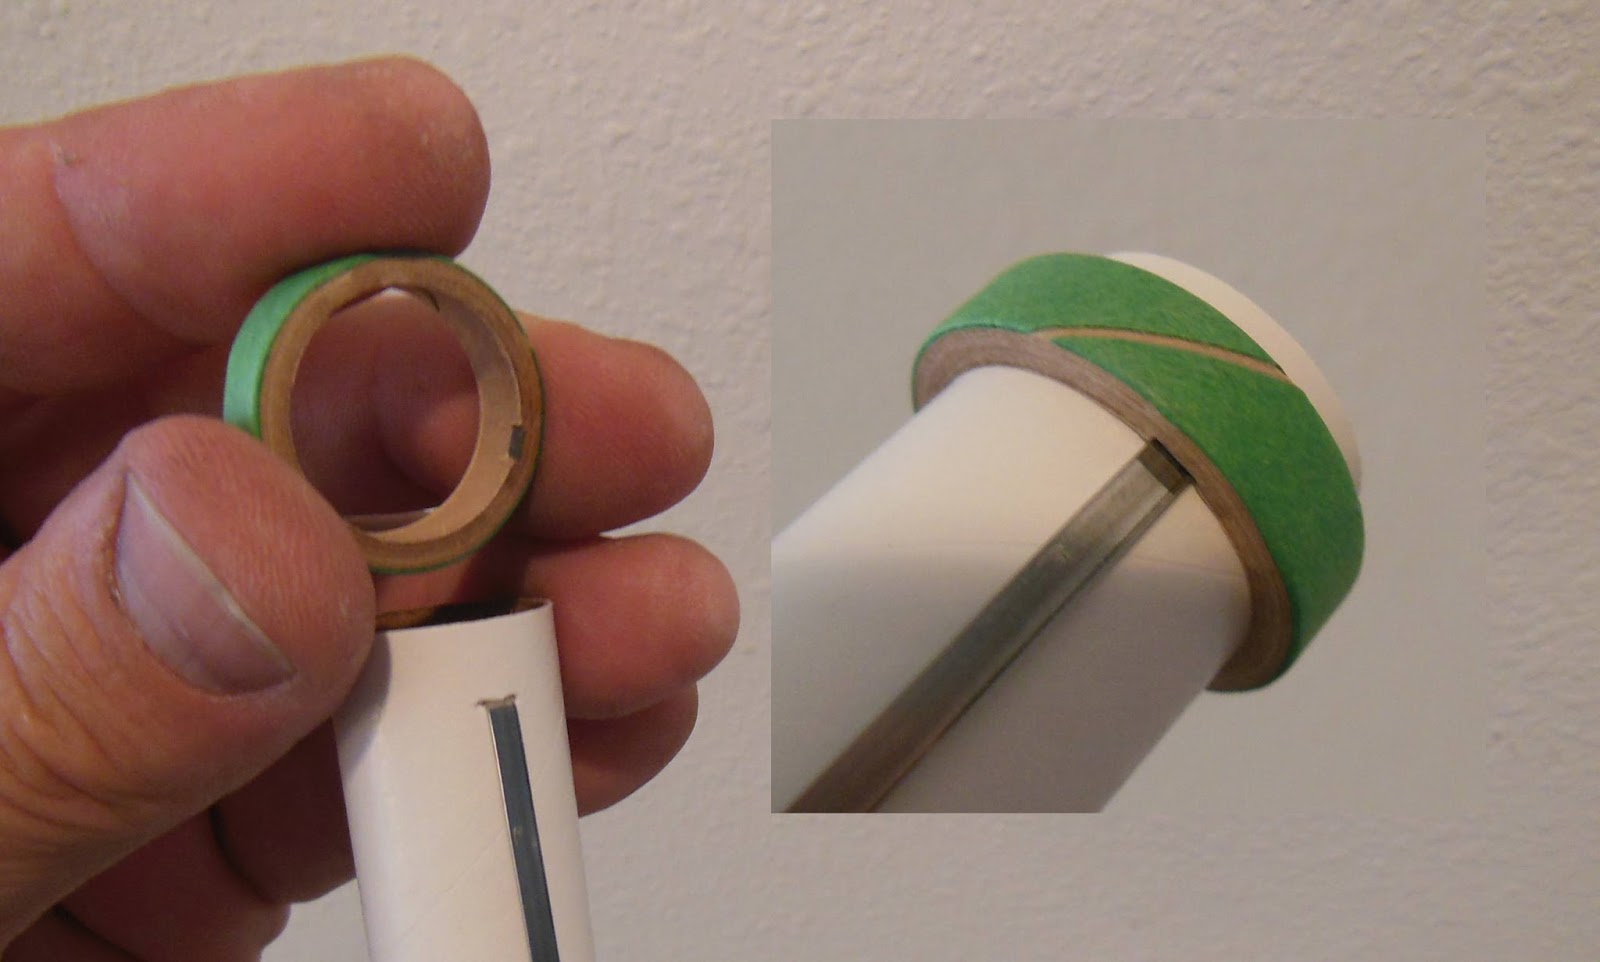
The open ends of the lower open ring are hard to hold down as the glue dries.
TIP:
Set the ring inside the end of the 24mm mount. This will compress the split ring onto the 18mm engine mount tube. (Just be sure there is no glue on the outside of the green ring before sliding it into the larger mount.)

BUILD TIME: 18mm Engine Mount = 20 minutes
TOTAL BUILD TIME so far = 60 minutes

No post about the parachute assembly - it's pretty standard and has been covered before.
BUILD TIME: Parachute Assembly = 15 minutes
TOTAL BUILD TIME so far = 1 hour, 15 minutes

Thursday, September 26, 2013

Semroc Cherokee D Build Part 3, 24mm Engine Mount

Look at the left side of the picture. You can see the engine hook compressing the BT-50 motor mount tube.
The instructions don't mention notching the centering ring for a better fit of the engine hook.
TIP:
Anytime a part deforms a tube like this, you should notch the ring. It won't take much to relieve the pressure.

The inset picture on the right shows notched ring and the rounder tube.
Sometimes engine fit can be tight. Imagine how much tighter the engine would be if the motor mount tube was compressed and out of round.

Here's the finished 24mm engine mount.

TIP:
Use black electrical tape to hold down the engine hook.
I recently opened up an older model where a masking tape wrap was in  place. The tape was dried out and flaked off the engine tube!

TIP:
Wait to do your tape wrap until after the centering rings are in place.
With the rings glued in place you can set the tape closer to the actual center.

BUILD TIME: 24mm Engine Mount = 20 minutes
TOTAL BUILD TIME so far = 50 minutes

Wednesday, September 25, 2013

Semroc Cherokee D Build Part 2, Fin Edge Rounding


TIP: 
Don't sand off the brown laser burnt edges yet.
Use the dark burn as a gauge to tell if your rounded edges are even when sanding.

The top fin is before, the bottom fin shows the rounded edge.
This part of the sanding was done with 220 grit on a block.
Here's the fin after rounding the leading and trailing edges.
The remaining burnt brown balsa is sanded off after the initial rounding.
Use a piece of 400 grit over a finger to remove the remaining burnt edge and finalize the rounded sides.

TIP:
Check that your rounded edges are really round by looking down the fin from the root and outside edges.

BUILD TIME: Shaping fins = 20 minutes
TOTAL BUILD TIME so far = 30 minutes

Tuesday, September 24, 2013

Semroc Cherokee D Build Part 1, Parts

This was a favorite, I'd built the Estes original in the early 1970s.
The BT-55 tube is strong. It's a clean design with plenty of decals.
I don't think it was ever launched with a D engine though. Mainly B6 and C6 engines.

This build will be a little different.
It's standard construction - I'll be concentrating on posting build TIPS
I'll also be keeping track of how much time it takes for each step.


Here's the parts:
Great Semroc Quality
Three 1/8" thick fins
12" parachute. The original kit had an 18" chute)
It seems like Estes was always including a larger parachute than what was really needed.
Most other parts are standard


The parts of interest:
Great profile shape of the BNC-55AC nose cone
BIG decal sheet, lots of pieces crowded on a half page
The 5055 centering rings are cut from thick white stock.
On the lower right is the 20/50 engine mount for 18mm engines.
One ring is already cleanly split for the engine hook movement.

BUILD TIME: Opening bag, taking pictures = 10 minutes