Showing posts with label Pop-Pod. Show all posts

Thursday, August 22, 2019

Estes Gryphon #7280 Build, Part 1, Parts

I want to call this one "Gry-fon" but it is pronounced "Griffin".
From Wikipedia: The griffin, griffon, or gryphon is a legendary creature with the body, tail, and back legs of a lion; the head and wings of an eagle; and sometimes an eagle's talons as its front feet."


Here's the kit parts in the bag -

Some have posted they see a resemblance to the OOP Edmonds Aerospace kits. The new Gryphon is a rear wing, canard design but that's where the similarities end.

Also included in the kit is the Launch Controller Wire Standoff. This standoff helps hold the controller wires and clips away from the lower wings of the glider. A smart addition.
On the right are the black and white decals.

Tuesday, April 2, 2019

Apogee SR-72 Darkbird Build Part 5, Pop-Pod Assembly & Streamer


This instruction drawing was a little confusing. It reads: "Glue four large centering rings . . ." The drawing only shows two wide rings.


Here's what they mean.
Four 5/20 centering rings, stacked and glued on the BT-5 pop pod tube. The top ring is even with the end of the tube.

The plastic cast hold down ring was too tight on the rear end of the pop pod tube.

It took some light carving and sanding on a dowel to get a friction fit.

The hold down ring is slid on.
I applied some Fabri-Tac glue fillets.

Fabri-Tac seems to be very good for plastic to tube joints. I wouldn't recommend it for delicate plastic bonding like the Estes Mercury Redstone capsule and tower assembly.
The red Mylar streamer is attached to the low end of the pop pod with a piece of tape.

With a A3-4 engine in place the pop pod assembly was balanced and marked. The taped streamer was centered on the balance point.
The balance point would have been more accurate if I used a spent engine casing.

Monday, July 2, 2018

Apogee Mini Condor Boost Glider Build, Part 9, Pop Pod Paint & Finished


The blue nose cone needed a coat of gloss white before the fluorescent paint could be applied. I didn't paint the body tube, it was already white.
Maybe I should have painted the pop pod body tube an overall white. Fluorescent paints are almost transparent and any discoloration on the tube will show through.
Some of the rough, flat paint was polished so the decal would adhere better.
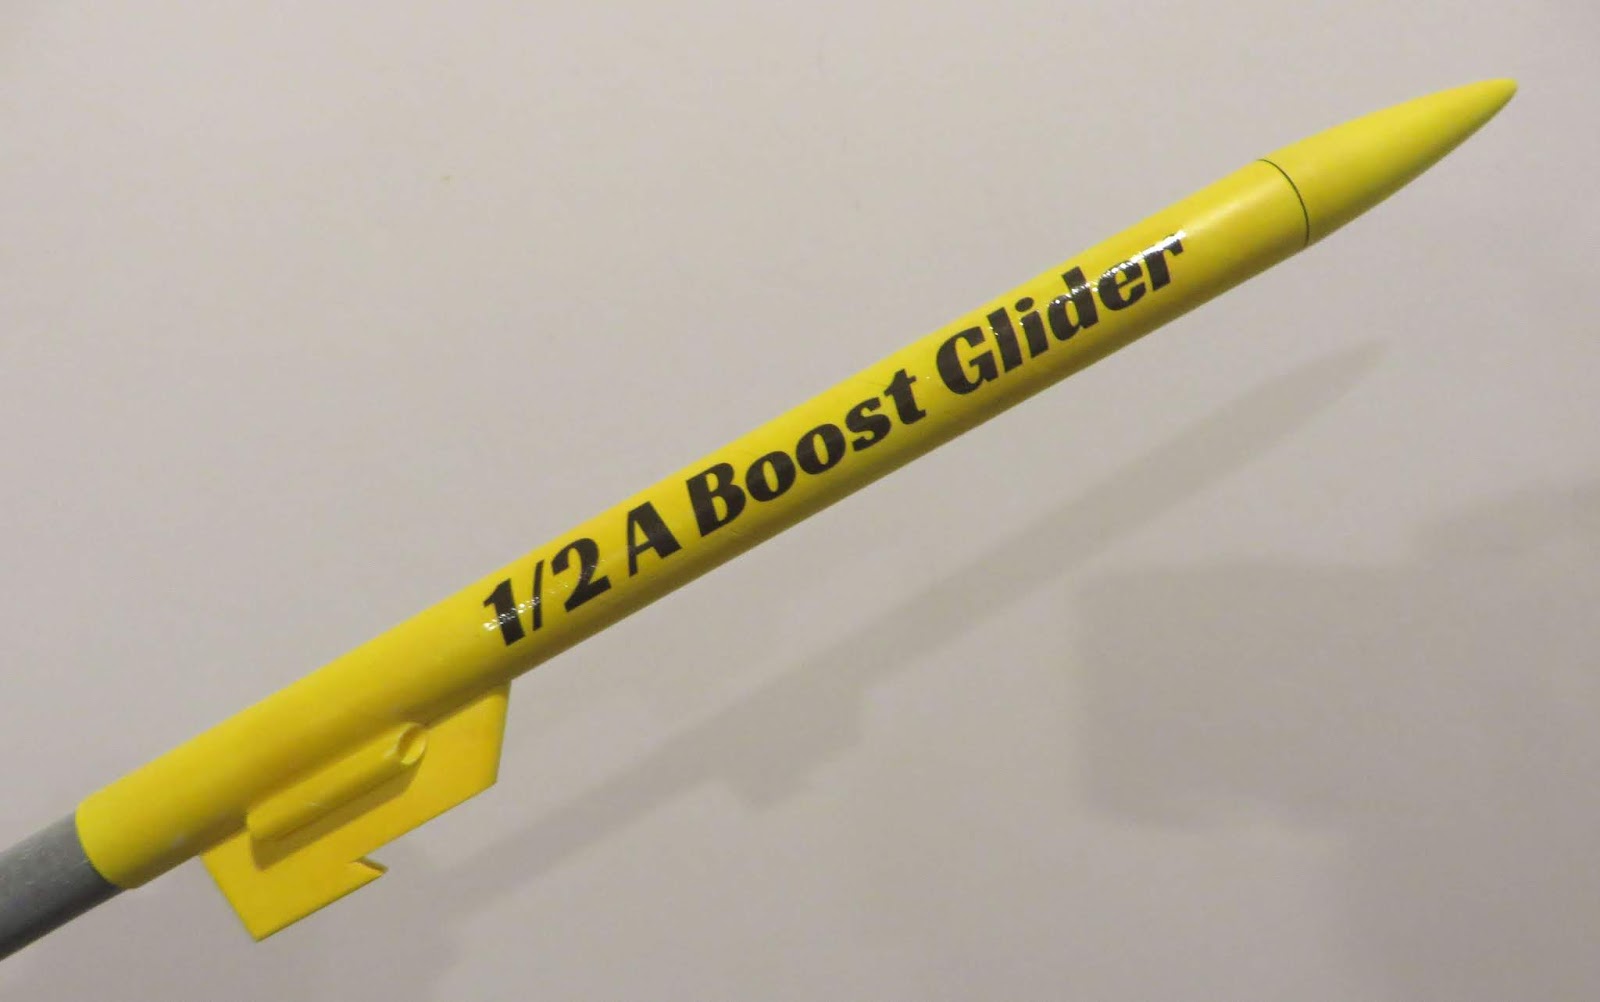
The 1/2 A Boost Glider decal was applied over fluorescent yellow.
Here's the bottom of the boost glider. The black felt tip marking trim was widened so it could be better tracked from the ground.

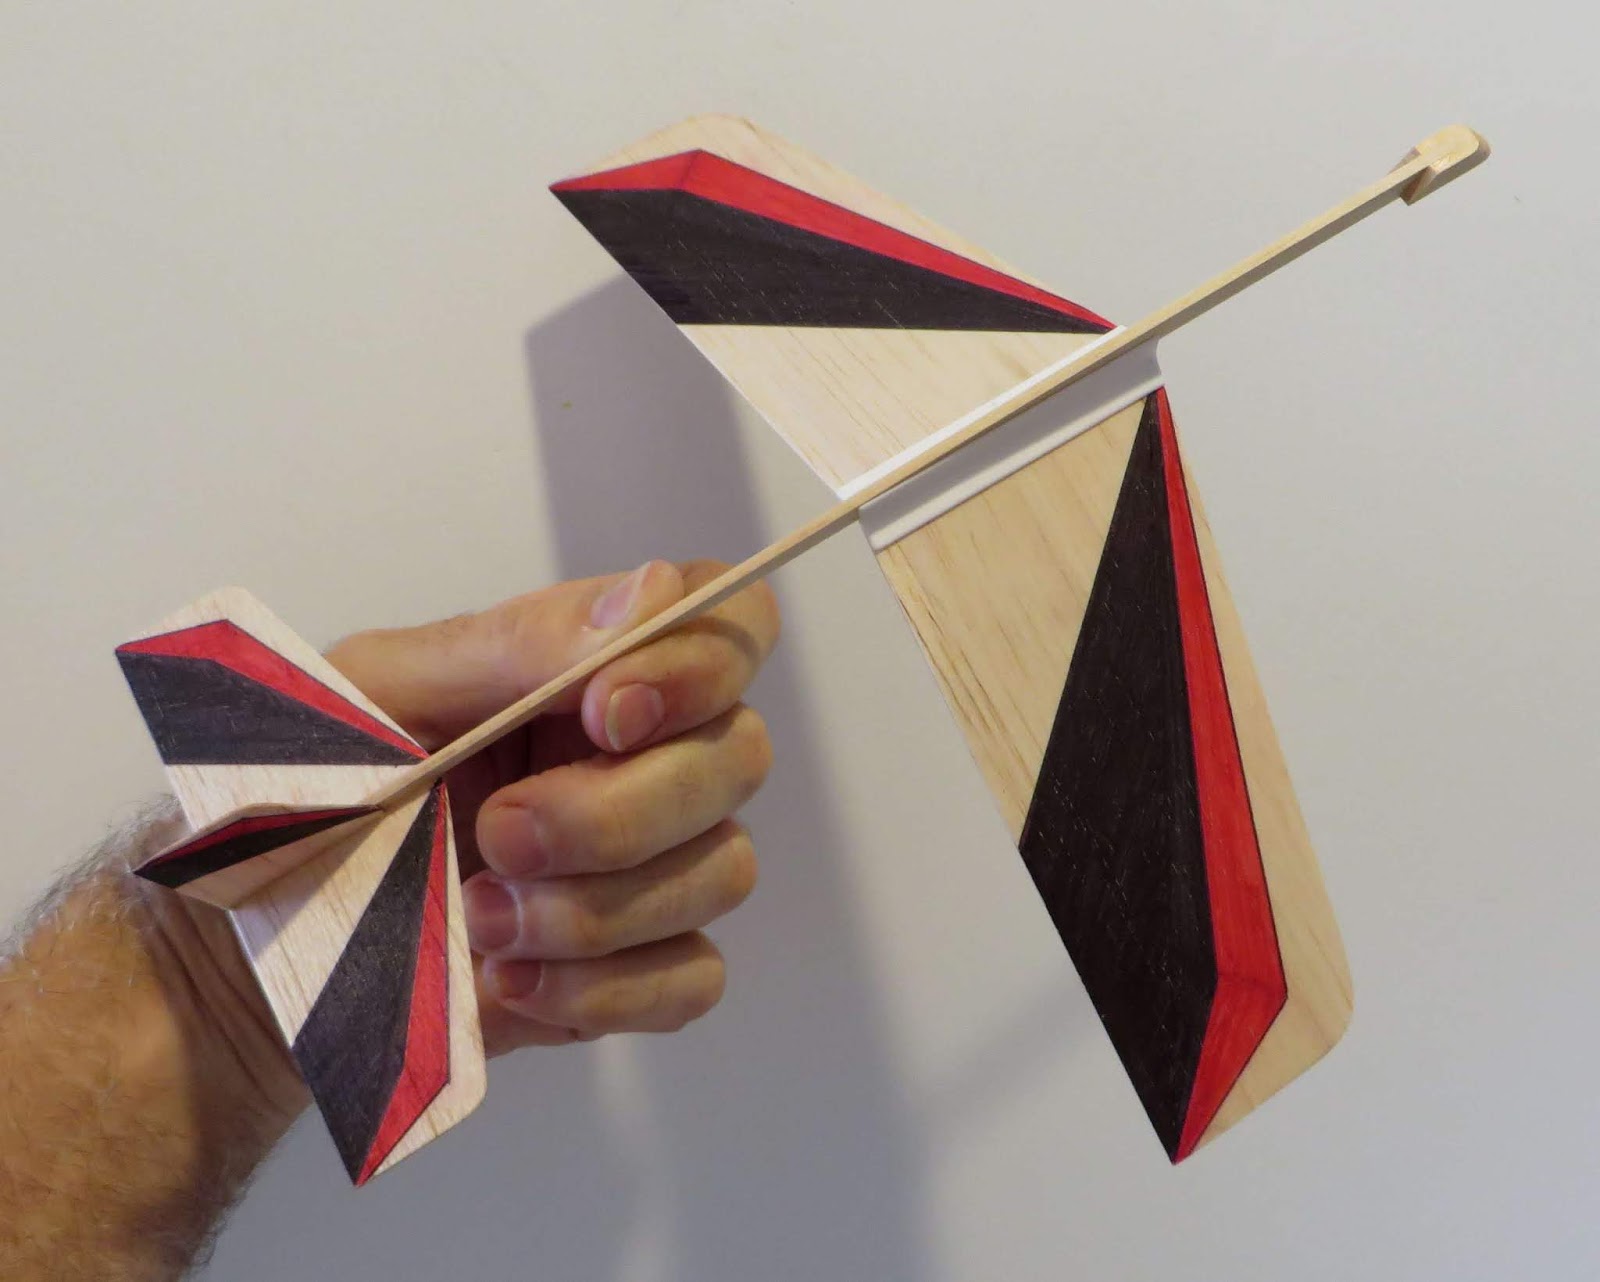
This is an interesting boost glider design. The wing attachment piece sets the dihedral automatically. The pop pod hook is one piece cast plastic.
I was a little concerned about the 1/32" thick tail surfaces. Once they are glued on they did feel much stronger.

To trim the glider, the wing is slid up or back down the fuselage stick. After you get a good glide, mark the wing position then glue on the wing.

I asked Tim at Apogee if the Mini Condor could win a boost glide competition. He said: Oh, yes!" Wish me luck!

Saturday, June 30, 2018

Apogee Mini Condor Boost Glider Build, Part 8, Pop Pod Details


Here's a picture from the Apogee website.

That pop-pod tube seems very long!


The front end of the launch lug got trimmed at a 45 degree angle for less drag.


I cut about 2" off the pod tube. I would think it'll still be stable a little shorter. I'll be using this in 1/2A BG competition, a full A engine is heavier.


The blue plastic nose cone has a slight burr at the lip. 400 grit was used to sand it down.

The outside diameter of the nose cone now matches the body tube diameter.

The shoulder is loose though.
It took two wraps of masking tape to bring it up to a good fit.
The overhanging tape edge was slit with my Army knife scissors. Those pieces were wrapped over the rounded shoulder.

Saturday, June 23, 2018

Apogee Mini Condor Boost Glider Build, Part 3, Pylon Fit


The 1/16" overhang of the white plastic pylon overhang was sanded even with the front angle of the hook plates. That left a flat front and high drag.

The hook plates and fuselage front were rounded. The front of the pylon was also re-rounded.
The resin pylon is almost 3/16" thick. The instructions don't mention doing this, but I sanded a curve into the bottom to better fit and better adhesion to the small diameter BT-5 tube.

The pylon is glued on with medium CA glue. CA glue can get brittle over time and I wanted the best bond I could get.

The bottom of the pylon got a swipe of a Sharpie. 220 grit was wrapped around a 13mm T engine and the bottom curve sanded. The ink lets you see what is removed and visually helps you keep the line straight.


The pylon is glued on 3/8" from the rear of the body tube.

A bead of medium CA was applied to the round recess. Set the back of the pylon at the 3/8" mark and rock it forward to seat it on the tube.

Tuesday, January 30, 2018

Estes Scissor Wing Transport Build, Part 15, Ends and Edges


The rear fins and exposed tube on the pop pod were already sprayed gloss black. I wanted the fins to be less noticeable so they were hit with flat clear acrylic.

TIP: Before you spray any clear, brush off any dust. Dust will show up and be very visible under the clear coat. 


For some reason the trailing edges of the fins didn't get an opaque black coat. A Sharpie was run over the edges.


Before applying the elevator hinge, align it with the ends of the elevator. Lightly tape the bottom to hold it in place.


Flip over the model to apply the clear hinge. The clear hinges from the kit didn't stick very well.


I ended up using some clear packing tape for the hinges.

They were set down and burnished. the overhang was cut with sharp scissors.

Saturday, January 27, 2018

Estes Scissor Wing Transport Build, Part 12, Pod Parachute


The instructions have you loop-tip the parachute shroud lines to the center of the pod tube. Follow with a wrap of masking tape. Masking tape is paper and will easily tear.

TIP: Instead of paper tape, cut a square of clear plastic from the excess from the peel and stick decal sheet. This will be much stronger.


The shroud lines were tied towards the back end of the pod.
With a used C6-3 engine in place I couldn't tie the parachute lines at the balance point. I ended up tying it towards the back so the pod would fall at more of an angle.


This step of the instructions say to round the pod fins now. Why now?
It was easier to round the fins before gluing onto the rear of the pop pod.

Friday, January 19, 2018

Estes Scissor Wing Transport Build, Part 5, Rear Fins

Before gluing on the pod fins, notice the pencil marks on the centering rings and over the edge of the tube.

TIP: When these fins are set on the tube they will totally cover up the pencil lines. Extend the lines around the tube end and over the rings for easier visual alignment.


It not easy to sneak a glue fillet around the side braces. I had to apply glue, smooth the fillet and remove excess with a Q-tip.

Thursday, January 18, 2018

Estes Scissor Wing Transport Build, Part 3, Pop Pod


I didn't want to cut up the instructions so I scanned the marking guide wraps.
TIP: When you scan fin templates or marking guides, always put a ruler inside the scanner. After you print a copy, check the print ruler against the physical ruler. If both match up you should be good to go.


Even though the printed copy ruler was correct, the kit marking guide still didn't match up - close though - 

Before gluing anything onto the BT-20 pod tube, I filled the seam in the short length that will be exposed out the back of the BT-50 main body.


After sanding down the primer/filler the tube was marked for the engine hook and rear centering ring.


The rings were too tight on the pod tube. I could have peeled the inside, but instead -

TIP: Burnish down the raised burr with the rounded end of a ballpoint pen. Now I had a good friction fit.

Tuesday, March 14, 2017

Estes Skydart II #3229 Build, Step 24, Pop Pod Chute Packing TIP

There's not much room for the parachute and shroud lines between the BT-20 pop pod and the BT-50 main air frame body tube. Careful packing can insure a good ejection and quick opening of the chute.
My first attempts at packing the chute were frustrating. Rolling a chute around a pop pod will take practice. Be sure to dust the chute with talcum powder before packing the day of flight.

The shroud lines can really get in the way when sliding the pop pod all the way into the glider body. You'll be better off with the shroud lines under the parachute.
Start by rolling the lines forward of the tape attachment wrap. Two wraps forward, then start back down for one long wrap crossing over the top lines.

(You might end up spiking the chute, then do the initial shroud line wraps shown above.)
Spike the parachute as normal and lay the "triangle" down the tube over the lines with the tip an inch back from the top.

Center the length of the parachute down the tube. While keeping the tip tight against the tube. (inset picture) Tightly roll the top side around the tube and tuck it under the low side. The thumb holds the tucked side in.
Keep the tip flat and tight against the pod body tube.
Roll the open low side up and over the tucked in side.


Hold the chute rolled up tight and flat as you slide the pod into the body tube. Turning the pop pod can help as you slide it all the way into the tube.

Practice packing the chute a few times before you go to the launch site. With all the distractions on launch day you'll be glad you had some dry runs.

Monday, March 13, 2017

Estes Skydart II #3229 Build, Step 22, Pop Pod Parachute

The instructions show the typical chute attachment where you slide the canopy through the shroud line loops. I wanted a better attachment with no tangled lines.

All three of my line loops got a small overhand loop knot at the center point.
After removing any turns in the line, the three knots were set side-by-side and a cotton string was pushed through the small loops. With the ends tied side by side you can end up with no tangles in the lines.

That line was tied around the balance point of the pop pod tube. Place a used engine in the mount and balance the pod.
TIP: Tape the chute lines to that balance point. The instructions don't mention this but the pop pod will now descend horizontally.

Saturday, February 25, 2017

Estes Skydart II #3229 Build, Part 3, Pop Pod Assembly


Combined, the five nose weight washers weigh 0.57 oz.

Here's the thick 5/50 centering ring even with the top of the short BT-5 tube.
The washer weights butt up against it. A 5/20 ring glues against the bottom of the weight stack.
The last 5/20 ring is glued even with the low end of this short BT-20 tube


Here's another place where the re-issue kit is different. Two Mylar retaining rings are glued around the engine hook.
The upper Mylar ring is glued under the top of the hook. The middle Mylar ring is glued over the hook as normal.
A 20/50 ring is glued against the upper bend of the engine hook.

Here's the finished pop-pod assembly.
On the top is the low engine end, below that the upper weighted washer assembly is glued in place.

On the reissue kit the ejection charge passes through the top of the pop pod. On the original design the top of the pod was blocked. The ejection charge went through two holes punched in the sides of the pod.