Showing posts with label DIY. Show all posts

Friday, August 1, 2025

Centuri Skylab Build, #KB-4, Part 4, D.I.Y. Centering Rings

TIP: One of the best centering ring materials is the left over mat board found at a frame shop. Ask the manager if they have any scraps, leftover pieces too small to be used in a frame.
If you're lucky they might give them to you for free! If not free, cheap anyway.

Trace around the diameter of the tubes. Trace the larger tube first, it's easier to center the smaller tube afterwards. 
It might take a few tries to get the smaller pencil ring centered.


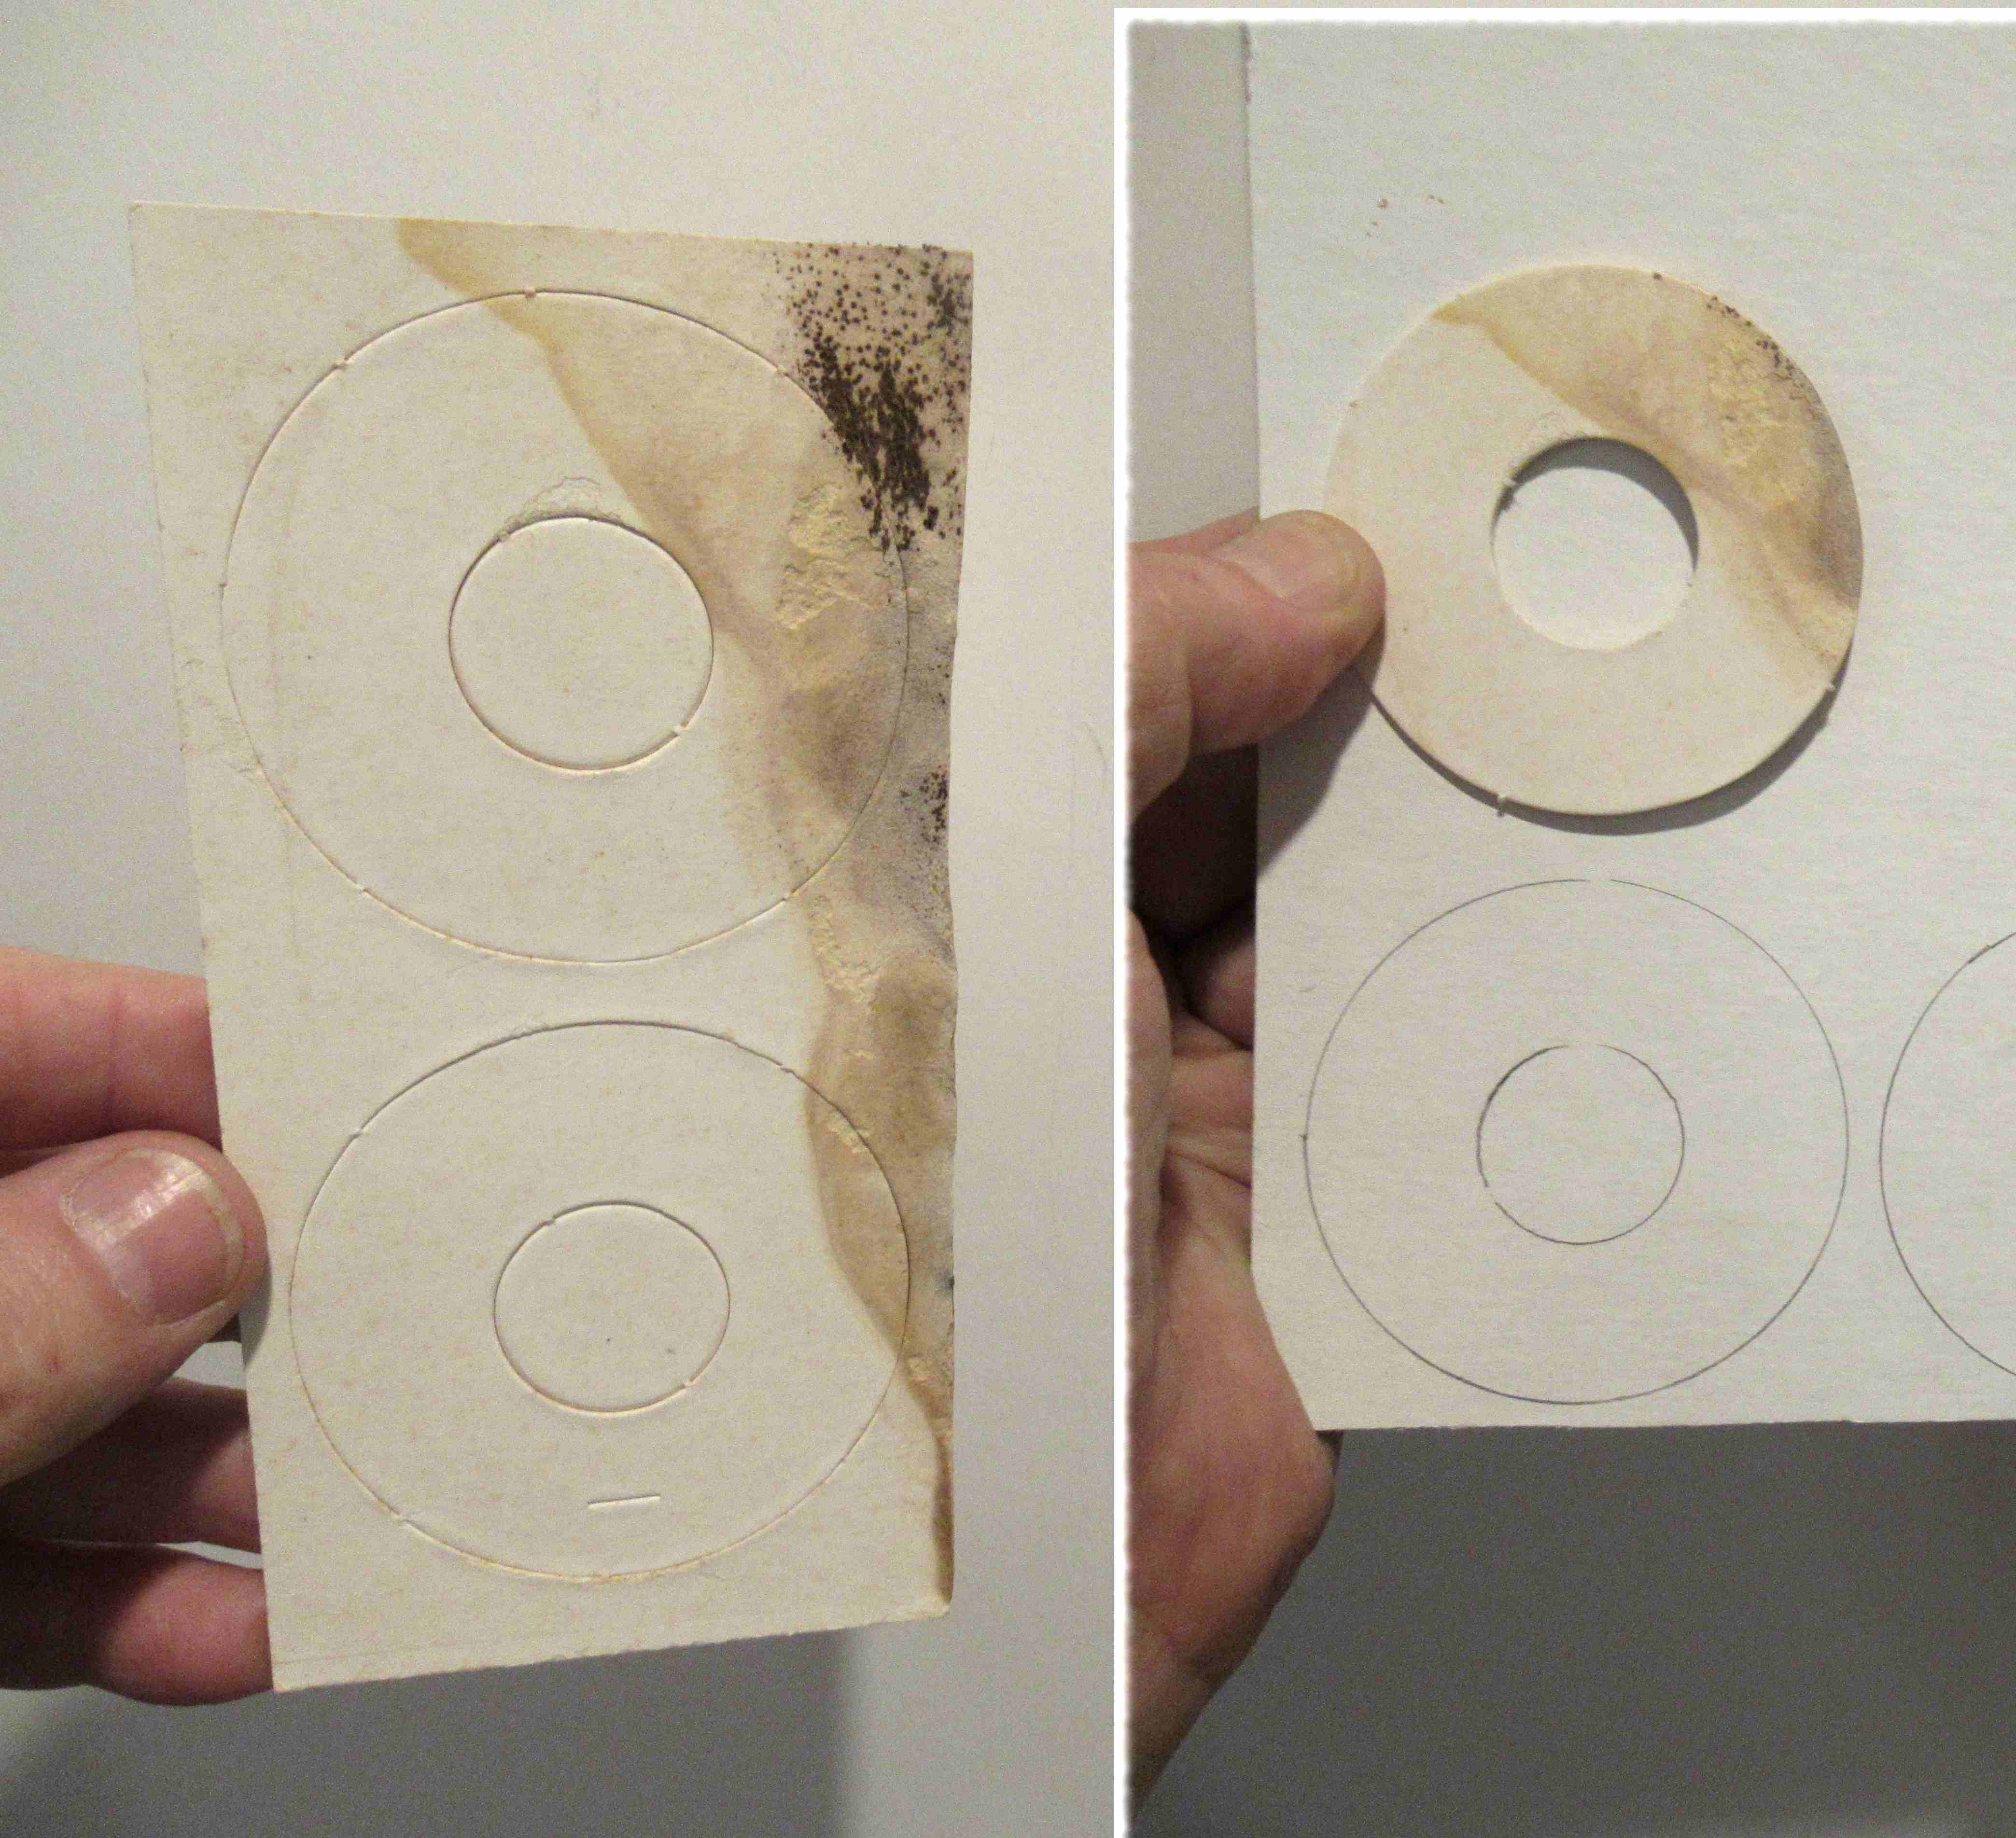
With a new blade, cut the center out first. 
Cutting the center hole first is easier when you have more of the cardstock to hold onto.

That small circle in the center was on the mat board from an earlier build. I should have erased it for the picture.

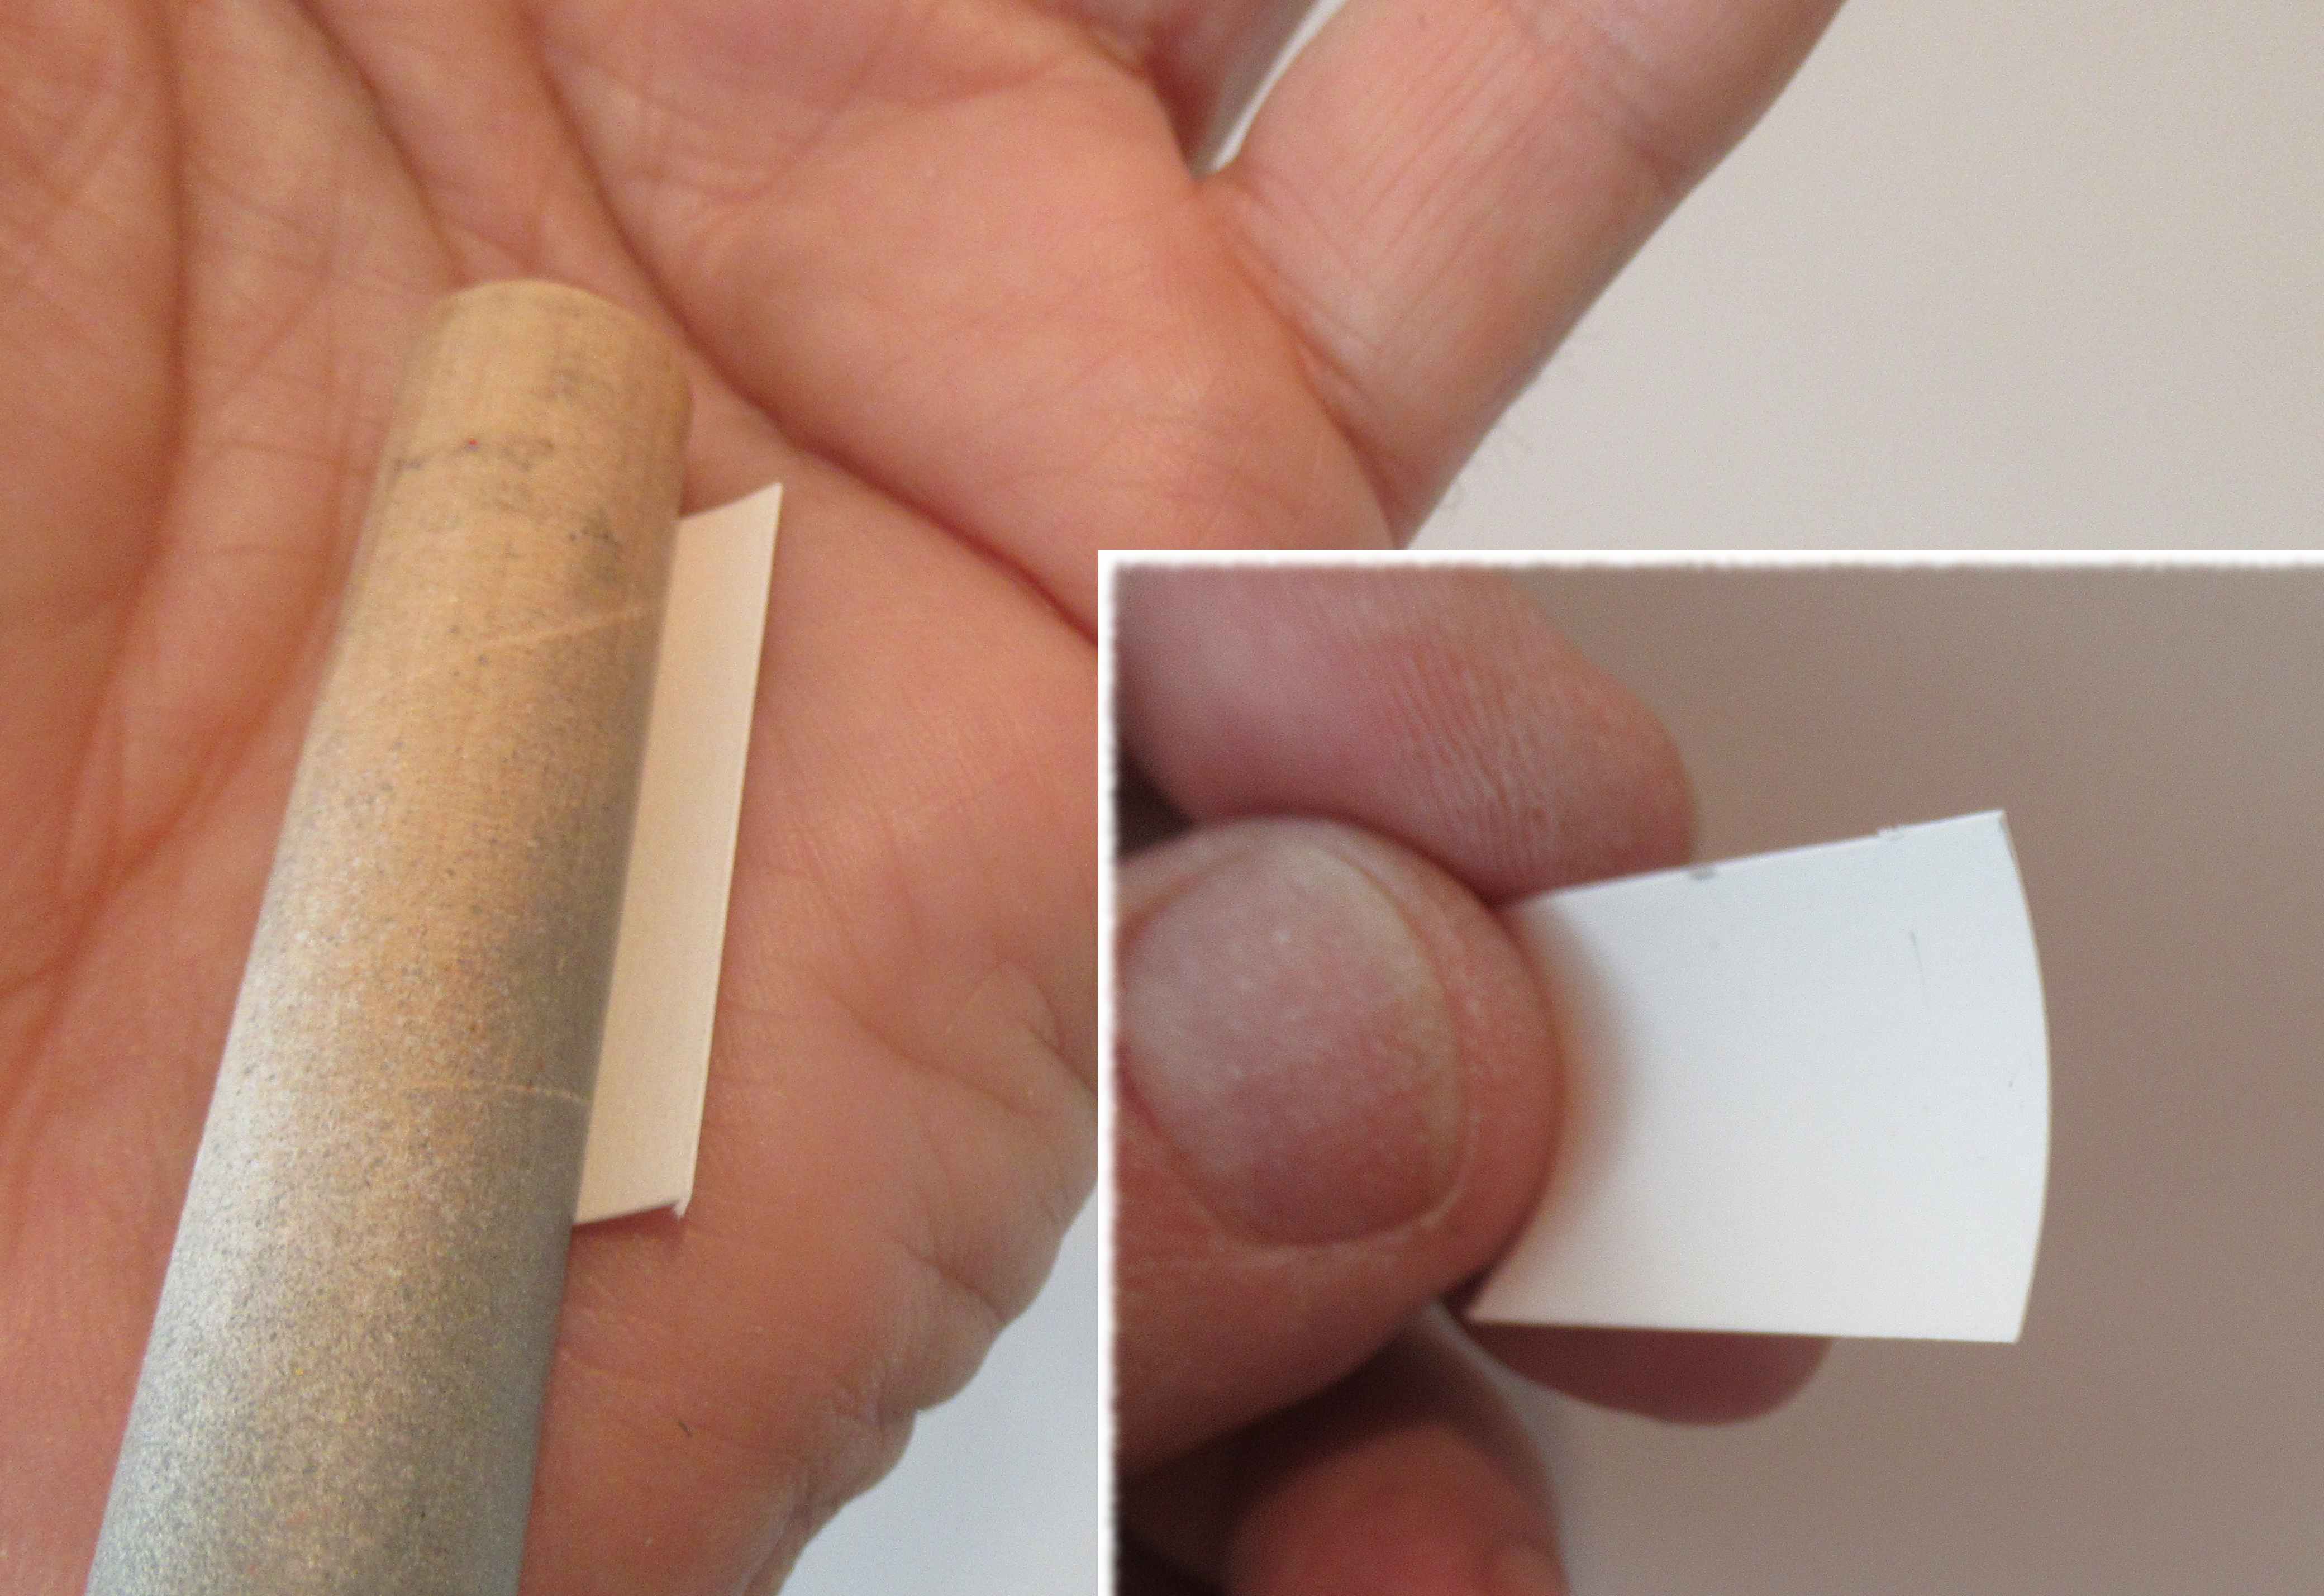
Some 320 grit was rolled around my finger to enlarge the diameter..

Sand a bit, check the fit - repeat until you get a good friction fit.


When the hole is to size,
you might find a raised lip around the edge.
Leave the lip. It gives you a tighter fit and a wider gluing edge later on.

Sunday, April 20, 2025

D.I.Y. Couplers - Tip


I needed a coupler "sleeve" to fit a Centuri sized ST-18 (1.8" diameter) tube.
This is for a second prototype of a possible Odd'l Rockets ROBOT kit.

You can't find couplers in this size so I'll have to make one using a 1" length of the ST-18 tubing


Cut the coupler in a straight line using scissors.

Slip the cut coupler and mark the overlap with pencil.
On the left, you can see the pencil line.
Cut off the overlap, not directly on the line, but a little large.

Test the fit in the outside tube. 
Is it is too tight, you can sand to fit with some 220 grit on a block. 
Enlarge the right side picture to see a perfect fit in the tube.


Tuesday, February 4, 2025

New Painting Wands


I'm overdue for some new painting wands! These are painting handles that slip into an engine mount and lock in the engine mount.

You'll need dowels, 7/16" in diameter to slide into used 18mm engine casing. Cut the dowels to about 15" long.

No reason to knock out the clay nozzle, the dowel end rests against the nozzle.


The dowels will be friction fit inside the engine casing.

Draw a pencil line as a start point and to count the winds of tape. Do six wraps of tape and test the fit in the casing.


After getting a tight fit,

Sand and round off the upper end of the casing to make it easier to slide into the engine mount tube.


Done! 
Four new 18mm painting wands.

When spray painting, I hold the models horizontally, and turn the models after each spray pass.
Sticking the wand in the ground and spraying the rocket vertically is inviting paint runs.

Wednesday, January 29, 2025

D.I.Y. Making Centering Rings, Part 2


Depending on the thickness of the mat board, you cut probably on the outside line using scissors.

Check against the end of the larger tube. Chances are this diameter will be to large.


Here's why you cut out four rings - 
You'll need the thickness and stiffness of all the rings to sand to the correct diameter. One or two rings by themselves would flop around when sanding to size.

On the left I'm sanding the ring edges with a rotating motion. Check the fit, sand some more until you get a friction fit.

Here's a good friction fit of the ring in the BT-50 tube.

I originally was going to have the build powered by 13mm  diameter mini motors. After studying the design I decided to go with 18mm standard motors.

I won't need these rings now, but will hang onto them for another time.

Tuesday, January 28, 2025

D.I.Y. Making Centering Rings, Part 1

While I wait for warmer weather, the Black Star Voyager spray painting will be delayed! 
I'm doing a slight upscale of another OOP kit that needs centering rings. This was to be a spare parts drawer build. 
I didn't have the correct size centering rings, a BT-5 to a BT-50. Rather than wait for a mail order, I decided to make them from framing mat board, a thicker cardstock.
TIP: To get some cheap centering ring .050" thick boards, go to a frame shop and ask if they have any "window mat" scraps. .050" thickness is what kit makers use for most all their kit part cardstock. Some mat boards will be thicker, but that is certainly useable and stronger than the .050" board.

Trace around the larger body tube with a sharp pencil.
If you need two rings, trace four rings.

Carefully center the smaller tube and trace around it.
Check to see it is centered. If needed, erase and trace again.    


Cut out the smaller, center hole first.
This is one of those times you should use an X-Acto #11 style blade. Cut right on the pencil line.

On the right, you can see the cut isn't perfect, those rough edges will be covered with a glue fillet later.


If you cut on the pencil line,
You should get a good friction fit over the smaller tube.

If it seems too tight, 
roll some 400 grit over a finger and sand the whole a bit larger.

More in the next post - 

Sunday, December 18, 2022

Estes Maxi-Brute Honest John (Kit #1269), Part 2, New DIY Centering Rings

This may not be a complete build and finished model. This big build has a pretty big footprint, I'm am running out of storage space. 
I will be concentrating on the fine details - 
The multi-piece launch shoes, two piece nose cone fit, gluing up and smoothing the vacu-for fin edges  and the cardstock ring wraps.

 
Most of the kit was in great shape - The centering rings weren't useable.
There was some water damage and delamination.
I could order new ones, but what fun is that? Sometimes it's quicker just to make my own.

I used the old rings to trace onto some white mat board. I traced four, two pair will be laminated  together. The original rings seemed thin if I decided to go with anything more than a D12 engine.


The centers are cut out using a new #11 blade. 
TIP: You'll find it easier to cut the centers first, then the outside of the ring.

Go slow, making the circle arc as smooth as possible.


Dry fit the ring onto the BT-50 tube.
The first cuts usually give a tight fit over the tube. Use some sandpaper around a fingertip to widen the hole to a good, friction fit.


After the centers are established,

Cut the outside line using scissors. More in the next post - 

Tuesday, April 5, 2022

Estes EAC Firecat #0821, Build, Part 3, Closing The BT-48 Tube Joint


You'll need an interior patch to hold the butted joint seam on the BT-48 tube.
Cut a piece of cardstock about 1/2" wide and 1/4" longer than your body tube.

Pre-curve the piece in your palm using a rolling dowel until you get an arc as shown in the inset picture.
I used a thin coat of wood glue spread evenly over the entire piece.

Press in place centered over the joint. Use the dowel to apply pressure over the patch piece.

After it dries, sand the overhang off using a sanding block until the patch is even with the ends of the body tube.

When you are stuck without a proper part - 
Using this method, you can make couplers to join segments of body tubes.

To smooth out the joint,
Apply a small line of glue the last 3/8" on both sides. 
Wipe off the excess with a fingertip then immediately burnish and roll over the seam with a smooth pen barrel. Pressing the loose fibers into the glue should smooth out the cut. 
The ends will be exposed on the finished model.

Wednesday, December 18, 2019

Semroc V2 Build, Part 11, Extending The Body

I had to make a coupler from a short length of BT-55 to add on the short extension.
1.Cut a segment of tube.
2. Cut vertically down the tube using scissors. Cut in a straight line.
3. Set tightly in tube and trace down the overlap with a sharp pencil.
4. Cut off the overlap with another straight line, just to the side of the pencil line.
You should end up with a tight fit and clean joint seam.
The coupler is glued about 1/3 the way into tube.


On the left is the BT-55 extension slid in place over the coupler.
On the right is the simple mask for the silver paint.


Ah crud! (Not the wording I really used.)

Metallic paints don't always pull clean when masked. This will have to be sanded, masked and painted again.
I thought about setting the V2 aside for a little while.
Did you ever build a model and it seemed cursed? We've all been there. I wasn't happy with the earlier fin mask, it's just okay.
The fix is coming . . .

Tuesday, January 29, 2019

Canopy Carving, Part 3

The bottom surface needs a concave curve to fit the shape of the nose cone.
Some 100 grit was wrapped around a used engine casing to remove some of the canopy bottom.

You'll have to constantly check the fit against the nose cone and remove any area that touches the nose cone. It will take some time to "gouge" out the bottom of the canopy.


Laminating thinner pieces of basswood together has an advantage when carving.
Look close at the top canopy. You can see the glued lamination. If they are straight and perpendicular the top surfaces are straight.

The bottom picture shows the underside. The oval shape underneath is another glued lamination. You can easily see which areas require more sanding to even out the oval shape.


The X-15 canopy has flat glass panes set into it.
A center line and some reference lines were drawn as sanding guides.
A sanding block with 220 grit was used to sand the flat surfaces.

The side of a pencil was rubbed over the raised edges to mark the borders. With the pencil line borders you can compare the two and make adjustments until they match.


Here's the finished canopy. The fit isn't 100% but any small voids will be filled with glue fillets.

Sunday, January 27, 2019

Canopy Carving, Part 2


Carve most all of the sides off just outside the pencil lines.
Smooth out the sides with some 110 grit sandpaper on a block.

Look close from the top and bottom and try to get everything symmetrical.


Next, the top is carved tapering the front and rear to the cockpit profile.
Sand the surface smooth with a block.


The top outside edges are rounded.
After trimming down the upper edges with small chip cuts, smooth it out with 220 grit wrapped over a finger.
Leave the bottom surface flat.
I've wrapped some 100 grit sandpaper around the models main air frame tube, this time a BT-60. Sand until the bottom has a gentle curve to match the round body tube.

If you were gluing this canopy to a body tube you could be done now after the underside is sanded to match the body tube curve. This canopy is going to be glued onto a curved nose cone.

Saturday, January 26, 2019

Canopy Carving, Part 1

Here's an older post that has been sitting in the "draft" pile.
This canopy was carved to make a Goony X-15 from a BT-60 and Quest X-15 kit parts.


I always enjoyed carving neckerchief slides when I was a Boy Scout. I didn't know then that I was carving basswood.
Basswood is fun to carve if you have a sharp knife.

I'll be copying the canopy from the Quest X-15 kit. I might want to make a mold for some vacuform canopies later on.

On card stock a half profile was drawn. I'm just trying to get it close, it doesn't have to be exact.


I didn't have any basswood blocks so some 1/8" thick pieces were laminated with wood glue. The glued pieces were allowed to fully dry under some heavy plexi-glass. TIP: Gluing up pieces under glass allows you to see if the pieces have slipped out of line.


The half profile shape was drawn on the top of the glued up block. Draw a center line down the wood block
Line up the center line and draw one side. Flip over the template and draw the other side.

Sunday, September 30, 2018

Home Print Decal Clear Coat TIPS, Part 2


When you are spraying a lot of decals for different kits, it's easy to lose track of how many coats have been sprayed.

I keep a Sharpie handy. Each small dot designates the sheet got one coat.

Spray the second coat with the sheet in the "landscape" position. Turning the sheet helps with complete coverage.

Again, let the second coat dry for a minimum of five minutes.


Flip the sheet back to the portrait position for the third coat.

Wait a few hours before transferring onto the model to be sure the clear coats are dry.

Saturday, September 29, 2018

Home Print Decal Clear Coat TIPS, Part 1


No - this aint' no ugly puppet show.
When spraying decals you should be wearing a mask and find some sort of cover for your hand. The UV clear gloss acrylic paint is sticky and is hard to remove from your skin. I save and re-use grocery bags.


Three coats of Krylon UV Resistant Clear is about right. The clear coat will be thick enough for easy transfer, still thin enough so the decal isn't raised above the surface.

The first coat is sprayed with the sheet in the "portrait" position.

Acrylic dries pretty quick, you can do the second coat after five minutes.

Keep a cheap brush handy. Before the second and third coat, brush off any dust that could be caught under the next spraying.

Tuesday, April 17, 2018

Estes Little Joe II (Small) Build, Part 5, DIY Centering Rings


If you have good, sharp scissors you can cut the outside of the rings with them.
Here I cut right down the pencil line. I want a bit of a border so the rings can be sanded to fit the BT-58 tube.

As usual, I made two extras and will pick the best of the four.

All the rings were slipped over a BT-5. The outside edges were gang sanded. The central tube gives support and alignment while sanding.


The rings were punched for the engine hook.
On the other side is a small hole for a replaceable Kevlar line.

I used a rotary punch to make the notches. Here I'm cutting off the bottom of the round punch for a squared corner.

Estes Little Joe II (Small) Build, Part 4, DIY Centering Rings

You can't simply order 5/58 centering rings from Balsa Machining Service. I'll have to cut these out from mat board, about .050" thick


With a thin mechanical pencil, trace around a BT-5 and the BT-58 tube. Be sure the BT-5 is well centered inside the BT-588 circle. It might take a few tries to get it right.

The mechanical pencil traces a line to the outside of the body tube diameter.
Cut out the center hole first, it's easier to do when you have more of the board to hang onto. Cut just inside the pencil line.

Normally I use a break off blade knife for most cutting. On something this tight I'll use a new #11 blade.


Wrap some sandpaper around an engine casing to sand and round out the inside circles. Sand a bit and check the fit of a BT-5 tube until you get a good friction fit.