Showing posts with label Apogee. Show all posts

Tuesday, January 28, 2020

New Sanding Block from Apogee

The Great Planes Easy Touch Sanding Block is probably my most valuable rocket building tool. I have two of them on my bench, one with 220 grit, the other has 400 grit.
They haven't been produced since Hobbico went out of business.

Apogee Components saw a need and filled it -
This is their new 11" long Sanding Tee.
To see it: CLICK HERE

You can hold a piece of folded sandpaper around the sides with your fingers while sanding. I find I have more control using some sticky back sandpaper, you can certainly use that here. With adhesive backed sandpaper you can concentrate on sanding instead of trying to keep the sandpaper tight and still.
Apogee added a rounded side, Tim says it is for sanding fillets. You've got to be careful sanding over a hard edge like this. You can easily sand into the balsa fin.
This new Sanding Tee is sold in an 11" length.
My two Great Planes sanding blocks are both 5.5" long, a perfect size for me. If I were to buy an Apogee Sanding Tee, I'd probably cut it in half and have two blocks with different grades of sticky backed sandpaper on each.

This looks to be an essential addition to any work bench.

Wednesday, July 24, 2019

Free Plans From Apogee


If you visit the Apogee Rockets Website you should find this offer -
FREE PDF Book of 25 Rocket Plans!
Simply subscribe to the Peak Of Flight Newsletter - CLICK HERE
Free plans - GOOD! Add the POF Newsletter  - Better GOOD!

EDIT UPDATE: You have to treat this FREE offer and "order it" like you would any rocket part or kit. They will then send you a link for the plans. Lots of out of print Shrox designs.

Saturday, April 6, 2019

Apogee SR-72 Darkbird Build Part 9, Finished


This flat black paint ended up more like a satin finish. The dull black is more "Stealthy" anyway. The design works well, sort of a profile SR-71 style.
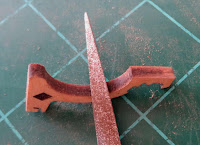
The only thing I don't like is the rough surface of the hinge. I'm sure it could be smoothed out, I just didn't take the time.

This small pop-pod glider operates like the Estes Sky Dart and original Citation Bomarc. Yep, the first Estes Bomarc did "glide". Later versions of the kit had parachute recovery.

Not much color and no decals on this one. Test glides and a launch await after they find a new NEFAR field! Fingers crossed.

Friday, April 5, 2019

Apogee SR-72 Darkbird Build Part 8, Paint Problems

I thought I would save some glider weight by not doing a filler primer coat after the CWF was sanded down.

Carpenter's Wood Filler does not seal the balsa wood.
After the first light gloss black was sprayed I was left with a blotchy surface. Even though most all of the Duplicolor Filler/Primer is usually sanded off before color paint is sprayed, it still seals the wood and allows for a smoother paint coat.

The other weird thing was the drying time. The paint on the wood surfaces dried as normal, but the body tubes took four days to dry! Central Florida weather has been mild this week with very low humidity. The paint was a gloss black Rustoleum enamel.

I did some dry sanding to even up the surface.
On the right I used a wide point permanent marker at all the root edges. Sometimes it's hard to get spray paint into the inside edges. I didn't want to add any more paint weight than I have to.

With the surfaces not being as smooth as I would have liked, I switched over to flat black paint. Flat paint can help hide a rough build. Gloss paint shows everything!


The back end of the engine pod got some black from a wide point marker.

Thursday, April 4, 2019

Apogee SR-72 Darkbird Build Part 7, Elevon Hinge

The elevon hinge is a fibrous, almost transparent piece of cloth. I've seen this material before but can't recall where.

The instructions say to use CA glue but I was concerned that would make it stiff and possibly crack later on.
Because it is so porous, I knew white glue would work. I applied the glue and spread it out evenly with a Q-tip. I glued half onto the elevon first.


The other side of the hinge is centered on the back edge of the wing.

The picture on the left also shows the elevon stop pieces, the forward ones are glued in place.


I used the dihedral guide piece to find the correct start angle and set the rear stop piece.
The top picture shows the small orthodontic rubber bands hooked over the outside ends of the elevon stop pieces.
This picture has the pop-pod engine mount in place. The stop wing is holding the elevons flat, even with the surface of the wing.

In the lower picture the engine mount and stop ring are slid out the back. The rubber bands have raised the elevons.

Wednesday, April 3, 2019

Apogee SR-72 Darkbird Build Part 6, Ram Jet Nose Cones


The ram jet nose cone bases were a little wide to fit into the BT-5 tubes.

On the left is the cone base before.

On the right is a cone base that was sanded flat and the sides cleaned up. It didn't take much sanding to get a better fit.


It's going to be hard to get the spray paint inside the ram jet tube with the nose cone glued in place.

I pre-colored the inside of the tube edge and near the base of the nose cones with a wide Sharpie.

A small ring of Fabri-Tac glue was applied inside the tube and the nose cone slid in place.

You'll have to use your eye to center the cone. Both cones should be slid in the same depth.

Tuesday, April 2, 2019

Apogee SR-72 Darkbird Build Part 5, Pop-Pod Assembly & Streamer


This instruction drawing was a little confusing. It reads: "Glue four large centering rings . . ." The drawing only shows two wide rings.


Here's what they mean.
Four 5/20 centering rings, stacked and glued on the BT-5 pop pod tube. The top ring is even with the end of the tube.

The plastic cast hold down ring was too tight on the rear end of the pop pod tube.

It took some light carving and sanding on a dowel to get a friction fit.

The hold down ring is slid on.
I applied some Fabri-Tac glue fillets.

Fabri-Tac seems to be very good for plastic to tube joints. I wouldn't recommend it for delicate plastic bonding like the Estes Mercury Redstone capsule and tower assembly.
The red Mylar streamer is attached to the low end of the pop pod with a piece of tape.

With a A3-4 engine in place the pop pod assembly was balanced and marked. The taped streamer was centered on the balance point.
The balance point would have been more accurate if I used a spent engine casing.

Monday, April 1, 2019

Apogee SR-72 Darkbird Build Part 4, Small Fins, Launch Lug & Canopy

The smaller top fins are glued onto the BT-5 ramjet tube at an angle.
The approximate angle was sanded on the root edge with my sanding block.

I couldn't find the pattern sheet in the kit. There is some drawings on the instructions I scanned and printed.
The fins were glued on to the correct angle.

The launch lugs are glued onto the bottom of the BT-20. They are not directly centered but set to one side.

TIP: At one time I would use a launch rod to line up two launch lugs. I now use a bamboo skewer. It's about the same diameter and much lighter. The heavier rod can pull lugs out of line.
The canopy is also printed on the instruction sheet. This was also scanned and printed on 65 lb. card stock.

I assembled two canopies. I felt it was a little long so the length was trimmed a bit.

On the right you can see how little white glue was used to adhere it to the body tube.


The canopy isn't very high off the body tube but is easily seen on the finished model.

I slipped the nose cone shoulder into the tube for support when the canopy was pressed in place.

Sunday, March 31, 2019

Apogee SR-72 Darkbird Build Part 3, Wing Gluing

As I usually do, all the balsa parts were filled with CWF before gluing the model together.

This balsa is only 1/16" thick. When one side is brushed with CWF it did warp. But after the other side was treated the balsa straightened out again.

The side view shows how straight the three piece wing is after smooth sanding.
To try and save weight for a better glide, I didn't spray the parts with filler/primer. That was probably a mistake as you'll see later on.


TIP: After gluing on the inner wing, I used my aluminum angle to check the alignment of the long wing piece.

Note the wings were glued on 1/2" forward of the end of the BT-20 tube.


The side BT-5 tubes are glued onto the outside edge of the inside fins. These are also spaced 1/2" from the trailing edge of the inside wing.

My sanding block was used as a flat surface to check the alignment.

Saturday, March 30, 2019

Apogee SR-72 Darkbird Build Part 2, Wings and Fins

The main fins are long, made up of three pieces.

I set them down on a straightedge. The upper picture shows the main wing before the edges were fitted.


The joint edges got hit with a sanding block until a good fit was achieved.
The outside part of the wing is made up of two pieces. Both were glued up on a straightedge.

The instructions said to use CA glue for most of the rocket construction. I used yellow wood glue.

The instructions don't mention it, but I did round the leading edges of the wings after everything was glued together.


For the first time in a while - The tube marking guides actually fit the tubes. Everything wrapped and lined up. Thanks Apogee!

Why can't all the vendors get this right?

Friday, March 29, 2019

Apogee SR-72 Darkbird Build Part 1, Parts

I bought this rocket a few years back, directly from Apogee.
The SR-72 Darkbird is 14" long, the main airframe is a BT-20.

This pop-pod boost glider operates like the Estes Sky Dart and the original Citation Bomarc. The long engine pod is ejected and returns via streamer. When the pod ejects, the elevons lift and the main body goes into a glide. The elevons are held down during boost. The elevon "up tension" is activated by small orthodontic rubber bands.

I asked Tim VanMilligan why it was called the SR-72. He said it was the next generation of the SR-71, a fantasy stealth bomber.


There are four 5/20 centering rings. The two identical die-cut balsa sheets are 1/16" thick.

To the right, the parts of interest:
I only found one orthodontic rubber band in the bag, I have others.
EDIT: In a comment, Eero Fluge pointed out, the second rubber band was around the streamer! I looked right past it and probably threw it away.
Two BT-5 sized vacu-form ram-jet nose cones.
The red Mylar pop-pod streamer.
At the bottom is the almost transparent elevon hinge material
In the center, the cast elevon hold down ring.

Wednesday, August 22, 2018

Apogee Fly-Away Rail Guides, Build, Part 3, Finished


Double check the fit around a body tube. I painted my competition models and the fit was a little tight. The rail guides didn't immediately fly off the tube when released.

I wrapped some 220 grit sandpaper around a body tube and sanded the inside diameter slightly larger.


The instructions recommend painting the guides a bright color. Apparently they can fly off and land 10 feet from the launcher. A bright fluorescent color will be easier to find on the ground.

After painting the small rubber bands were pulled into the slots to join the two halves.


Here's how they fit around a BT-20 tube.
Notice the stretched rubber band at the bottom.
At the center top is the "T" shaped halves that slide into the launch rail.

These fly-away rail guides are another great example of what can be made using a laser cutter.

Tuesday, August 21, 2018

Apogee Fly-Away Rail Guides, Build, Part 2


The hold down tics are small, but the plywood is thick. It took a little work to cut through them and free up the parts.


Here's both sides from one set showing how they back each other up to fit around the boy tube.

The piece on the left hasn't been sanded, the right side has been cleaned up.

It's not necessary to sand off the burnt edges but I did anyway.
I used a combination of 220 grit sandpaper and my diamond files.


The long side brace pieces are glued into the notches.


After the glue dries the sides were cleaned up.

Monday, August 20, 2018

Apogee Fly-Away Rail Guides, Build, Part 1

 It's been written that launch lugs contribute to 20% of the drag on a model rocket.
Along with the pop-lugs, Fly-Away Rail Guides can leave the lugs on or near the launcher while the rocket continues upward.

These Fly-Away Guides are from Apogee. They also require a 1010 Aluminum Extrusion Rail to launch the rocket.


There are two complete guides in each kit. Five small orthodontic rubber bands are also in the bag. Four are needed, one extra is added.


Here's the bottom of the laser cut plywood.
There is some areas where the laser didn't cut all the way through to the bottom. It's understandable, this is 1/8" thick plywood.

Monday, July 2, 2018

Apogee Mini Condor Boost Glider Build, Part 9, Pop Pod Paint & Finished


The blue nose cone needed a coat of gloss white before the fluorescent paint could be applied. I didn't paint the body tube, it was already white.
Maybe I should have painted the pop pod body tube an overall white. Fluorescent paints are almost transparent and any discoloration on the tube will show through.
Some of the rough, flat paint was polished so the decal would adhere better.
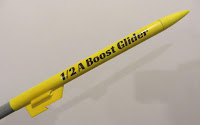
The 1/2 A Boost Glider decal was applied over fluorescent yellow.
Here's the bottom of the boost glider. The black felt tip marking trim was widened so it could be better tracked from the ground.

This is an interesting boost glider design. The wing attachment piece sets the dihedral automatically. The pop pod hook is one piece cast plastic.
I was a little concerned about the 1/32" thick tail surfaces. Once they are glued on they did feel much stronger.

To trim the glider, the wing is slid up or back down the fuselage stick. After you get a good glide, mark the wing position then glue on the wing.

I asked Tim at Apogee if the Mini Condor could win a boost glide competition. He said: Oh, yes!" Wish me luck!

Saturday, June 30, 2018

Apogee Mini Condor Boost Glider Build, Part 8, Pop Pod Details


Here's a picture from the Apogee website.

That pop-pod tube seems very long!


The front end of the launch lug got trimmed at a 45 degree angle for less drag.


I cut about 2" off the pod tube. I would think it'll still be stable a little shorter. I'll be using this in 1/2A BG competition, a full A engine is heavier.


The blue plastic nose cone has a slight burr at the lip. 400 grit was used to sand it down.

The outside diameter of the nose cone now matches the body tube diameter.

The shoulder is loose though.
It took two wraps of masking tape to bring it up to a good fit.
The overhanging tape edge was slit with my Army knife scissors. Those pieces were wrapped over the rounded shoulder.