Showing posts with label Screw Eye. Show all posts

Saturday, July 12, 2025

Estes Mini Bomarc Clone, Kit #TK-5, Part 6, Nose Weights


I needed two Estes NCW-1 nose cone weights. I found an single original lead weight in my spare parts drawer.
The older Estes catalogs say one lead washer weighs 0.12 oz. Two would weigh 0.24 oz.

Deep in the spare parts drawer was a few older Semroc NCW-1 weights. One weighs 0.15 oz. There is no center hole for the screw eye.
The Semroc weight is larger in diameter and won't slide into the BT-20 main body tube.


I used a wire cutter to reduce the diameter. 
The lead disk was rounded on some 220 grit sandpaper.

A diamond rat tail file started a hole for the screw eye.
After drilling and shaping, the disk now weighs 0.30 oz. I did some more sizing and got the two lead disks down to 0.25 oz.
The nose cone was from Balsa Machining Service (BMS).
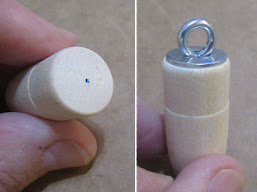
BMS drills out their nose cones for a hardwood dowel. The screw eye is turned into a small hole in the dowel center. This attachment is much stronger than balsa alone.

The fit of the dowel was tight. I sanded the sides a bit, but it wasn't enough.
When pressed into the hole, the nose cone started to split! Some CA glue was run into the split and the gap filled.

Monday, September 30, 2024

Enerjet by Aerotech, Arreauxbee-Hi, Part 9, Engine Mount, Launch Lug & Screw Eye Fitting


With the lower body tube turned over - 

Here's how the engine mount sits, recessed into the body tube.
Note the centering ring is right at and even with top of the fin slot.

With the fin locks in line with the fin slots, test the position by sliding a fin or two in place. You don't have to snap the fin tabs in place yet, just be sure the fins project straight out.


It could be difficult to apply CA glue to the rear fin tab/fin lock joint.
TIP: As shown in the last build, set a toothpick tip into the joint. Drip the CA glue onto the toothpick, enough glue so the drop runs down the toothpick and into the joint.   
The paint was scraped off around the launch lug slot.
Notice the low end of the raised alignment tab stops at the bottom of the lug. 
DON'T SCRAPE the the paint past the bottom end of the slot. The raised lug base sits down to the bottom of the slot.

The picture to the right shows how the CA glue was applied. The glue is applied towards the center so it won't squeeze out beyond the edges of the lug base.


The screw eye is turned into the coupler bulkhead.

TIP: On the right, notice the screw eye isn't screwed in beyond the threads. If turned in past the threads, the screw eye will be loose. The threads help lock it in place. Apply glue on both sides of the screw eye.

Wednesday, April 10, 2024

Estes Mini Bertha Clone, #TK-3, Part 5, Odds & Ends


Before marking and gluing on the fins - 
I fill the gap between the outside of the centering ring and the edge of the tube.
Apply some CWF around the outside of the joint. Let dry and sand. You can sand and work around the engine hook with a sanding block.


The upper inside edge gets a wipe of CA glue. 
After drying, the glue gets a light sanding with 400 grit wrapped around a finger or dowel.
The nose cone weight is attached to the nose cone.
NEWBIES: Don't just blindly start the hole with the screw eye. If you are off center, that washer might come in contact with the inside walls of the body tube.

Mark the center with a pencil point. Screw the screw eye in first, going in about 3/4 of the threads. Remove the screw eye and squirt some glue in the hole. You know the drill.
Place the washer weight on the screw eye and reinsert the screw eye, this time screwed all the way in. 

Sunday, June 18, 2023

NewWay Angled Invader, Part 10, Rib Gluing & Nose Cone Details


Set the rib over its position on the wing and mark the glue area with pencil.


Every time I've built an Alien Invader model I applied glue all the way down the root edge out of habit.
Glue is only needed on the upper and lower ends - not in the middle.


Here's how the wings look, ready to be glued onto the main  body tube.
The "H" Assembly Guide helps hold and position side window detail pieces. Be sure the horizontal strut of the nose guide has the two laminated layers.

Before gluing, sand the bottoms of the detail pieces flat.

I did my standard CA method - 
Squeeze out a drop of CA onto some scrap cardboard.
Dip a toothpick into the drop of glue.
Run the wet glued toothpick tip around the outside edges of the detail piece.


The screw eye is turned into the hole in the base of the 3D printed nose cone.

It felt too tight and I didn't want to risk cracking the attachment point. I widened the hole with a small rat tail diamond file.
The screw eye has a better fit now.

Sunday, October 9, 2022

Estes Solar Sailer II, Kit # 2044, Step 4, Ring Prep & Engine Mount

The instructions don't mention it - 
Cut a shallow notch so the ring will slide over the engine hook.
The rings were too tight and required some sanding of the inside wall. 400 grit is wrapped around a used engine casing.

Note the penciled arrow. That points down to the glue sealed and sanded smooth, visible side.
The instructions have you place the lower ring over the middle of the engine hook. This places the lower ring too high inside with no easy way to add a glue fillet.
I did a wrap of electrical tape around the middle of the engine hook. The lower ring had a 1/8" piece cut out for engine hook flex. 
Setting the ring 1/4" from the bottom allows for a glue fillet from the bottom.

On the left - the notched ring is set into the BT-50 tube (dry) to hold it tight around the BT-20 tube as the glue dries


I didn't have to order the BNC-50J nose cone, it was in my spare parts drawer. I lucked out - I didn't even know I had it.
This nose cone is from Balsa Machining Service. 
There is a hole in the shoulder for the hardwood dowel to glue in.
A small hole is drilled into the dowel for the screw eye.
This screw eye attachment is very strong and won't pull loose!

The hole gets some glue and the dowel is pressed in.

My dowel extended out the back about 1/8".
I cut off the extensions and sanded it flat. Not necessary, just something I did.
Squirt a bit of glue into the dowel hole. Screw in the screw eye.

Wednesday, April 13, 2022

Estes EAC Firecat #0821, Build, Part 11, Final Decals & Loose Ends

You've got to cut up the Bandit decals to get the Firecat to look like the face card.

These are the remaining four vertical black rectangles, cut in half. 
Place these on the white side of the body, directly over the rectangles on the BT-48 roll wrap.

The remaining horizontal bars (seen in the first picture above) are cut in half and set behind the U.S. AIRFORCE decals. Because they are short, they won't reach all the way around.


Here's the view from the bottom.
My balsa nose cone was ordered from BMS, #BMS50HJ.
There was a hole in the bottom center, no drilled dowel was supplied or would fit in the small hole.
I was concerned the screw eye wouldn't "grab" well in the center.  
Simple solution - Set the screw eye to the side. Turn it so it won't hit the inside body tube wall.


FIX:
I didn't get good paint coverage on the trailing edge of the vertical fins.
I used a red Sharpie to fill in the red. NOTE: This doesn't always work! Try a small area first. It can fill well on narrow areas like the flat trailing edges of  a fin. It will not work on flat, larger areas.


I forget to paint the toothpick antenna.

It was taped to a dowel, hit with a gloss white coat.
Smooth sanded after drying and sprayed again.

Monday, April 19, 2021

Wolverine Jayhawk Build, Part 4, Screw Eye & Parachute

The screw eye is screwed into a dowel that you glued into the nose cone base. This makes a very strong screw eye attachment.

I placed some glue in the nose cone base hole and pressed the dowel into place. I didn't press it all the way in, I wanted to sand the dowel end flush with the base of the nose cone.
OOPS: After it was glued in I realized the dowel was glued in backwards! The drilled screws eye hole was inside the nose cone.
I knew I'd never get it back out, so another small hole was drilled for the screw eye attachment.


Eight parachute reinforcement discs are supplied, only six are needed.
I wanted to be sure these were plastic, permanent discs so I tried to tear one of the extra disks. It did rip, telling me it was a paper disk.

I'd prefer stronger disks, so I switched them out for Avery plastic disks.
The instructions tell you to place the disks 1/4" from the edge. I don't see any reason to do this. The table covering plastic can stretch if pulled, I put the disks closer to the corners.

TIP: Because of the stretch, the shroud line hole was punched close to the outside of the inner disk circle.

TIP: Some tablecloth covering plastic sheeting has a smooth side and a textured side. Attach your discs to the smooth side for better adhesion.

Tuesday, April 24, 2018

Estes Little Joe II (Small) Build, Part 12, Tower Assembly


The long escape rocket is glued into the tower skirt.
The fit of the pin was very tight. I sanded down the bulb on the end slightly.

Here's the finished tower, ready for a coat of gloss white.
You probably don't have to paint it, but after sanding off the capsule details you'll want a smoother surface for the decals to stick.


A screw eye is set into the capsule base disk.
The hole is small and required a much smaller than standard screw eye. I picked up these size 8 screw eyes at Home Depot.

Thursday, March 15, 2018

New Way Firecat 4 Build, Part 7, Gluing Up the Nose Cone


I tried the nose cone base on all four sides to find the best fit.
The pencil line was a reference when the top and bottom were glued together.

The body tube corners are slightly rounded.
After the nose cone base was glued on, the corners of the NC were rounded to match the tube.


The screw eye is turned and glued into the nose block with a washer.


It took two applications of CWF to get the nose cone assembly filled and the surfaces even.

Thursday, March 1, 2018

Semroc Mini Optima Build, Part 5, Coupler Bulkhead


The hole in the plywood coupler bulkhead seemed small. I was concerned the screw eye might split it.

The hole was enlarged with a small rat tail file.
The instructions tell you to turn the screw eye in until the threads just disappear.
TIP: Don't turn it in beyond the threads or you'll have nothing gripping the screw eye in place. This bulkhead is only about 3/32" thick.

I added a glue fillet on the inside.


The bulkhead is glued just inside the edge of the black coupler. Positioned like this you can add a glue fillet.

Friday, May 19, 2017

Goony X-15, Part 9, Nose Weight

This one might be okay without any added nose weight but I'll play it safe and add a 1/2 oz. of clay.
I had already set the screw eye in the nose cone base. I unscrewed it along with some balsa from the shoulder.

I've never drilled out a nose cone for weight before! In the picture you can see the decals were already placed. Decals are shown in the next post.

The screw eye hole acted like a pilot hole. I started with a 1/8" drill and worked up to a 1/2" diameter drill shown at the right. Don't go too deep!

There was some balsa glued on the threads of the screw eye. I could have found a new one, but I'm cheap.
The balsa was filed out of the threads with a small diamond file.

1/2 oz. of clay was pushed into the nose cone hole.
The screw eye was screwed back in towards the outside of the shoulder. Turn the screw eye so it will clear the body tube when the nose cone is inserted in the tube.

Wednesday, May 10, 2017

Estes Photon Probe #3026 Build, Part 11, Paint Choices


The older kit face card had the middle section painted pink. I do have pink spray paint but it's not a dark enough shade for me. I decided to go with orange like the Photon Disruptor.

Here's the paint mask Scotch tape being pulled. The line was very clean.


While the older Photon Probe was shown with a pink center, the newer reissue kit had purple.
This is the second build ready for decals.


The older kit decals are on the top. They included the additional decals shown on the right side.
While these weren't on the newer decal sheet the re-issue kit instruction picture still shows them.


What's this?
No more "Screw in the screw eye and remove. Squirt glue into the hole and re-insert the screw eye."
The new instructions have you simply screw it into the balsa shoulder. No glue!
I'd feel better knowing the screw eye was glued in.

Saturday, December 10, 2016

Estes Long Tom #3016 Build, Part 11, Screw Eye Install


To the left is the screw eye supplied in the kit. The threads are too small to effectively lock into the balsa adapter.

On the right is the screw eye I replaced it with. It's the same length but the threads are wider.

At club launches I see ejection separations where screw eyes pull out of balsa.


TIP: For a straight screw eye install - go slow.
Screw the eye in one full turn, stop and check for straightness.

If it's crooked (like on the left) push it up straight then continue screwing in another full turn. check again.

As normal, remove the screw eye and squirt in some glue. re-inset the screw eye.

The pictures show a straight, strong install.

Monday, October 24, 2016

Semroc (Estes) Starship Excalibur Build, Part 24, Dry Sand & Nose Weight


Some 400 grit was wrapped around a Q-tip for cushioned sanding in all the fillets.
There is a LOT of fillets and joints to be sanded.

A washer weight goes underneath the screw eye. I would think with all the fin area this one would be stable without the nose weight.
Be sure you have centered your screw eye hole before setting the washer in place.
The instructions don't mention it, but add some glue to the bottom of the washer.
Set and center the washer then follow with the screw eye. Turn the screw eye in until it butts up against the washer.

Thursday, March 10, 2016

Centuri Astro 1, Build, Part 4, Nose Cone and Fin Prep

Take an extra moment before screwing in the screw eye.
Mark the center with a pencil. Rotate the nose cone and chances are that first mark won't be perfectly centered. Mark the center again.

TIP: When screwing in the screw eye, go slow.
Screw a full turn, stop and check the alignment. Be sure it is going in straight. If you catch a crooked insertion early you can correct it before turning it in all the way.


TIP: The nose cone is a over 5" long and very pointy. In past experience, pointed balsa nose cones seem to get hit and blunted.
I'm building two kits as once.
The nose cone on the left is the before, on the right is the second cone rounded off. The later Centuri Astro I kits had plastic nose cones with rounded tips.
TIP: The balsa fin stock was slightly different between the two kits.
To match the density and grain the fins were grouped and marked on the root edges.

With this unusual fin shape it's easy to round the root edges by mistake. That was a problem with the Asto I fins. Many first time builders glued them on wrong, looking more like the Estes Alpha. I found myself almost rounding the wrong (leading) edges.
Marking the root edge tips made me stop, reposition and sand the correct sides.