Showing posts with label TLP Pershing. Show all posts

Thursday, May 7, 2015

TLP Pershing #K046 Build, Part 54, Gluing the Charge Retainers


Here's how the vinyl lettering looks with the shroud back in place.
I'll glue the shroud base and install the parachutes now.

The kit supplied a 30" oval shaped Mylar parachute.
I might change it out for two 18" Odd'l Rocket chutes.


The charge retainers glue right over the vinyl type.
These were set down with a glue stick. Later the tops and bottoms will get some CA applied with a toothpick.
The U.S. ARMY isn't so stark with the olive drab retainer over it.

And finished!

Wednesday, May 6, 2015

TLP Pershing #K046 Build, Part 53, Applying Vinyl


I got the vinyl lettering, so back to finishing up the TLP Pershing:

I saw an Ebay listing for custom vinyl.
For around $10.00, RapidVinyl.com cut two sets of U.S. ARMY lettering for me.

When applying vinyl sometimes you tape one side and make a "hinge". In this case I marked the outside cover with pencil center marks.

The back layer is peeled off. Pull slowly, down and away from the lettering still on the top layer.


Don't burnish until the lettering is centered and in position. You can re-position the lettering line if it is only lightly set on the surface
Press the letters in place then peel off the top layer.
Again, pull slow, down and away from the letters.

Cover the letters with a piece of clean copy paper and final burnish.

Sunday, April 12, 2015

TLP Pershing , Finished - For Now!


The model still needs the white vinyl U.S. ARMY on the upper section. That will be added after I figure out the font and where to get it cut locally.
When the "U.S. ARMY is placed, the card stock charge retainers are set on top of that.
I probably won't mess with all the "31" decals and others shown on the Estes sheet. As far as I'm concerned, it's done!

Don't tackle this one unless have a lot of building experience! Getting the three shrouds smooth took a lot of filling and sanding. The black Con-Tact vinyl strips added a little more strength to the underlying card stock in the long nose section.
This is an impressive model and as close as I'll probably ever get to an original Estes Pershing.
It's BIG, almost 40" tall! Finished (with parachute installed) the weight is 11.4 oz.
Old Estes catalogs list their Pershing kit at 11.5 ozs, The slightly larger Estes kit used a D12-3.
Starting engine for the TLP Pershing will be the Aerotech RMS E18-4.

Saturday, April 11, 2015

TLP Pershing #K046 Build, Part 52, Charge Retainer, Part B


After cutting out the double thickness cardboard there is some raised edges.
First, roll the edges down with a burnisher.


The edges will have to be sanded flat and clean.
The edges got a run over with medium CA applied with a Q-tip.
This hardens the sides and allows for sanding with 400 grit.


There was enough of the olive drab left paint to spray the charge retainers! The can was nearly empty and sputtered some, but covered it all.

I made four and will pick the best two for the model.


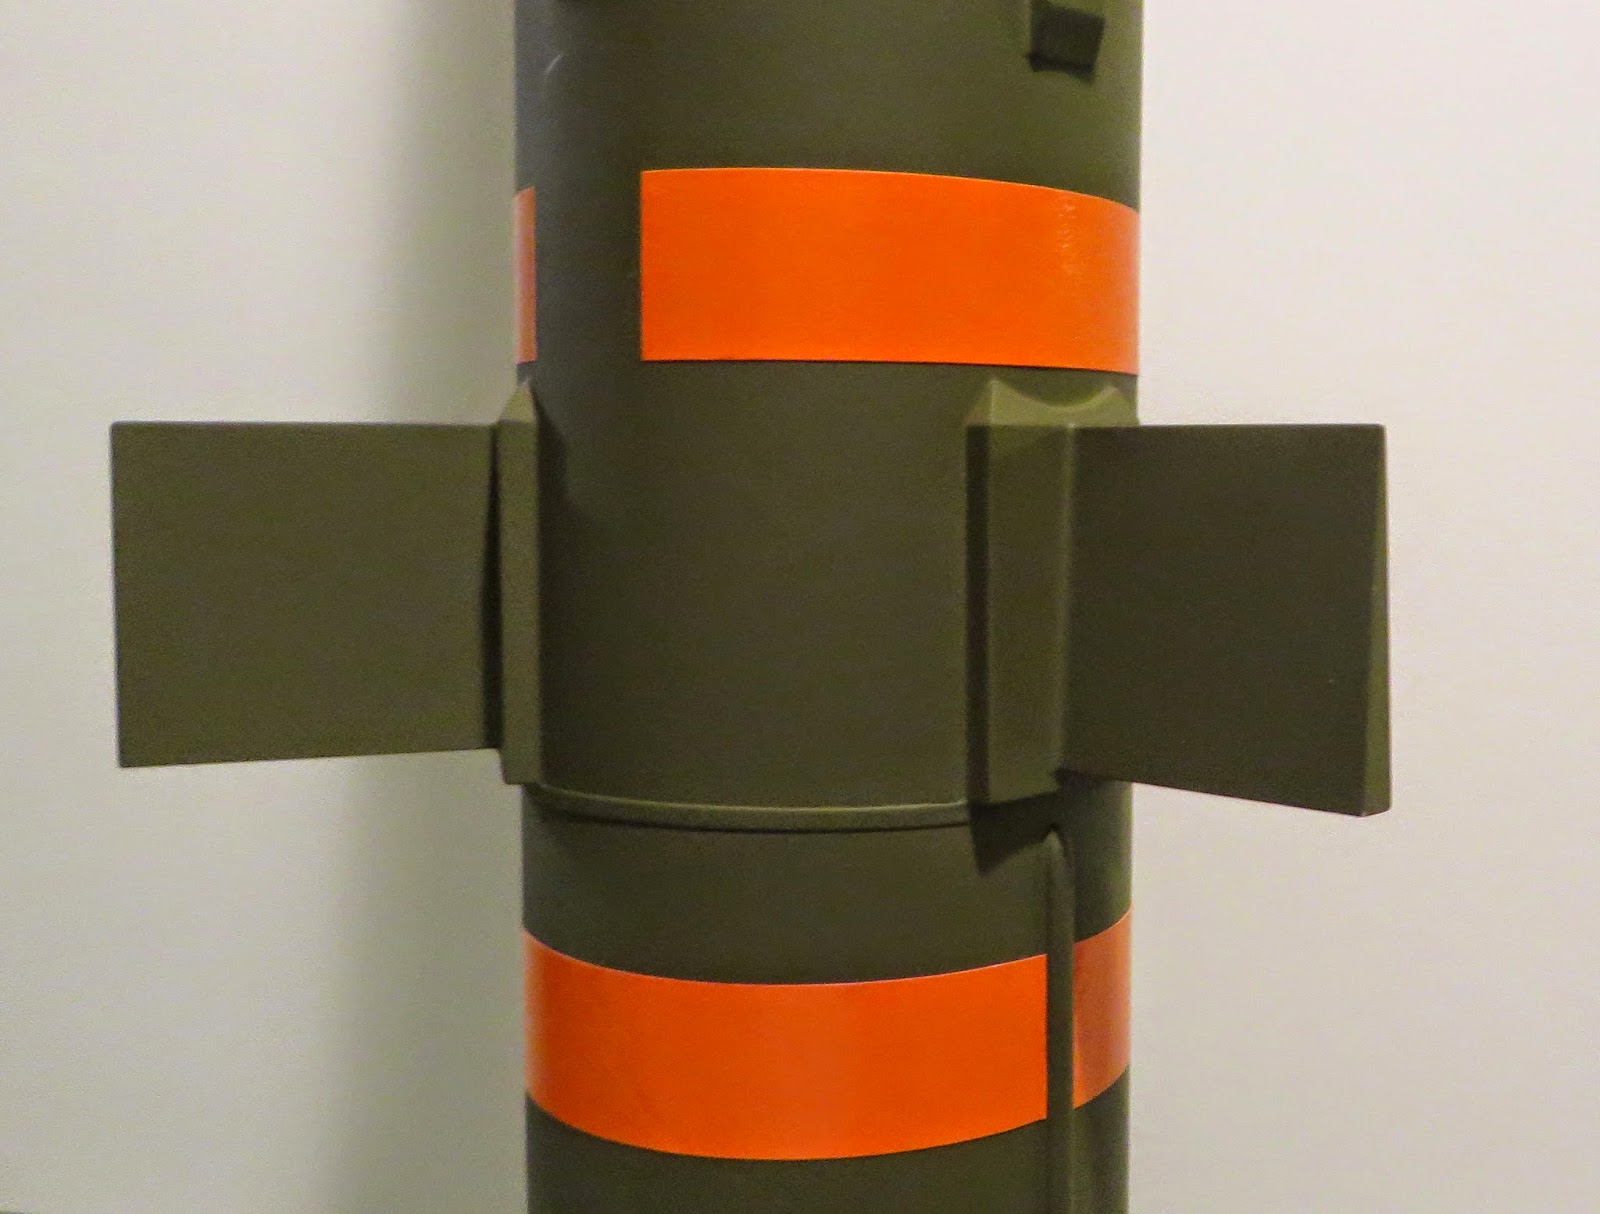
Here's where the charge retainers will go after the U.S. ARMY is placed.
They will glue on right over the white lettering.

Friday, April 10, 2015

TLP Pershing #K046 Build, Part 51, Charge Retainer, Part A

Earlier on, I took a break from the orange bands to figure out the size of the charge retainer. These will be cut from card stock, painted olive drab and glued in place over the U.S. ARMY name.

The charge retainers were on the Estes centering ring card sheet.
The centering ring scan on the JimZ website CLICK HERE seemed a little large.
Using the engine tube hole as a guide, I drew a circle .980" in diameter. That's a hair bigger than the BT-50 size at .976" diameter.
The entire scan was reduced until the centering ring circle matched the .980" diameter circle drawn earlier.
The charge retainer height was then 4.687" tall.
Multiply that by .955 (Estes BT-101 dia. to this TLP kit BT-100) and the new charge retainer should be 4.476" tall.
The Estes retainer was traced, copied and reduced to the 4.476" height.
The retainer will be printed on double layered card stock.


I used my rotary punch to make some of the inside cuts easier.

Thursday, April 9, 2015

TLP Pershing #K046 Build, Part 50, Upper Section Orange Bands


The horizontal orange nose bands were scaled and traced earlier.

This template was simply taped to more of the orange sprayed label paper and cut out. Three were made.


Directly below the left side of a black vertical stripe, the low olive drab section was marked for the left edge of the orange bands.
Once one was set down, the remaining two bands were placed. Setting them directly below the black stripes made an automatic spacing between them.


The upper section colors are complete!
I'm very happy with the look, sharp and distinct.

Wednesday, April 8, 2015

TLP Pershing #K046 Build, Part 49, Upper Section Black Bands


When I printed up the nose cone marking guides from JimZs, it ended up too large.
I tried to use it anyway, extending the marks to the center. Using a knife and straight edge, wedge cuts were made.

This was slipped over the nose section to give an idea how the back vertical strips will be placed.

A master template piece was cut from the old standby - Con-Tact Blackboard Covering Material.
This is the greatest, cheapest black trim material out there!
Find one source HERE


After the first two vertical black strips were set down on opposite sides. A strip of paper was wrapped halfway around and marked at the the two black strip centers.
The area between was divided into thirds. These pencil marks are the center of the two strips, between the first two set down.
The remaining vertical black wedge strips were set down centering and spacing them visually.

I can't recommend the Con-Tact Blackboard trim enough!
The Estes instructions say to mask and paint the black strips. The Contact paper is so much easier and about as thick as a layer of paint. It lays down like thin, re-positional vinyl.
The vertical black bands also help hide any slight depression left from the shroud tab gluing areas underneath.

Monday, April 6, 2015

TLP Pershing #K046 Build, Part 47, Nose Section Mask B


TIP: Notice how the tape is being pulled away - down and away from the mask line!
I get the cleanest mask lines this way. It's worth a try, anyway.
Where the Scotch tape strips overlapped there was a small bleed under the edge. This would happen even with the most expensive masking tapes.

I've had people email and say they can't get clean masking lines. I'll say it again -
TIP: If your surfaces and fillets aren't smooth and clean, you paint masks won't end up clean and sharp. The tape edge must seal on all surfaces.


Before the paint is totally dry (and "bonded" to the color underneath) you can push this small paint bleed back into the lower painted area.
I'm not scraping, but using the side of the blade to push the paint down and off the white area.


Here's the upper section mask.
It's so big it won't fit on my card stock backdrop for pictures!

Saturday, April 4, 2015

TLP Pershing #K046 Build, Part 46, Nose Section Mask A

The lower part of the long nose section is painted olive drab.
I did a tracing of the curved bands from the Estes decal scan to get near the proper curve for the masking strip.
This slightly down scaled decal scan will also be used to make a template for the upper, horizontal orange bands.


After scaling, the olive drab paint will be on the lower 4.10" of the nose section.
(That small black mark is not on the model, it was drawn in the photo edit.)


Using the curve from the orange nose cone bands as a guide, marked Scotch tape was cut on glass into curved strips.


It took three strips to go around the nose section.

The entire upper section will be masked off and left white for now.

Friday, April 3, 2015

TLP Pershing #K046 Build, Part 45A, Self Stick or Decals?

A comment from Jim on April 3,
"Found a build thread on the rocketry forum for the Estes Pershing complete with pictures of the kit parts and the orange decals are clearly the peel and stick type. However the author mentions that the instructions describe the stripes as water slides!"

Thanks Jim, I found the start of that build thread:
From November of 2008, MartkH did a build of the Estes Pershing on TRF. To see the build start, CLICK HERE
The parts picture shows the bright yellow-orange stripe sheet.

In post #5, Mark writes:
"Interestingly the original orange stripes in my kit are adhesive, but the adhesive is gone. The decal scans on Jimz site show the striping as water slides. Maybe the older versions were stick-ons, and Estes switched to water slide at some point? Also, the other decals (US ARMY, etc.) are water slides and look useable except that they are yellowed or almost brown looking. The scans at Jimz look the same."

Tbzep adds:
"Mine were paper stick-ons also."

The stripes I added are orange and not fluorescent orange. Oh well, close.

Thursday, April 2, 2015

TLP Pershing #K046 Build, Part 45, Upper Orange Band - Part C

The upper orange band is broken up into six segments on one side, the band is solid on the other.

A line of masking tape was used for horizontal alignment.
TIP: Before setting the alignment masking tape on the model, it was pressed on my pant leg and removed a few times to cut back on the adhesion. Jean fibers stay on the tape so it isn't as sticky. You don't want a piece of masking tape to lift any paint now!

Place the pieces using your knife blade tip.

Even using a calculator I couldn't get the segment spacing to look like the pictures in the Estes instructions.
It's okay - close enough for me!

Looking back, I could have used trim Monokote for the orange bands. But trim Monokote would have ended up like it is now, with a slightly raised surface.
Monokote grabs quickly, this painted Avery paper is easily lifted and moved until it is in the correct position.

A Comment About Pershing #K046 Build, Part 44, The Orange Bands - Part B

Sometimes you learn a few things in a rocket build.

I had some research into the Estes kit and the paint patterns on the JimZ website.
To the right is a screen shot of the orange band application. It clearly says: 
"APPLICATION OF WATER-TRANSFER DECAL (A)"

I assumed a water transfer decal was included in the kit. The JimZ scans looked like water slide. I took the easy way out by spray painting some self adhesive sheets and cutting out the strips.

I got a blog comment from Jim:
The orange stripes on the Estes kit were also of the peel and stick type, so the way you're doing them is actually more true to the original than painting them would be. Looks fine to me!

Thanks Jim! I guess I was closer than I thought.
Maybe Estes used water slide decals for the orange bands on one run of kits and self adhesive strips later on. Who knows? I never had an original Estes Pershing kit.
Jim did. His had self adhesive orange trim.

Wednesday, April 1, 2015

TLP Pershing #K046 Build, Part 44, The Orange Bands - Part B


The backing was peeled off and the orange strips set in place, the ends against the lower tunnels.

I was concerned about the Avery label paper being advertised with "Ultrahold Adhesive".
It did allow for placement, lifting and re-positioning before being burnished down with a Q-tip.


Why did I use spray painted, self-adhesive label paper?
I didn't feel like doing a complex mask. The chances of paint lifting is bigger when doing tough masks.
The painted adhesive backed paper does have a raised edge. It doesn't bother me. The vertical "U. S. ARMY" will probably be cut from vinyl. The orange color lines are clean.

It might bother a true scale builder, but that's their problem. I'll get it close enough to capture the feel of the old Estes kit.

Tuesday, March 31, 2015

TLP Pershing #K046 Build, Part 43, The Orange Bands - Part A


A strip of paper was wrapped and pressed into the tunnel joints to get a width estimate for the orange bands.

The orange bands were cut off the painted orange self adhesive label sheet.
The Estes kit band decals were 1" wide.
Everything in this slightly smaller (BT-100) Pershing was multiplied by .995 to get the smaller sizes. The band ended up being cut at an obvious .995" wide.

The band halves were carefully cut out.
Set them side by side to be sure they are the same size.

You'll want the both sides the same where they meet up around the other side of the tube.

Monday, March 30, 2015

TLP Pershing #K046 Build, Part 42, More Paint Progress


Here's the lower body after spray painting with the Testor's olive drab.
That little three ounce can covered the entire lower body and there should be enough left for the lower nose section.


The orange strips are next. I'll use the Estes Pershing instructions for guidance.
Decals could be used but they won't stick well over the flat paint.
That and they would have to be printed over a white background.
I'll be trying something new this build.


I picked up some full sheet shipping labels.
These are Avery brand, #15265.

The only disadvantage I could see, the package advertises "UltraHold Adhesive". This might not allow much re-positioning.

A full sheet will be sprayed orange then the horizontal bands will be cut.


The closest orange I could find was Rusto 2X Real orange.
It's probably a little darker than the Estes kit orange, but I'm to the point where I just want to get this one finished!

Sunday, March 29, 2015

TLP Pershing #K046 Build, Part 41, More Paint!


The Rustoleum green wasn't close to olive drab.
With a 40% off coupon for Hobby Lobby I bought some Model Master paint at a reasonable price.
This is probably the best hobby paint out there. Great coverage and the small can goes pretty far.


With the body tube at about 4" diameter you can fit your hand in there.
I put a plastic grocery bag over my arm to hold the lower half for painting.
Initially I sprayed the fillet areas and end surfaces to be sure I had no gaps and everything was smooth.
The Testor's flat paint should feather in and blend well. You couldn't get a blend with gloss paint.

Saturday, March 28, 2015

TLP Pershing #K046 Build, Part 40, Paint!


A light shot of white shows some lines running down the Titebond M&TG fillets.
The inset picture is after some light sanding with 400 grit wrapped around a Q-tip for cushioned sanding. Light sanding takes down the ridges. The paint that is left even helps fill the slight furrows.

You can be as careful as you can when smoothing out the Titebond M&TG fillets, but there will be lines at the sides and glue boogers at the ends.

I thought I might get by with some Rusto 2X Hunter Green. The TLP instructions say olive drab or dark green should be used. This Hunter Green isn't close to olive drab.

This will be a big model to spray. I may have to pay the extra for two cans of the Testor's Master Modeler paint.

Before anybody comments about using a gloss paint - I know.
I spray gloss colors for better decal adhesion and transfers. You can always hit the model with a dull coat over the glossy decals and paint.

Friday, February 20, 2015

TLP Pershing #K046 Build, Part 39, Launch Lugs

Okay, I'm a low power guy, I still use launch lugs. I know, I should be using rail buttons. This model will get 3/16" lugs.
The TLP instructions don't mention the position of the lug. Forum posts have said that TLP leaves that up to the builder.
The kit supplied lug looks like a plastic soda straw sprayed with a flat finish paint. I'll substitute two regular 3/16" diameter x 2" long lugs.

The lug seams get filled off the model with CWF.
This lug was slipped over a dowel. A wrap or two of masking tape made a tighter fit over the dowel.
With the lug on the dowel you can paint the entire lug without getting filler on your fingers.

I couldn't find the Pershing Center of Gravity in the instructions or online.
I'll split the two lugs and place them on the flat sides of the fin pads.
This hides the lugs - somewhat.

The will be a delay on more posts and finishing the Pershing. In Orlando, it's too cold to paint right now! I'll get back on it when it warms up a bit.