Saturday, February 22, 2025

Estes Star Seeker (Tri-Pack) Kit #0866, Part 7, Paint & More Sanding


Here's the launch lug that will slide over the launch rod.
The rear of the lug is 5/8" from the rear.


After spraying the the model with gloss white,
some fillet bubbles showed. These were filled with more glue.


After the paint dried, the launch lugs showed how rough they were. 
This required some 400 grit sanding before another coat of spray.


No masking!
Just a clean, glossy white finish, ready for decals.

Friday, February 21, 2025

Estes Star Seeker (Tri-Pack) Kit #0866, Part 6, Fin Assemblies


Keep your glue lines short - 

Set the lugs in place and make the fin edges with pencil. 
Apply some glue up to the pencil lines and place the lugs.


Here's how the lugs set when set against the fin joint.  

The wing fin assemblies are glued to a standard 120 degree three fin spacing, using just two of the pencil lines. This makes a wide "W" shape.

The "flight" launch lug is glued onto the third pencil line.

Thursday, February 20, 2025

Estes Star Seeker (Tri-Pack) Kit #0866, Part 5, Fin & Launch Lug Assemblies


The dowels are glued to the top of the upper (unmarked) fins.


Two launch lugs are glued side by side.
Make two sets. I found it easier to make glue fillets now.


On the left, I've lightly sanded the glue line for better glue adhesion. 
On the right, the dowel fins are glued with that spacing overhang on the outside.

Be sure to make two "mirrored" fins.  

Wednesday, February 19, 2025

Estes Star Seeker (Tri-Pack) Kit #0866, Part 4, Engine Block & Kevlar ShockCord


The original kit had two engine blocks,
one for the engine stop, the second to tie a rubber shock cord. No parachute or streamer, just nose-blow recovery.
Enlarge the picture on the left.

I can't imagine trying to slide in that upper block ring into a ring of glue with a binding rubber shock cord tied around it.

I'll be installing a single lower engine block with a tied on Kevlar line.


The engine block got a notch for a better fit of the Kevlar line tie.


The inside 1/8" (or so) of the tube got a wipe of CA glue. This was followed by sanding just the edge with 400 grit on a block.


I used a spent "T" motor to position the engine block and Kevlar line.

Occasionally your find a raised cut-off burr on the end of the casing. Roll that off with some 400 grit.
This makes for an easier slide into the engine mount tube.


TIP: When installing an engine block, have ALL your parts close at hand. You don't want to be looking for the engine block as the glue in the tube is starting to set.

The glue applying dowel is marked with a pencil ring about 1 1/2" from the top. 
A ring of glue is set around the top of the dowel.
Set the dowel in the tube up to the pencil line trying not to touch the inside walls of the tube. 
Roll the dowel and transfer a line of glue around the inside of the tube.

Quickly set in the engine block and push into position, with 1/4" of the engine casing extended out the bottom of the tube. Remove the casing.

Tuesday, February 18, 2025

Estes Star Seeker (Tri-Pack) Kit #0866, Part 3, Filling Seams & Gluing On Dowels


The body tube, dowels and launch lugs were CWF filled and sanded.
A dowel was slipped in for support while sanding.

A shot of filler/primer followed .
Here I'm sanding the filler/primer to surface with an old piece of 400 grit. Any filler/primer that might collect on the sandpaper can be cleaned off under running water with a soft brass wire brush.
Two of the four fins are marked 1" down from the top edge.
This is where the perpendicular fins will be glued on.

I found it easier to mark a 1" span on a scrap piece of cardboard, then set the fins on the pencil lines.


Here's the first try at the 1" long dowels.
Looking at the instruction drawings, I could tell they were too short. There are no launch lug or dowel lengths listed in the instruction parts list.

Here's the longer 1 1/4" dowels.
I now have the feeling the dowels should be a smaller diameter. Oh well, I'm going with what I've cut.
(Edit: The dowel diameter I used was 3/32" diameter)

Monday, February 17, 2025

Estes Star Seeker (Tri-Pack) Kit #0866, Part 2, Parts Prep


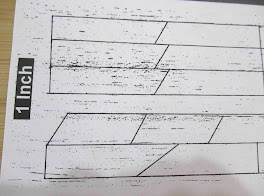
The Star Seeker fins are the 4 parallelogram shapes, fourth row down from the top.

Cut out four from 1/16" thick balsa.
Before the launch lugs were cut to length, 
I filled the seams with CWF. The long lug was held by pushing it onto a Q-tip.


There is a slight flared lip on the shoulder of the nose cone.

Roll down the lip with some 400 grit.


The balsa fins, dowels and launch lugs were filled with CWF and sanded with 400 grit.

All were taped down for a shot of filler/primer.
These are the first, incorrect length dowels and launch lugs. In the end, all were re-cut to 1 1/4" long.

Sunday, February 16, 2025

Estes Star Seeker (Tri-Pack) Kit #0866, Part 1, Parts

 
The dowels and launch lugs (shown above) were cut too short. The build will show the longer and correct 1 1/4" long lugs and dowel pieces. Mistakes can happen when lengths aren't listed in the instructions. I took a guess by simply looking at the instruction drawings.

You might assume a BT-5 is 1/2" diameter and the BT-50 at 1" diameter. That would mean a simple 2x upscale. But, the BT-5 is actually .541" diameter and the BT-50 is .976" diameter - Not a 2x upscale.

I'll be building a original BT-5 version and after that an upscale BT-50 version.
To see Jay Goemmer's "Downscale Chart: CLICK HERE
While Jay's chart says to multiply by 1.79, I'll be using a heavy walled (and slightly wider diameter) BT-50H tube.
Here's my conversion chart. Every dimension of the BT-5 parts was multiplied by a factor of 1.8 to get at the BT-50H sizes.


I drew up decals for both the BT-5 and BT-50 version.
The rounded corner "door" rectangle will be fixed with a narrower line.


Gotta' love a model where the parts fit into a 3" x 5" zip bag.