Sunday, May 20, 2018

Estes Citation Patriot, #000652 Build, Part 9, Decal Alignment


The registration of the blue shield and red bars were slightly out of line.
I decided to cut these apart and try to line them up when transferring to the model.

The vertical USA decals are applied on opposite sides of the tube. Line the first USA decal up, centered above the black fin. A strip of masking tape rolled around the tube helped get both USA decals at the same height.

The cut and separated red bars were then centered above the USA decals.


GOTCHA: Be ready, these decals are almost too thin! They will easily fold over on themselves.
TIP: Before setting down a decal, wet the tube! Rub a wet finger over the area where the decal go.

The seams were rolled over and smoothed with a wet Q-tip.


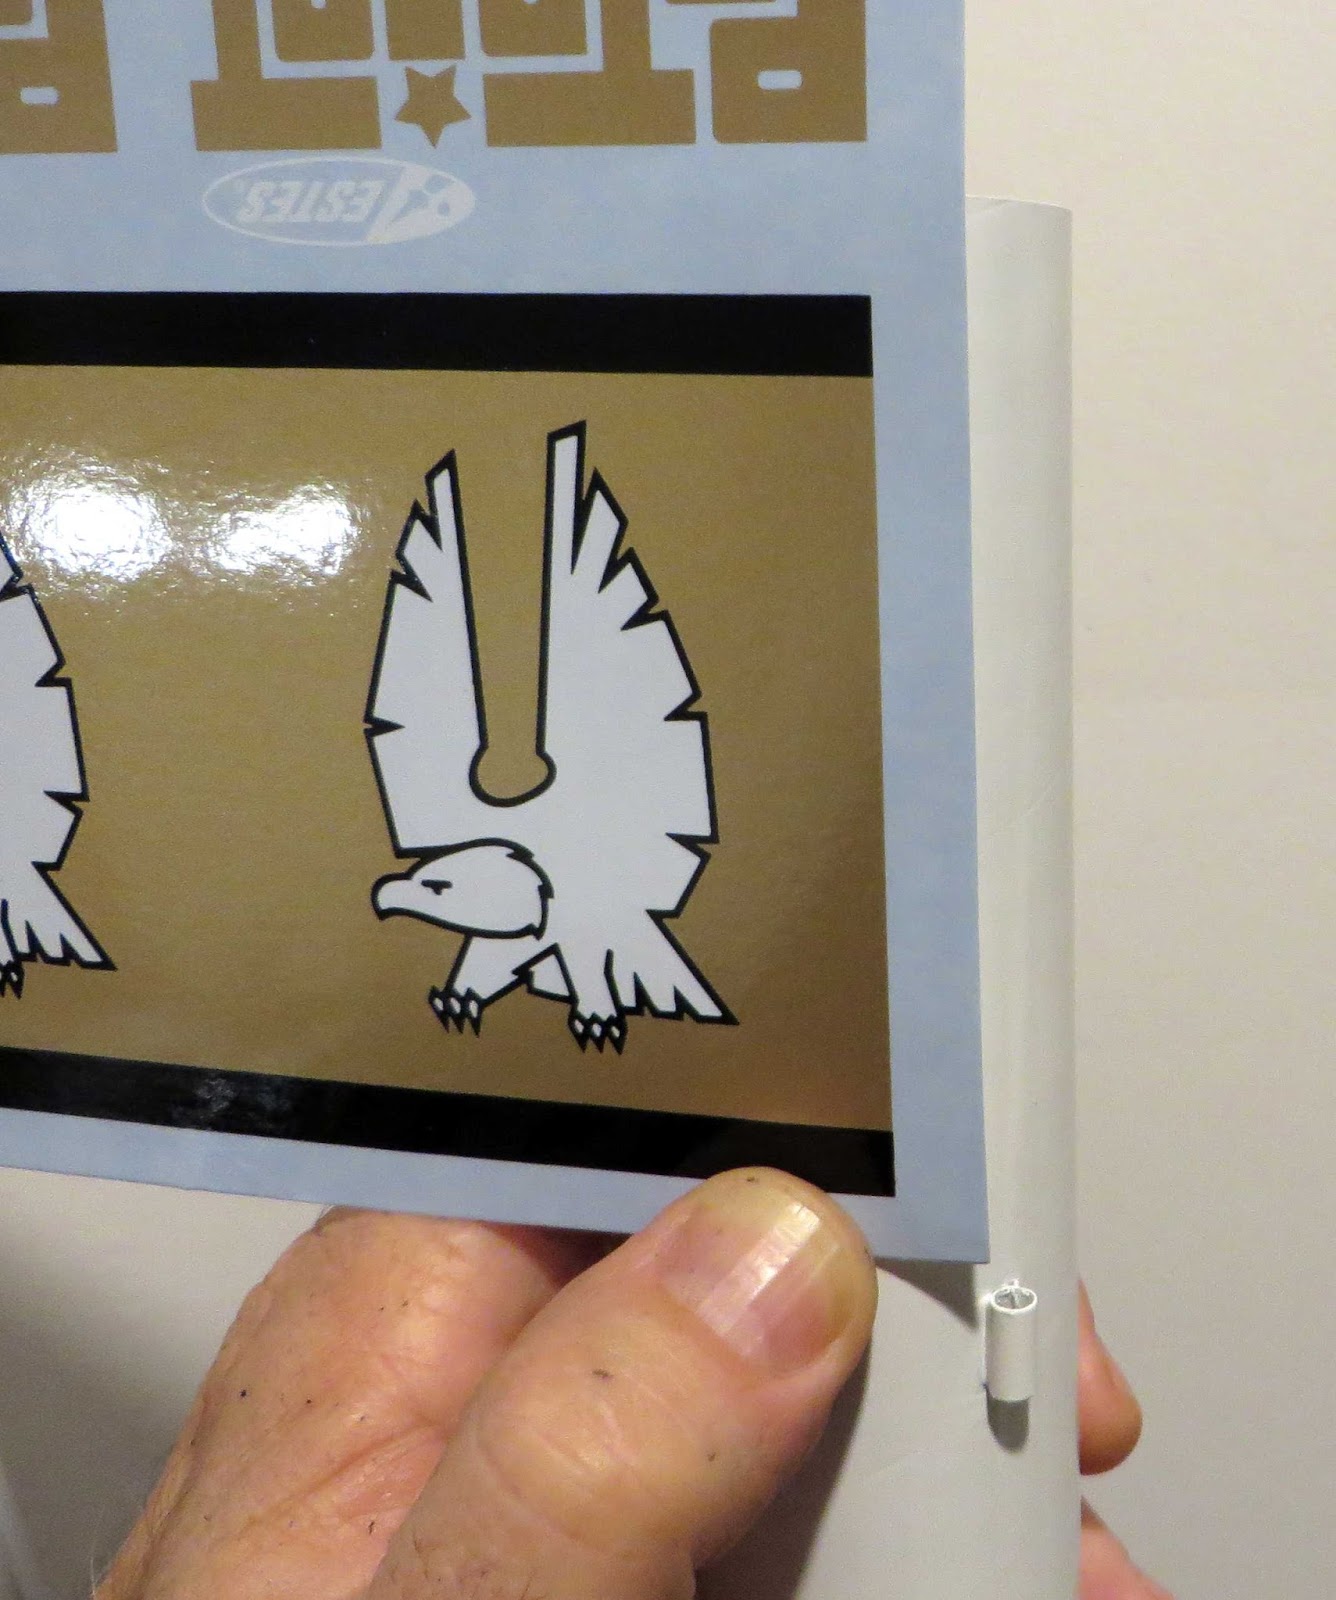
The first Eagle is centered over the black fin. Notice the light blue backing sheet is kept on the decal and slid back as the decal is applied.

When the rest of the decal is rolled around the body tube, the second eagle should be centered between the two white fins on the launch lug side.


Look close to find the gold decal overlap. The seam can only be seen when the light hits it.

Saturday, May 19, 2018

Estes Citation Patriot, #000652 Build, Part 8, Cleanup and Decal Question


TIP: Mister Clean Magic Sponges will take off most light paint over sprays. On the left is the before, the right side is after the black smudge was removed.

Go light with the magic sponges. The solvent/cleaner could remove more paint than you would want.


Here's the mask line of the one black fin. The nose cone was also painted black, off the model.


When I first saw the Patriot advertised something was off.
Check out the height of the gold eagle decal. On the face card picture there is too much white area around the decal.

When I checked the decal placement in the instructions, the decals were correct. Just like the original kit from 1971.


As with all decals, set them on the model "dry" before applying. On a few kits you realize adjustments have to be made.
On some kits the decals end up going over the launch lugs. You can't trim a thin, wet decal. Here there was no problems.


EDIT: David Carllucy did a new Citation Patriot build on YORF. He shows photo comparisons of the of the decals through different runs of the kit. The newest Patriot kit has decal graphics matching the original Citation kit from 1971. To see the decals over the years: CLICK HERE

Estes Citation Patriot, #000652 Build, Part 7, Paint and Masking

Earlier on, the main BT-60 tube seams were filled with CWF and a shot of filler/primer. The seams were filled.

The picture shows the tube after light sanding of the first white coat.
On this tube there were secondary seams underneath the glassine layer. They aren't as deep but wider than the normal tube seams.
I probably could have filled them with a few more applications of filler/primer but thought they wouldn't be noticeable with all the big decals. 


One fin and the nose cone are painted gloss black.

TIP: To fit the decal layout, make the black fin opposite the launch lug line.


Many small pieces of Scotch tape were used to mask around the rounded leading edge of the fin.


TIP: Don't wait until the paint is dry to remove the mask. You should get a sharper mask line by removing the tape while the paint is still gummy.


TIP: Before the paint sets - 
If the mask isn't perfect (with very small bits over the mask line) you can "push and roll" the paint edge back against itself with the flat side of your knife. No scraping of the knife is needed.

Here's a pretty good mask over the rounded leading edge joint. It's not perfect but good enough.

Above the fin tip is a slight black over spray. It'll be removed in the next post.

In the picture the upper part of the tube shows one of the secondary "recess" seams. The normal seams were filled with CWF and primer/filler.

Friday, May 18, 2018

Estes Citation Patriot, #000652 Build, Part 6, Chute Lines and Fin Gluing


I almost don't want to tug test on the shroud lines. If they break easily I'll replace them with #10 cotton embroidery thread.

They broke!

I'll usually work on the pre-assembled parachutes.
The shroud line tie hole is always a rough punched tear in the sheet.

The rotary punch makes a cleaner hole.
TIP: Be sure to use some card stock behind the sheet parachute for a cleaner punch.


The fins got a single application of CWF and sanding.
Then a fairly heavy coat of Duplicolor Filler/Primer and sanding.

Two steps to fill the grain and done!
The fins were glued on with Carpenter's Wood Glue.
Fillets were added using Titebond Nor-Run, No Drip glue.

Thin masking paint strips were stuck around the inside of the tube edge.
With a dowel wand inserted in the engine mount some paper towel pieces were pressed into the engine mount recess. Notice the end edge of the tube is still exposed and will get painted.

Estes Citation Patriot, #000652 Build, Part 5, Engine Mount and Kevlar

Here's another one of those steps that could be confusing for a first time builder.
It looks like the upper bead of glue is being applied to the outside of the body tube. It  obviously goes inside, but no glue bottle is going to reach that far in.

GOTCHA: Putting a ring of glue at the back end of the tube now won't do any good. That low glue bead would be pushed forward by the upper ring not leaving much to adhere the low ring.

TIP: Apply one bead of glue far up inside the tube (with a dowel or scrap stick from the balsa fin sheet) for just the forward centering ring. Don't worry about the rear ring right now, Apply a rear glue fillet around the rear ring after the mount is in place.

The instructions also have you glue on the fins before the mount is glued in.
TIP: It's easier to get the engine tube flush with the end of the main air frame tube without the trailing fins on the model.

The mount was set beside the body tube and a dowel marked to apply a bead of glue inside the tube. I try to set the glue bead just before where the upper ring will end up.

Here's the mount in place, both tube ends are even.

The short launch lugs in place.
The rear lug is 3/8" from the rear of the main air frame.
The top of the upper lug is 4" from the top of the tube.

Thursday, May 17, 2018

Estes Citation Patriot, #000652 Build, Part 4, Engine Mount and Kevlar


The instructions show the upper centering ring almost even with the end of the stuffer tube. I glued the ring about 3/16" down from the top for a better fillet.


I would have liked to do a replaceable Kevlar mount but the space between the rings was too wide. I could have probably used an launch lug but went with the upper ring retention.

Before gluing in the engine mount - 
Set the mount against the main body tube to measure the length of the Kevlar. The loop knot at the top was tied short of the body tube end.

Estes Citation Patriot, #000652 Build, Part 3, Nose Cone Prep


The nose cone mold seam was slight, both sides of the cone were pretty well aligned.

I started with a flat file then moved to 220 grit sandpaper.
The remaining recess was filled with a bead of medium CA glue. 220 grit followed then 400 grit smoothed it out.

I would prefer to use Squadron Putty. It sticks well, I think there is acetone in the putty. The putty always dries out and is very hard to get out of the tube. Some have used acetone to soften the dry putty but I hate using it.


The shock cord tie lug on the nose cone had a nick in it!
After removing the flash from the center it seems like a weak place to tie the shock cord.


The lug was removed and a hole was drilled for the shock cord tie. This is a much stronger retention. I remember having to do this on the Bull Pup nose cone.