Saturday, September 17, 2022

Estes Space Shuttle Columbia Build #1385, Part 6, Assemblies

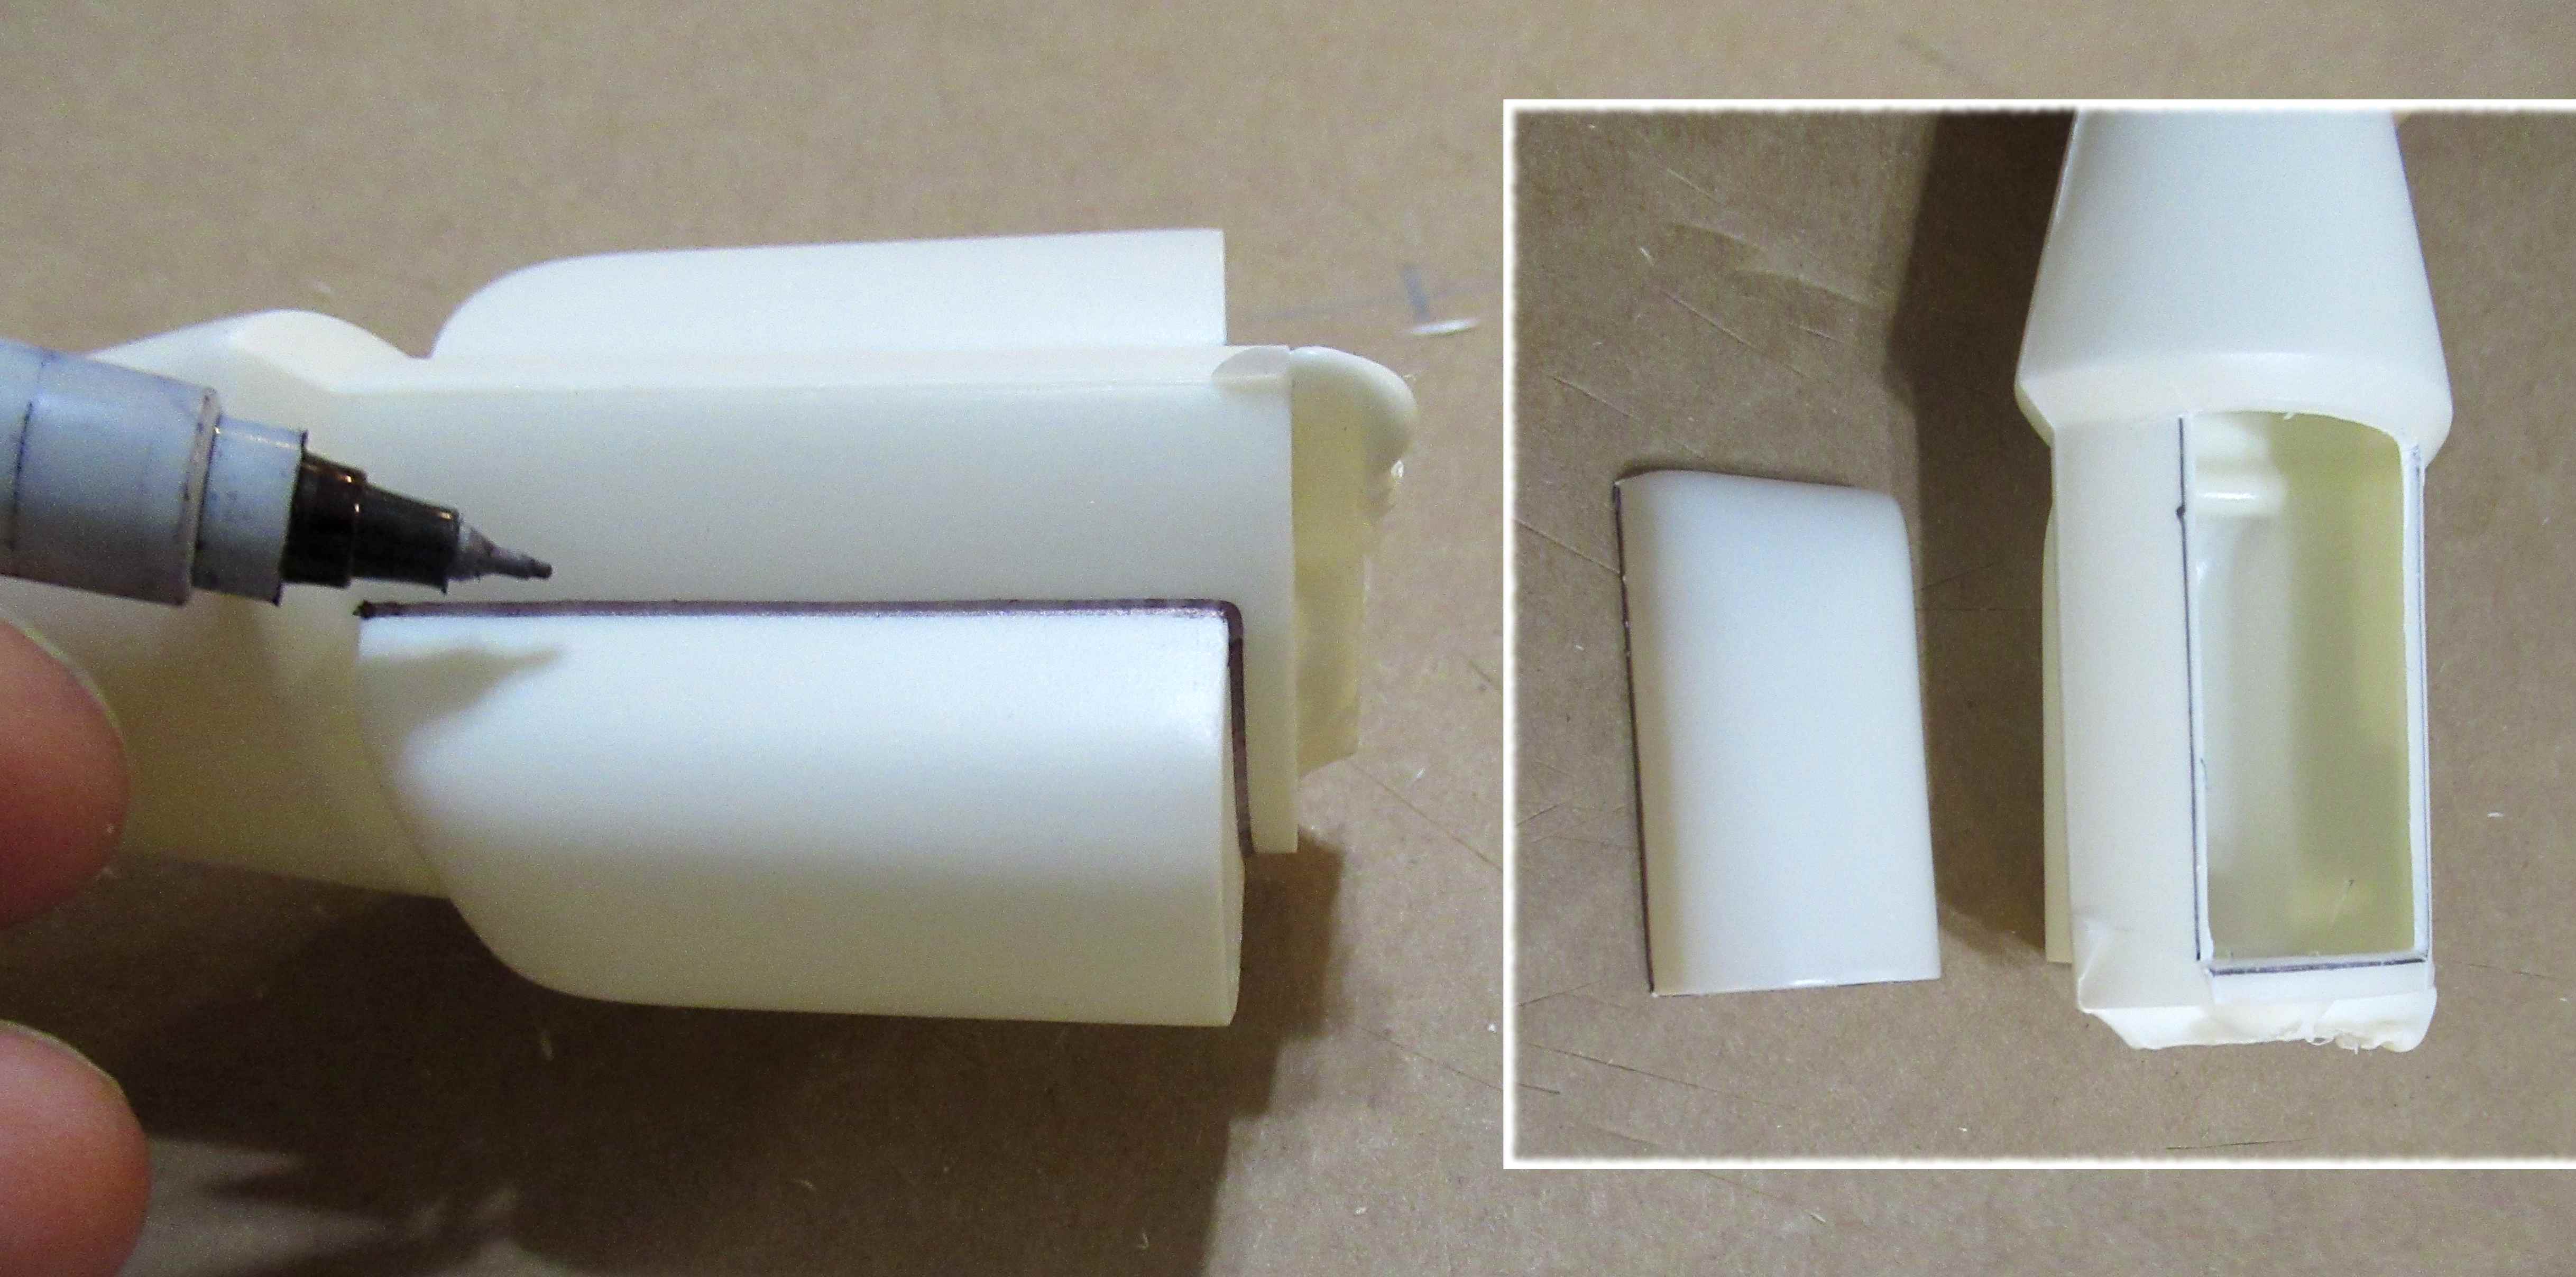
The fit of the triangular wedge in the rudder wasn't great. On the right you can see some of the distortion at the top and bottom.
This took some additional trimming for a slip fit.

Notice the balsa extending outside of the bottom of the cardstock wedge. After the cardstock rudder triangle was glued in place, the overhang was sanded even with the flat backside.


The split rudder was used as an air brake on recovery of the Shuttle. This model version uses the "open" air brake to deflect airflow and keep the boost vertical.


A quick search of the real Shuttle rudder:
"The split-rudder on the orbiter works as a rudder and also as a speed brake (found on most airplanes as a spoiler located on the wing). It does this by splitting in half vertically and opening like a book. This deflects the airflow, increases drag and decreases the orbiter's speed as it rolls along the runway upon landing."


The original kit tape disks had lost all their stick. I substituted new Avery reinforcement disks.

The 18" parachute print was obviously an enlargement of a 12" chute. The blow-up works except where the tape disks are supposed to go. The location position circle is a bit large.                                                                                                                           

The body tube seams got a fill with CWF. Notice the exposed motor mount tube has some seam fill.

The CWF was knocked out of some small areas and required a second application and sanding.


The plastic nose cone mold lines were filled with a bead of medium CA and sanding to surface.

Be careful - the CA glue will run! It takes a while to dry so set the nose cone up so the clear glue can't form a drip.

Friday, September 16, 2022

Estes Space Shuttle Columbia Build #1385, Part 5, Gluing Up The Wing

The wing is glued up from eight pieces of die-cut balsa.

Here's the back end showing the near fit.
Some block sanding was needed to get a tighter fit of the edges.
I look for areas that are touching and lightly sand that area. That should bring the glue edge gaps closer together.

 
What looks like a little hole in the upper picture is a small die-crush bit. that will be filled when the entire wing is painted with CWF.

The center pieces were the worst of the group.
The centerline was sanded again where the edges touched until I got the best fit.


This is a dry fit of the assembly - no glue yet.

The fit of the joints is much better.


I was more concerned with the inside joint fits.
The outside edges are easily cleaned up and rounded off after the glue on the entire wing assembly has dried.

Thursday, September 15, 2022

Estes Space Shuttle Columbia Build #1385, Part 4, Engine Mount & Clay Weight


The engine hook gets a soft bend to keep the ends over the top and bottom of the engine.

Don't just bend it from the middle - 
Try soft bending it from one end to the other.


The instructions say to cut a engine hook movement notch using a knife. 

I used a rotary punch for a cleaner cut.


The instructions suggest the upper ring is glued even with the upper bend of the engine hook.

I like to overlap the upper bend of the hook. It makes a stronger mount. The upper ring did get a shallow crescent punch to fit over the engine hook.


The clay weight weighs .41 oz.
ALL the weight is used, pressed into the inside tip of the nose cone.

Wednesday, September 14, 2022

Estes Space Shuttle Columbia Build #1385, Part 3, Balsa Fix & Plastic Nose Cone Prep


I was very careful, used a sharp knife and still broke off the tip of one forward wing piece. Usually I glue the broken piece back on, but I couldn't find it.
I glued on a slightly larger piece of scrap balsa into the broken tip with wood glue. 


I let the glue thoroughly dry.
The tip was shaved down close to the correct shape but left slightly oversize.

The new tip was final shaped with sandpaper.

The plastic on the edges of the OMS pods was thick!

I first marked the outlines with a fine point Sharpie. Many passes with a new, sharp blade finally freed the two detail pieces.

The instructions simply say to sand the edges smooth.
You'll get a much better fit by sanding with some 220 grit wrapped around the body tube. Some "back and forth" passes over sandpaper will put a curve onto the edges.


Separating the nose cone from the back OMS piece was much easier. 
The narrow neck was scored and the piece broken in half.

Tuesday, September 13, 2022

Estes Space Shuttle Columbia Build #1385, Part 2, Prepping Balsa

This had to be the worst case of die-cut balsa I've ever seen in a kit!
The balsa is dense, the blades only got through maybe half the 3/32" thick sheet.

On one sheet the rudder was cut most of the way through. Check out the direction of the wood grain. It required quite a bit of cutting - and some guessing!


This was the tough cut - 
Note I started the cut before and outside the corner intersection. Cut down and away from the tip. This can prevent the balsa breaking along the grain in the tight corner.


This is what was removed from one of the two balsa sheets, one side of the main wing.
You end up with two rudders, you only use one in the build.

Monday, September 12, 2022

Estes Space Shuttle Columbia Build #1385, Part 1, Parts


The bag and face card are very large!
Turn over the bag and you can see all the empty space.

They could have fit everything is a bag half as wide.

Here's all the parts:
At the top are the nose cone and clay nose weight.


Parts of interest:
Two sheets of poorly die-cut balsa. Both sheets are 3/32" thick. The die cutting was only visible on one side. 
A die cut sheet with the body side panels and rudder deflector.

The decal sheet will probably need a coat of Micro-Sol. 


The OMS Pods are blow molded at the rear end of the nose cone.
The cockpit canopy is molded into the nose cone.


Well, the rubber shock cord and parachute reinforcement disks didn't stand the test of time. Easily replaced.

Estes Space Shuttle Columbia Build #1385, Background


The first appearance of the new Space Shuttle Columbia was on the cover of the 1982 Estes catalog.


Here's the catalog page for the kit.

Bt-60 based with a new blow-molded nose cone. The canopy is molded into the nose cone. 
It doesn't glide but uses a standard 18" parachute for recovery.
The large wing is built up from eight pieces of die-cut balsa, 3/32" thick.
The OMS Pods are blow molded with the nose cone.


At first I thought this might be a rebranding of the Centuri Space Shuttle Columbia from 1080- but no. Both designs used a trifold cardstock rudder deflector. I would assume this helps maintain a  vertical boost.  
They are very close in size. The tube diameter is a ST-16 at 1.64" diameter, almost the same as an Estes BT-60 tube.

The Centuri version had fibre fins and press-on "decals".
Display nozzles remove for flight.
The OMS Pods on the Centuri kits are thin profile pieces glued on like small fins.