Wednesday, March 28, 2012

Tampa TTRA Launch Pictures, March 17, 2012


Roger Smith (JonRocket.com and RocketReviews.com) took some great pictures at the last Tampa TTRA launch.
While this blog concentrates on LPR rocketry, Roger took many more pictures of Low, Mid and High power launches HERE

The first launch of my SUPER ALPHA with a C11-5.


Drag race of Lonnie Buchanon's ANGRY BIRD and my PIGASUS.


The first flight of the Dr. Zooch SLS with a C6-5.


Mike Nipper's EASTER EGG.

Tuesday, March 27, 2012

Dr. Zooch Flame Fins Part 5


Three flame fins glue on each SRB fin tube assembly.

They are spaced at 90 degrees to each other. It's almost like a four finned rocket with one fin missing. The open area of the tube faces the central engine mount.

Mask off the small centering rings and spray the fin unit white.


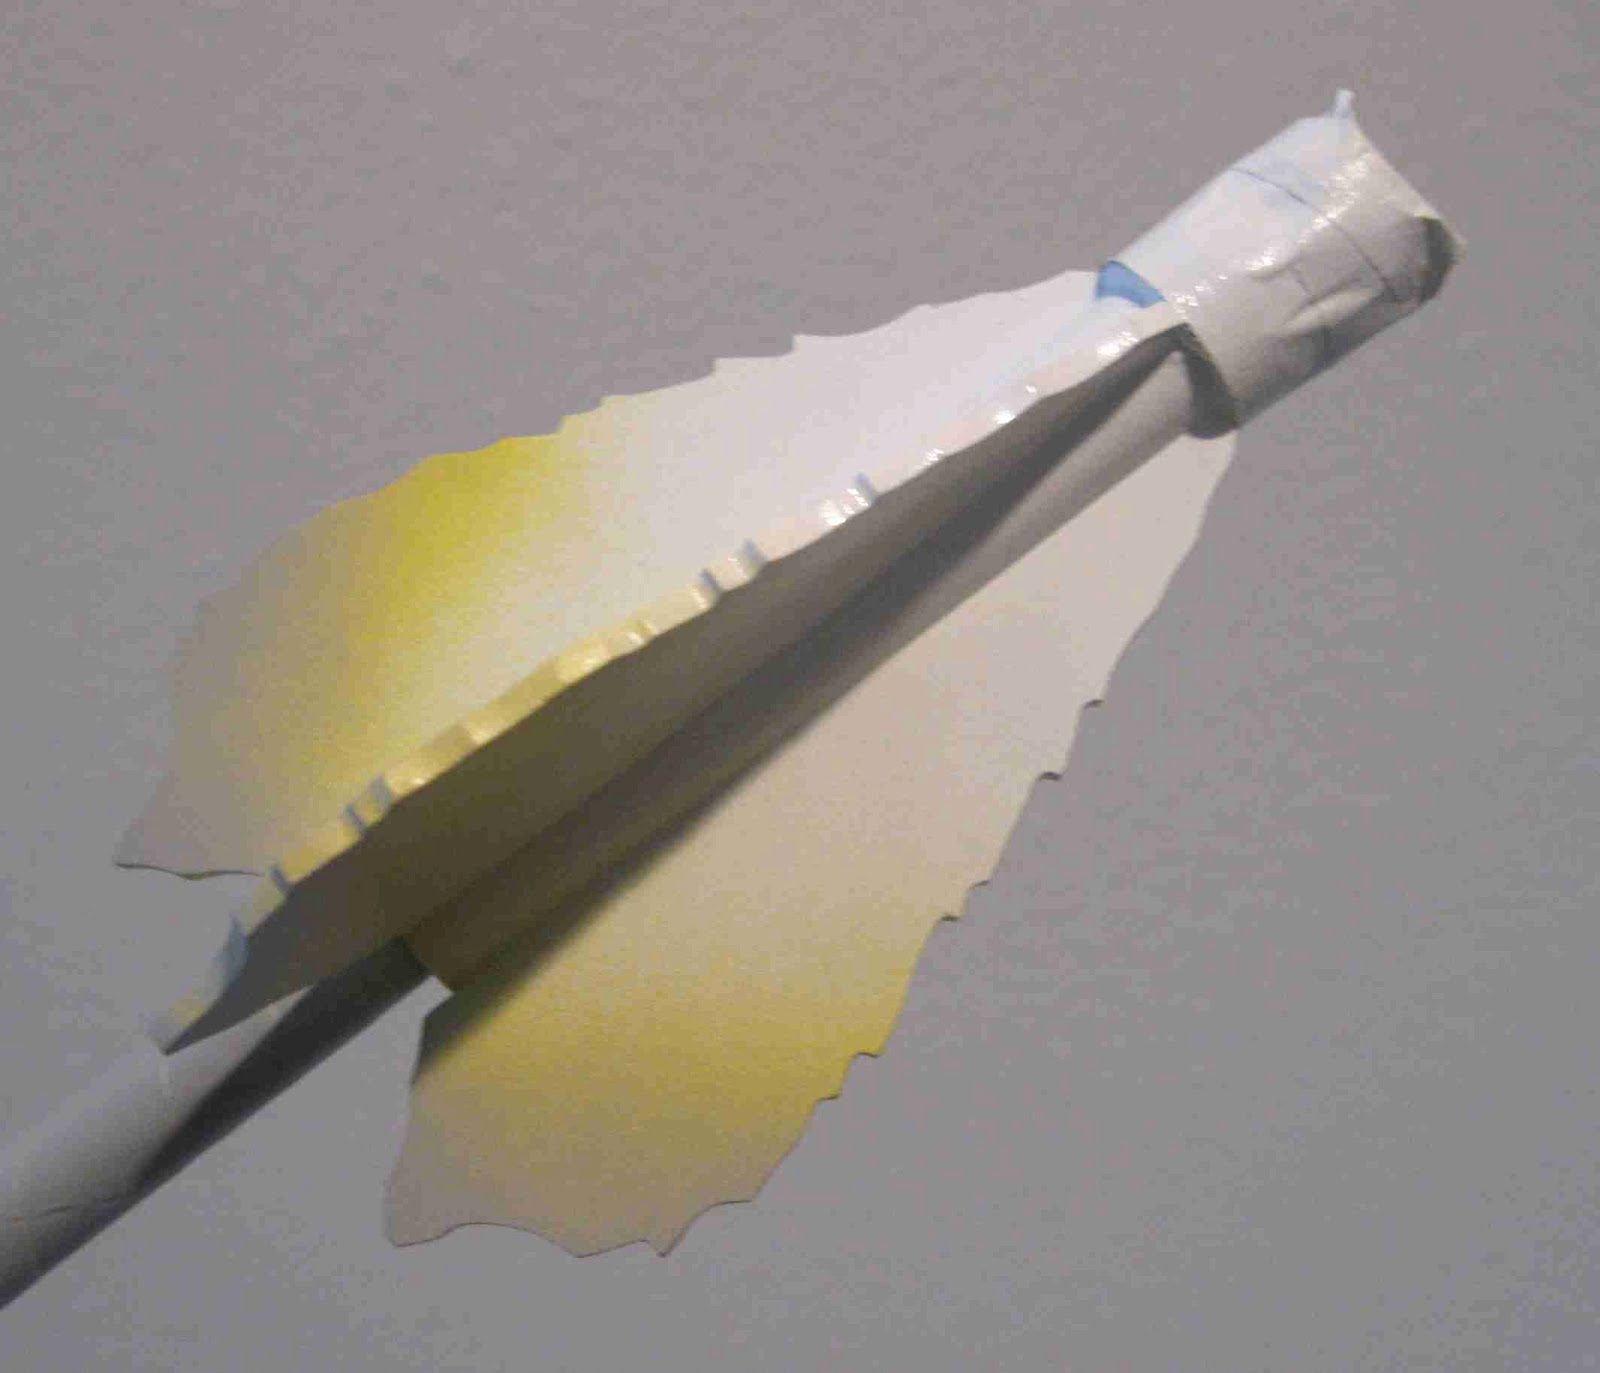
On the left is the sprayed and blended yellow paint.
If you were holding the fin unit at this angle, you would be aiming the yellow spray nozzle just below the bottom border edge of the picture.
Start pressing the spray nozzle at the left before the fin edge. Spray in a straight line.
Continue across the lower fin edge and release the nozzle when you are past the fin on the right.
Spray light mist coats until you reach the color density you want.

On the right is the third color, the gray primer.
Spray as you did before, but aim lower than you did with the yellow.
Try for an even blend.
When you do a blended finish, your finish will be dull at the color change area.


Here's all three variations from different builds.
I prefer the third with the white, yellow and gray coloring.
Dr. Zooch Flame Fins Part 4


Here's an image of a Shuttle launch.

Notice the color changes in the flame.
It goes from a very bright white, to yellow (maybe a slight orange also) to grey smoke.


I've made a few sets of Zooch Flame Fins before.

A first attempt at the left looks almost "cartoonish".
I had the right idea but the rear orange color was a little much.

On the right are the fins from the Zooch Thor Agena.
The white to yellow is better, but it needs the gray color.

Monday, March 26, 2012

What? No Posts on March 25?

Sorry about that!
I was in transit between the cruise ship and home.
I'll be home for a while and posting on a daily basis.

Dr. Zooch Flame Fins Part 3

The fins got a coat of thinned CWF and were sanded with 400 grit on a block.
The angled and round side of the block were used to sand the concave lines of the leading and trailing edges.

A second coat of CWF was applied on the leading and trailing edges. I was trying to square up and made the edges sharper.

I wouldn't recommend trying to round the edges on flame fins. It would weaken the sharp edges and be near to impossible to fill all the nooks.


Here's all six flame fins stuck down on their root edges for a shot of primer.

Dr. Zooch Flame Fins Part 2


The sharp angle bend over the edge of the block was used to sand the tight inside corners.

These don't have to be as sharp as the fin pattern shows.
All six fins don't have to have the same profile.


After sanding two fin sides together, the pins are removed.
Don't worry, the CWF will easily fill the pin holes.


The fin on the left is the simple block cut, pinned and ready for sanding.

The fins on the right show the edges after using the different curve and sharp angles of the sanding block.

Saturday, March 24, 2012

Dr. Zooch Flame Fins Part 1

I don't try to cut all the sharp edges of the flame fin pattern.

I use a straightedge and cut straight lines just at the points of the outside edges.
I don't usually use a pen to trace around a fin pattern. Ink can show or "bleed" through a final paint color.
I used a pen to illustrate how I cut out the fins.


There are six fins in total.
Two at a time are pinned together for shaping. Before pinning, I square up the root edges. The front and rear of the fins should be "close" to flush.


The wider concave "dips" were sanded with the rounded side of my wooden sanding block.