Friday, March 6, 2015
Estes Payloader II #3022 Build, Part 13, More Masking
The top of the body tube gets a band of red, 1/4" down from the top lip.
Again I used a strip of marked Scotch tape.
The center area of the body tube was covered with a wrap of printer paper.
The inset picture shows the full mask for the upper red band.
Inside the tube is masked with small pieces of masking tape, set in the tube sticky side out.
A roll of paper goes in the tube. A piece of masking tape holds it to the pieces of tape already in the tube end.
The nose cone will also be red.
TIP: The nose cone is pulled out slightly so a little bit of red goes on the shoulder.
This insures the entire top will look red even if the nose cone is not entirely seated in the payload tube.
Centuri Mini Motors, 1973
Here's the Centuri "Good News" flyer from April, 1973 announcing the 1/2" diameter x 2 1/2" long Mini Motors.
These engines came in 1/4 A through B4 sizes.
To see the flyer scans, CLICK HERE
The 2 1/2" long B engines didn't last long, I understand there were many CATOs. Centuri later produced just the mini A engines in the 1 3/4" long standard size.
MPC also had 13mm B engines. I still have some four packs of the MPC Minijet B3-7m engines.
Thursday, March 5, 2015
Estes Payloader II #3022 Build, Part 12, Masking
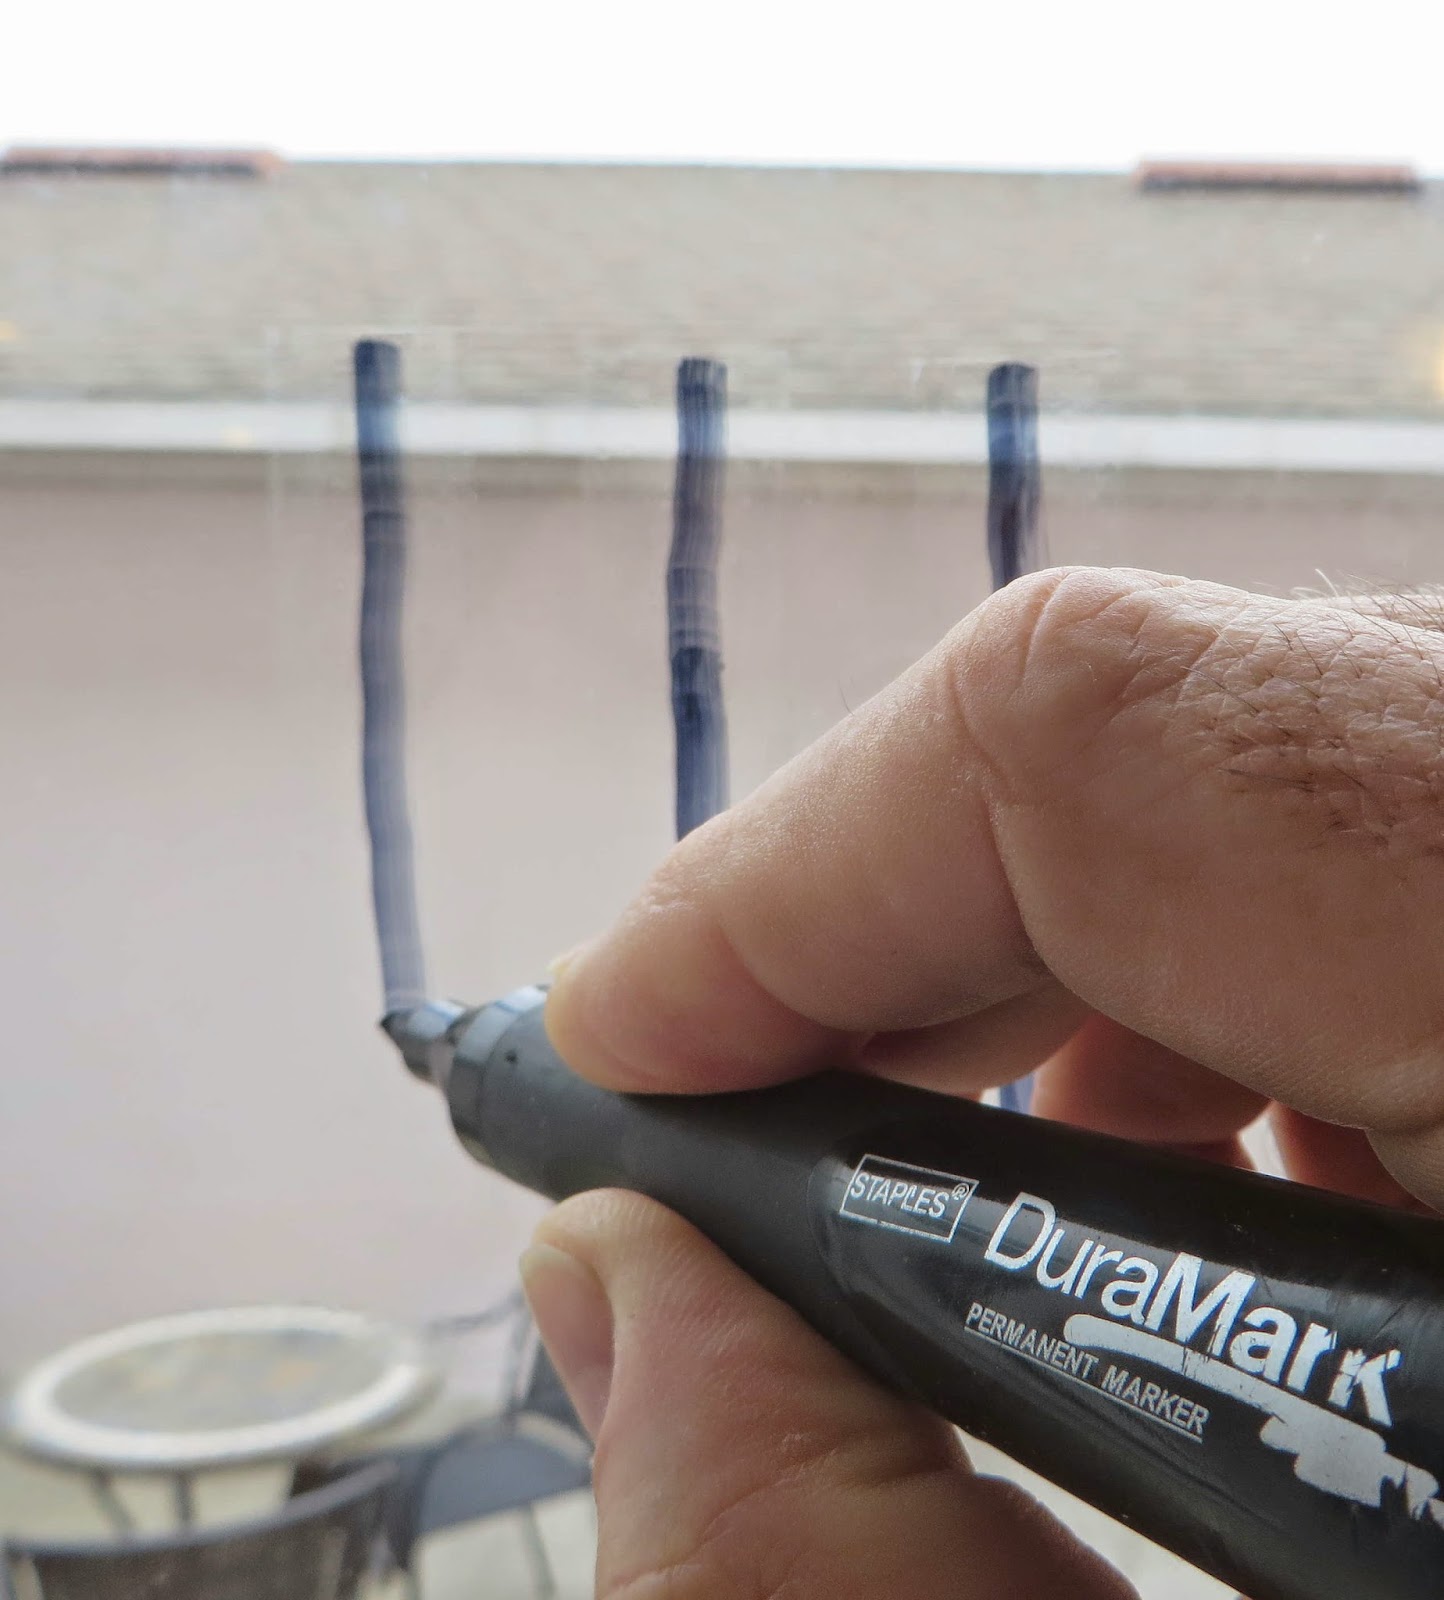
I don't use regular brown masking tape and won't pay a premium for the "boutique" hobby masking tapes. Scotch tape can give razor sharp lines and it's a lot cheaper.
Scotch tape strips are set down on my patio door glass.
To make the clear tape easier to see on the model, a wide point marker is run down the center of the tape strips.
A straightedge is set down along the middle of the marked line.
The black line is cut in half, down the middle with my knife.
Your hobby knife won't cut or score the glass unless you press down too hard.
One strip of tape will give you two facing pieces of tape for masking.
Set the tape down centered on a fillet. The black marker line makes it easier to see the mask edge.
If your fillets and paint aren't smooth, don't expect a sharp paint separation line. The more time you put in on filling and fillets, the better your painting masks will end up.
At the rounded leading edge, many small pieces of tape are set to curve around the fin.
This many pieces of layered tape may not give you a perfect rounded leading edge. After the tape is removed, any rough edges can be "pushed back" with the tip of your knife while the paint is still pliable, not fully dry.
I tend to lift the tape before the paint fully dries.

Post Launch Cleaning TIP
After six launches at the schoolyard my flat Quest blast deflector plate is pretty dirty. The soot is in a ring on the outer edge of the metal plate. Most of the flame hits and is deflected by my ceramic Odd'l Rockets Blast deflector.
One of the most valuable launch supplies is a few paper towels. I always keep some in the range box.
Carded models require an immediate wipe down after landing. Any wet dew can swell carded fins and body wraps even if the paper has been sprayed with a clear coat.
After six launches the paper towel is damp from wiping off the rockets. I use the wet paper towel to remove the fresh soot left on the blast deflector.
It's easier to do it at the launch site before packing it away in the launch box. That soot will get on everything around it just walking from the launch site back home.
Wednesday, March 4, 2015
Estes Payloader II #3022 Build, Part 11, Shoulder Painting TIP
Occasionally you see clear payload models at club launches. Chances are, the nose cone is painted off the model and the shoulder is also sprayed. The painted shoulder ends up underneath the clear payload tubing. Even the model pictured at the top of the Estes instructions has the nose and nose block shoulders painted under the clear tube!
The Estes instructions tell you nothing about masking the clear payload tube. Step 10 of the finishing instructions say to: "Paint the nose cone gloss bright red." What about masking the shoulders?

Centuri had a better way, from the original Payloader II instructions -
TIP: Paint the clear tube covering up the balsa nose cone and nose block shoulders!
The instructions add: "This is the best technique because the paint hides the visible parts of the connector and insert."

On the left is my Scotch tape mask just over and covering the end of the balsa nose block. (The block got a coat of CWF to increase it's diameter for a tighter fit.) The rest of the clear section was masked off. The low end of the exposed balsa nose block was set in the body tube, no paint got on it.
The inset picture shows the tube with the mask removed. Clean and covered!
The Estes instructions tell you nothing about masking the clear payload tube. Step 10 of the finishing instructions say to: "Paint the nose cone gloss bright red." What about masking the shoulders?
Centuri had a better way, from the original Payloader II instructions -
TIP: Paint the clear tube covering up the balsa nose cone and nose block shoulders!
The instructions add: "This is the best technique because the paint hides the visible parts of the connector and insert."
On the left is my Scotch tape mask just over and covering the end of the balsa nose block. (The block got a coat of CWF to increase it's diameter for a tighter fit.) The rest of the clear section was masked off. The low end of the exposed balsa nose block was set in the body tube, no paint got on it.
The inset picture shows the tube with the mask removed. Clean and covered!
New Klima Launcher and Controller
From the European Model Rocketry Website - CLICK HERE

The only Klima product I've seen available in the U.S. is the EXA rocket form Apogee. To see it, CLICK HERE
Klima develops Own Model Rocketry Line
"The German model rocketry company Raketenmodellbau Klima GmbH announced a new line of model rocketry kits, launch equipment and accessories. So far, Klima is known as the European distributor of the US-based company Quest Aerospace. Last year, Klima introduced a new series of composite model rocket engines produced at the company's plant near Augsburg, Germany.
During the Nuremberg Toy Fair 2015, Klima showed prototypes of a medium launch pad, an electronic launcher and some own kits. The pad and the launcher will be produced in Far East according to Klima´s specifications.
The dis-mountable plastic launch pad can handle model rockets from the low- to mid power range. It look similar to the MRC´s Concept-II pad from the 1990´s and could be used with standard rods as well as with an optional rail. The launcher is designed like a gun, can be powered with one or two 9 V mono block batteries and featuring optical LED control lights. The German retail price will be less than 20 Euros.
Additional, Klima has a new line of water rockets on development. According to Klima, the nozzle and fin unit will fit to all known PET bottles and use a new internal stabilization rod. The new Klima launch pad can be used for the water rockets as well, along with a mechanical water rocket launcher similiar to the electronic model rocket equivalent.
According to company owner Robert Klima, the new launch equipment and the model rocket kits will replace the Quest products in 2015 because Quest products are undeliverable since a while."
The only Klima product I've seen available in the U.S. is the EXA rocket form Apogee. To see it, CLICK HERE
Tuesday, March 3, 2015
Estes Payloader II #3022 Build, Part 10, Decal Redraw
I wasn't very happy with the kit decals.
The black stripes that go between the fins had some rough edges. The Estes logo wasn't printed clean.
The roll pattern was sharp though.
I originally wanted my Estes Payloader II closer to the Centuri catalog versions. The roll pattern might have to be a bit wider to fit the thick walled BT-50 I used.
A paper wrap was used on the painted tube to get the roll pattern width.
The PAYLOADER name was set in the "Impact" style font. Impact was the closest I could find to match the Centuri decals found on www.oldrocketplans.com.
It did take some stretching and spacing to get the name right.
It's interesting to note, the decals on the plan site show "Centuri PAYLOADER", not "Centuri PAYLOADER II".
EDIT: I didn't end up using the roll pattern decal I drew for the slightly wider diameter BT-50H tube. The decal from the kit worked fine! The overlap lined up perfectly with no gap at the joint. I'll still use the Centuri logo and model name I drew, it might have to wait until I print some other decals. I always combine a small decal area (like the Payloader II decals) on a larger sheet so I don't waste 3/4 of a decal paper sheet.
Subscribe to:
Posts (Atom)