Thursday, April 22, 2021

Wolverine Jayhawk Build, Part 7, White Undercoats

Filler/Primer was sprayed and sanded to surface.
Notice that any remaining filler/primer was scraped off the root edge fin gluing line.

White undercoats are important - 
1. They brighten up final finish colors
2. It shows any rough areas that might need to be cleaned up before the final color is sprayed.

Here's what I mean about rough areas after the white undercoat.
I honestly don't know what happened here. (How many times have you asked yourself that!)

The rough area was sanded smooth and would require another coat of undercoat white. 
I didn't want to re-shoot the entire model. 
TIP: The picture on the right shows a "floating" mask. A hole was torn in a paper mask and was taped so the edges wouldn't touch the surface. The paper mask was about 1/4" above the surface.

You can do this with a quick shot of filler/primer or if the area isn't too rough, just the white undercoat. This isn't recommended for the final darker color. Any rough or raised edge can be lightly sanded and feathered into the surrounding area after the paint dries.


After the small white shot was sanded the overall orange was sprayed.

I still have to paint that nose cone tip black. 

Wednesday, April 21, 2021

Wolverine Jayhawk Build, Part 6, Wing Tip Gluing


Here's the wing tips before and after sanding the filler/primer.

Note the filler/primer left in the remaining balsa grain.


The inside glue line is sanded to remove the filler/primer for better adhesion.

Some 400 grit sandpaper was wrapped around a Q-tip for cushioned width control.


I drew a pencil line at the front and rear center points of the wing tip for easier visual placement.
The tips were glued in place and centered.


You can let the glue dry while standing them up on a tabletop.

Tuesday, April 20, 2021

Wolverine Jayhawk Build, Part 5, Fit & Fill


Before filling the balsa,
Check the fit to be sure the wing tip is perpendicular or at a 90 degree angle to the larger wing fin. Sand and square up the outside edge of the wing if needed.


The engine mount tube will extend 1/8" out the back. It's not glued in yet - 
Don't forget to fill the visible seam on the engine mount tube.

On the left, CWF has been brushed on the balsa nose cone.

On the right is after the filler/primer has been sanded down.
I'm squaring up the nose cone shoulder edge. Pull the nose cone out slightly. Run a folded piece of 400 grit sandpaper around the open joint to sharpen the shoulder lip and smooth the edge of the body tube.


Here's the engine mount glued in with 1/8" of the engine tube extending out the back.

Monday, April 19, 2021

Wolverine Jayhawk Build, Part 4, Screw Eye & Parachute

The screw eye is screwed into a dowel that you glued into the nose cone base. This makes a very strong screw eye attachment.

I placed some glue in the nose cone base hole and pressed the dowel into place. I didn't press it all the way in, I wanted to sand the dowel end flush with the base of the nose cone.
OOPS: After it was glued in I realized the dowel was glued in backwards! The drilled screws eye hole was inside the nose cone.
I knew I'd never get it back out, so another small hole was drilled for the screw eye attachment.


Eight parachute reinforcement discs are supplied, only six are needed.
I wanted to be sure these were plastic, permanent discs so I tried to tear one of the extra disks. It did rip, telling me it was a paper disk.

I'd prefer stronger disks, so I switched them out for Avery plastic disks.
The instructions tell you to place the disks 1/4" from the edge. I don't see any reason to do this. The table covering plastic can stretch if pulled, I put the disks closer to the corners.

TIP: Because of the stretch, the shroud line hole was punched close to the outside of the inner disk circle.

TIP: Some tablecloth covering plastic sheeting has a smooth side and a textured side. Attach your discs to the smooth side for better adhesion.

Sunday, April 18, 2021

Wolverine Jayhawk Build, Part 3, Kevlar & Engine Mount


This Kevlar is plenty strong, but braided Kevlar can unravel.

TIP: To stop the unraveling, just wipe some white or wood glue on the last 1/2" on each end.
DO NOT USE SUPER GLUES on any string! It will run down the fibers, stiffen the cord making it brittle.


The Kevlar loop isn't pulled up tight against the upper centering ring until after the glue fillet is added.

Pull up on the end of the line and press the Kevlar loop right into the glue fillet.
Be sure to press down and "seat" the knot close - If the knot is too high it could bulge out the BT-50 body tube when the mount is glued in.

When you draw up kit instructions, you follow the direction of the vendor. I didn't agree with the centering ring spacing. That being said, the rocket will perform just fine assembled the way the instructions show.

I did want more open space below the lower centering ring for easier movement of the engine hook. The way the rear centering ring is glued as shown here, inserting the engine could be difficult.


TIP: On a 20/50 engine mount, glue the lower ring higher up or 1" from the bottom.

There isn't much room for engine hook flex between the BT-20 and BT-50 tube as it is. Setting the lower centering ring higher up allows for easier movement of the engine hook.

Saturday, April 17, 2021

Wolverine Jayhawk Build, Part 2, Engine Mount Tube & Centering Rings

The brown tube on the left is the rough finished engine mount tube included in the kit. The rear of the tube will be seen on the finished model so it will be replaced. Below it is the thick walled BT-20H from Odd'l Rockets. You can see the difference in the wall thickness between the tubes.

The outside diameter of the new heavy wall tube is wider than a standard BT-20, so the 20/50 ring ends up a bit small.


It's a simple fix -
Peel a bit of the inside ring wrap and peel it out.
On the right is a perfect friction slide fit over the replacement heavy wall BT-20H tube.


The instructions don't show this, but a Kevlar relief slot was filed into the upper ring with the side of a flat diamond file.

A engine hook relief slot was cut into the lower ring.

Friday, April 16, 2021

Wolverine Jayhawk Build, Part 1, Parts


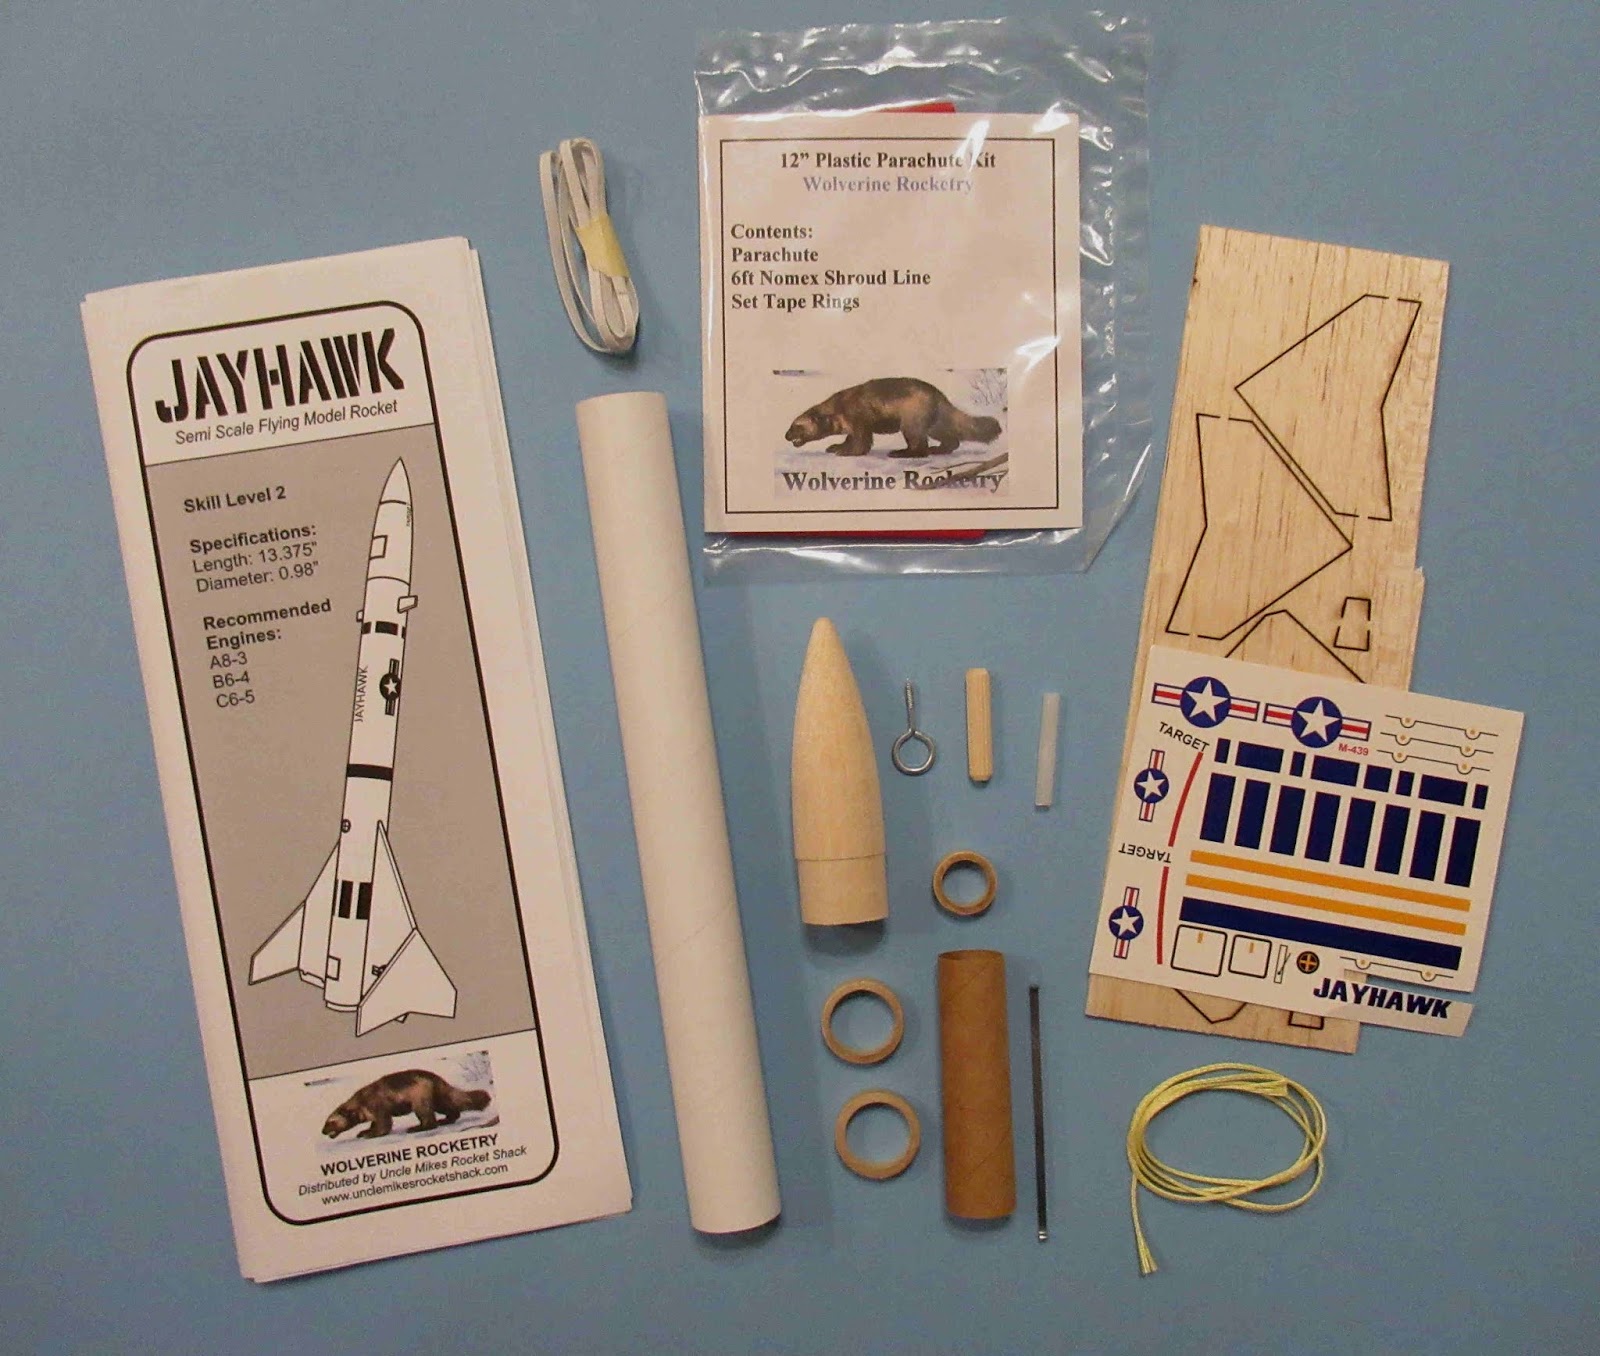
All the Jayhawk parts -  

The parts of interest: 
The ridged dowel  tells me this is a BMS produced nose cone.
The dowel is glued in the base of the nose cone, the screw eye is screwed into the dowel making a very strong attachment.

The outside of the engine mount tube seems rough. I'm sure it is strong enough, but the low end is exposed and will be seen.

The Kevlar is the braided style, plenty strong for a LPR model.

The 12" parachute is cut from sheet table cover plastic.
While the chute is six-sided, there are eight reinforcement disks included.
The shroud lines are strong black thread. The line is one continuous strand and will be cut into three equal lengths.